Learning about the types of yeast and when to use them is easier than you think! I’ve broken down everything you need to know about baking with yeast, proofing dry yeast, and choosing which one to use so you have success in all your baking endeavors at home.

Pin this now to find it later
Pin ItNothing beats the heavenly aroma of freshly baked bread spreading throughout the house. Except for maybe the sweet smell of melt-in-your-mouth pumpkin cinnamon rolls!
Luckily, whipping up fresh bread, cinnamon rolls, pizza dough, and croissants becomes super easy once you learn some basic information about the types of yeast and how to successfully use them in baking.
- While there are several types of yeast (active dry yeast, instant dry yeast, brewer’s yeast, nutritional yeast, sourdough starter, and fresh yeast), this blog post focuses on the types of dry yeast used for baking.
- Red Star Platinum Yeast is my favorite. It’s been my go-to for years because it doesn’t require proofing, which is a huge time-saver! (While I’ve partnered with Red Star Yeast brand in the past, this post is not sponsored.)
- Yeast is essential for creating fluffy, chewy, soft baked goods.
Read on to learn all the yeast baking basics, including what exactly yeast is, details on the types of dry yeast, when to use each type, and yeast tips for beginners!

What is yeast?
Yeast (saccharomyces cerevisiae) is a living organism used to make fluffy loaves of bread, pizza dough, cinnamon rolls, beer, and wine. It feeds off sugar and starch and thrives in a warm, moist environment.
- Yeast converts sugar and starch into carbon dioxide and alcohol through fermentation.
- It leavens baked goods, produces alcohol in beer and wine, and can give foods a distinct “yeasty” flavor and aroma.
- Active dry yeast and instant dry yeast are the two types of yeast commonly used in baking. Active dry yeast needs to be proofed first, and instant dry yeast can be added directly to dough.
Types of Yeast: Active Dry Yeast vs Instant Dry Yeast
There are two types of dry yeast: active and instant. Rapid-rise yeast, also known as quick-rise or fast-acting yeast, is a type of instant dry yeast meant to work at a rapid rate.
Active Dry Yeast
- Active dry yeast needs to be activated (or proofed) to ensure it’s alive and that our bread and baked goods will rise. If it’s active, the warm water and yeast will start to foam and bubble within a few minutes.
- To activate, dissolve a pinch of sugar in a bowl of warm water. Then, stir in the yeast, and wait about 10 minutes. If the mixture is foamy, you’re good to go with the rest of the recipe!
- Foamy yeast means it’s alive and ready to work!
- When to use: Use active dry yeast if the recipe calls for proofing or a long, slow rise time.
Instant Dry Yeast
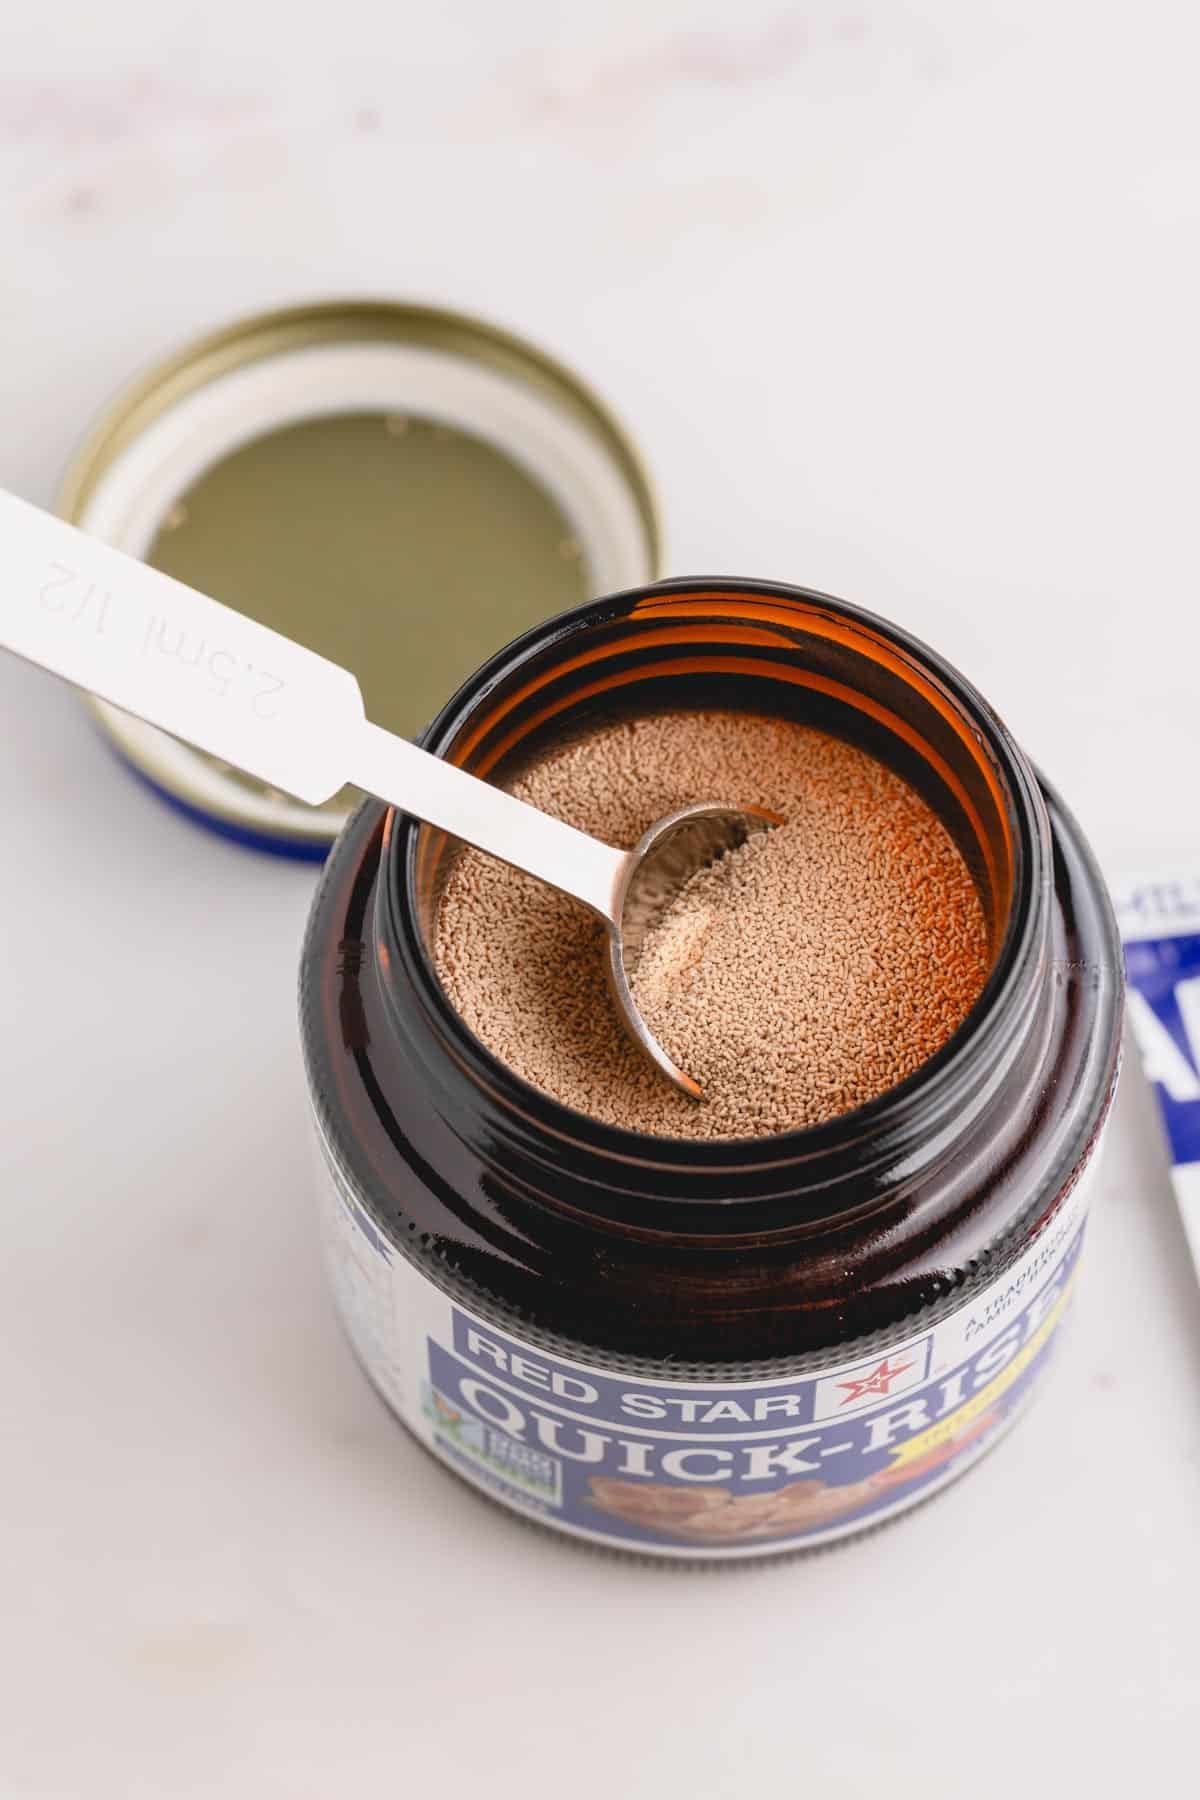
- Instant dry yeast is ready to work the instant you open the package! Sounds great, right!? That’s why Red Star Platinum Yeast is my favorite!
- It consists of fine granules that easily dissolve in dough, making it so there’s no need to activate instant yeast with warm water and sugar. Simply combine the yeast with the dry ingredients, and mix the dough.
- Rapid rise instant yeast is designed to work in half the time and is meant for recipes requiring only one big rise.
- When to use: Instant dry yeast is a faster and often more convenient option. Rapid-rise yeast is great for bread machine recipes and same-day baking.

Other Types of Yeast
- Fresh yeast – Also known as compressed yeast or cake yeast, fresh yeast works just like dry yeast, except it is highly perishable and only lasts about a week in the refrigerator.
- Sourdough starter – A fermented mixture of water and flour used to make sourdough bread and other other sourdough baked goods. Wild yeast and lactic acid feed on the flour and water mixture, producing CO2 and helping dough rise. If a sourdough starter is properly cared for, it’ll last for years!
- Brewer’s yeast – A specific type of yeast used to brew beer, found in two forms: top-fermenting yeast and bottom-fermenting yeast.
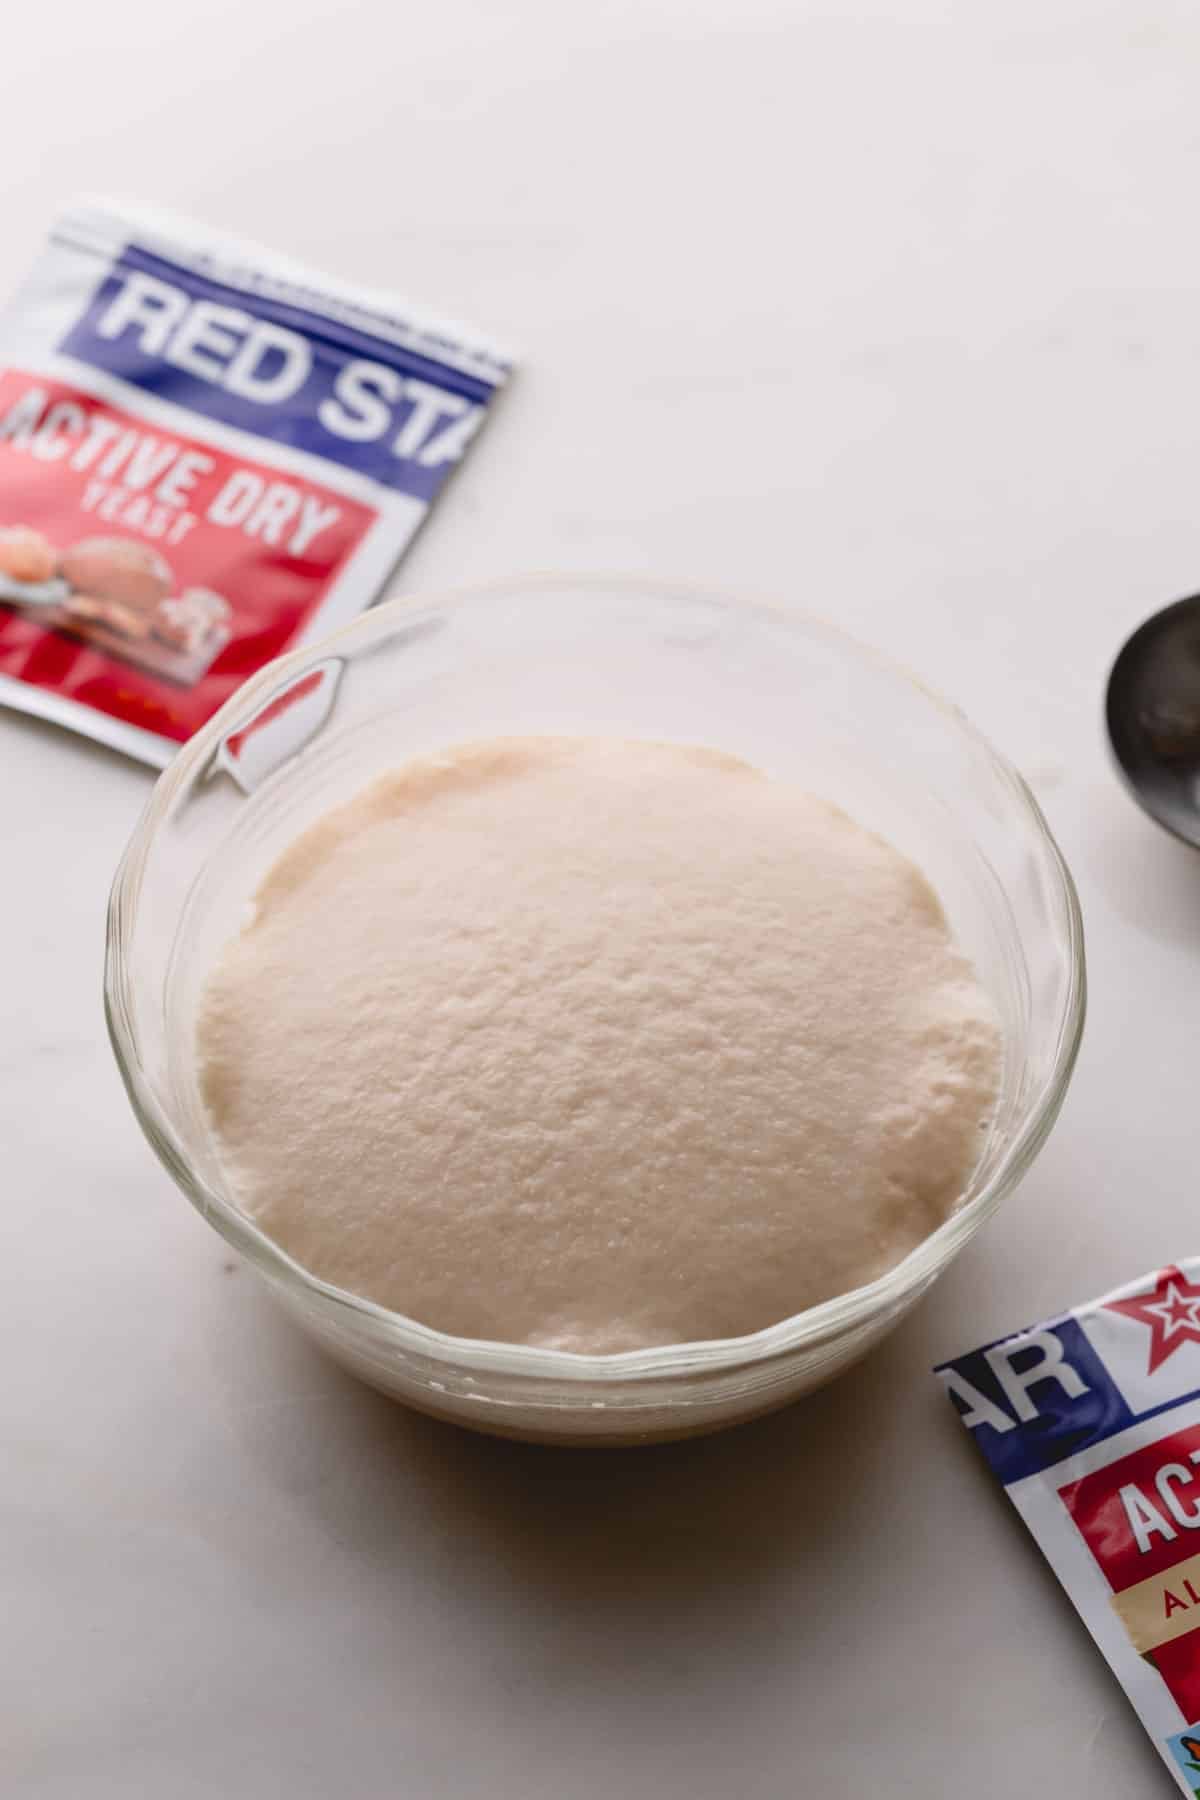
How to proof dry yeast
- Step 1: Fill a small bowl with warm water, ideally between 110°F and 115°F.
- Step 2: Mix 1 teaspoon of white sugar into the warm water until fully dissolved.
- Step 3: Add your yeast to the sugar and water mixture, and let it sit for 5-10 minutes to proof (or activate).


- TEST: If the yeast is active, it should become bubbly and frothy and grow in size as pictured below.
If you don’t see any bubbling in 10 minutes, I recommend to use a different yeast, as it might not be active and won’t rise your bread.

Use the right water temperature
Yeast is a fussy little organism that needs the water temperature to be “just right.” If the water is too hot, the yeast will die. On the other hand, if the water is too cold, the yeast won’t activate. For the best results, use an instant-read thermometer to check your water temperature. Thermapen is my go-to!
Yeast to Flour Ratio
A typical yeast-to-flour ratio is 1 packet of dry yeast (2 ¼ teaspoons or 7.4g) for every 4 cups (500g) of flour.
However, this isn’t a hard and fast rule. Different types of yeast may be able to be used in smaller or larger quantities, depending on your recipe.
Yeast Tips for Beginners
- Choose the correct type of yeast. If your recipe calls for instant yeast, you can’t just mix in active dry yeast and hope for the best. If you’re using active yeast in place of instant yeast, be sure to proof it first. And adjust the liquid amount accordingly.
- Don’t skip the proofing step if using active dry yeast. I know it might seem tempting to save time, but active dry yeast must be rehydrated in water and fed with sugar. Otherwise, whatever you’re baking won’t rise.
- Yeast thrives in a warm, humid environment. Once your dough is formed, place it in a warm spot in your kitchen to rise. I like to use the microwave! First, I microwave a glass of water for 1-2 minutes to create some steam. Then, I place the bowl of dough inside. This creates a perfectly humid, insulated box!
- You can check instant yeast for freshness, too. Even though instant yeast is almost guaranteed to be alive, you can double-check by simply sprinkling some into a bowl of warm water (100°F-110°F) with a pinch of white sugar.
- Use white sugar. Unless your recipe says otherwise, use granulated white sugar to activate yeast. It dissolves quickly and won’t add flavor to your baked goods like honey or brown sugar would.
Dry Yeast Storing Tips
- Unopened yeast can be stored at room temperature.
- Once opened, store jars of dry yeast in the refrigerator or freezer. This way, open jars will stay fresh for months or even years!
- Bring dry yeast to room temperature before using. Measure out the amount you need, and put the remaining yeast back in the refrigerator or freezer.
Yeast FAQs
Yes, if your recipe calls for instant yeast, it won’t instruct you to activate your yeast before mixing it into the dough. If you were to mix in active yeast instead, your dough wouldn’t rise, because active yeast must be activated with warm water and sugar.
Nutritional yeast is a yellow, flaky food product often used in vegan recipes for its savory, cheese-like flavor. It’s an inactivated version of Saccharomyces cerevisiae, and if used in baking, it would simply give the dough flavor and texture. It would not make the dough rise like active or instant dry yeast does!
Like yeast, baking soda and baking powder leaven baked goods through the production of CO2 gas. In some instances, you may be able to substitute equal parts lemon juice plus baking soda, or double-acting baking powder, for yeast. You can use a 1:1 substitute. So, if your recipe calls for 1 teaspoon of yeast, you will use 1 teaspoon of baking powder, or ½ teaspoon of baking soda plus ½ teaspoon of lemon juice. While none of these substitutes are 100% guaranteed to work, they’re worth trying if you’re in a pinch.