
Learn how to make homemade croissants with my straightforward, classic recipe with all of my foolproof tips! Yes, they are time-consuming to make, but with my step-by-step instructions, I guarantee you’ll master them with ease and feel like a French pastry chef!
⭐️⭐️⭐️⭐️⭐️ “Wow! I made these yesterday, and they are flaky and delicious. Started in the morning with the dough, then mid day did the next portion, then cooked half last night (taste test/shaping practice batch), and put half in the refrigerator to bake this morning. This recipe definitely made croissant making easy. Thank you.” ~Cheryl

Croissants are my biggest weakness. But unfortunately, you won’t find a bakery with amazing croissants around here. Actually, there is no bakery in our little town of 800.
So I solved the problem by learning to make them on my own – and let me just say, I could open my own bakery with this recipe.
My determination to figure out how to make croissants began way back in October of 2013, when I was on a work trip in San Antonio, TX. While enjoying a delicious croissant for breakfast at the hotel restaurant, I promised myself I would never buy one again until I learned to make one myself.
I tested this recipe over and over, refining it through research I did online and in cookbooks, and now I can’t wait to share all the knowledge with you!
I’ll caution that the method can take up to 3 days to make, but it’s broken down into very manageable steps. It’s a pastry I’m so proud to create, and my family loves it too.

Why you’ll love this recipe
- Bakery-style croissants baked fresh in your own kitchen. Nothing beats a warm croissant from a bakery. They are heaven in a bite! I’m sharing all the secrets to achieving that classic lacy texture inside, a custardy-soft interior, an extra-buttery, flaky crust, and a beautiful golden color!
- Simple to prep in advance. You can make the dough, roll the croissants, and refrigerate them overnight to bake fresh for a holiday morning or a brunch for a group.
- Easy to pair with a variety of dishes. They make the perfect addition to any menu for breakfast, lunch, and an afternoon snack.
⭐️⭐️⭐️⭐️⭐️ “I make these every Christmas morning and they are a hit at family brunch!” ~Victoria

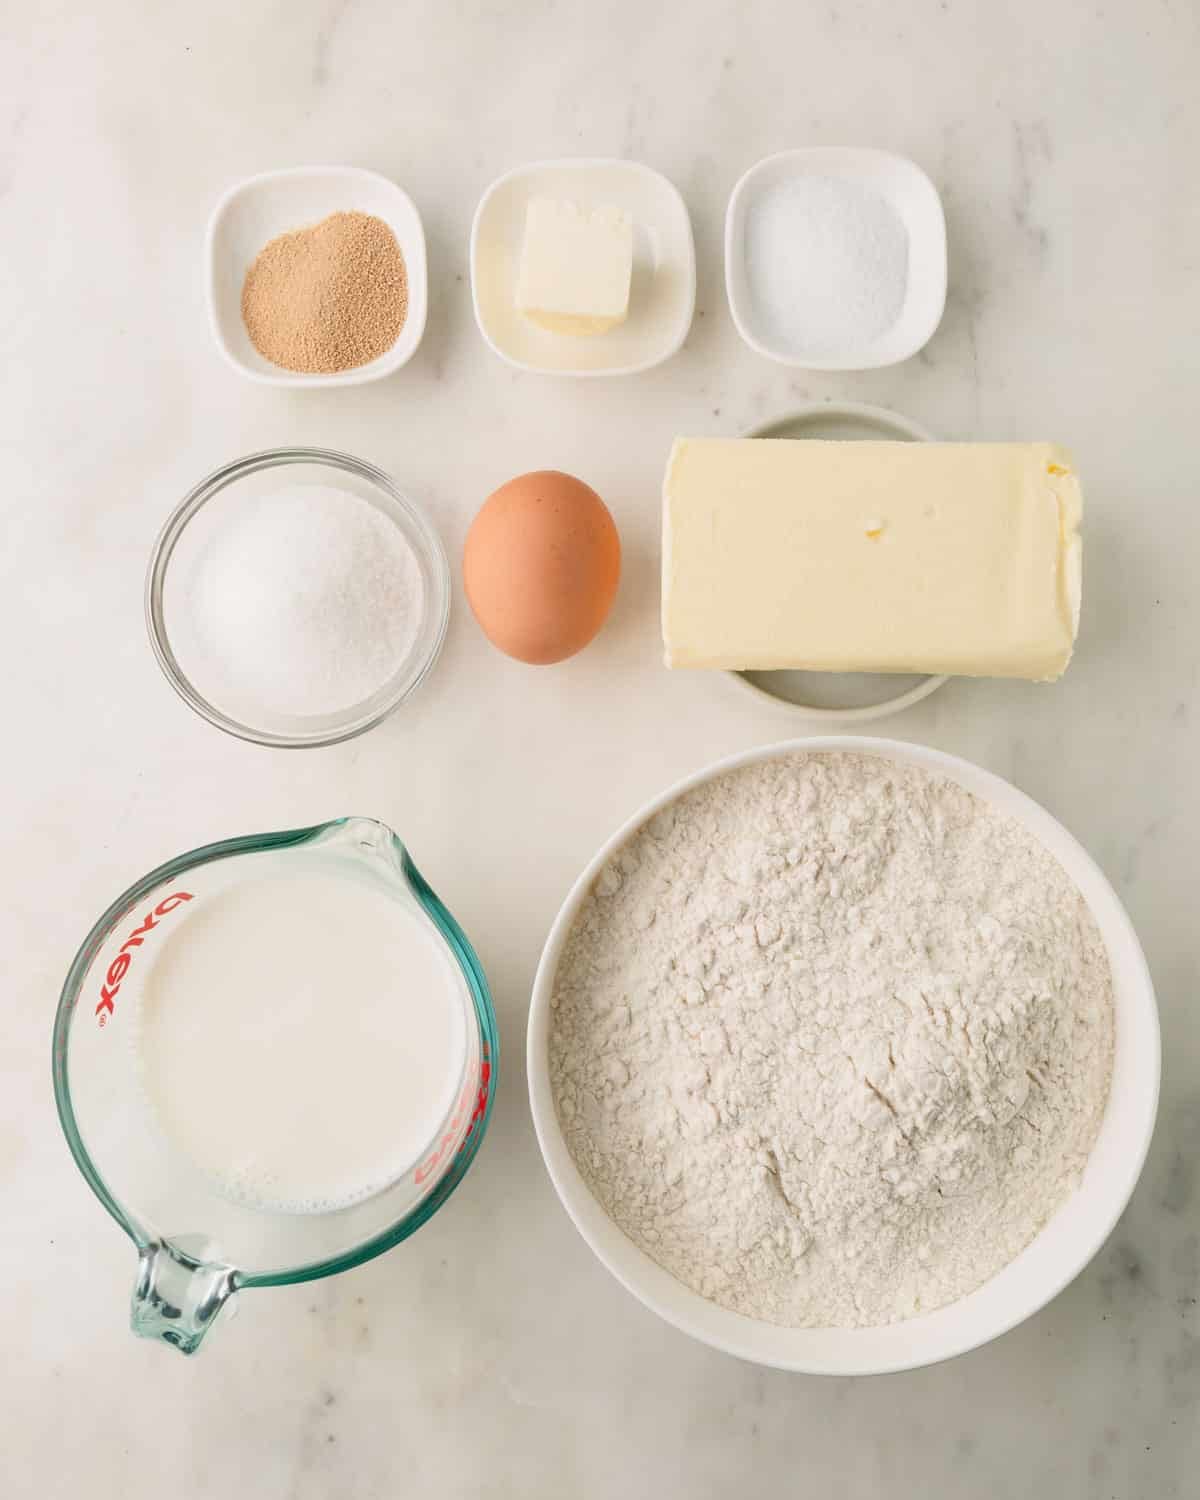
Key Ingredient Notes
For the dough:
- Bread flour – Choose high-quality bread flour for making croissants. Bread flour has a higher protein content, which helps to build a strong gluten network. And that’s particularly important in making croissants because it helps the dough stretch, hold the butter layers, and rise nice and tall in the oven.
- Milk – You can use any kind, but I recommend whole milk for a richer and more tender dough! Using milk instead of water yields more tender bread.
- Sugar not only sweetens the dough, but it also feeds the yeast.
- Unsalted butter – In addition to butter for laminating, we also add softened butter to the dough for flavor and richness.
- Dry yeast – You can use either active or instant dry yeast. My go-to yeast is Platinum Instant Yeast from Red Star Yeast. While I’ve partnered with this brand in the past, this isn’t sponsored. I honestly really love this yeast!!
- Salt – Always necessary in any baked good recipe to help bring out all of the flavors.
For laminating:
- European-style butter – For croissants, it’s crucial to use European-style butter, which contains higher fat. I recommend a minimum milk fat content of 82.5%. Its higher fat content and lower water make the layers cleaner and more stable, reducing tearing and butter leakage. It’s also more pliable, so it rolls smoothly with the dough and creates better flakiness.
Egg wash:
- Egg wash, a simple mixture of egg, milk, and salt, gives the croissants a deep, golden brown sheen.
Quick Process Overview
Ok, before we launch into the multi-day process of making croissants, here’s a high-level overview.
- Day 1:
- Make an easy dough + overnight proofing
- Make the butter block
- Day 2:
- Wrap the butter block in the dough
- Lamination 1: single fold
- Lamination 2: double fold
- Day 3:
- Sheeting the dough (a fancy way to say roll out the laminated dough)
- Shaping the croissants
- Proofing and baking
Schedule
Day 2 and Day 3 can be done on the same day. Or you can do all the laminating, sheeting, and shaping on Day 2. Then, proof and bake on the morning of Day 3.
How to make croissants step by step
DAY 1: Make the Dough and form the butter
Make the yeast dough (détrempe):
- Combine all the ingredients for the dough in a large mixing bowl with dough hook attachment.
- Mix until the dough comes together for about 5 minutes.
- Transfer the dough onto a floured surface and knead for a minute.
- Flatten the dough into an 8×8-inch square and wrap it with a plastic wrap.
- Refrigerate it for 8-10 hours, or overnight.
Slow proofing
Note, we’re not dissolving or proofing the yeast here, even when using active dry yeast. And using cold liquid is intentional! This slows yeast activation because the dough requires slow, long proofing over a couple of days.
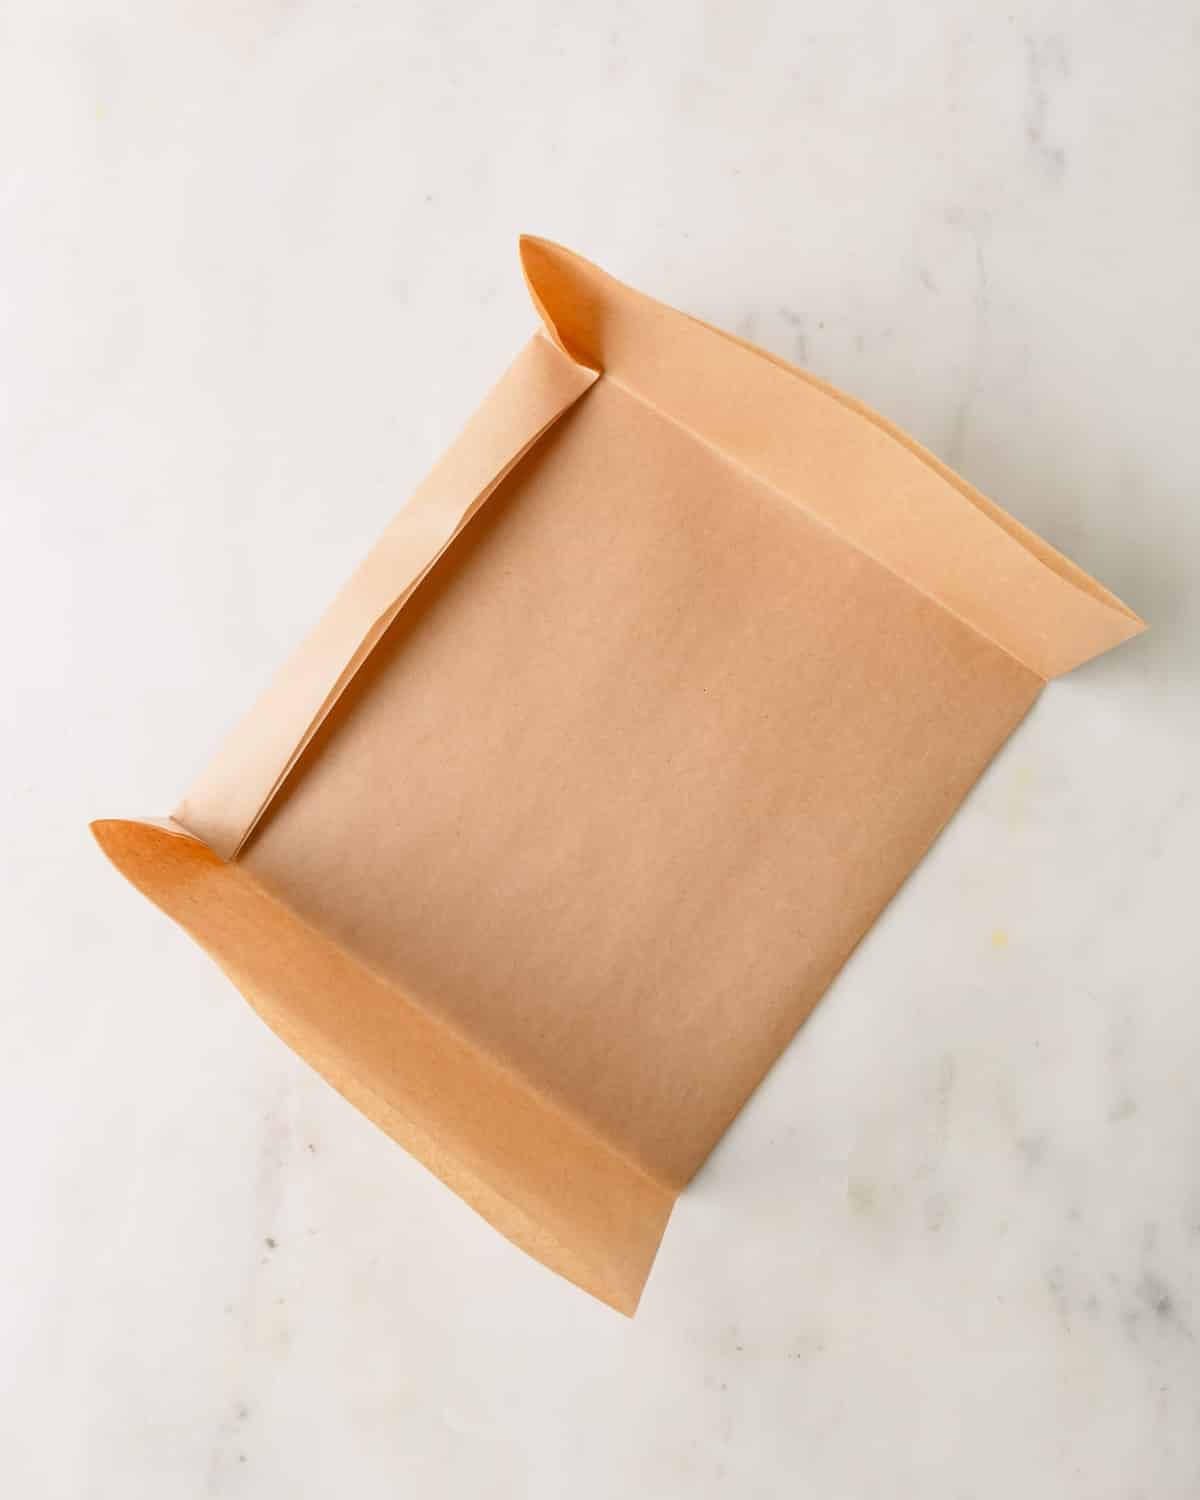
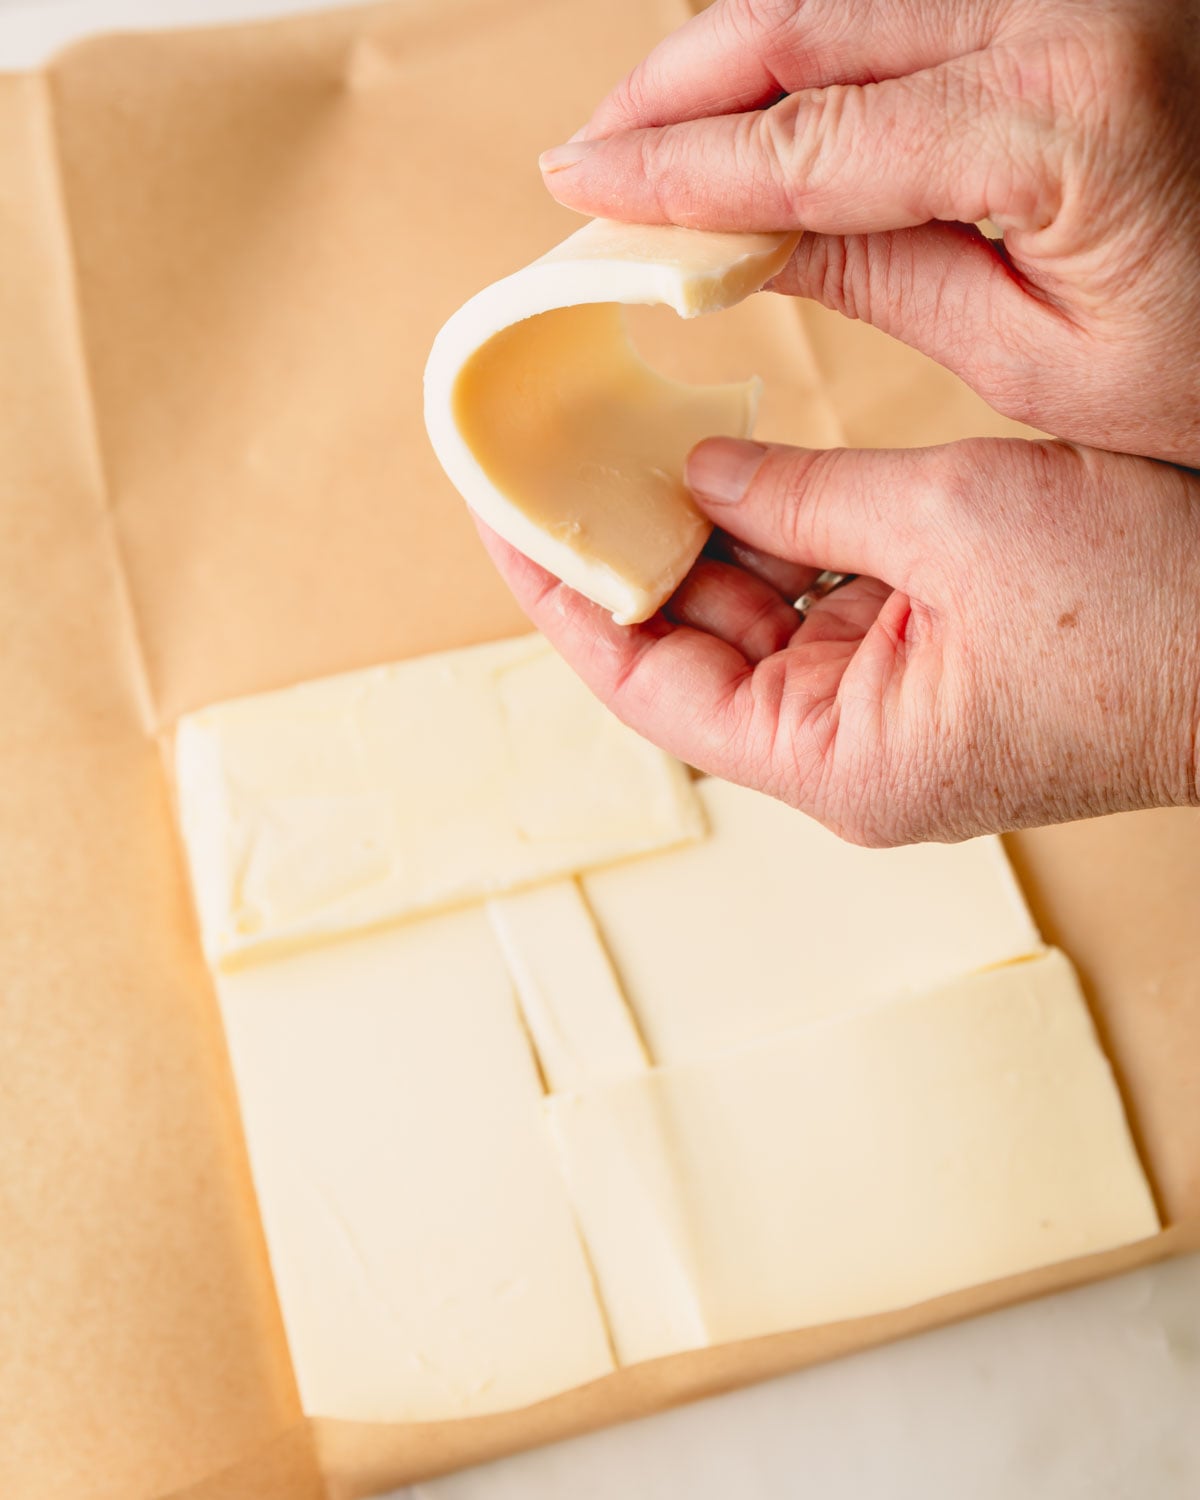
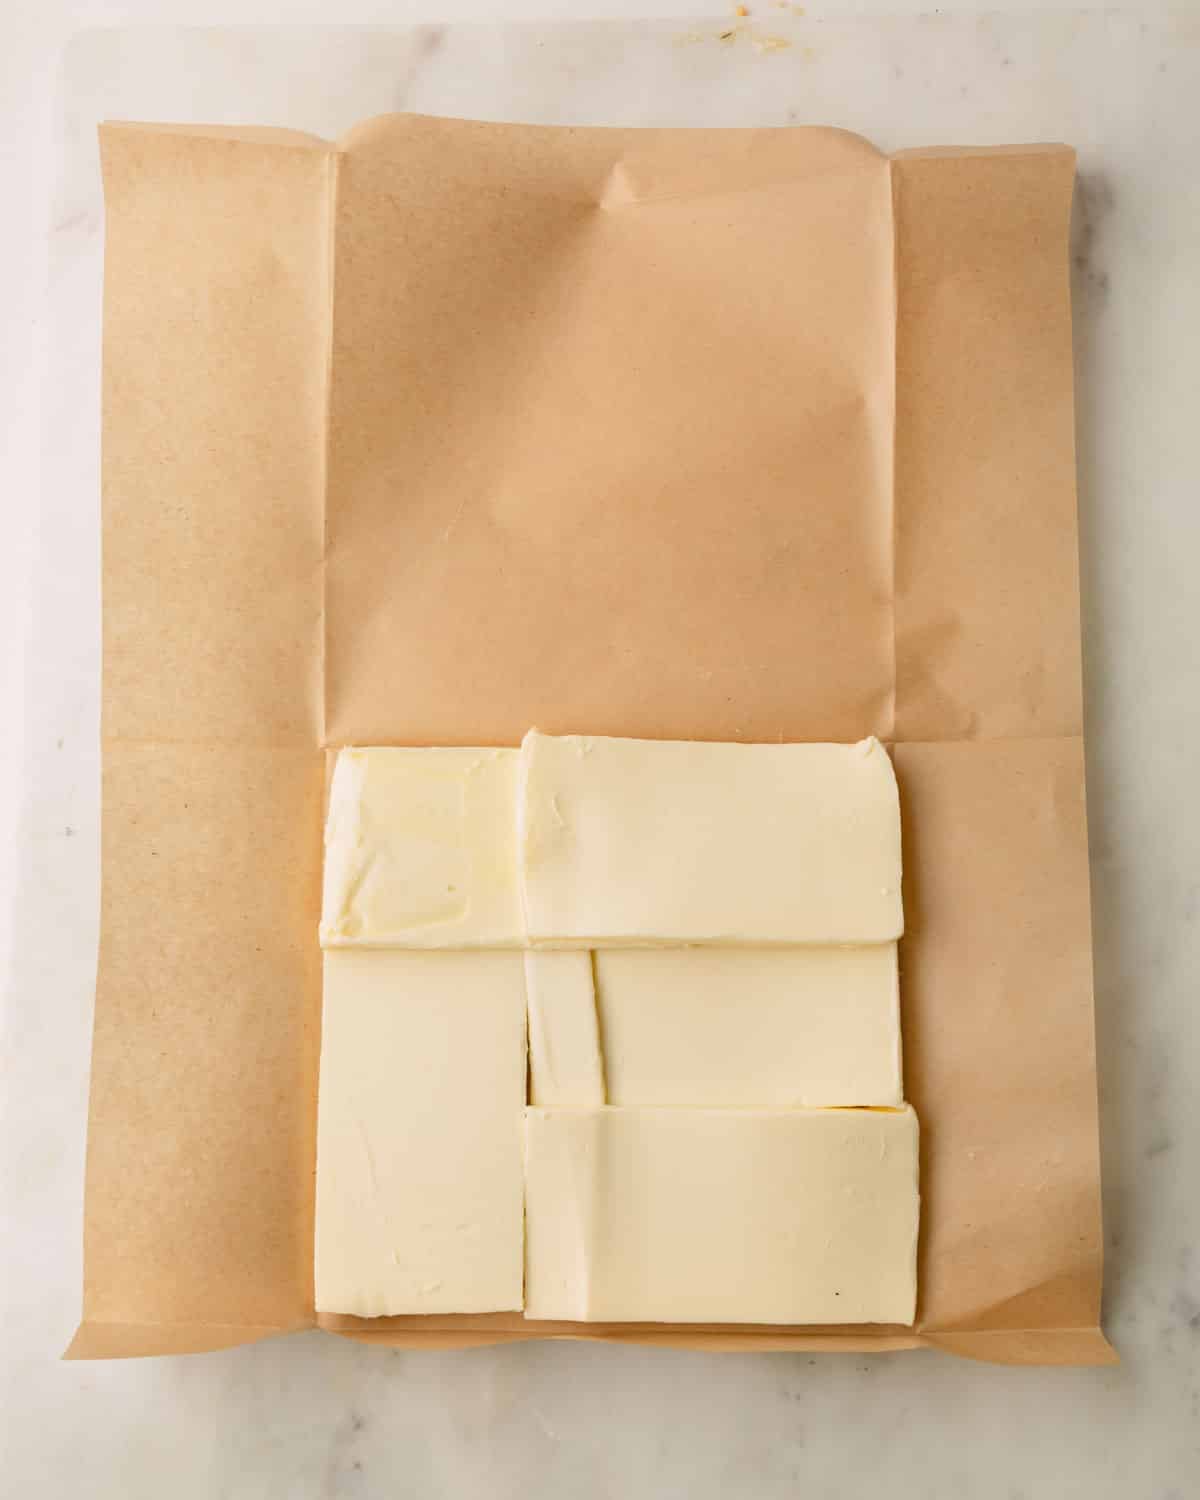
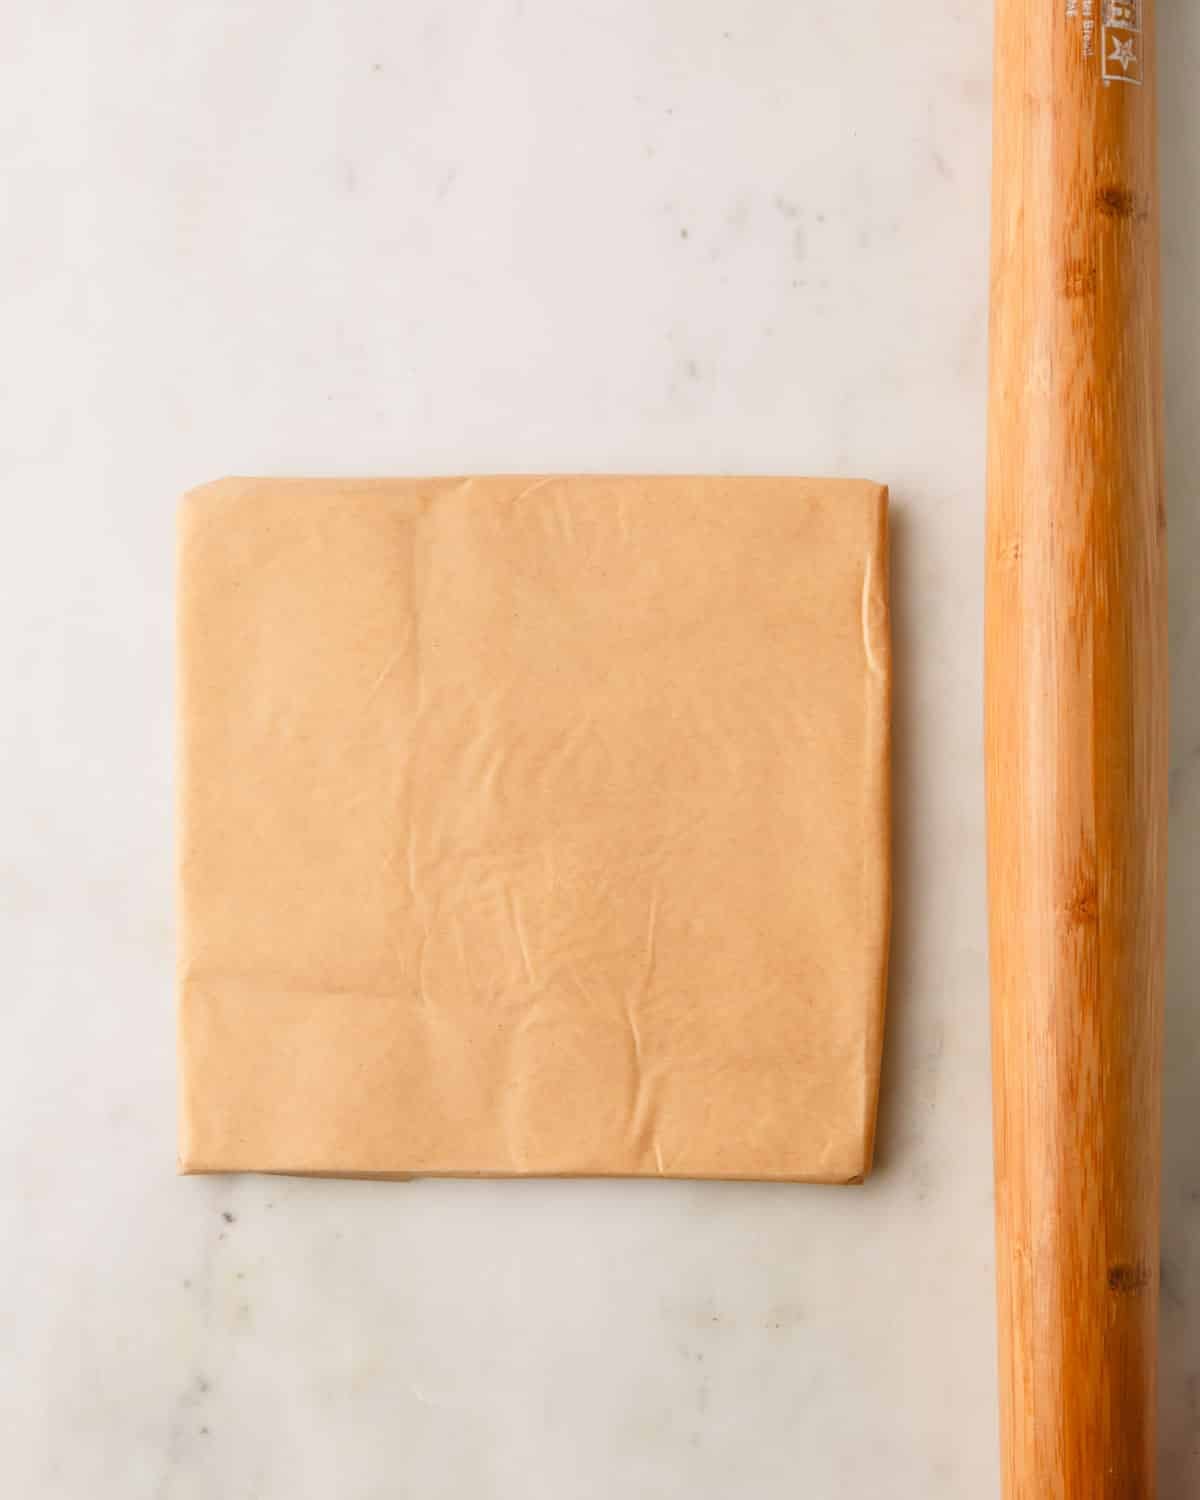
Prepare the butter block (beurrage):
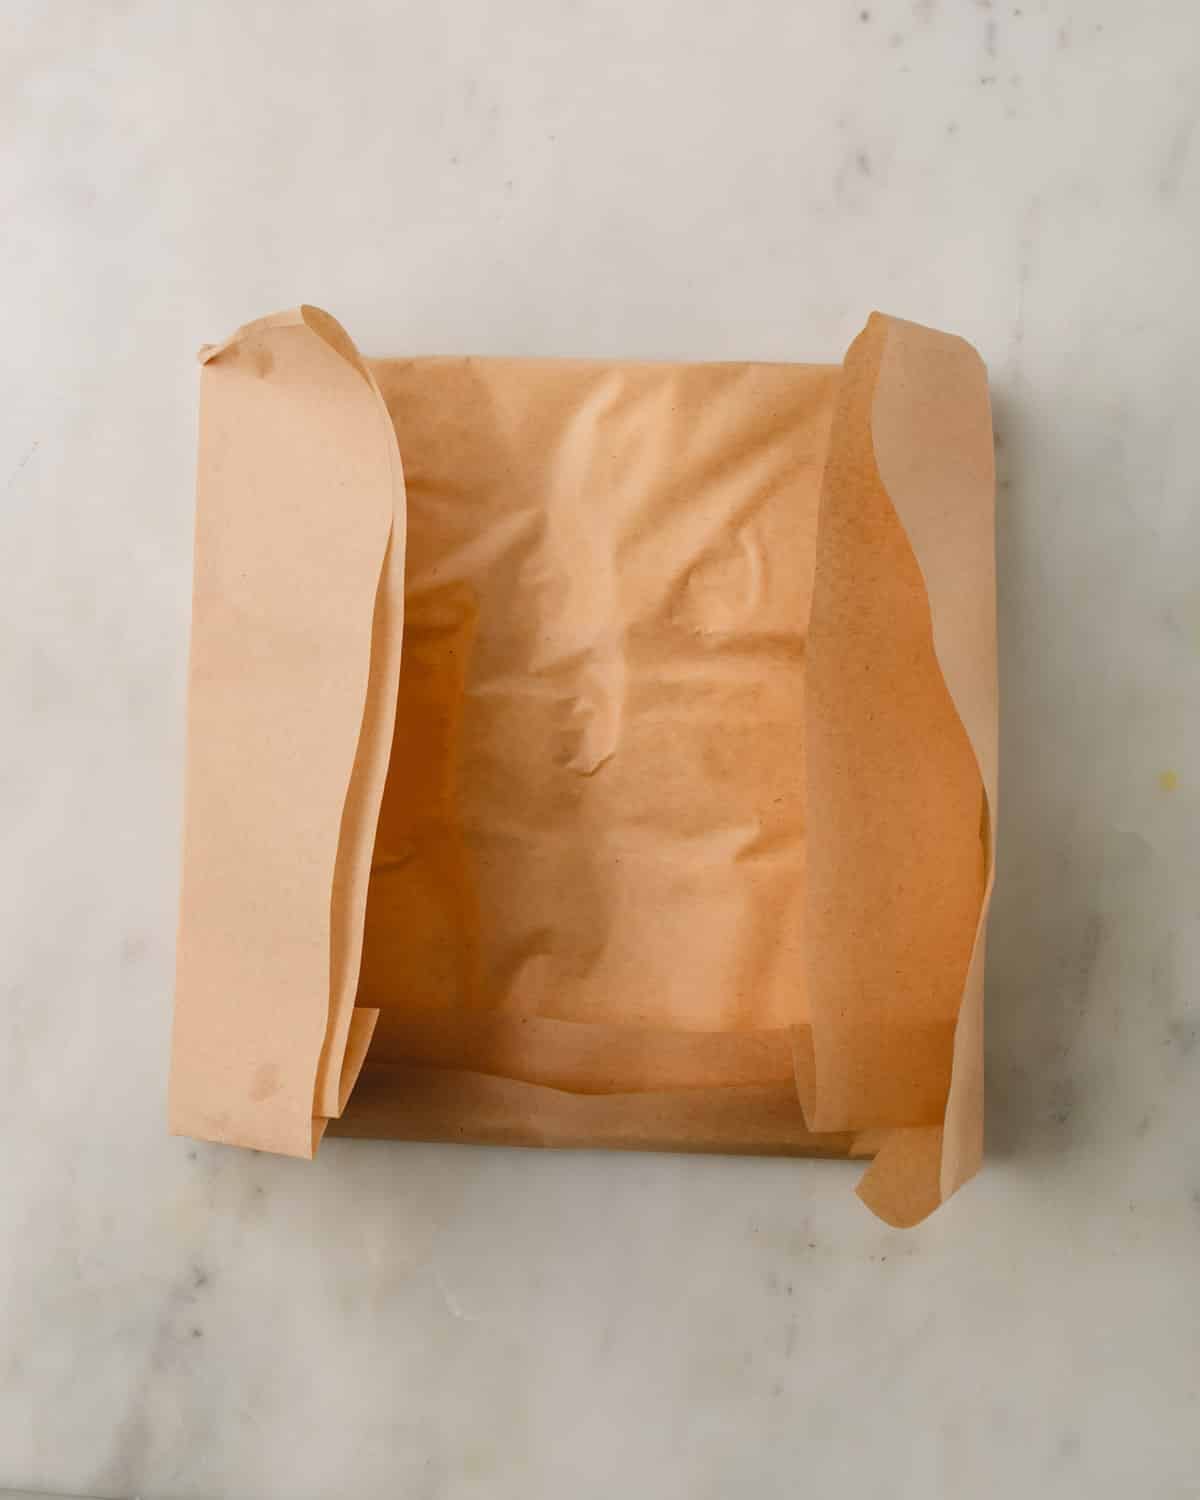
- Fold a sheet of parchment inward on all four sides to create a neat 7×7-inch square “pocket.” This acts as a guide so your butter block will be evenly shaped.
- Cut the butter into flat pieces and arrange them in a single layer inside the parchment square, filling it as evenly as possible. (TIP: Notice how the cold butter is still pliable thanks to its high fat content.)
- Fold the flaps to fully enclose the butter, forming a tidy packet.
- Using a rolling pin, gently roll the butter inside the parchment until it completely fills the square, creating a smooth, even butter block.
- Refrigerate for at least 30 minutes, or overnight. Do NOT freeze.
Do not freeze the butter
It’s important for the dough and butter to be at the same temperature so both stretch together as you roll and laminate the dough. Frozen butter will crack and create uneven pockets in the dough.
DAY 2: Laminate the croissant dough
We’re laminating the dough using two different lamination methods: single-fold and double-fold. Using a combination like this builds many thin butter-and-dough layers (36 to be exact) while keeping the dough manageable to roll. This creates a croissant that is light, flaky, and well-defined.
First Lamination – Single Fold (aka Letter Fold):
When rolling the dough, dust the counter with a small amount of flour, not too much. You don’t want too much flour in between the layers.
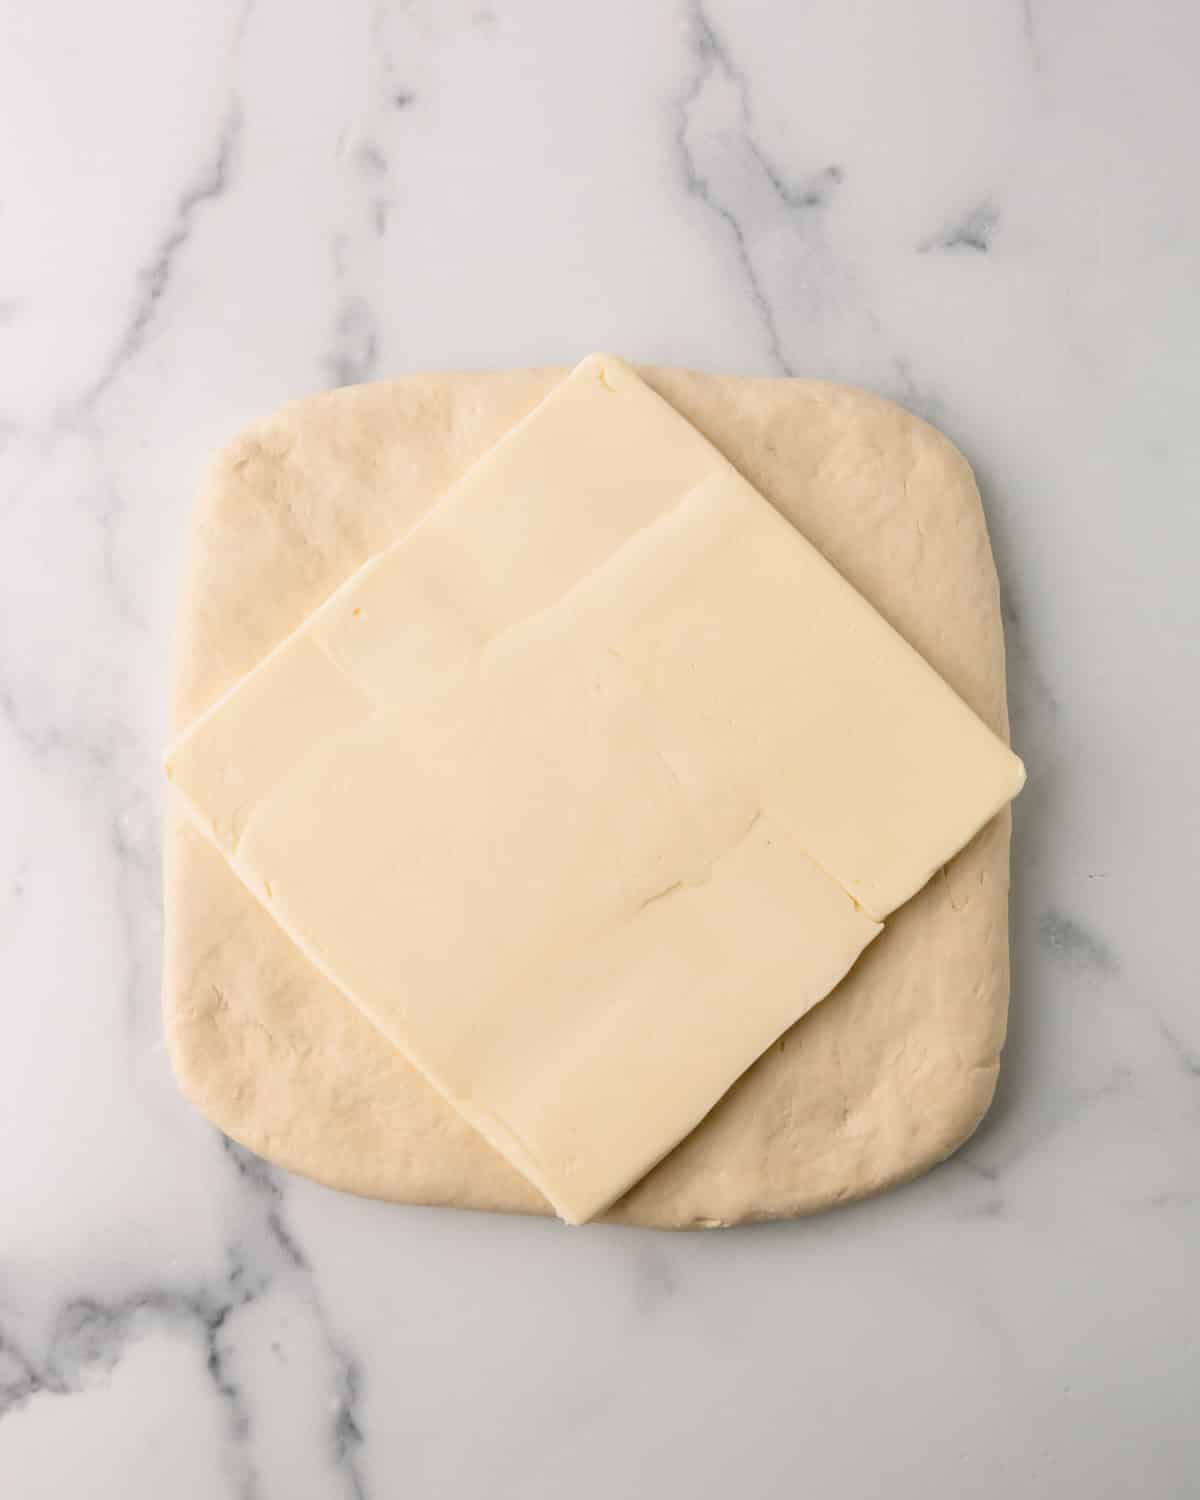
- Roll the square dough on a lightly floured surface into a 10×10 in square. It doesn’t have to be exact, but close enough.
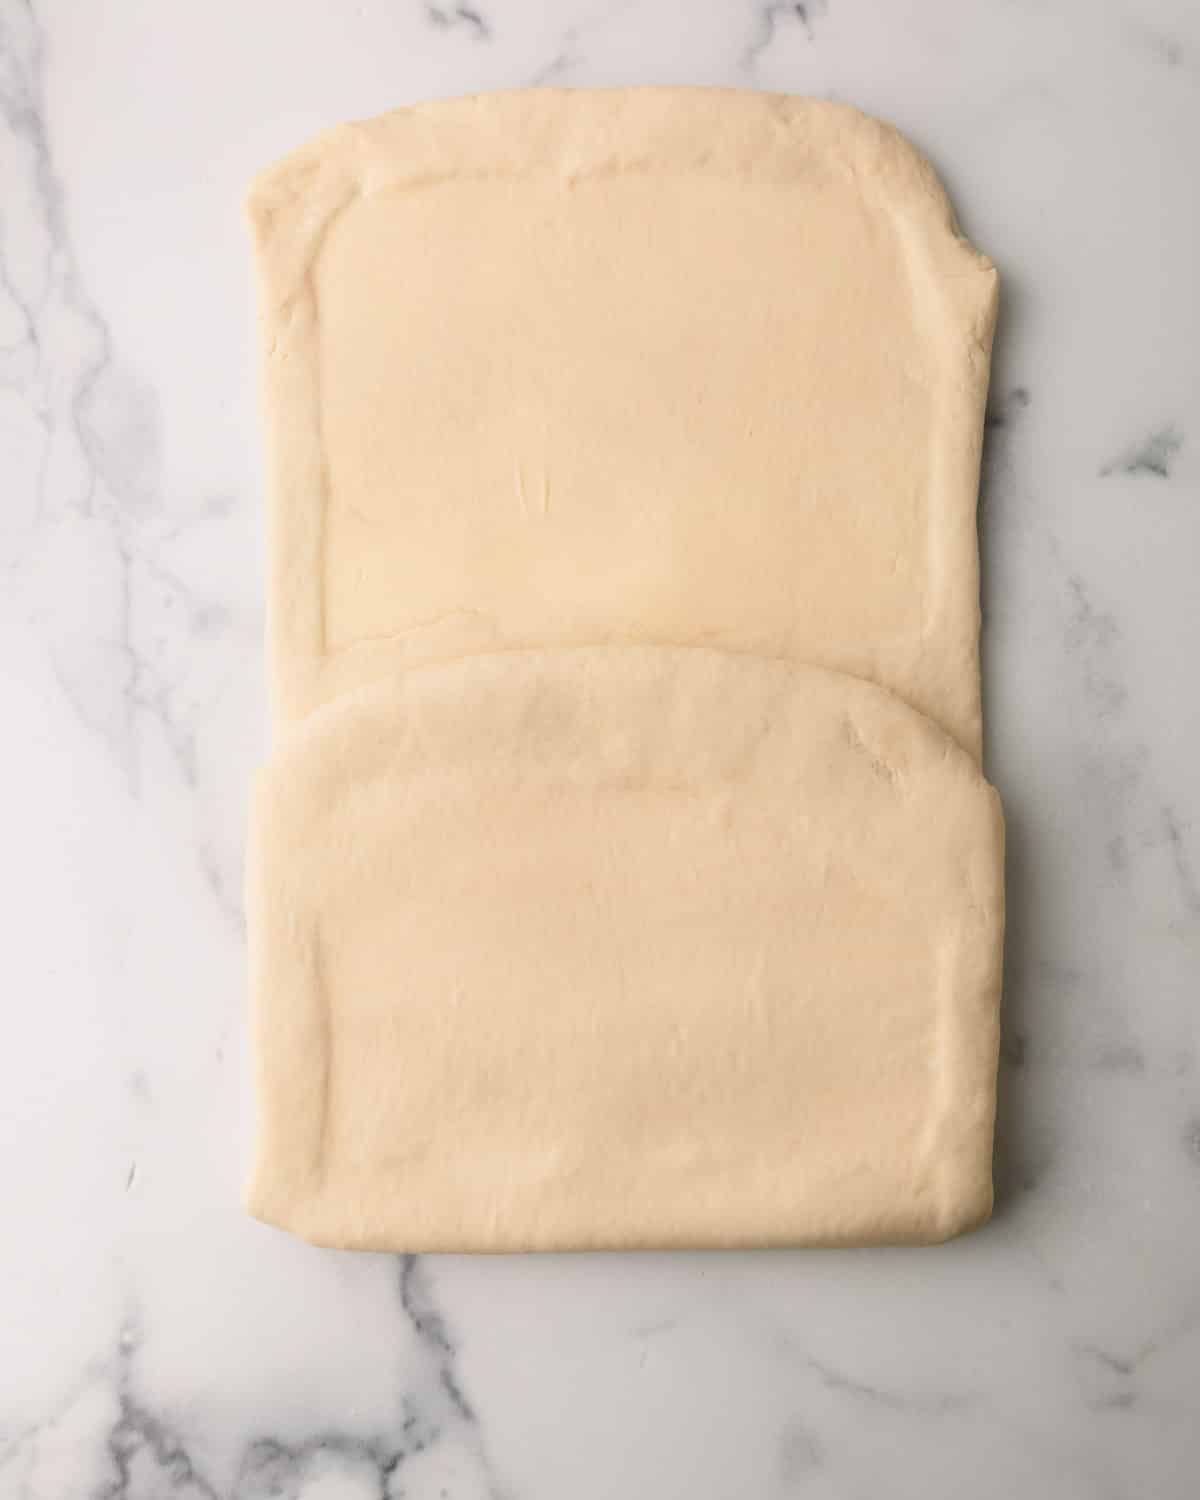
- Place the prepared 7×7-inch butter square on the dough, rotated so it sits like a diamond (with the corners pointing toward the sides of the dough).
- Fold the edges like an envelope, as shown below. Pinch the seams securely.
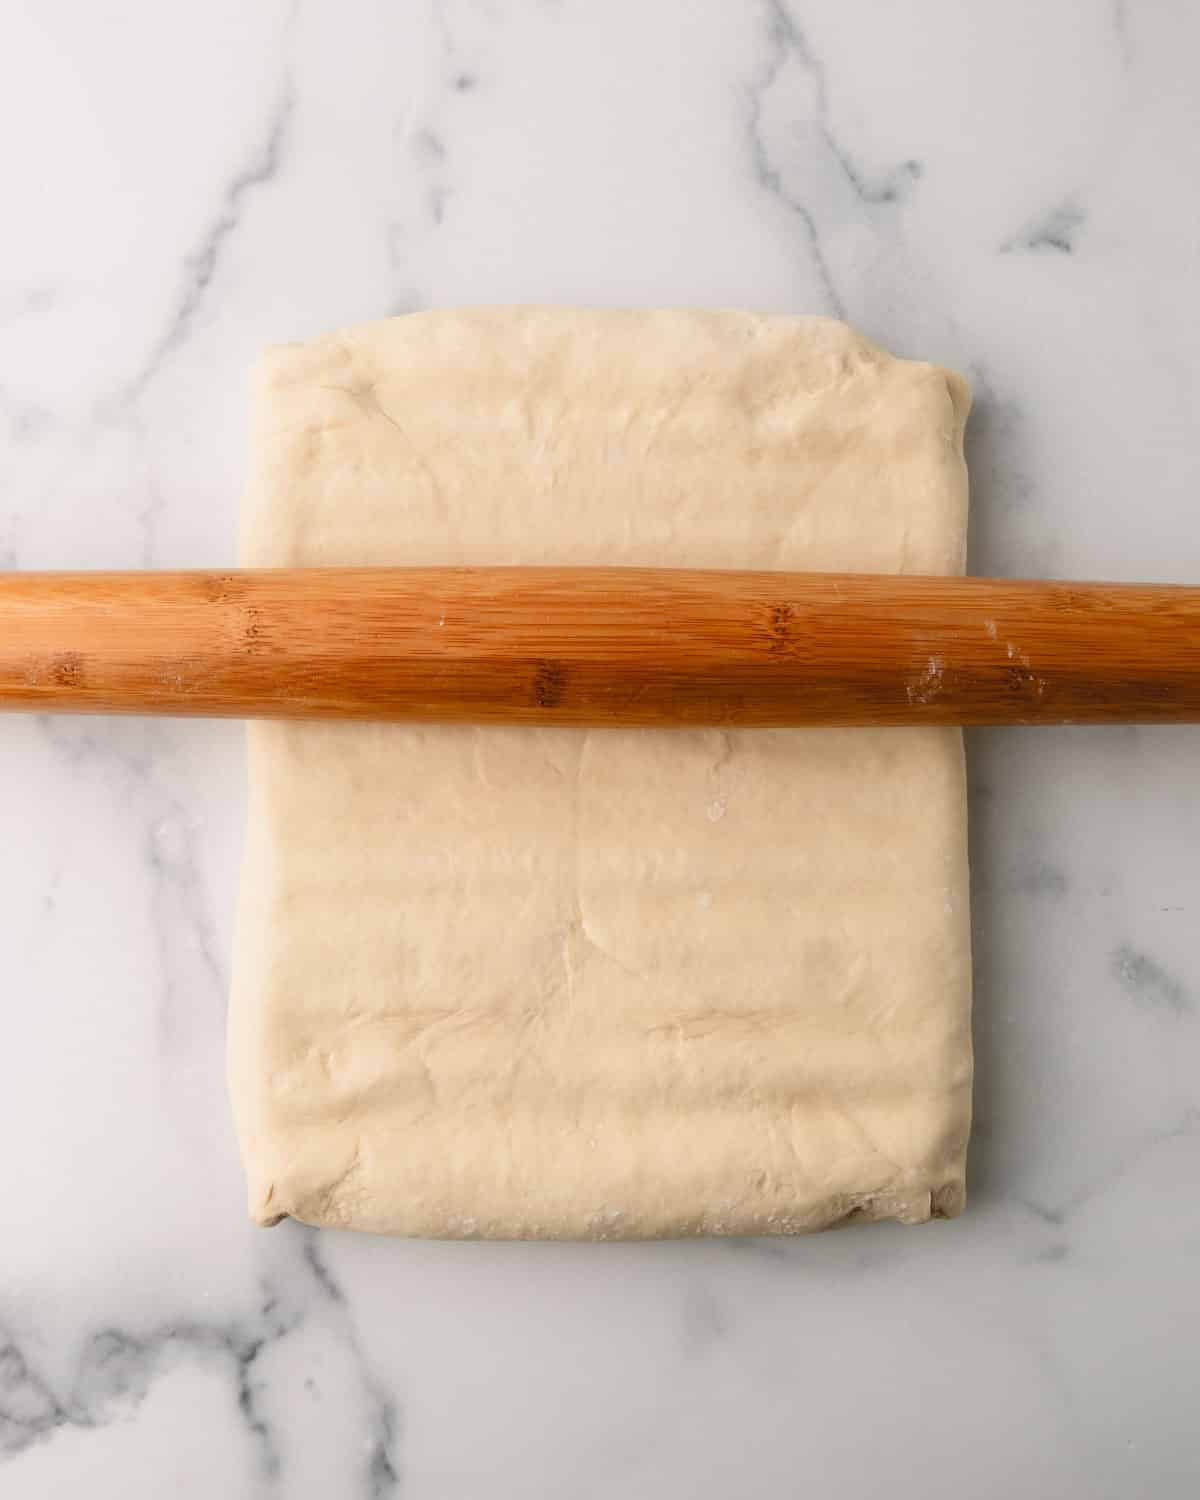
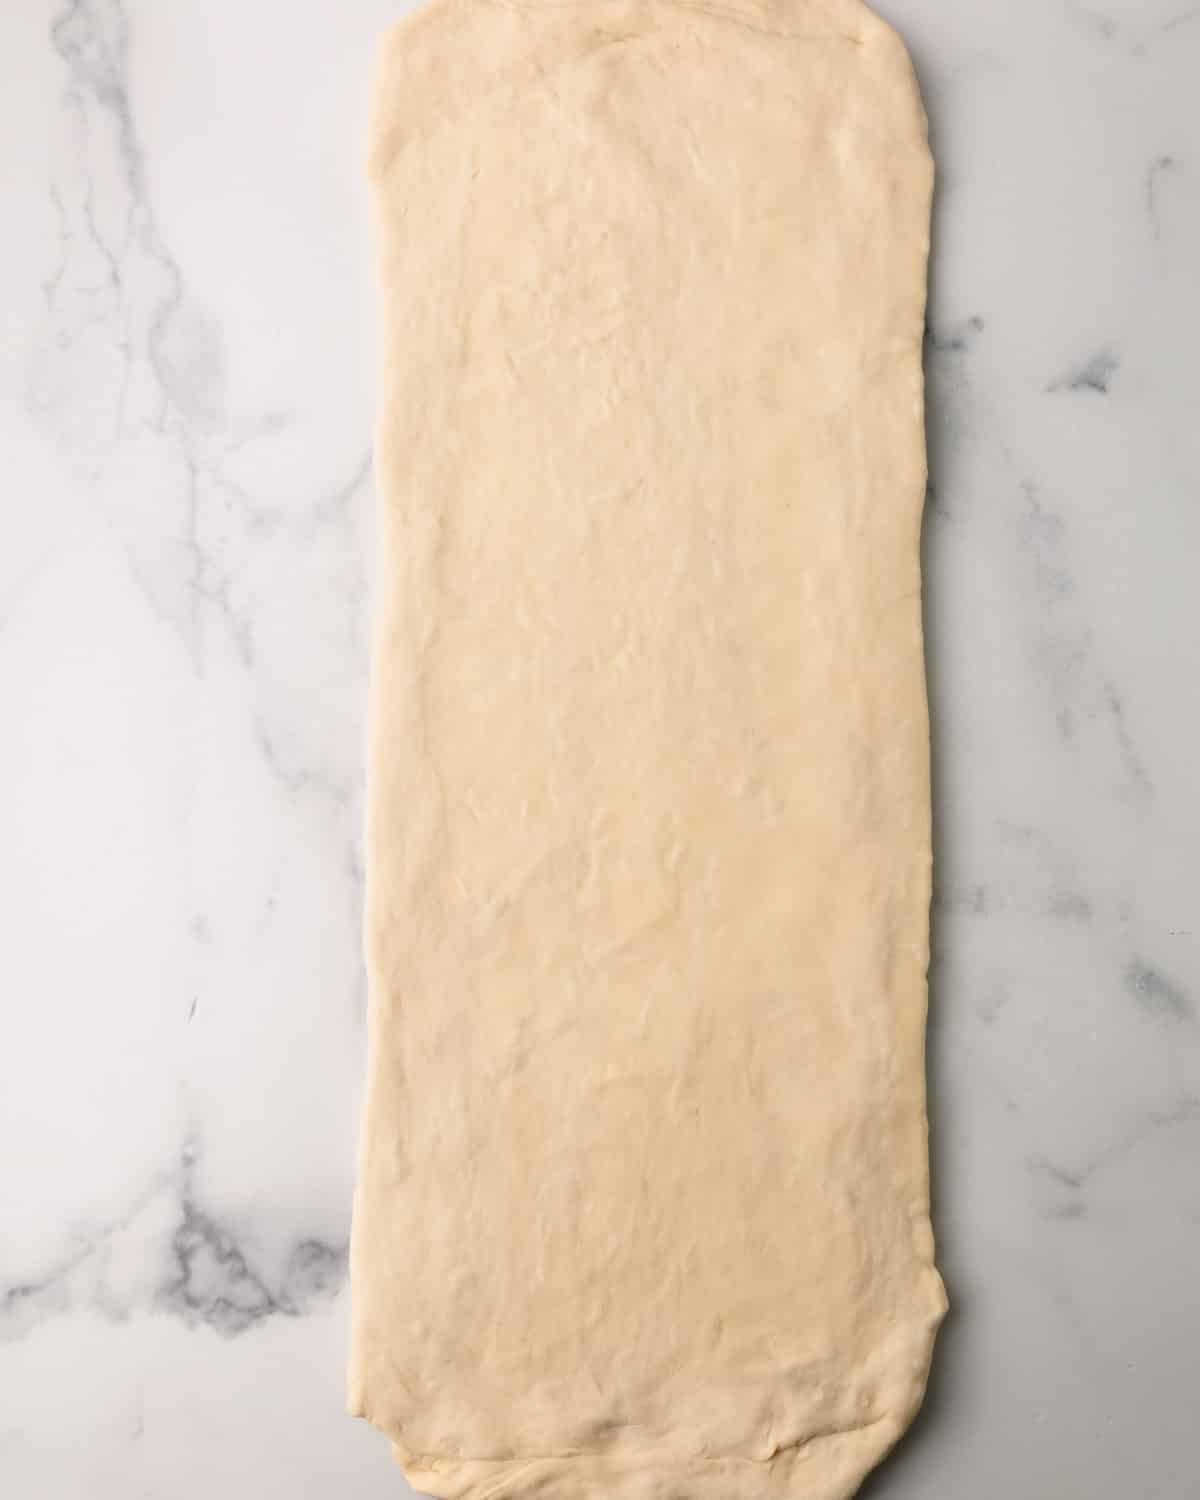
- Roll the dough into an 8×24-inch rectangle. Again, it doesn’t have to be exact measurements, but do your best to be close to that.
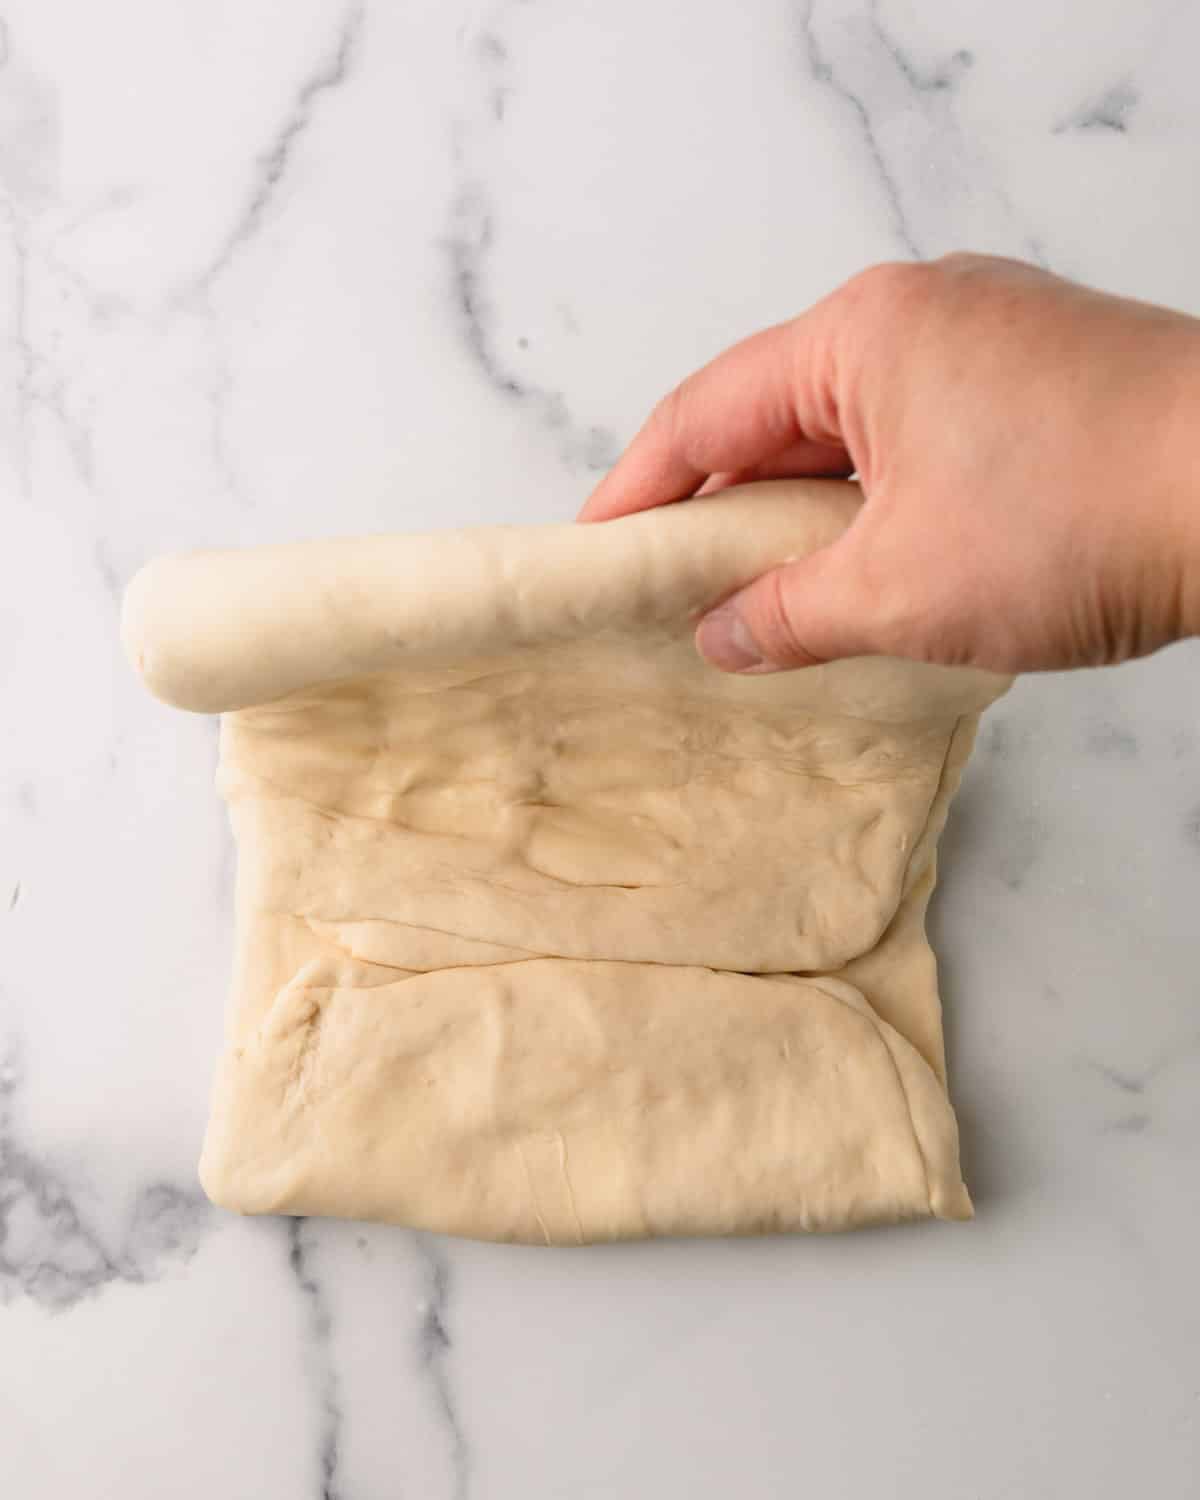
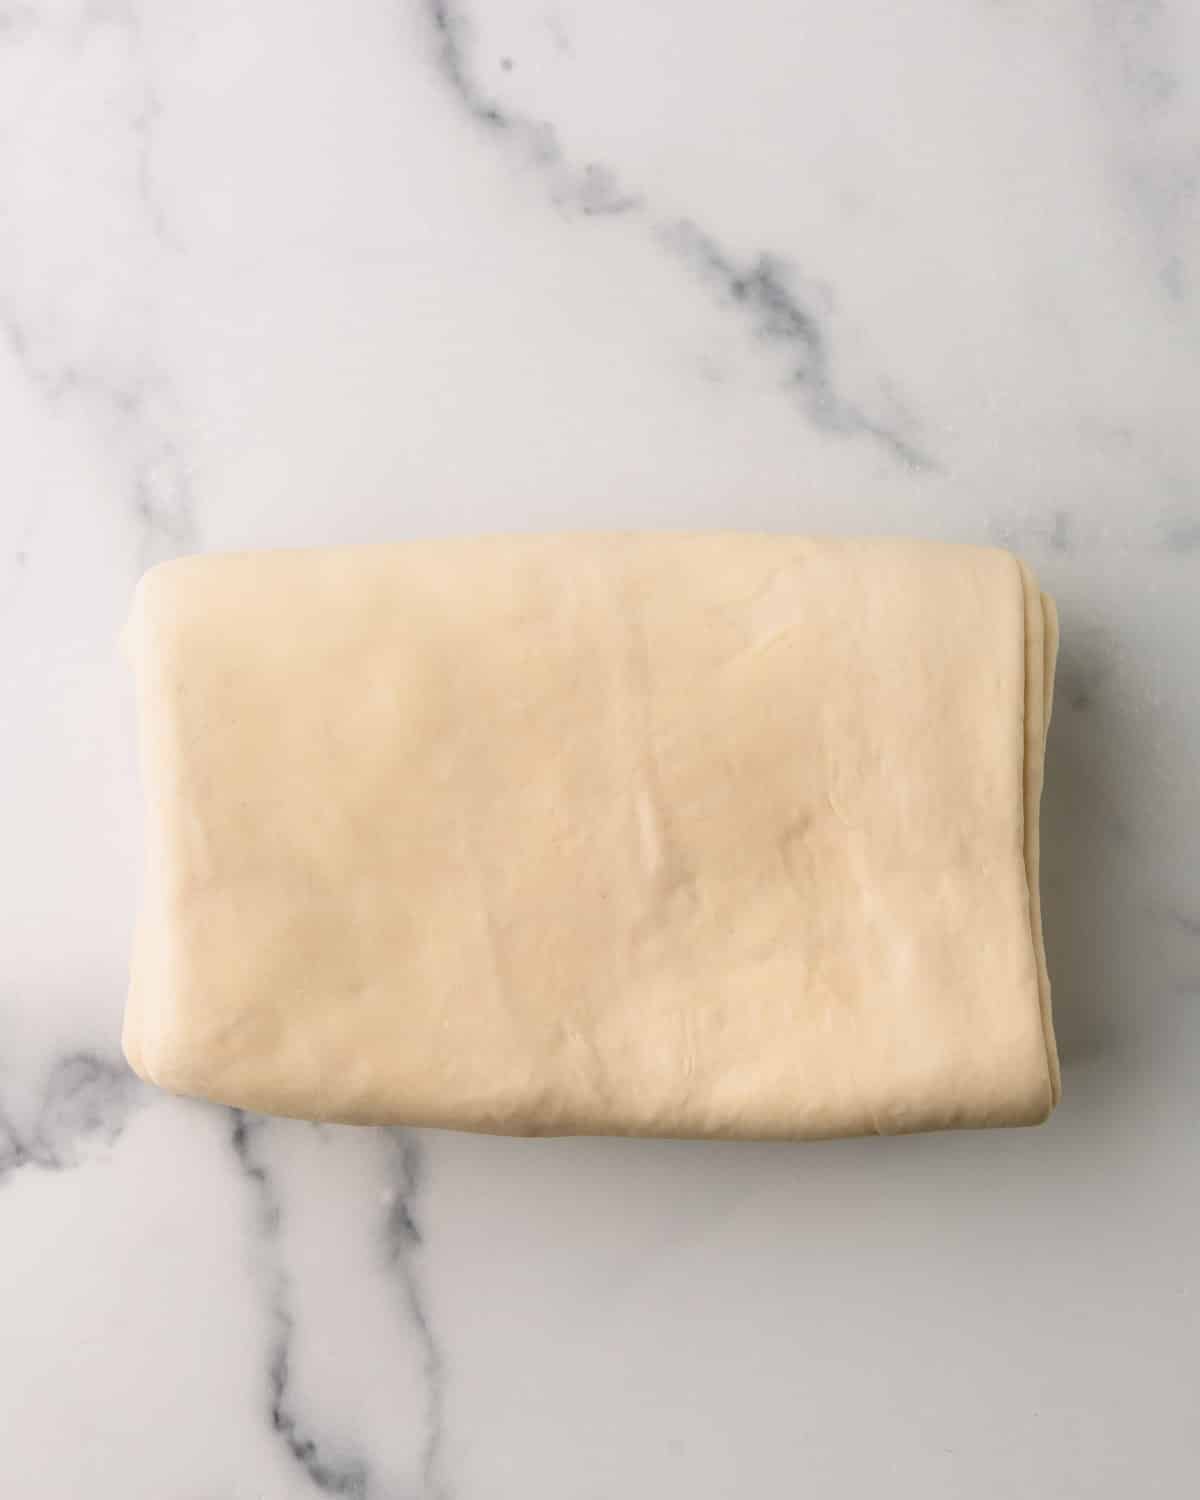
- Fold into thirds and wrap in plastic wrap. Refrigerate for 30 minutes.


Second Lamination – Double Fold (aka Book Fold):
- Place the dough seam on the side so the short end faces you.
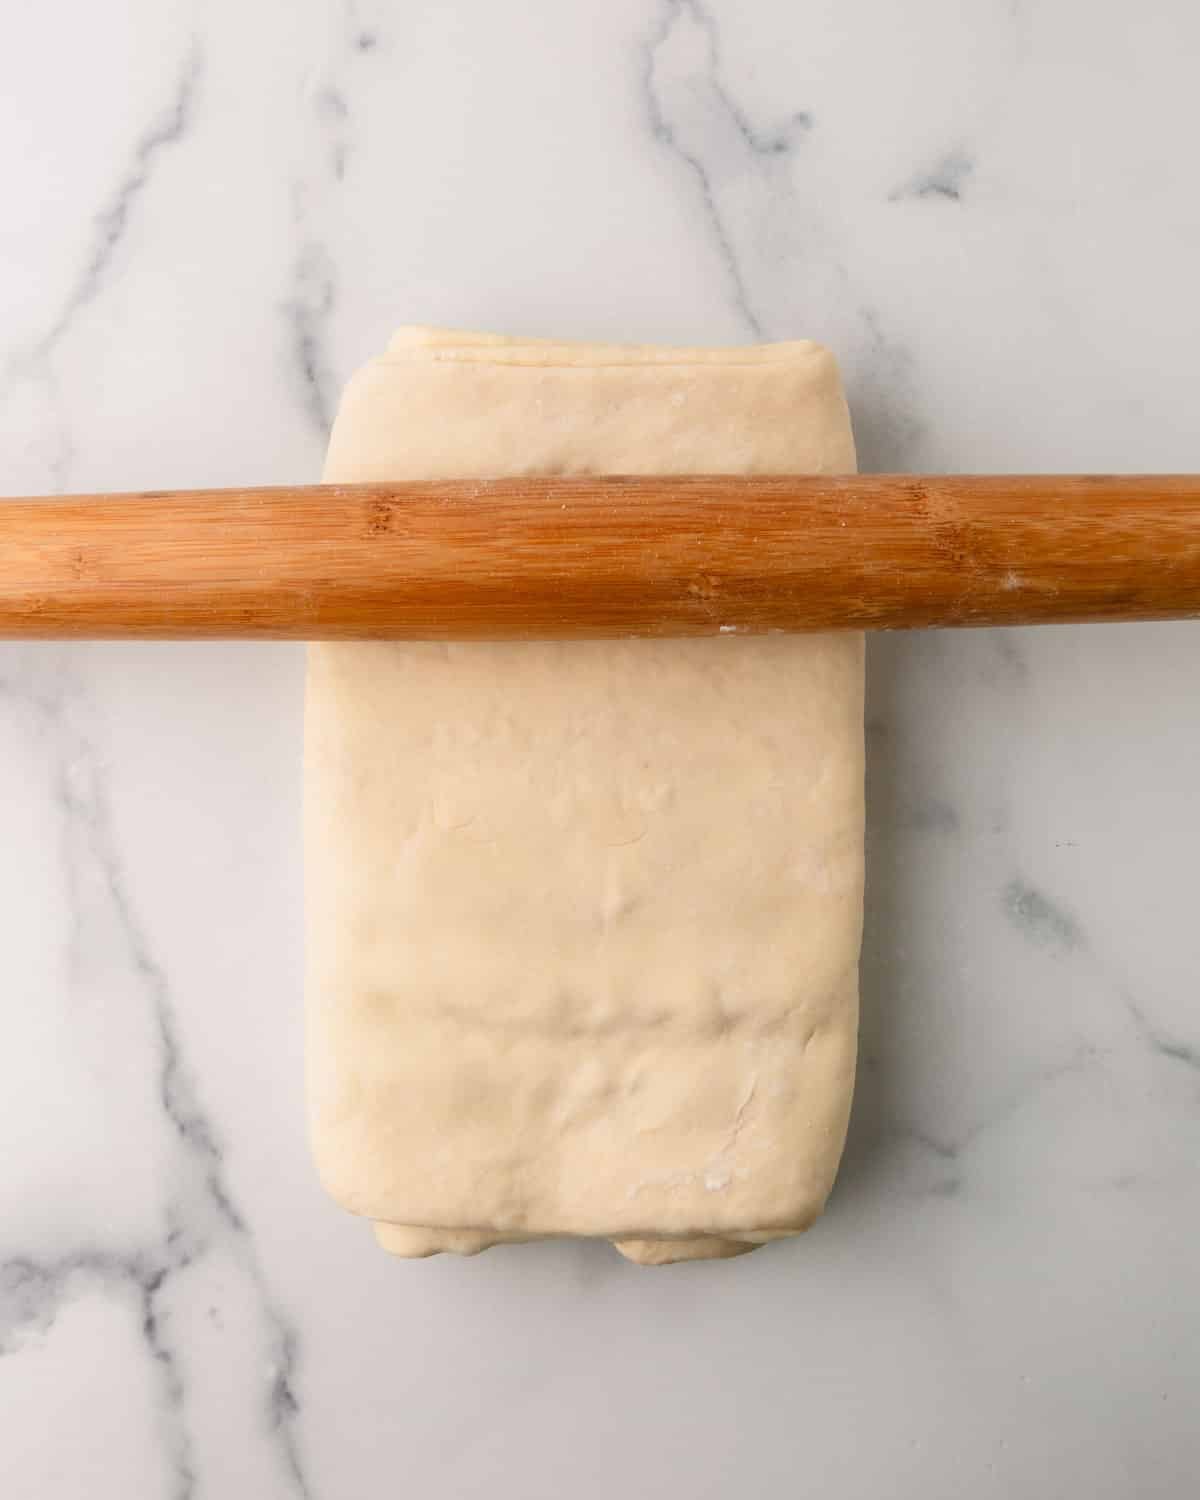
- Roll the dough into an 8×24-inch rectangle.
- Fold about ¼ of the bottom end inward, then bring the opposite short end in to meet it.
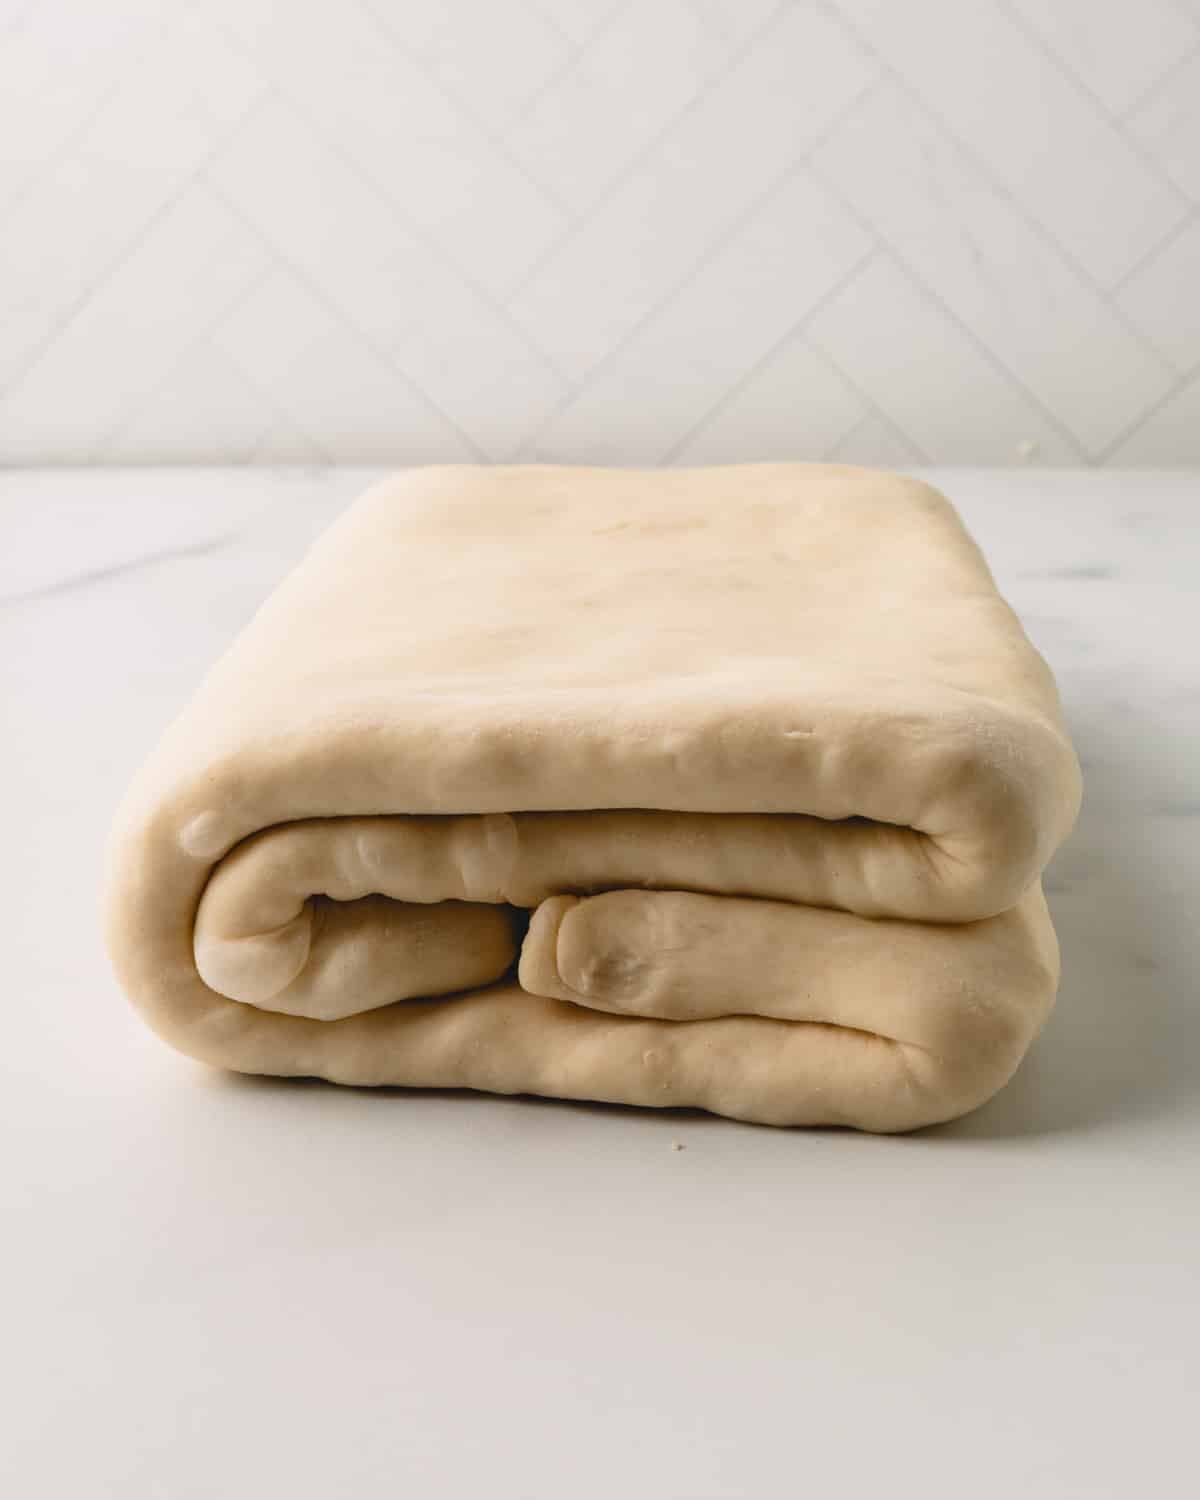
- Now fold the top end over to the bottom end along the center seam, just like closing a book. Wrap it in plastic wrap. Refrigerate for 30 minutes, or overnight.

DAY 3: Cut, shape, Proof, and Bake
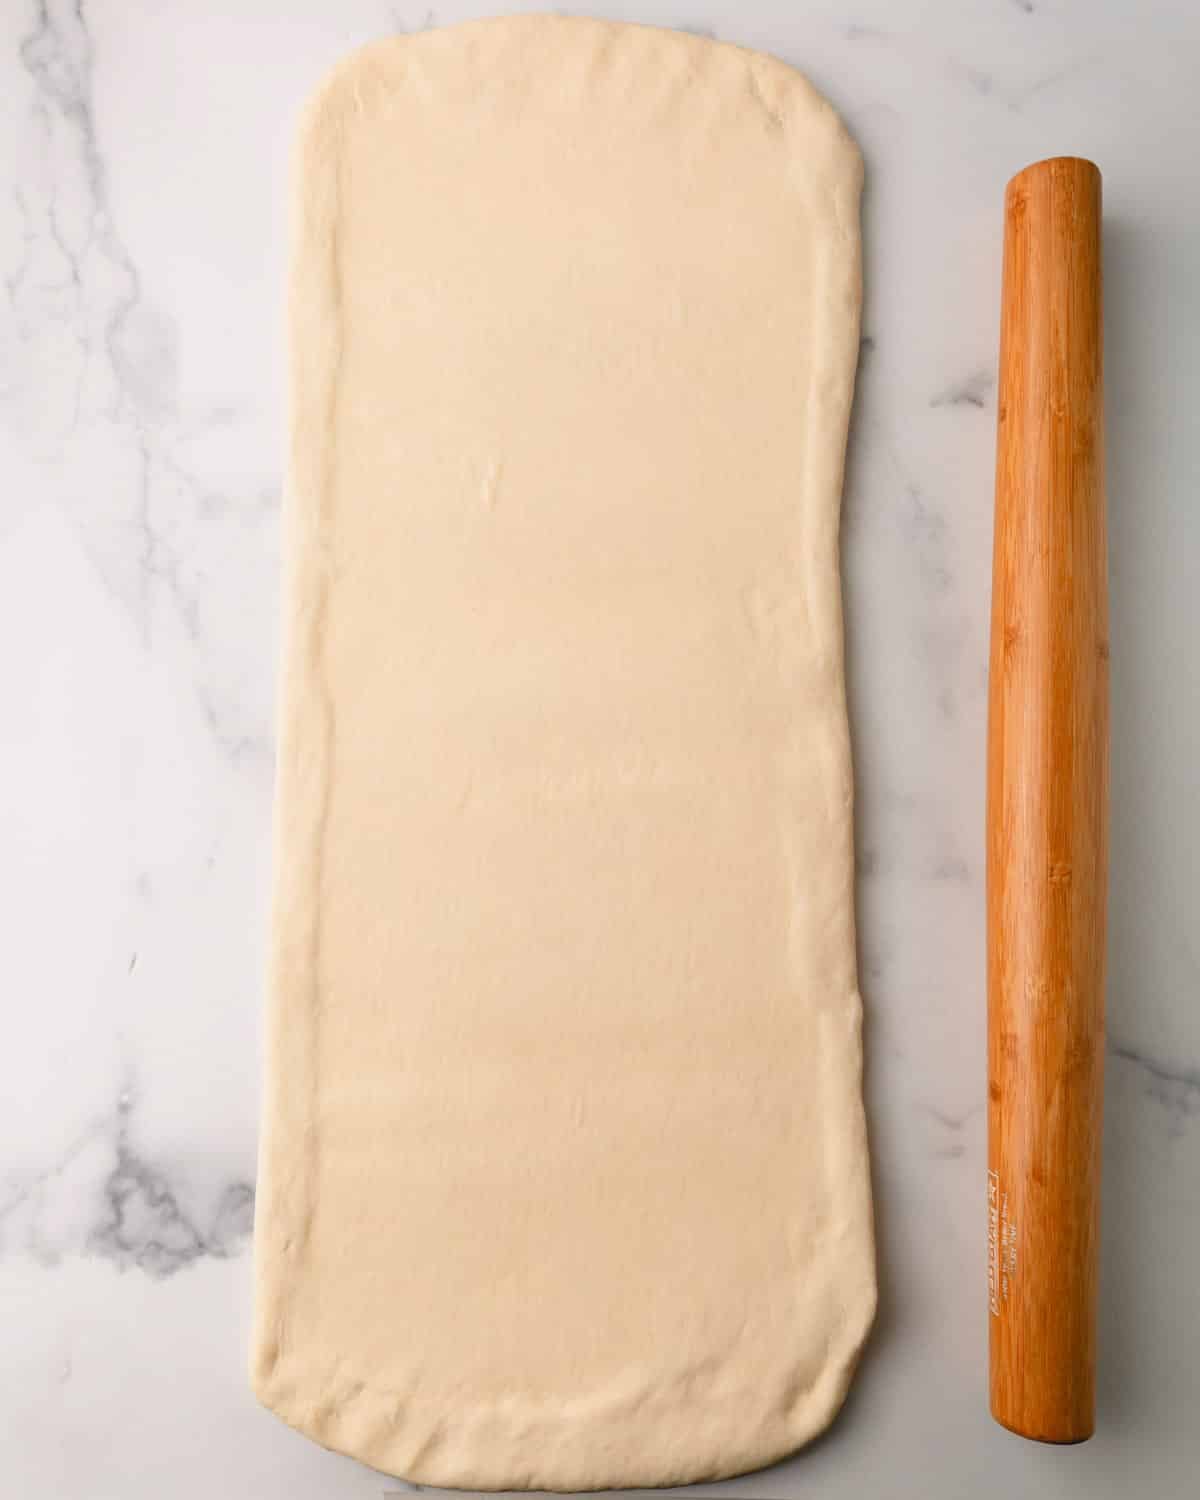
If you have a long enough countertop surface, roll the dough into an 8×44-inch rectangle on a lightly floured surface.
To make it more manageable, I cut the dough into 2 equal parts and rolled each into an 8×22-inch rectangle. Make sure to lift the dough before final measurement, because it shrinks back a little.

Sheeting and cutting the dough:
- Roll each block of dough into an 8×22-inch rectangle.
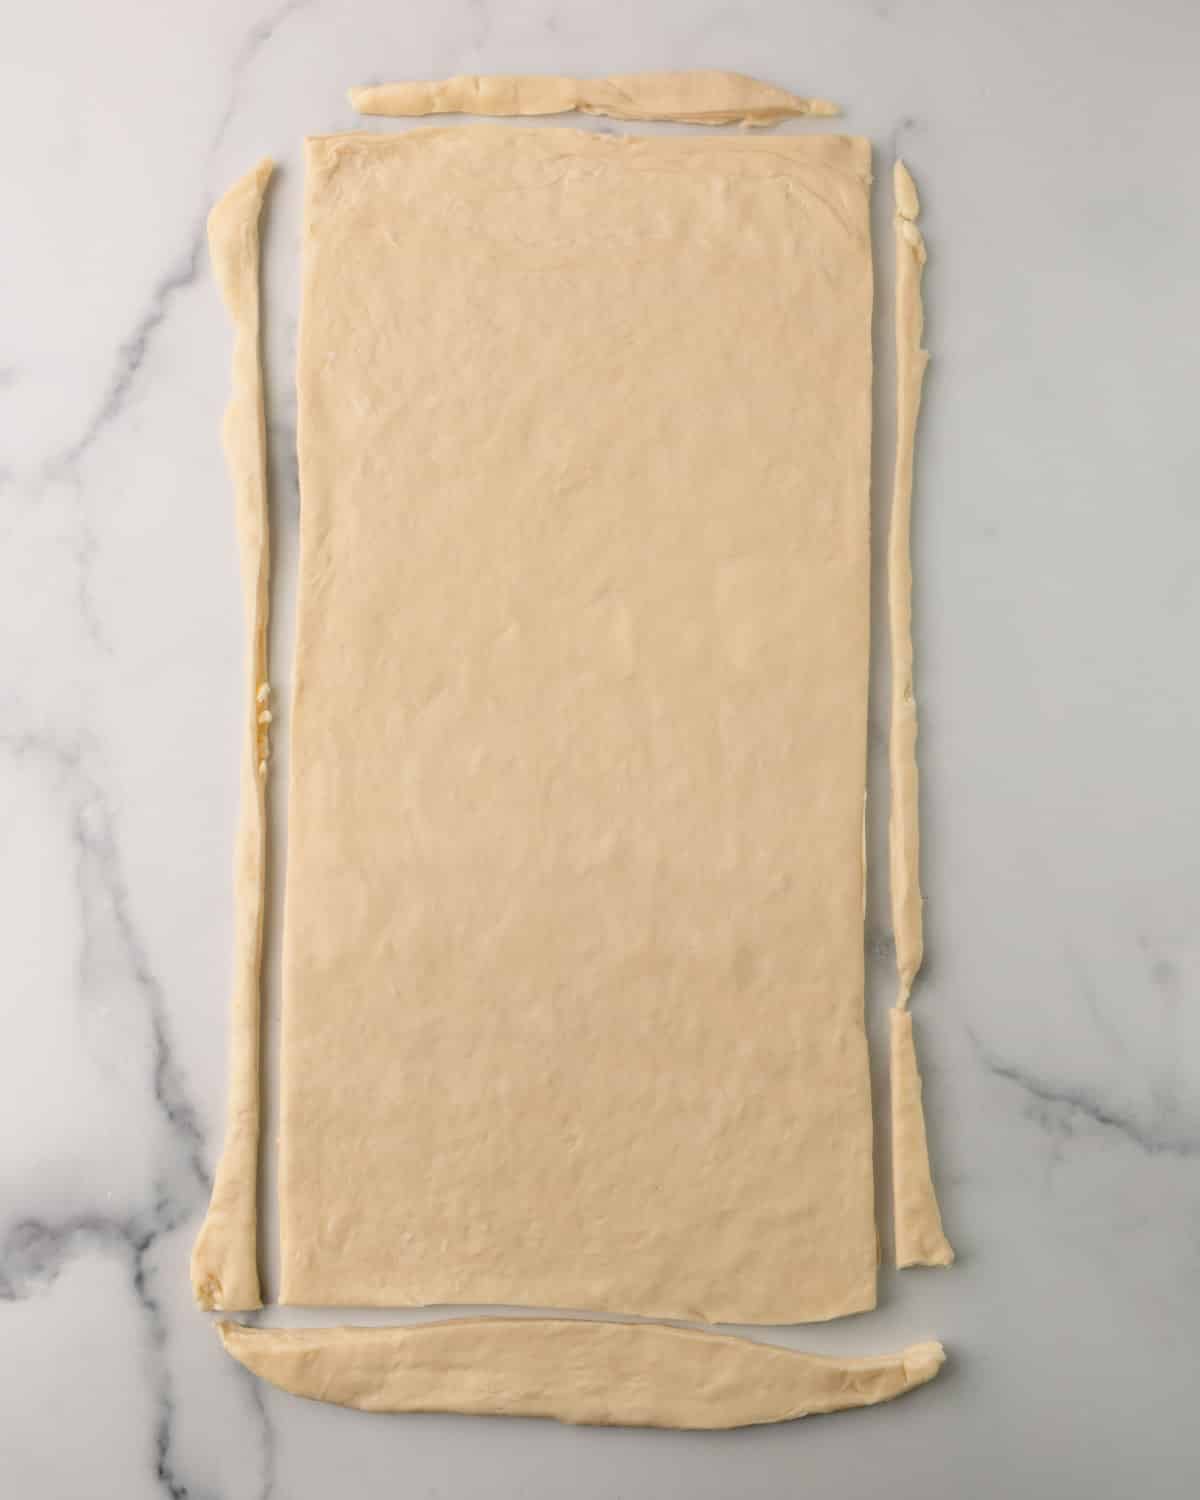
- Trim off the edges.
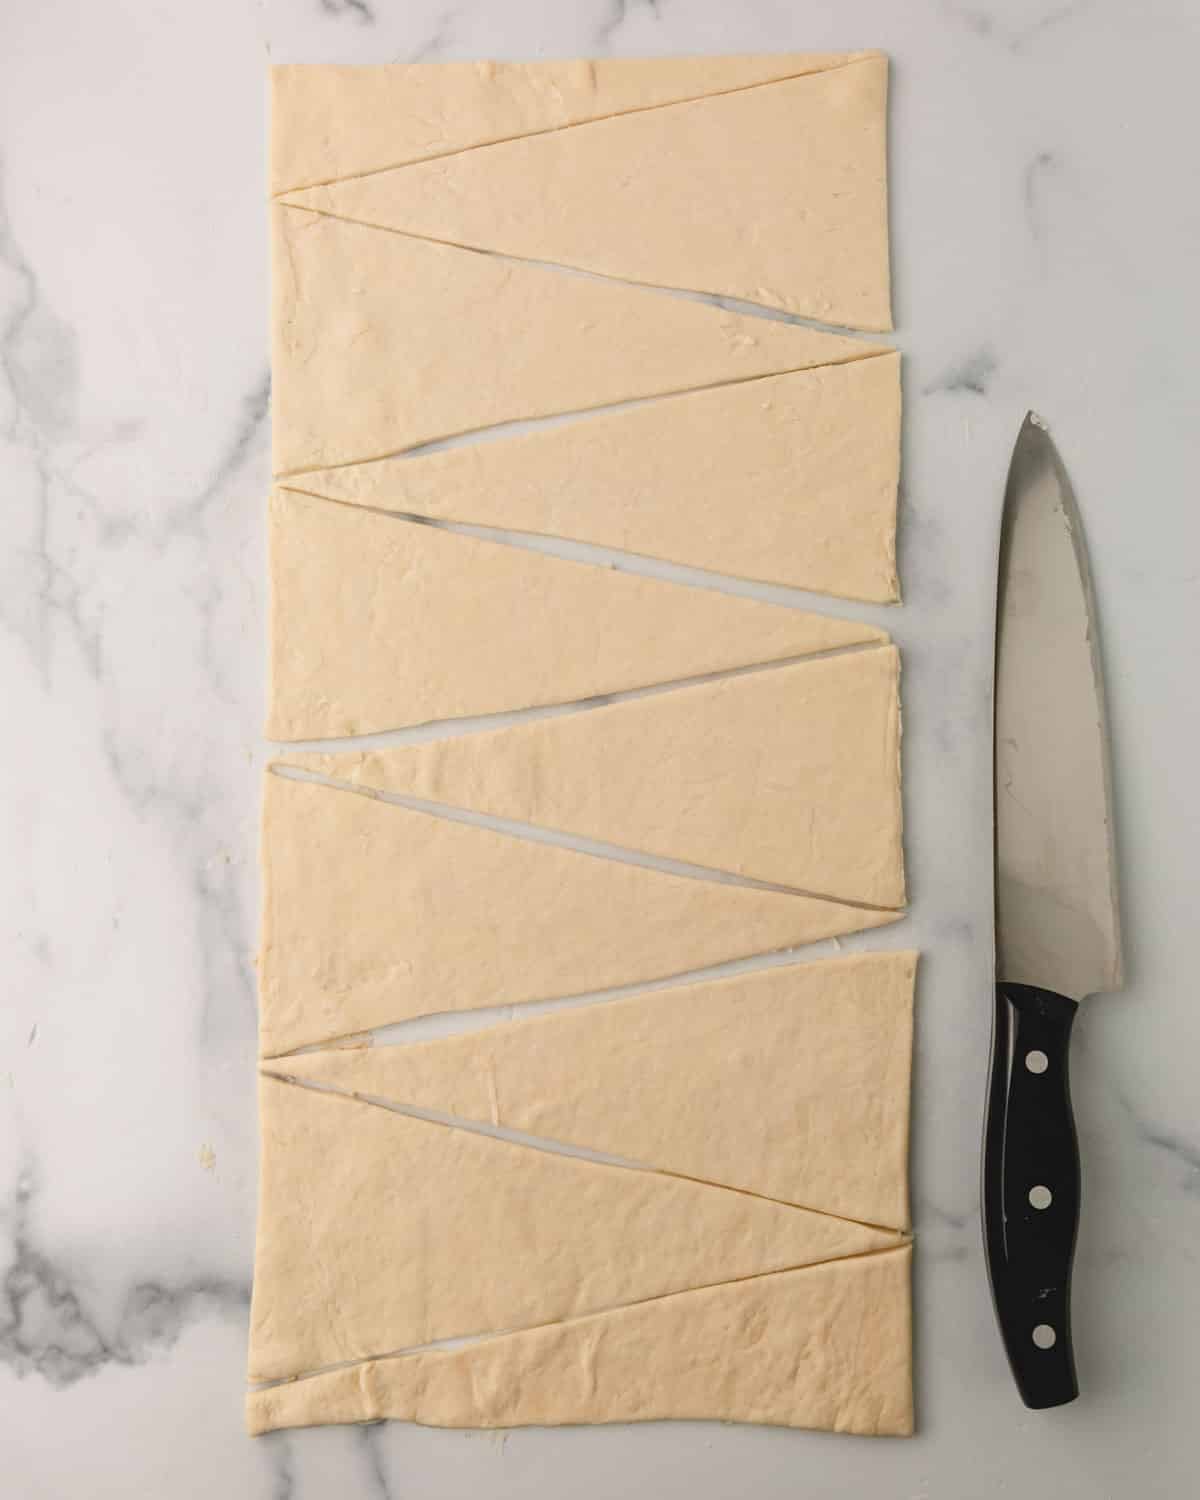
- Mark every 5 inches on the left side, starting from the bottom. Then mark every 5 inches on the right side, starting from the top.
- Cut the dough into triangles, connecting the marks on opposite sides. You should get 8 triangles from each block of dough.
Shaping the croissants:
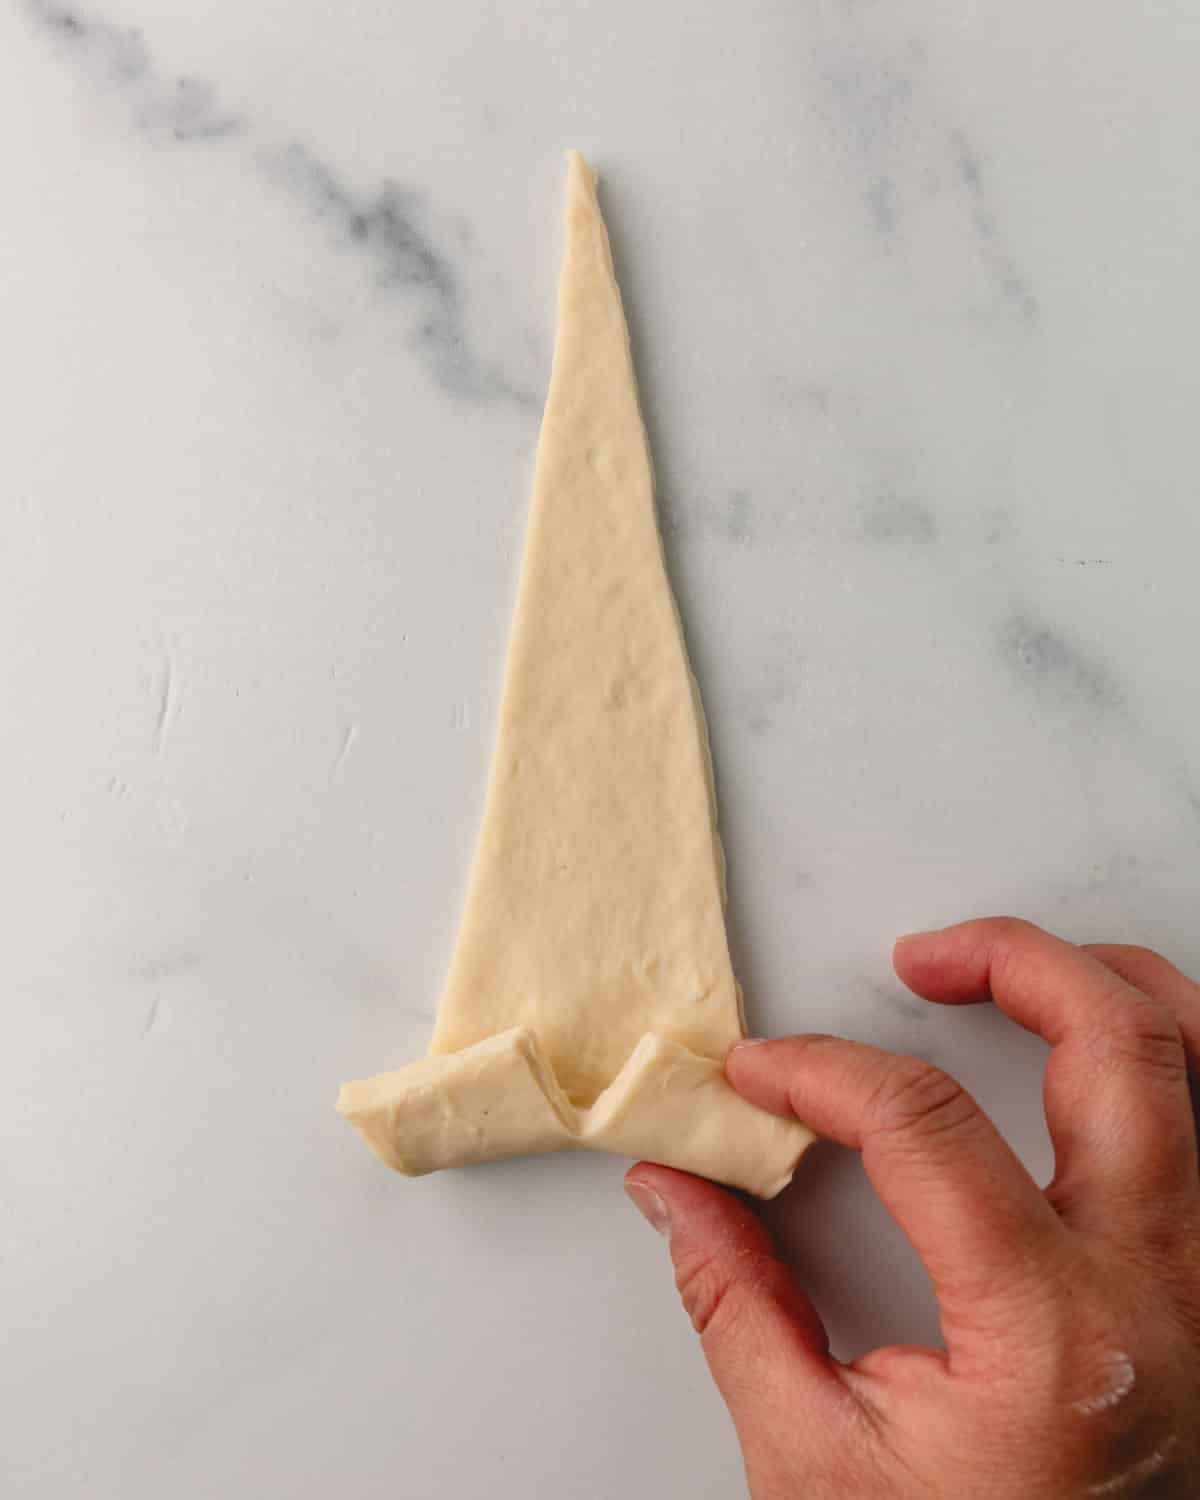
- Place the dough triangle with the wide base closest to you and the tip pointing away.
- Make a small slit in the center of the base to help the croissant spread as it rolls.
- Gently pull the two corners of the base outward and slightly downward. This widens the base and lengthens the triangle, helping create more layers when rolled.
- Starting at the base, roll the dough toward the tip while keeping the roll snug but not compressed. Continue rolling until the tip is tucked underneath the croissant to hold its shape during proofing and baking.
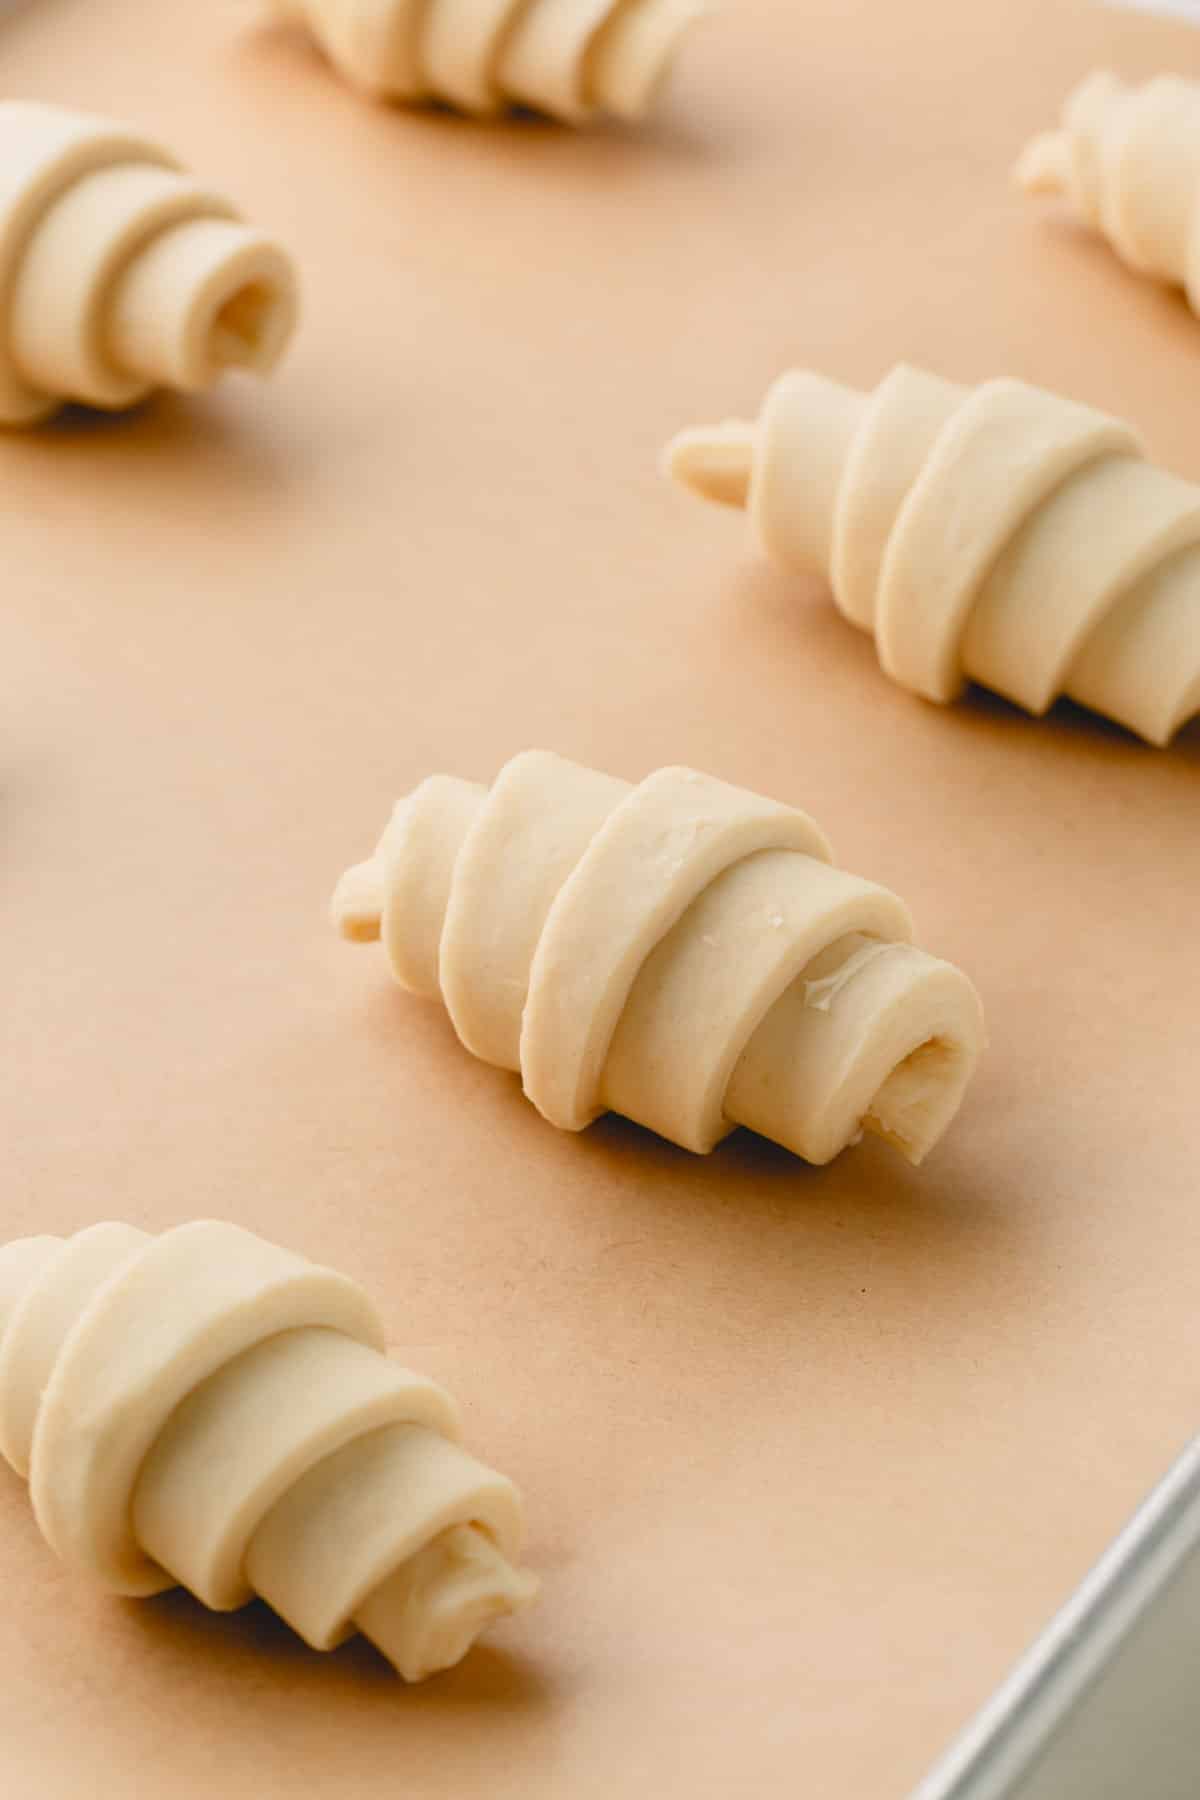
- Place the croissants on two baking sheets, lined with parchment paper. (8 croissants per baking sheet, spacing them at least 2 inches apart.)

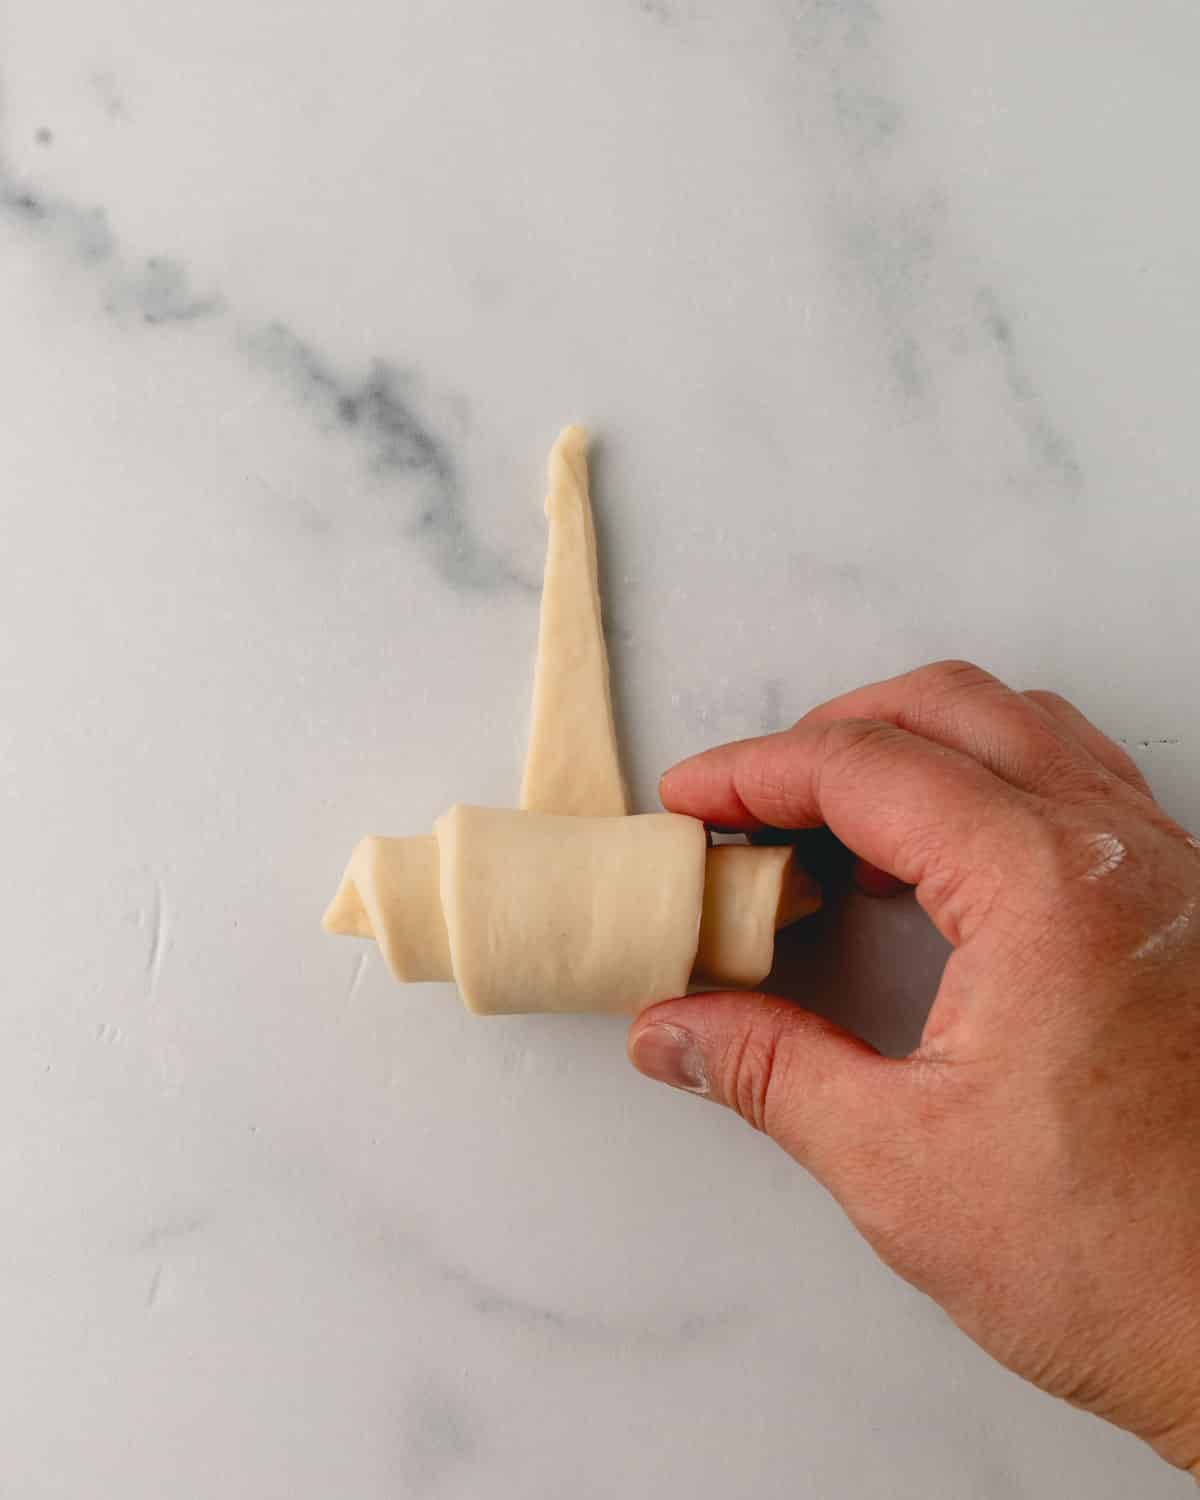
Aim for three visible rolls
A classic French-style croissant shows three distinct folds (or turns) when rolled. This creates the traditional shape and helps ensure a balanced structure and even layers inside the baked croissant.
Freeze unbaked croissants
After rolling and before proofing, you can freeze unbaked croissants to thaw and bake at a later date!
Proofing and baking the croissants:
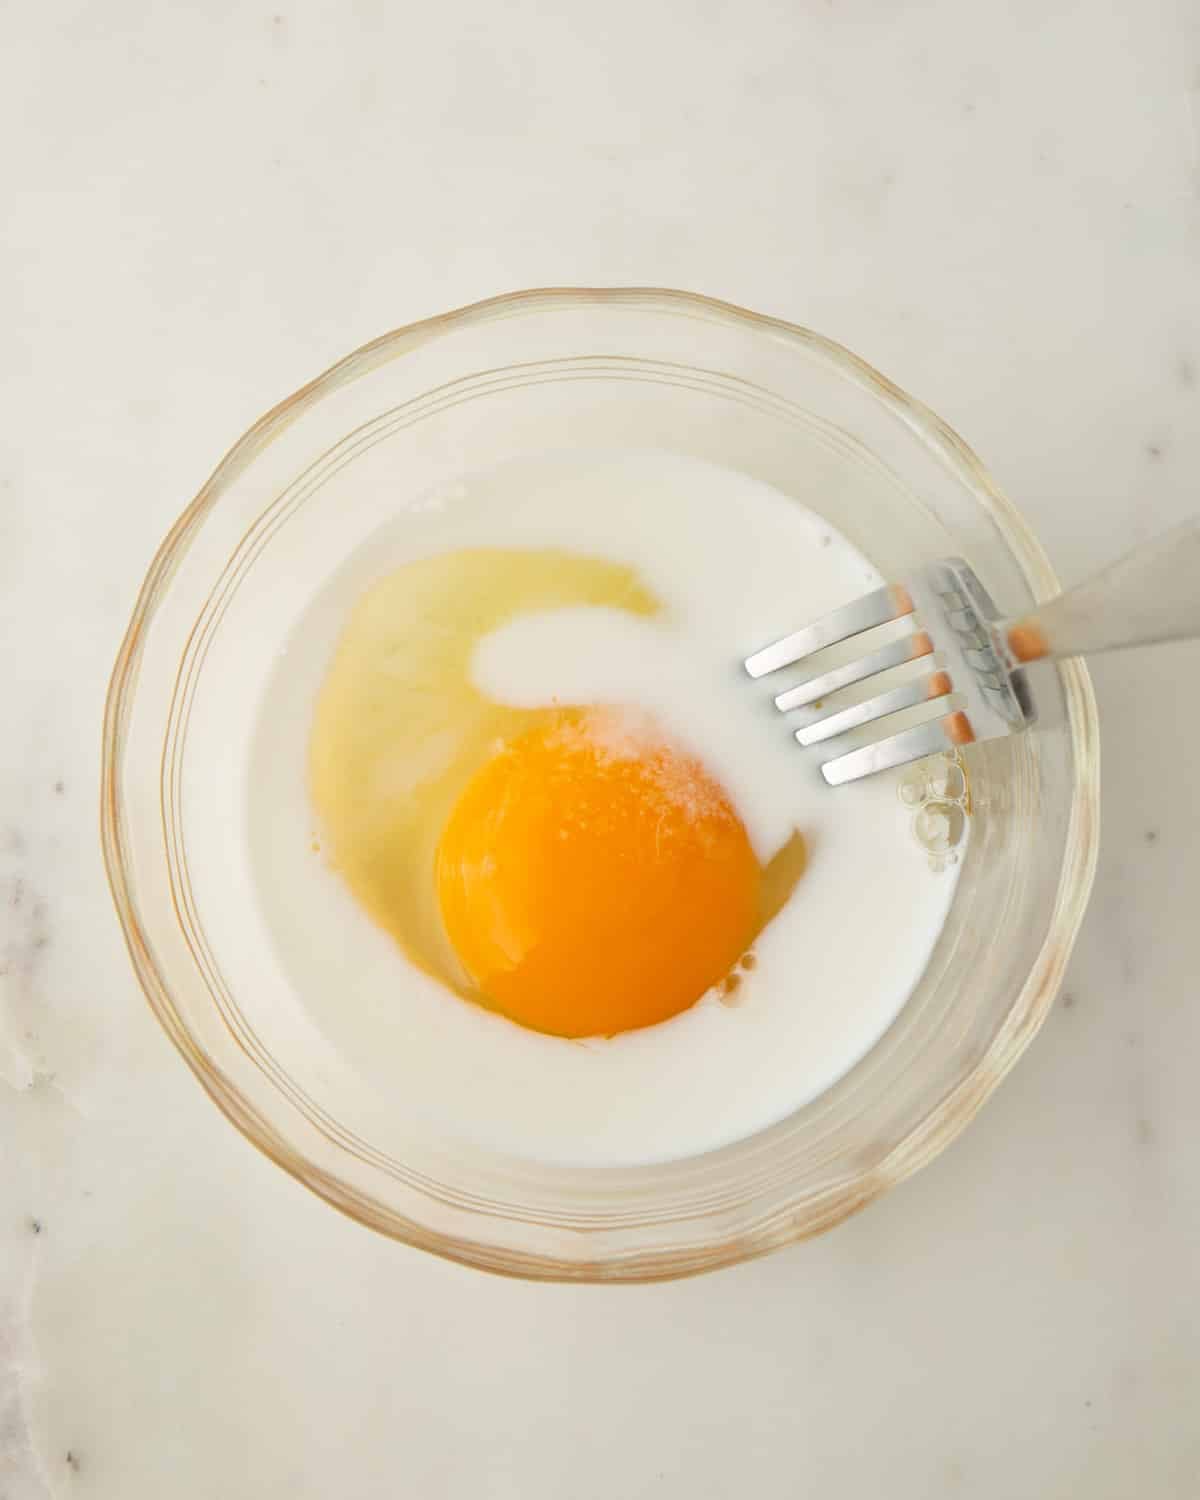
- Beat an egg with milk and salt in a small bowl until well combined.
- Brush the egg wash over the croissants.
- Proof the croissants until doubled in size, 2-4 hours.

Minimize Final Rise Time
The final rise can take up to 4 hours!! To cut down this time, I recommend placing the croissants in a warm draft-free environment. The ideal temperature for the final rise is about 75-80°F (24-27°C) and 85% humidity.
At Home Solution:
- Pour just boiled water into a small bowl and place it on the bottom of the oven.
- Place both baking sheets with croissants in the oven. Do NOT turn on the oven. Hot water will warm up the oven and add humidity.
TIP: I highly recommend monitoring the oven temperature with a thermometer to ensure it doesn’t rise too high. If the temperature is over 82°F (28°C), the butter will start to melt, ruining your hard work of laminating the dough.
If the temperature creep up to 78°F (26°C), just pop the oven door open to cool it down.
- Preheat the oven to 425°F (220°C) about 30 minutes prior to baking.
- Brush a second layer of egg wash over the proofed croissants.
- Reduce the oven temperature to 350°F (177°C).
- Bake, one baking sheet at a time, until golden brown, 20-25 minutes.


Expert Tips
- Make sure your ingredients are at the correct temperature before starting. I don’t recommend dissolving or proofing the yeast here, even when using active dry yeast. And using cold liquid is intentional! This slows yeast activation because the dough requires slow, long proofing over a couple of days. If you activate the yeast too soon or too fast, it may collapse later on.
- Use a kitchen scale for accurate ingredient measures. This is one of those recipes I do recommend using a scale so you use the correct flour to butter ratio to make the perfect croissant texture.
- Use European-style butter! It contains higher milk fat (82-85%), which is nice and pliable even when it’s cold. This makes laminating the dough much easier as the butter spreads and rolls along with the dough without breaking.
- When laminating the dough, make sure the dough and butter are at the same temperature. If the butter is colder than the dough, it’ll break as you roll the dough, creating uneven layers.
- Don’t skip the chilling times. This is crucial both for the dough and the butter to laminate properly.
- Don’t force the dough. If you notice it’s becoming hard to roll the dough, for example, if the dough keeps shrinking back, cover and rest it for 5-10 minutes to allow the gluten to relax.
- If your croissants aren’t rising, you may have chosen a too cold spot in your kitchen. Find a slightly warmer, draft-free area. The ideal temperature for the final rise is about 75-80°F (24-27°C) and 85% humidity. If the temperature is over 82°F (28°C), the butter will start to melt.

Storage
Store any leftover homemade croissants in an airtight container at room temperature for up to 2 days. Reheat in the oven for a few minutes until warmed through.
You can freeze baked croissants as well for up to 2 months. Either let them defrost then reheat or reheat from frozen until fully warm.
My favorite storage tip is to freeze rolled, unbaked croissants before proofing them. They can freeze for up to 3 months. When ready to bake, place them on a parchment-lined baking sheet the night before and let them thaw and proof overnight on the counter. Bake according to the recipe.
FAQs
Using cold butter to laminate the dough properly. This is what allows the croissants to develop those flaky layers when baking.
Always chill the dough after every fold (lamination) to make sure the butter sets and remains intact between every layer.
Under or over-proofing the dough as well as skipping the chilling stages. You want to make sure the croissants fully proof and double in size before baking for that light as air texture.
More Delicious Pastry Recipes

Homemade Croissants
Ingredients
For dough:
- 4 cups (500 g) bread flour Note 1
- 1 ½ cups (360 ml) milk cold Note 2
- ¼ cup (50 g) granulated sugar
- 2 tablespoons (28 g) unsalted butter at room temperature
- 1 packet (7 g) dry yeast instant or active Note 3
- 1 ½ teaspoons coarse kosher salt
For butter block:
- 1 cup (225 g) European-style unsalted butter Note 4
For egg wash:
- 1 egg
- 1 tablespoon (15 ml) milk
- ¼ teaspoon coarse kosher salt
Instructions
Day 1
Make the dough:
- In a large mixing bowl with dough hook attachment, combine all the ingredient for the dough and mix until the dough comes together for about 5 minutes.
- Transfer the dough onto a lightly floured surface and knead for a minute.
- Flatten the dough into an 8×8-inch square, then wrap it in plastic wrap. Refrigerate for at least 8 hours, or overnight.
Prepare the butter block:
- Fold a sheet of parchment inward on all four sides to create a neat 7×7-inch square “pocket.” This acts as a guide to ensure your butter block is evenly shaped.
- Cut the butter into flat pieces and arrange them in a single layer inside the parchment square, filling it as evenly as possible. (TIP: Notice how the cold butter is still pliable thanks to its high fat content. See the picture above!)
- Fold the flaps to fully enclose the butter, forming a tidy packet.
- Using a rolling pin, gently roll the butter inside the parchment until it completely fills the square, creating a smooth, even butter block.
- Refrigerate for at least 30 minutes, or overnight. Do NOT freeze.
Day 2
Laminating the dough:
- Roll the square dough on a lightly floured surface into a 10×10-inch square.
- Place the prepared 7×7-inch butter square on the dough, rotated so it sits like a diamond (with the corners pointing toward the sides of the dough).
- Fold the edges like an envelope, as shown in the picture above. Pinch the seams securely.
- First Lamination (Single Fold): Roll the dough into an 8×24-inch rectangle. Fold into thirds and wrap in plastic wrap. Refrigerate for 30 minutes.
- Second Lamination (Double Fold): Place the dough seam on the side so the short end faces you. Roll the dough into an 8×24-inch rectangle. Fold about ¼ of the bottom end inward, then bring the opposite short end in to meet it. Now, fold the top end over to the bottom end along the center seam, just like closing a book. Wrap in plastic wrap. Refrigerate for at least 30 minutes, or overnight.
Day 3
Sheeting and cutting the dough:
- If you have a long enough countertop surface, roll the dough into an 8×44-inch rectangle on a lightly floured surface. Or cut the dough into 2 equal parts, and roll each part into an 8×22-inch rectangle, as I've done here. (TIP: Make sure to lift the dough before final measurement, because it shrinks back a little.)
- Trim off the edges.
- Mark every 5 inches on the left side, starting from the bottom. Then mark every 5 inches on the right side, starting from the top.
- Cut the dough into triangles, connecting the marks on opposite sides. You should get 8 triangles from each block of dough.
Shaping the croissants:
- Place the dough triangle with the wide base closest to you and the tip pointing away. Make a small slit in the center of the base to help the croissant spread as it rolls.
- Gently pull the two corners of the base outward and slightly downward. This widens the base and lengthens the triangle, helping create more layers when rolled.
- Starting at the base, roll the dough toward the tip while keeping the roll snug but not compressed. Continue rolling until the tip is tucked underneath the croissant to hold its shape during proofing and baking.
- Place the croissants on two baking sheets, lined with parchment paper. (8 croissants per baking sheet, spacing them at least 2 inches apart.)
Proofing and baking the croissants:
- In a small bowl, beat an egg with milk and salt until well combined.
- Brush the egg wash over the croissants. Loosely cover the croissants with a plastic wrap and place them in a warm place until doubled in size, 2-4 hours. (TIP: The ideal temperature for the final rise is about 75-80°F (24-27°C) and 85% humidity. If the temperature is over 82°F (28°C), the butter will start to melt. See the post above for my home solution.)
- Preheat the oven to 425°F (220°C) about 30 minutes before baking.
- Brush a second layer of egg wash over the proofed croissants.
- Reduce the oven temperature to 350°F (177°C).
- Bake, one baking sheet at a time, until golden brown, 20-25 minutes.
- Cool the croissants before serving!
⭐️ Did you make this recipe?
Please leave a review and let us know how you liked it!
Tips & Notes
– Making homemade croissants is labor of love, but so worth it! Plan on spending 1 hour 15 minutes of hands-on active time over 2-3 days. Rest of the time is inactive time for resting the dough for overnight proofing and chilling in between laminating the dough.
– Day 2 and Day 3 can be done on the same day. Or you can do all the laminating, sheeting, and shaping on Day 2. Then, proof and bake on the morning of Day 3. Storing Tips:
– Croissants are best eaten the day they’re baked, but you can store in an airtight container or paper bag for up to 2 days. Reheat briefly in the oven to restore crispness.
– Freezing instructions: Once you shape the croissants, instead of proofing, simply place the baking sheet into the freezer for at least 3 hours, or until completely frozen. Then transfer them into a ziplock bag. These can frozen for up to a month.
– To bake the frozen croissants, first thaw them on a baking sheet, lined with parchment paper, or silicone mat covered with kitchen towel on the counter overnight. In the morning, continue with “Proofing and Baking” instructions.
Nutrition
This recipe was originally published on May 26th, 2014.


Some of the butter melted out. Is that normal or did I do something wrong?
I followed the receipe exactly, and I am so pleased with the results! The dough was perfect at every stage, and a real pleasure to work with, especially after having failed at sourdough. I’ll be making these again and again, the grands said so. Thank you for perfect homemade croissants!
Woo-hoo! I’m so happy you tried and enjoyed making croissants! Thank you SO much for choosing my recipe and for your feedback, Molly!
Great recipe! I had to adjust the oven temp to 375*F because my first batch burned on 425*F. Must be the difference in climate. It’s very humid in East Texas. Thank you for a wonderful bread delight!
Hi, Theresa! So happy you made my recipe. And I appreciate your feedback!!
I make these every Christmas morning and they are a hit at family brunch! I’m making it just for my household but one question: can I make and form them and leave them in the fridge over night and bake in the morning to save time?
Yes, you can, Victoria!! So happy you enjoy this recipe year after year! Thank you for your feedback! Merry Christmas!
Hello! I’m trying your recipe for the first time, but I’m halfing it since it’s just my husband and I during the quarantine. I feel stupid, but could you tell me how I would have the measurements? I understand how to half the amounts of ingredients, but I’m not a baker, so I’m unsure about the inch measurements as far as rolling out the butter, the dough, marking inches, etc. Do I just half those, too? My dough is in the refrigerator as I type! Thank you so much!
Hi, Rachel. I’m a little confused here. It sounds like you already made the dough?? How did it turn out? I’d have advised not to halve the recipe, but hope yours turned out fine.
Wow! I made these yesterday, and they are flaky and delicious. Started in the morning with the dough, then mid day did the next portion, then cooked half last night (taste test/shaping practice batch), and put half in the refrigerator to bake this morning. This recipe definitely made croissant making easy. Thank you.
Yay, so happy to hear you tried this recipe and got to enjoy homemade croissants, Cheryl! And thank you for your feedback!