
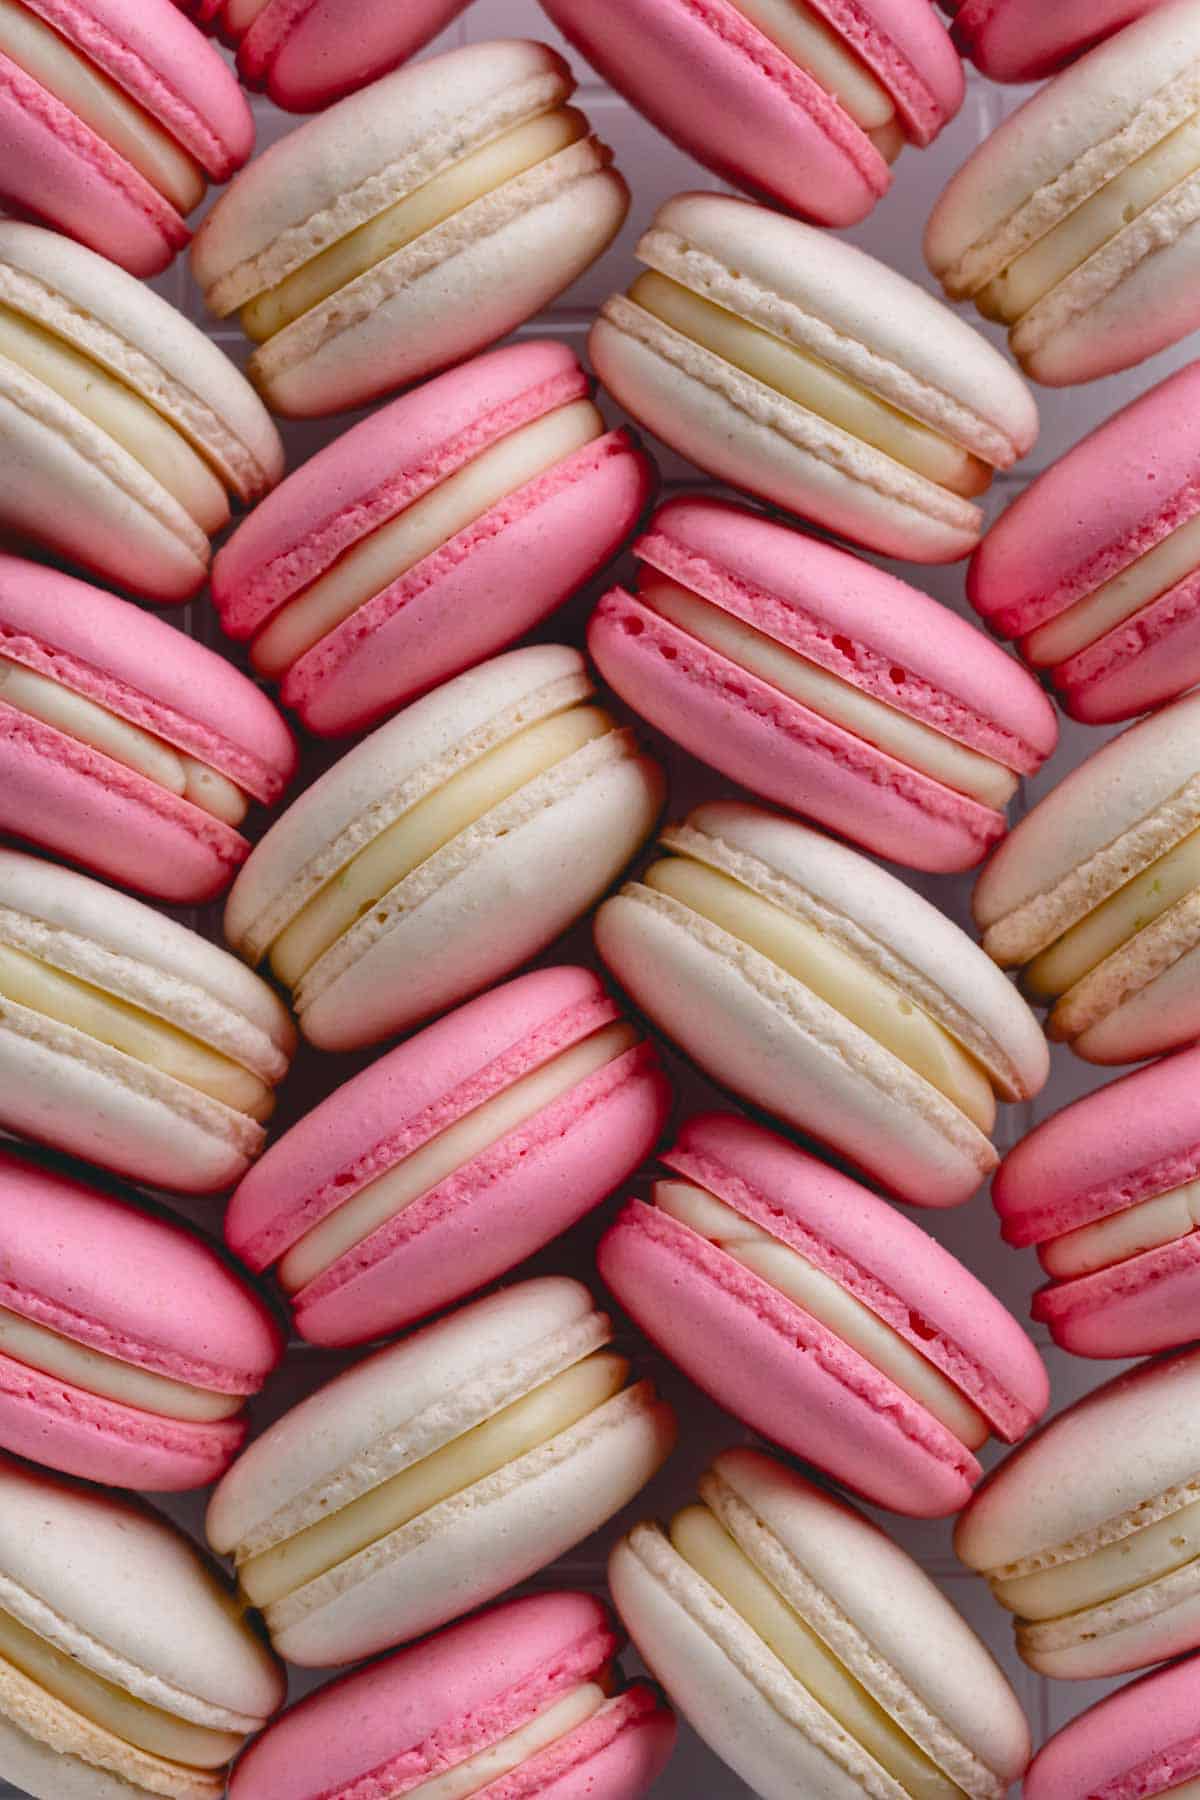
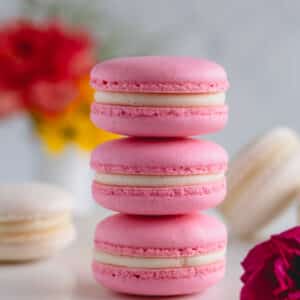
Master classic French macarons with my time-tested easy macaron recipe complete with my in-depth explanation of key techniques, step-by-step photos and a video to achieve perfectly full macaron shells with pretty feet and smooth tops.
Are you ready to finally master the art of French macarons? Yay, I’m so excited to help you.
Consider this as your ultimate resource for perfecting these dainty little cookies. I’m not holding anything back!!
Macarons vs Macaroons
Did you know macarons and macaroons aren’t the same? In fact, they’re are completely different cookies!
- Macaroons [mak-a-roon] are little coconut cookies, often dipped in chocolate.
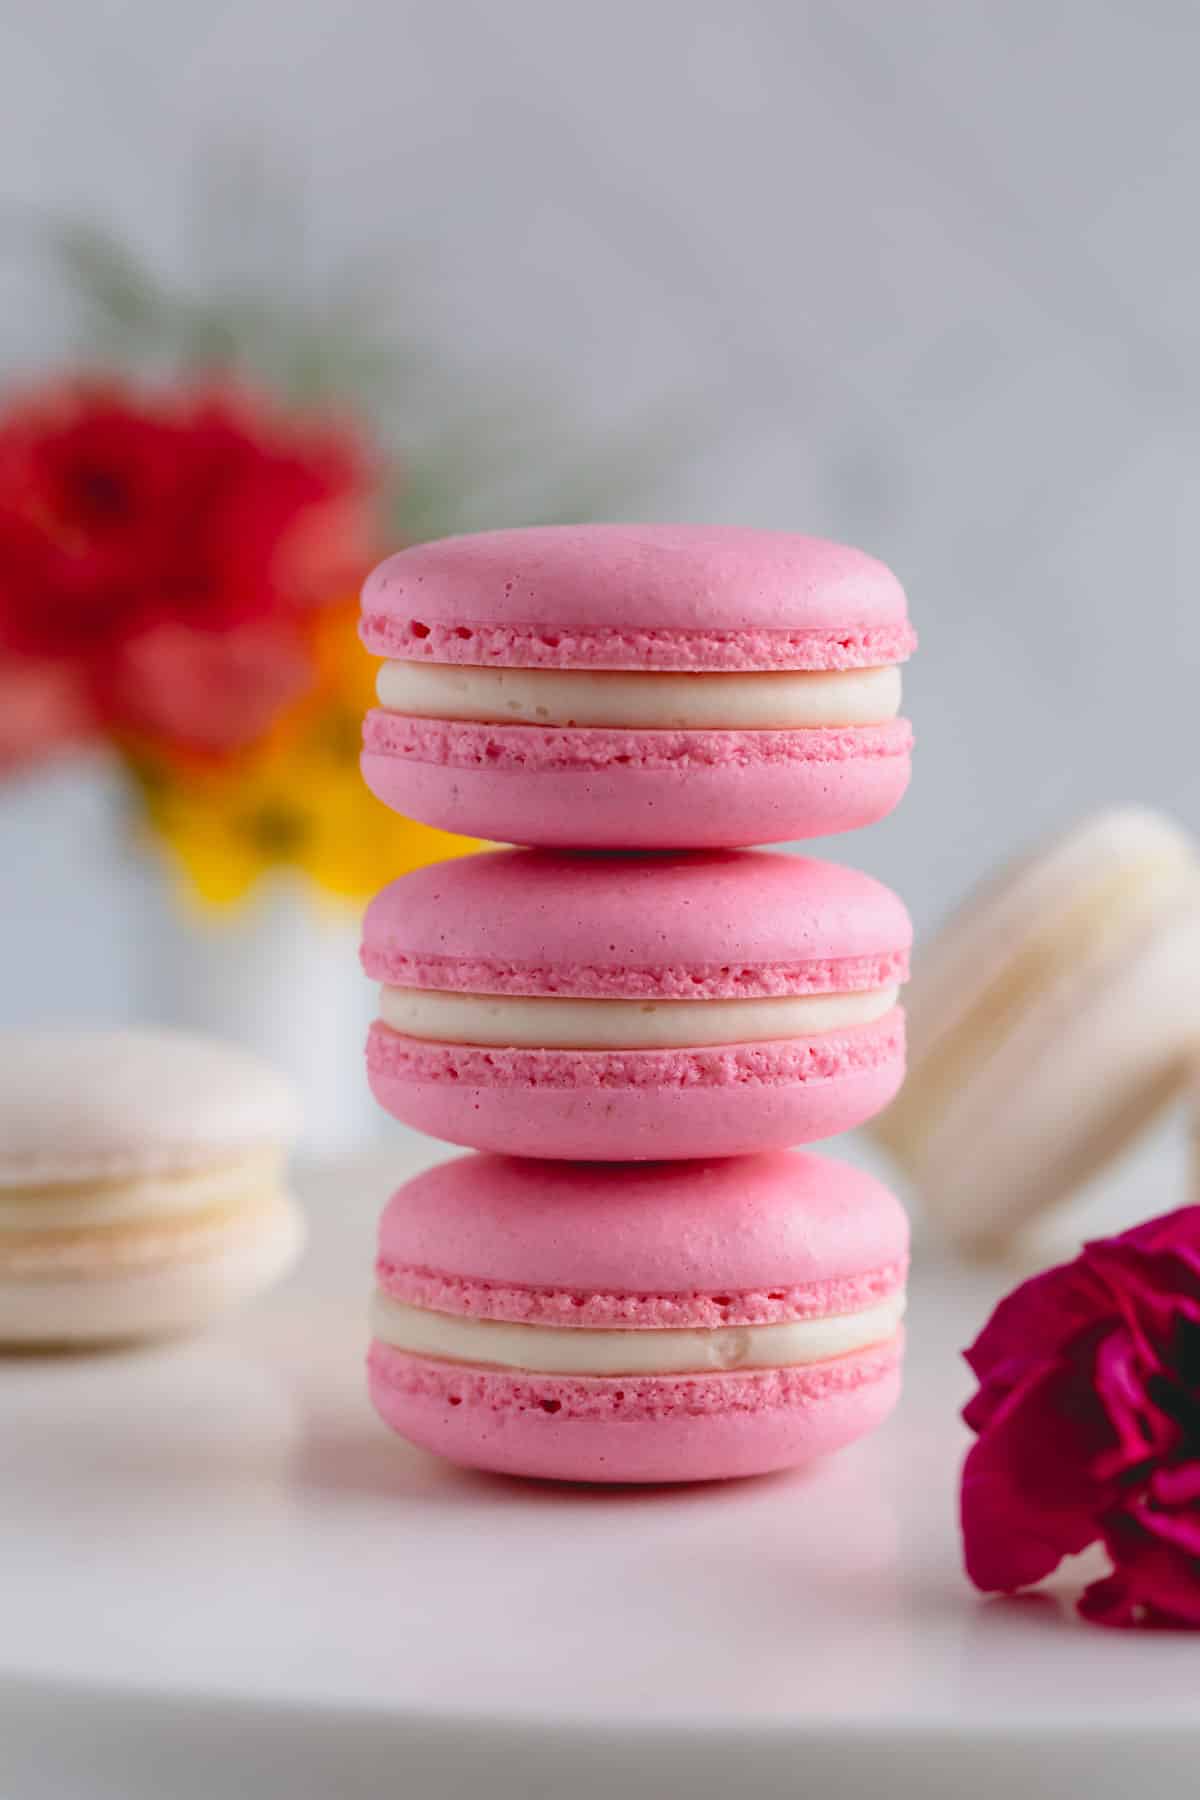
- French macarons [mak-a-ron], on other hand, are meringue-based almond cookies filled with different fillings, such as buttercream, ganache, etc.
Why you’ll love this macaron recipe
I don’t believe in foolproof macaron recipe. Making these finicky cookies is all about the technique!
In this post, you’re going to learn all the nitty-gritty details to make perfect macarons with confidence.
My basic macaron recipe has been first published in 2013 and has been made by hundreds of my readers with great success. And I know you can too!
Here’s why you’ll love my french macarons recipe:
- French meringue method: There are three ways to make meringue: Italian, French and Swiss. French meringue is the easiest for a home-baker, and it’s my go-to method.
- Reduced sugar amount: I’ve tested and re-tested my macaron recipe to use the least amount of sugar without compromising the texture!
- Tried and tested by not only me, but also hundreds of my readers.
Key Ingredient Notes
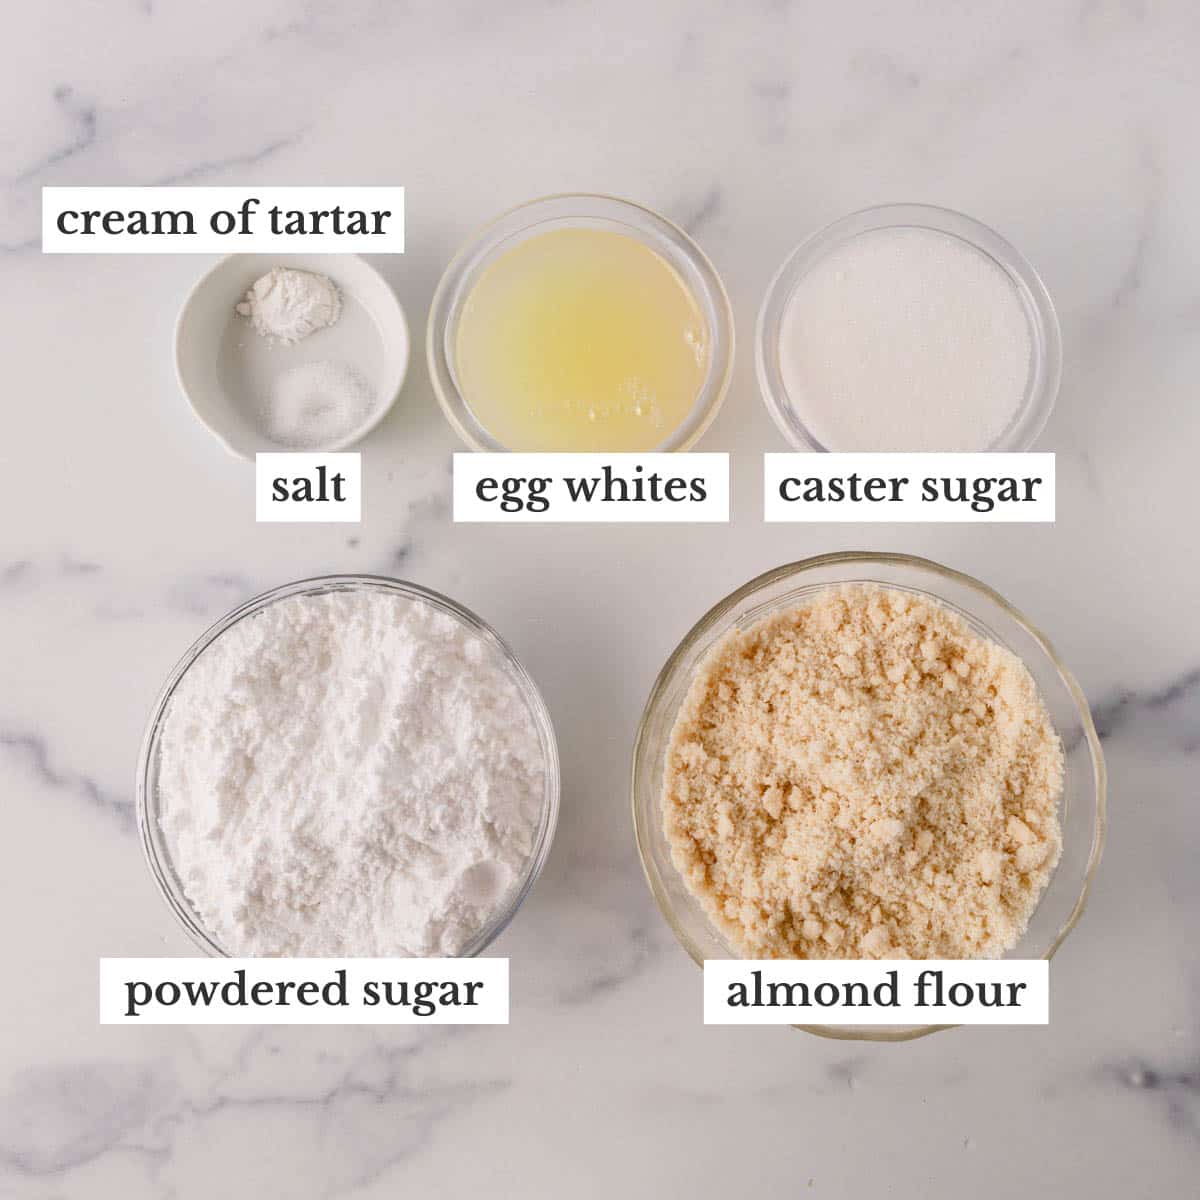
French macaron shells require only 5 ingredients, one of which is optional. Therefore, each ingredient plays an important role.
- Egg whites – Quality egg whites lead to stable meringue, which is the foundation of perfect macarons. Choose fresh eggs, carefully separate the whites and yolk, and weigh the amount precisely. I’ve also had success with carton egg whites. Be sure to check the labels and avoid the ones that’s says “not for meringue”.
- Almond flour – Choose super-fine almond flour to with light beige color and fluffy texture. Avoid oily, yellow and/or coarse almond flour.
- Powdered sugar – I don’t recommend making your own powder sugar, because commercial powdered sugar has cornstarch in it. And it helps with texture of the cookies.
- Granulated sugar – It’s important to use fine granulated sugar for meringue, as it dissolves quicker. You can also use caster sugar, aka baker’s sugar.
- Cream of tartar is optional and can be omitted. However, it helps to stabilize egg whites and create sturdier meringue. It’s just an extra insurance!
Essential Tools:
I have an in-depth post about 9 essential tools to make macarons. But in a nutshell:
- Kitchen scale is one of the most important tools you need to master macarons. Inaccuracy in measuring the ingredients could lead to major frustrations.
- Sifter – You can use either sifter or fine mesh strainer for sifting the dry ingredients.
- Mixer – Both stand or electric hand mixer works for making macarons. It’ll be hard (not impossible) to whip the egg whites without an electric mixer!
- Heavy duty baking sheet is sturdy and heats evenly. Stay away from dark sheets to prevent browning.
- And here’re other misc tools that come in handy: 16-inch piping bag, Wilton 2A round tip, parchment paper, large silicone spatula and oven thermometer.
How to Make French Macarons
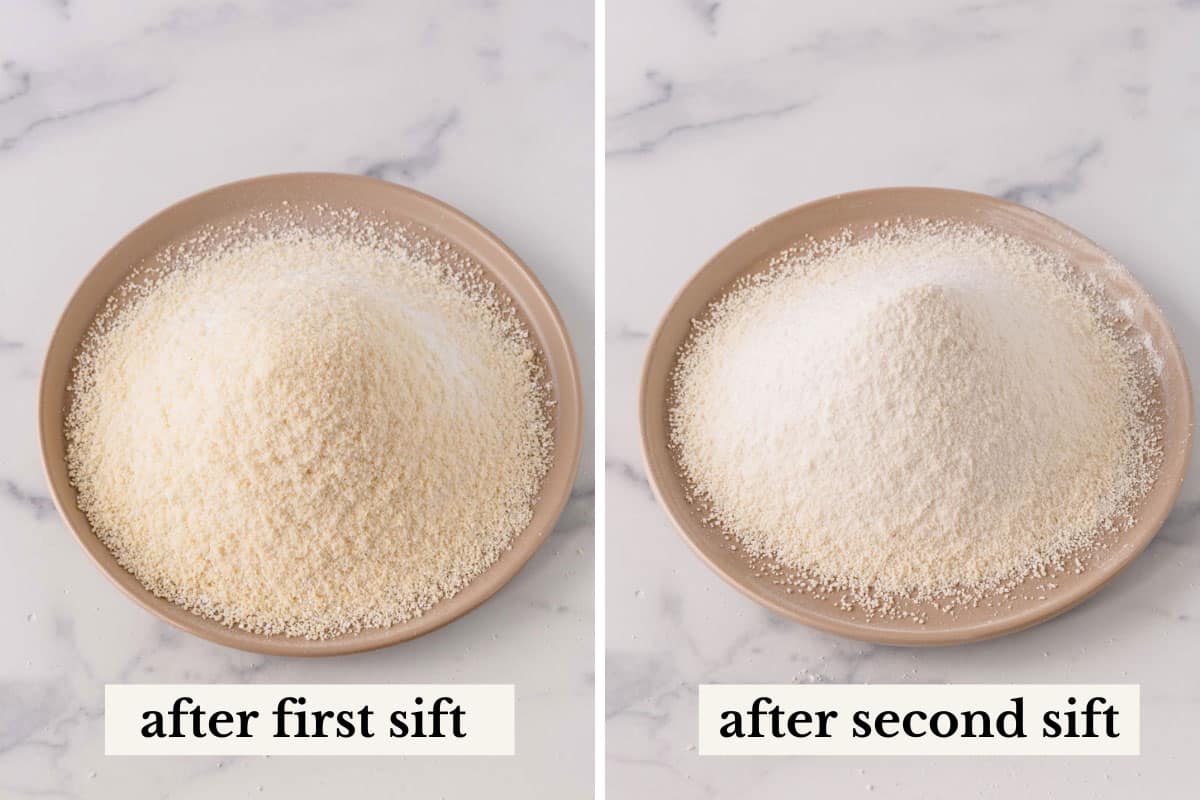
1. Sift the dry ingredients
Sift almond flour and powdered sugar twice. Yes, two times. Not only are we combining the two ingredients, we’re also aerating the dry ingredients to get that beautiful full interior.
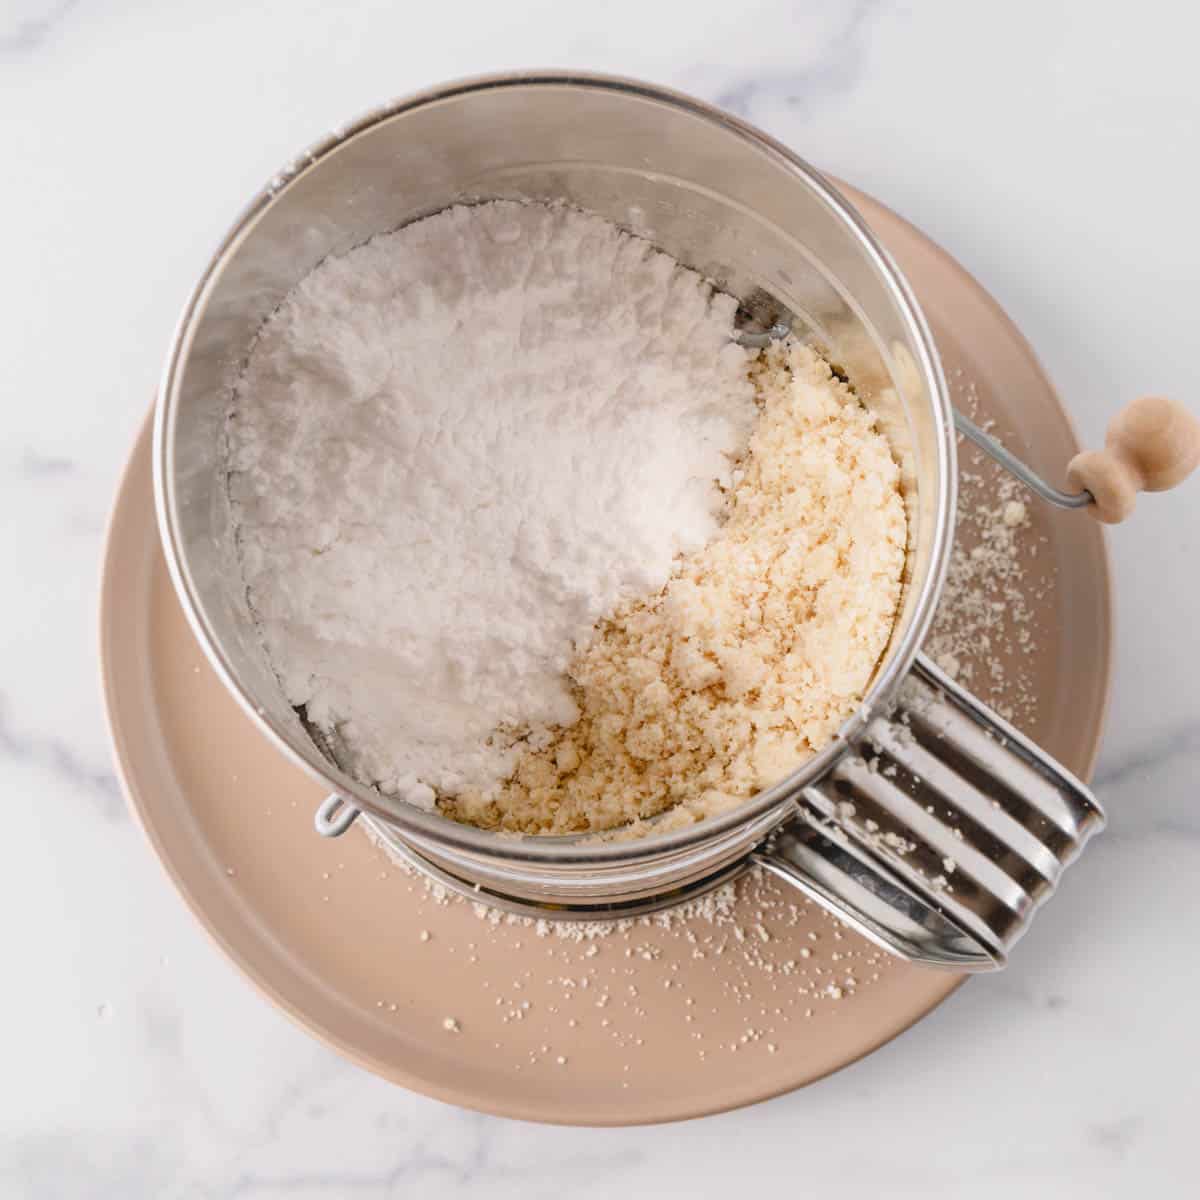
- NOTE: Unless your almond flour is chunky, I don’t recommend processing the dry ingredients in the food processor, because you may over-process the almond flour, which would lead to blotchy shells from oily almond flour.
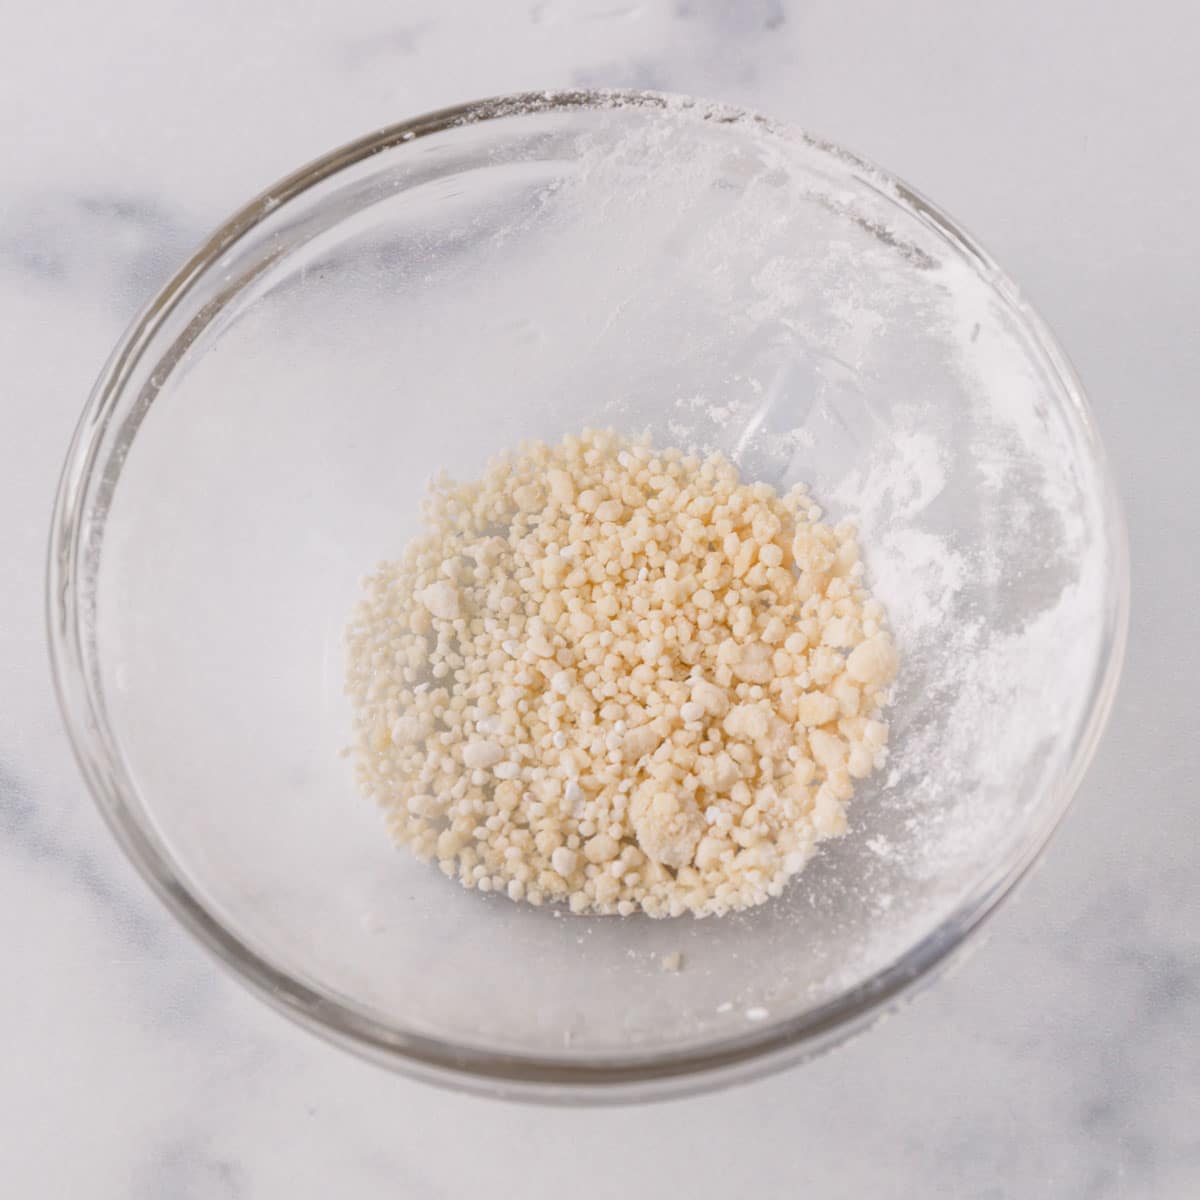
Toss chunky almond bits
If you have up to 2 tablespoons of chunky dry ingredients left in the sifter, you don’t have to replace it. Simply discard those chunky bits.
2. Make the French meringue
Combine egg whites, granulated sugar, salt and cream of tartar, if using, in a large bowl.
That’s right, no need to add sugar in small additions. It turns out whipping everything together from the get-go works better for macarons!
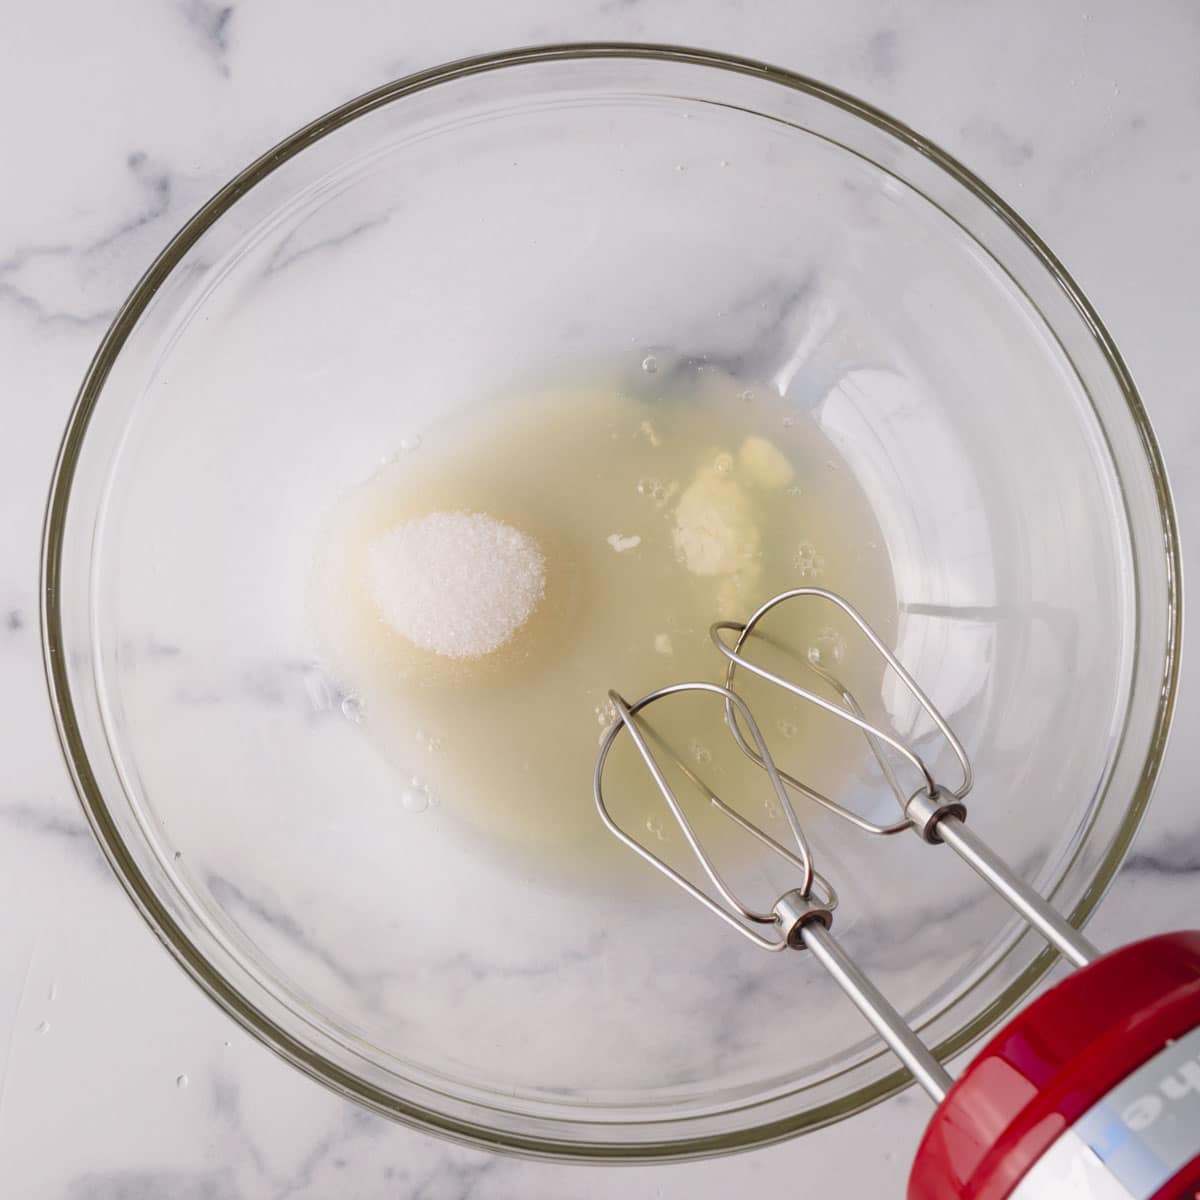
2023 UPDATE: In the last year, I’ve changed my French meringue technique to combining the egg whites, sugar, salt and cream of tartar from the start instead of adding sugar slowly into lightly whipped egg whites. I found this meringue method works better for macarons.
Beat the egg whites on a consistent medium speed until soft peaks form. (On KitchenAid stand mixer, I beat the meringue on speed 4.)
At this point, you can add gel food coloring, if desired.
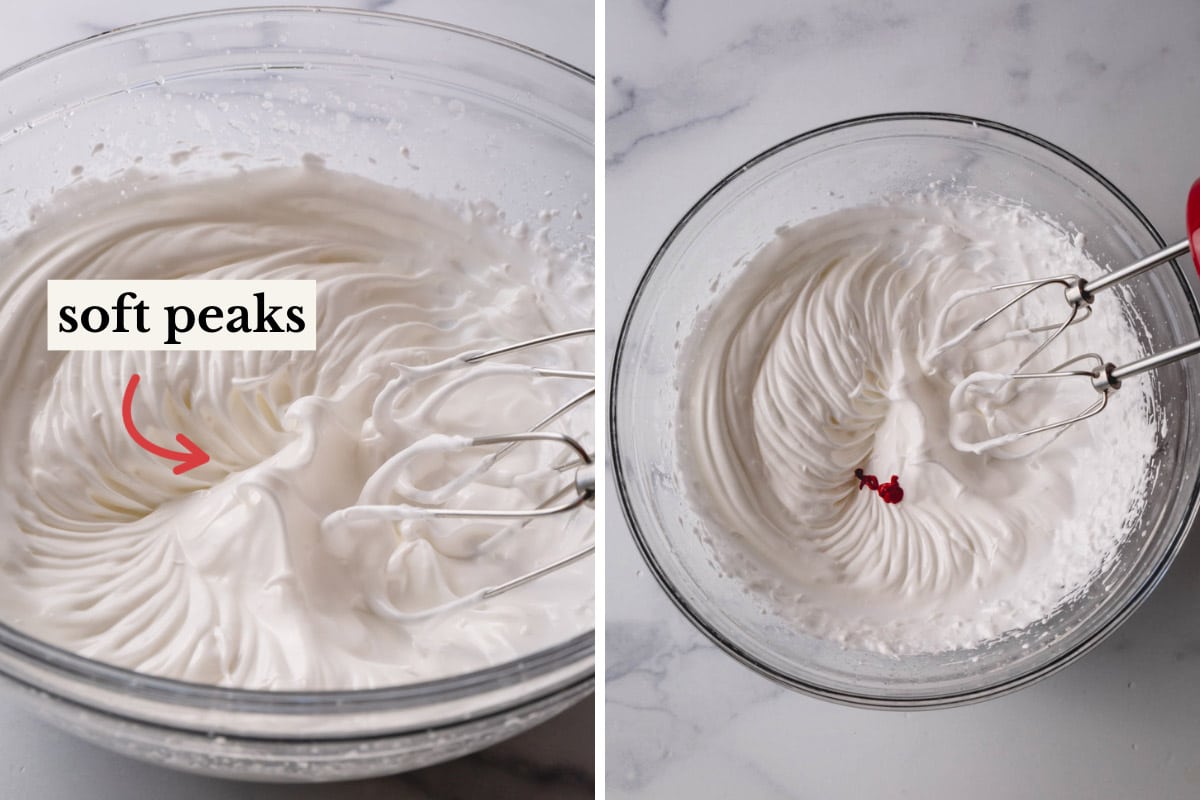
Continue whipping the meringue on medium speed until stiff peaks form.
Visual Cues: Your meringue should be super thick and ball up inside the whisk. When you lift the whisk, the meringue should hold a pointy end and have sharp ribs.
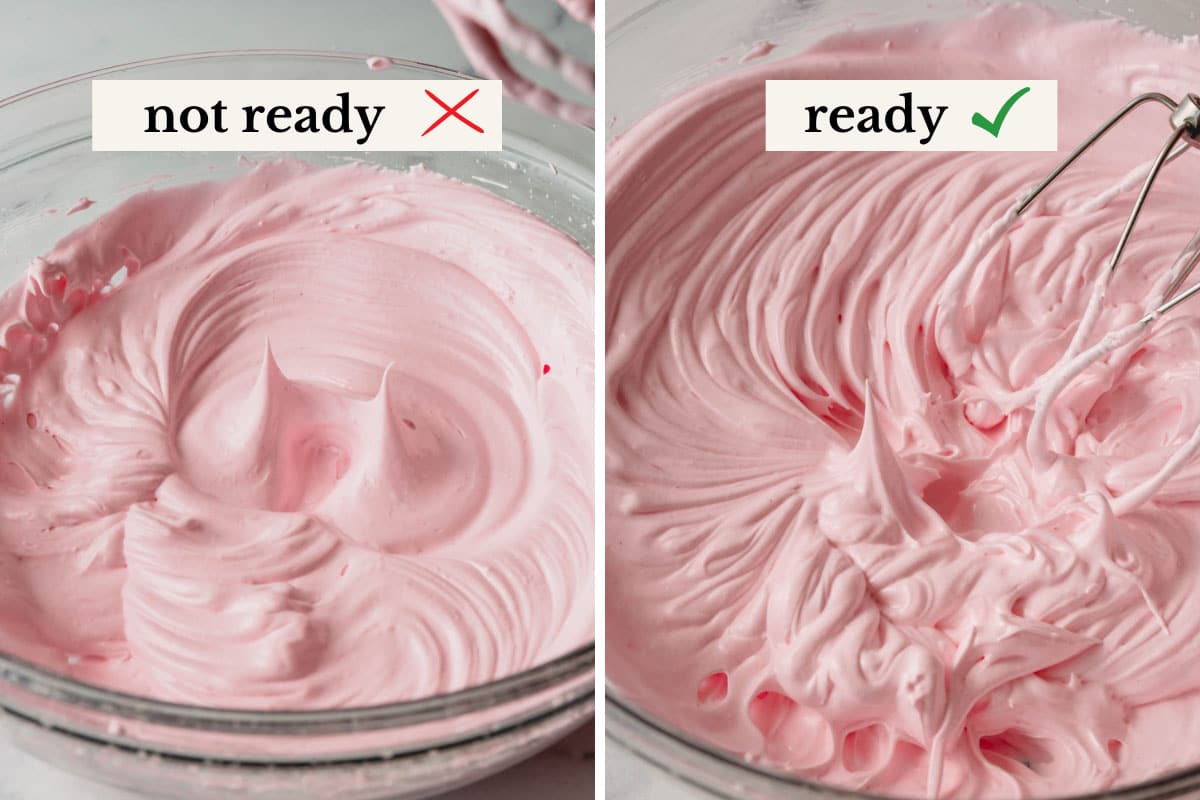
One the left image above, while the meringue has stiff peaks, it is not quite stiff enough. You want to see those well defined ridges as shown on the right image.
Technique #1: Master The meringue
- Room temperature egg whites whip better and get more volume, but cold eggs separate better. Separate the egg whites right out of the fridge, and allow the egg whites come to room temperature on the counter for about 30 minutes.
- Make sure the mixing bowl and whisk are completely grease-free and egg whites have no yolks in it. Any trace of fat may ruin your meringue and it won’t allow your meringue reach hard peaks. Glass, stainless steel or copper bowls are the best!
- Use super-fine granulated sugar, or caster sugar for meringue, as it dissolves easily.
- Don’t rush it! Beat the meringue on medium low and consistent speed for the most stable meringue. I continuously whisk the egg whites on speed 4 on my KitchenAid stand mixer or medium speed on hand mixer the entire time. It takes a longer this way (30-40 minutes!), but it’s well worth it!
3. Mix macaron batter /Macaronage
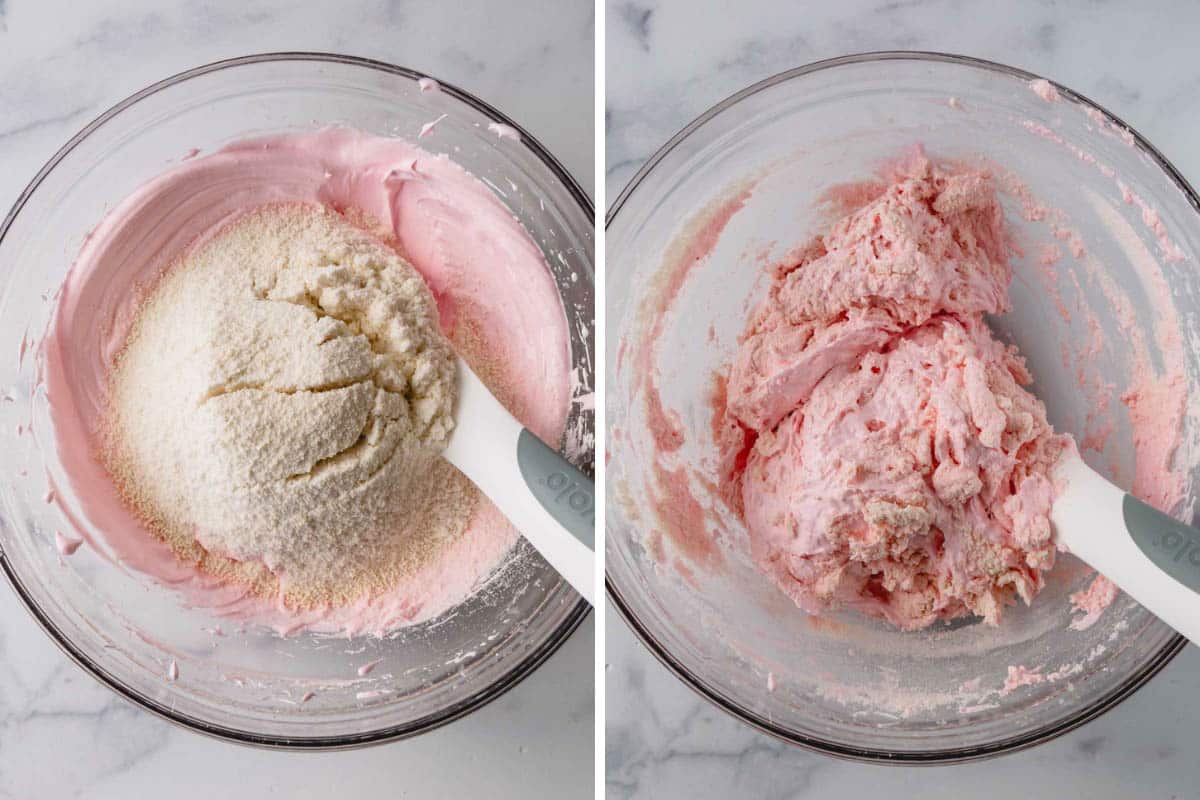
Sift in almond flour mixture into the meringue.
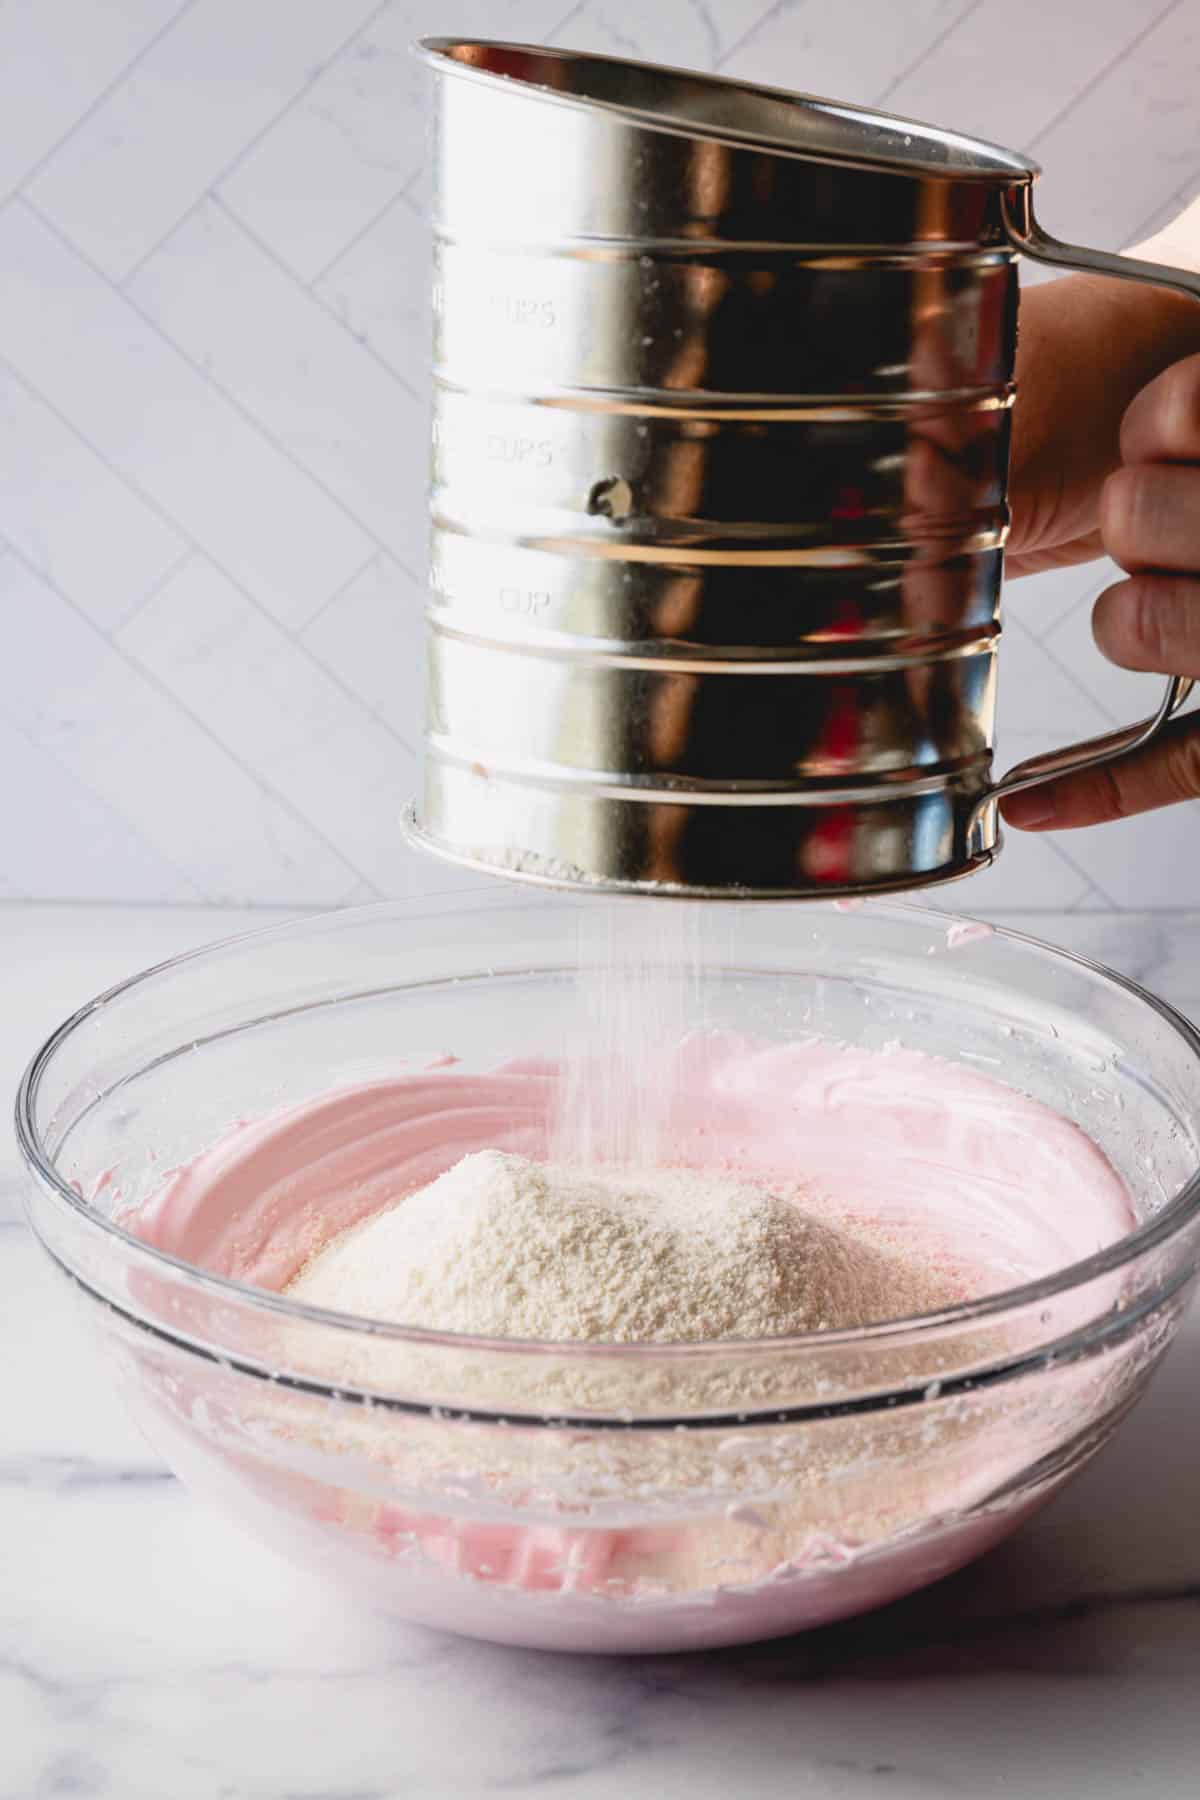
Fold the dry ingredients into the meringue with a large silicone spatula. Then fold the batter until lava-like consistency, which means the batter is thick, yet runny enough to slowly flow off the spatula.
WATCH MY REAL TIME MACARONAGE VIDEO
Technique #2: Macaronage
The proper consistency of macaron batter will make or break your final cookies. Over-mixed batter will be runny and spread too much. Under-mixed batter also leads to numerous other issues.
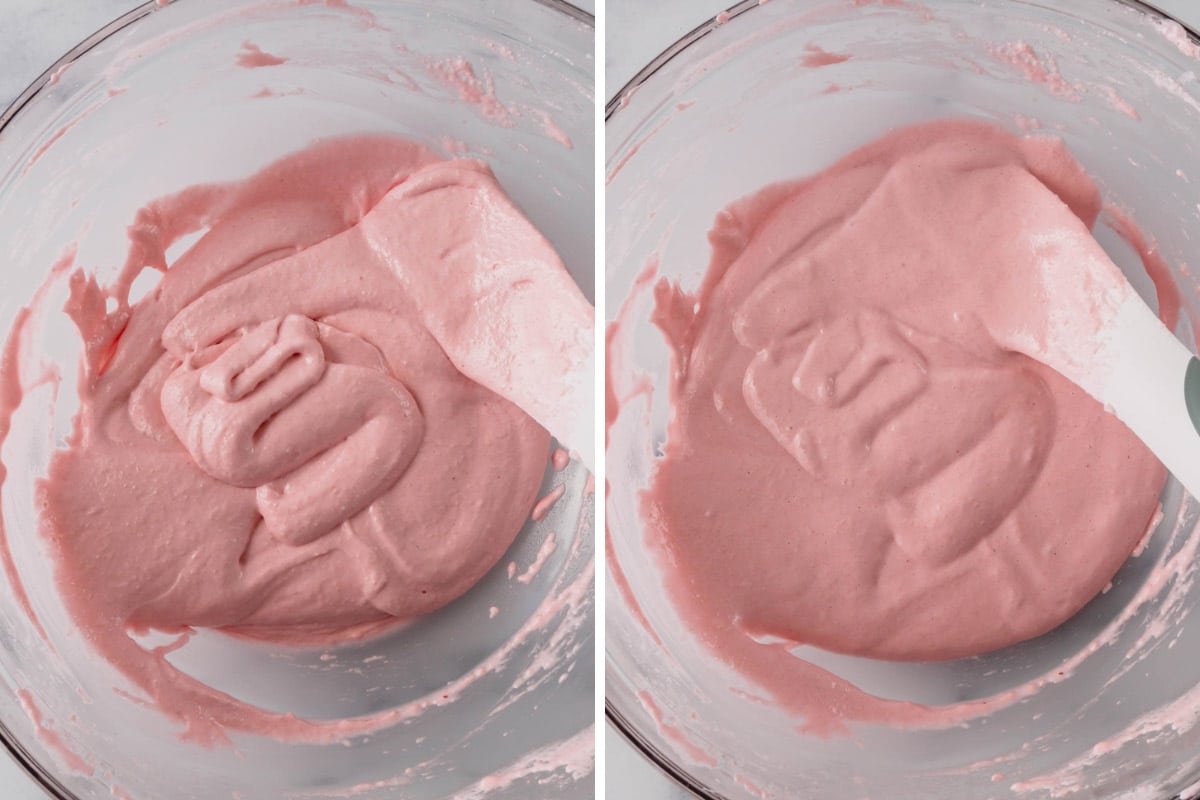
Start checking the consistency of the batter after 50 folds. (Yes, I used to count each fold when I was learning the technique! You won’t need to count the folds once you get to know the proper consistency.)
To test the consistency of the batter: Scoop the batter with the spatula and drop it back into the bowl. Then tilt the bowl slightly and count to 10. If the edges of the ribbon are dissolved back into the batter in 10 seconds, the batter is ready!
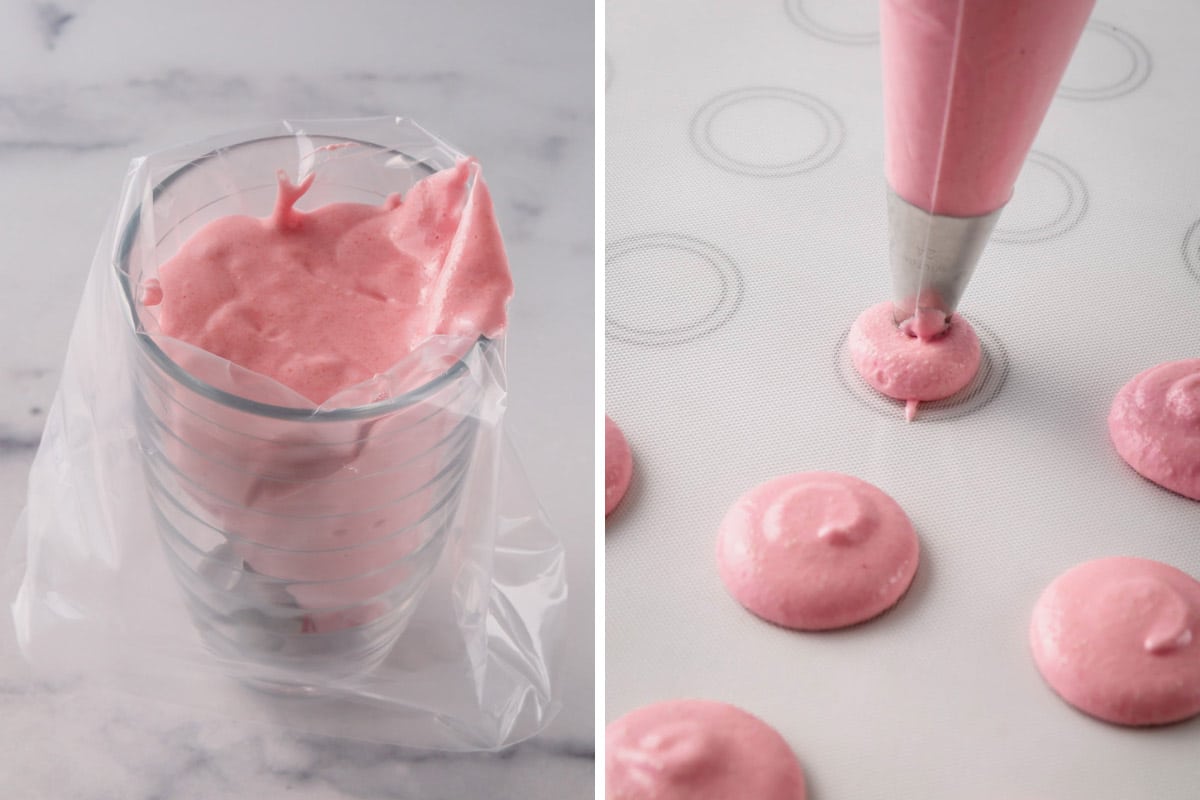
4. Pipe the macaron shells
Transfer the batter into a piping bag, fitted with a round tip (I use Wilton 2A tip). And pipe 1.5-inch rounds on two baking sheets, lined with teflon sheets or parchment paper.
Shinee’s Tip: For even air circulation, flip the baking sheets upside down.
free Macaron template
I made a perfect template for you. Subscribe to my e-mail list and download this custom macaron template for FREE. (This template is perfect for my recipe and super easy to use!)
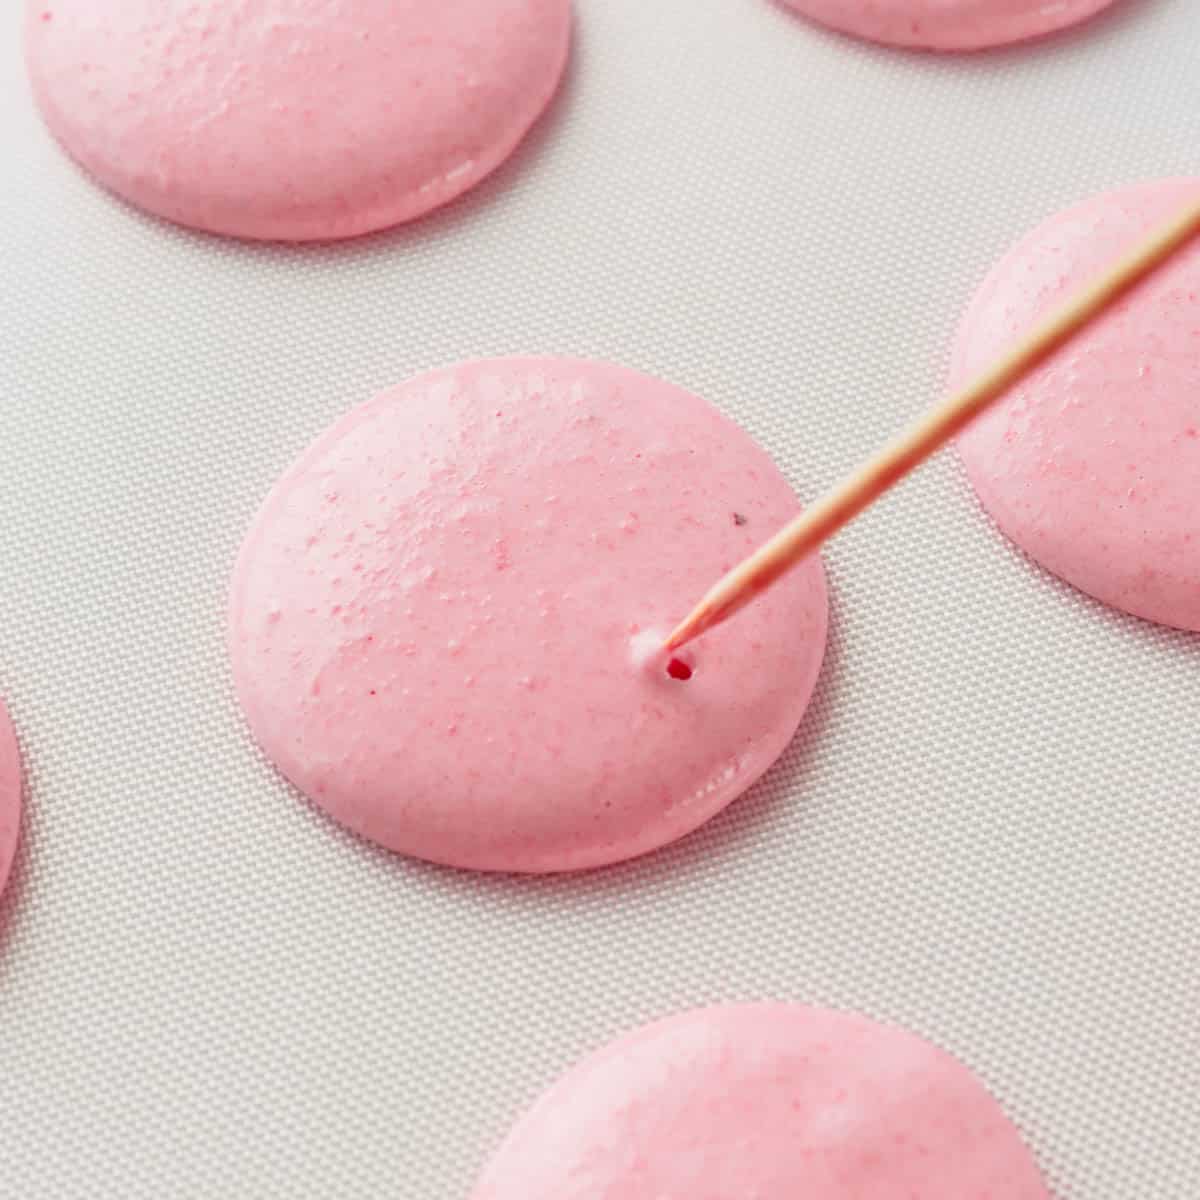
Tap the baking sheet from the bottom a few times to smooth out the shells and pop any air bubbles trapped in the shells. If needed, use a toothpick to pop stubborn bubbles.
WATCH MY PIPING TECHNIQUE VIDEO
Technique #3: Piping macaron Shells
The proper piping technique ensures nice round macaron shells with full meaty interior.
- Hold the pastry bag at straight 90° angle about ½-inch above the baking surface.
- Squeeze the batter from the top of the piping bag to fill 1½-inch circle without moving the piping bag up and down.
- Pipe the macarons about an inch apart for good air circulation.
5. Rest and bake
Preheat the oven to 300°F for at least 30 minutes. Check the accuracy of oven temperature with an oven thermometer for best result.
Rest macaron shells before baking for 15 minutes.
Bake, one baking sheet at a time, for 15-18 minutes. I don’t use convection settings for baking macarons. My oven is set to heat from top and bottom.
Shinee’s Tip: To prevent browning, place an empty baking sheet on top rack to shield the heat.
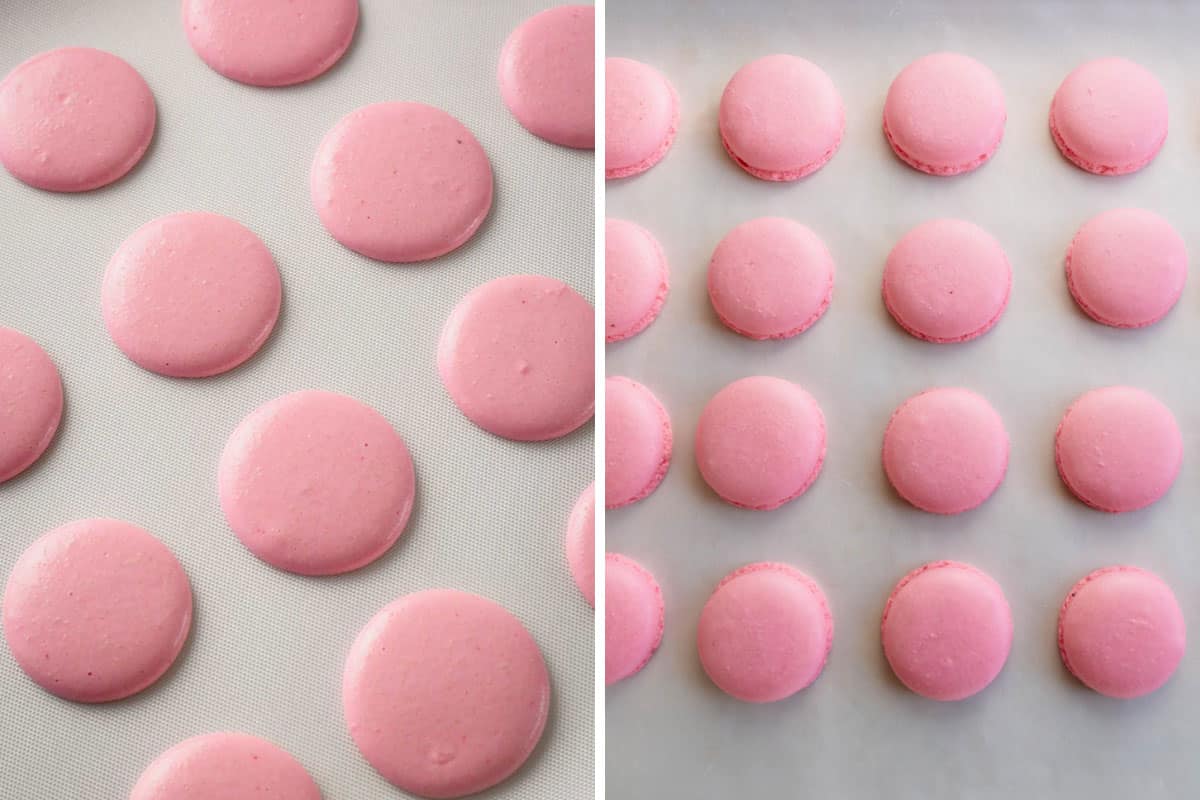
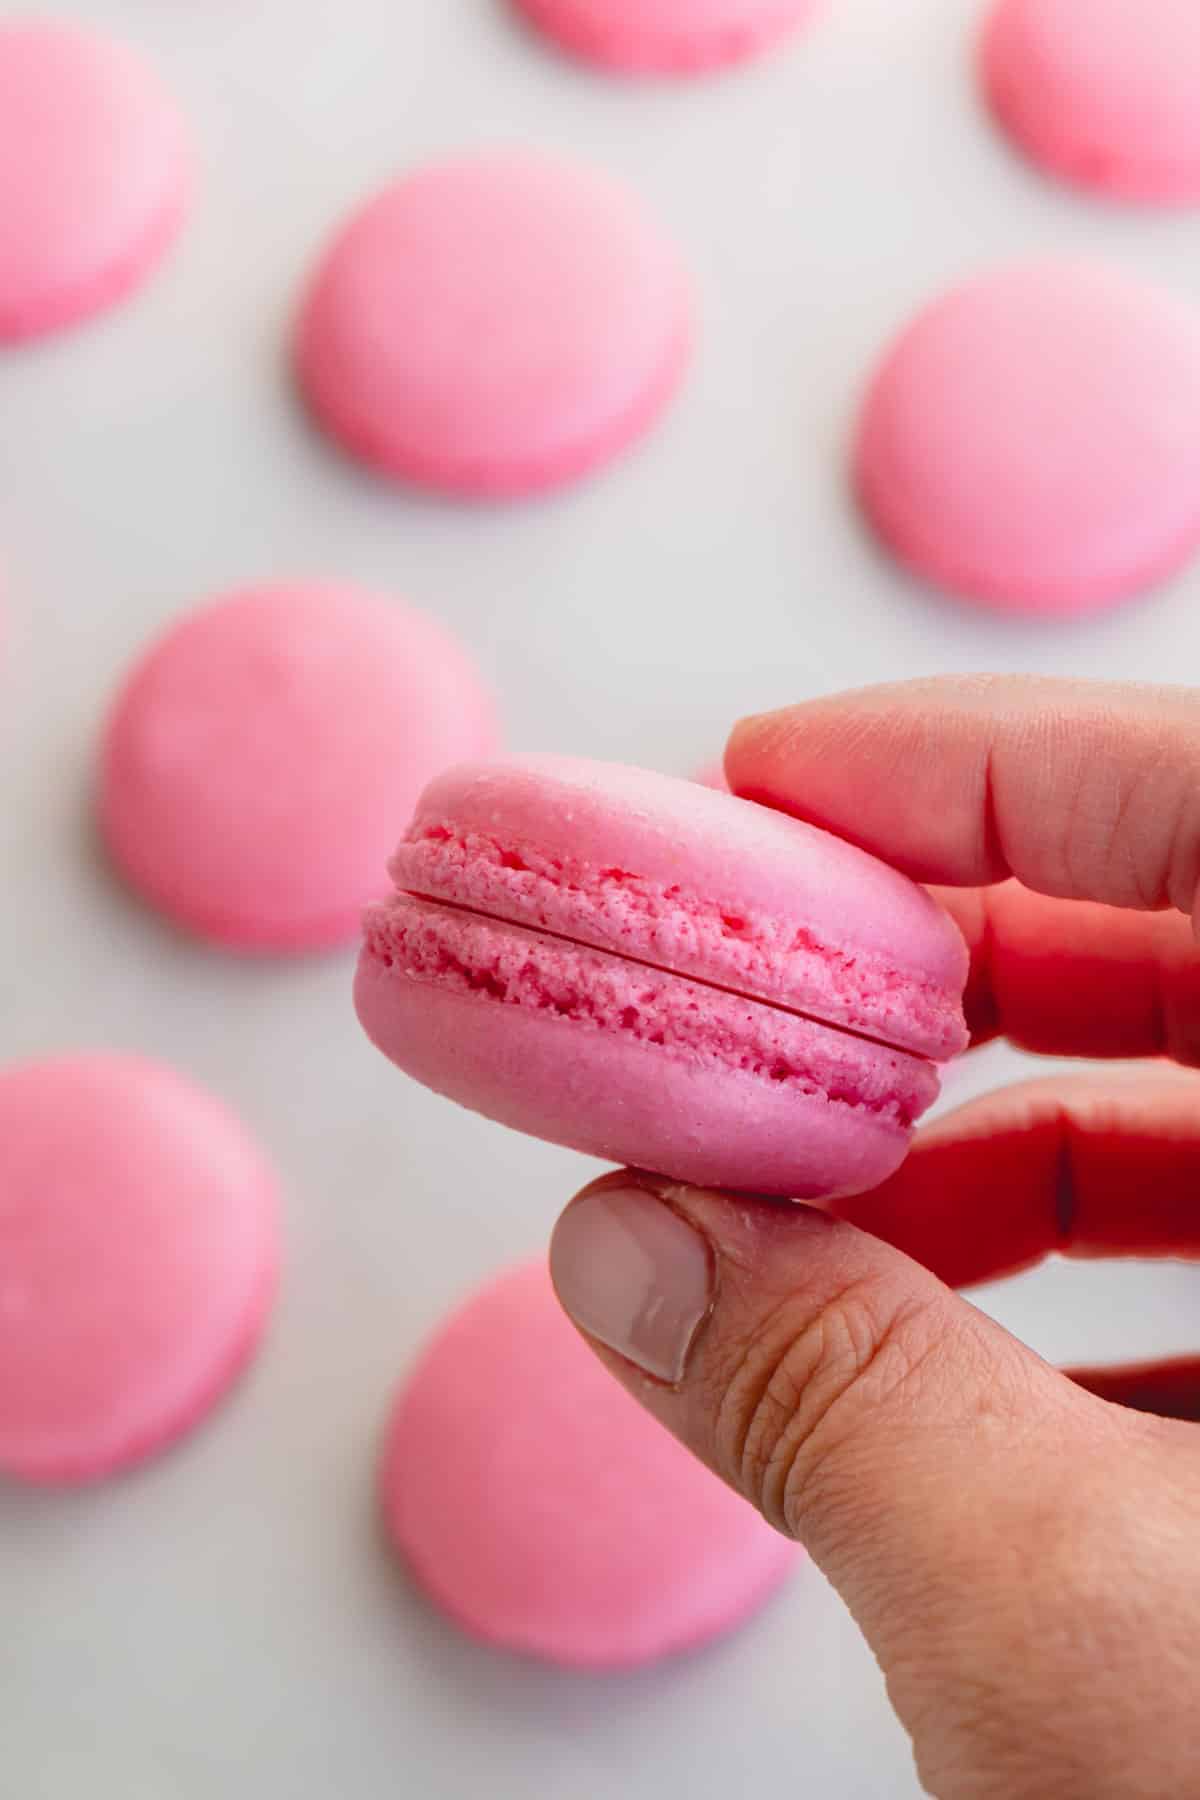
Check the doneness
Touch a macaron lightly and try to move it. If it slides and wobbles, bake a minute or so longer. The cooked macarons should be firm to touch and the base shouldn’t move. It’s always better to slightly over-bake macarons than under-bake them!
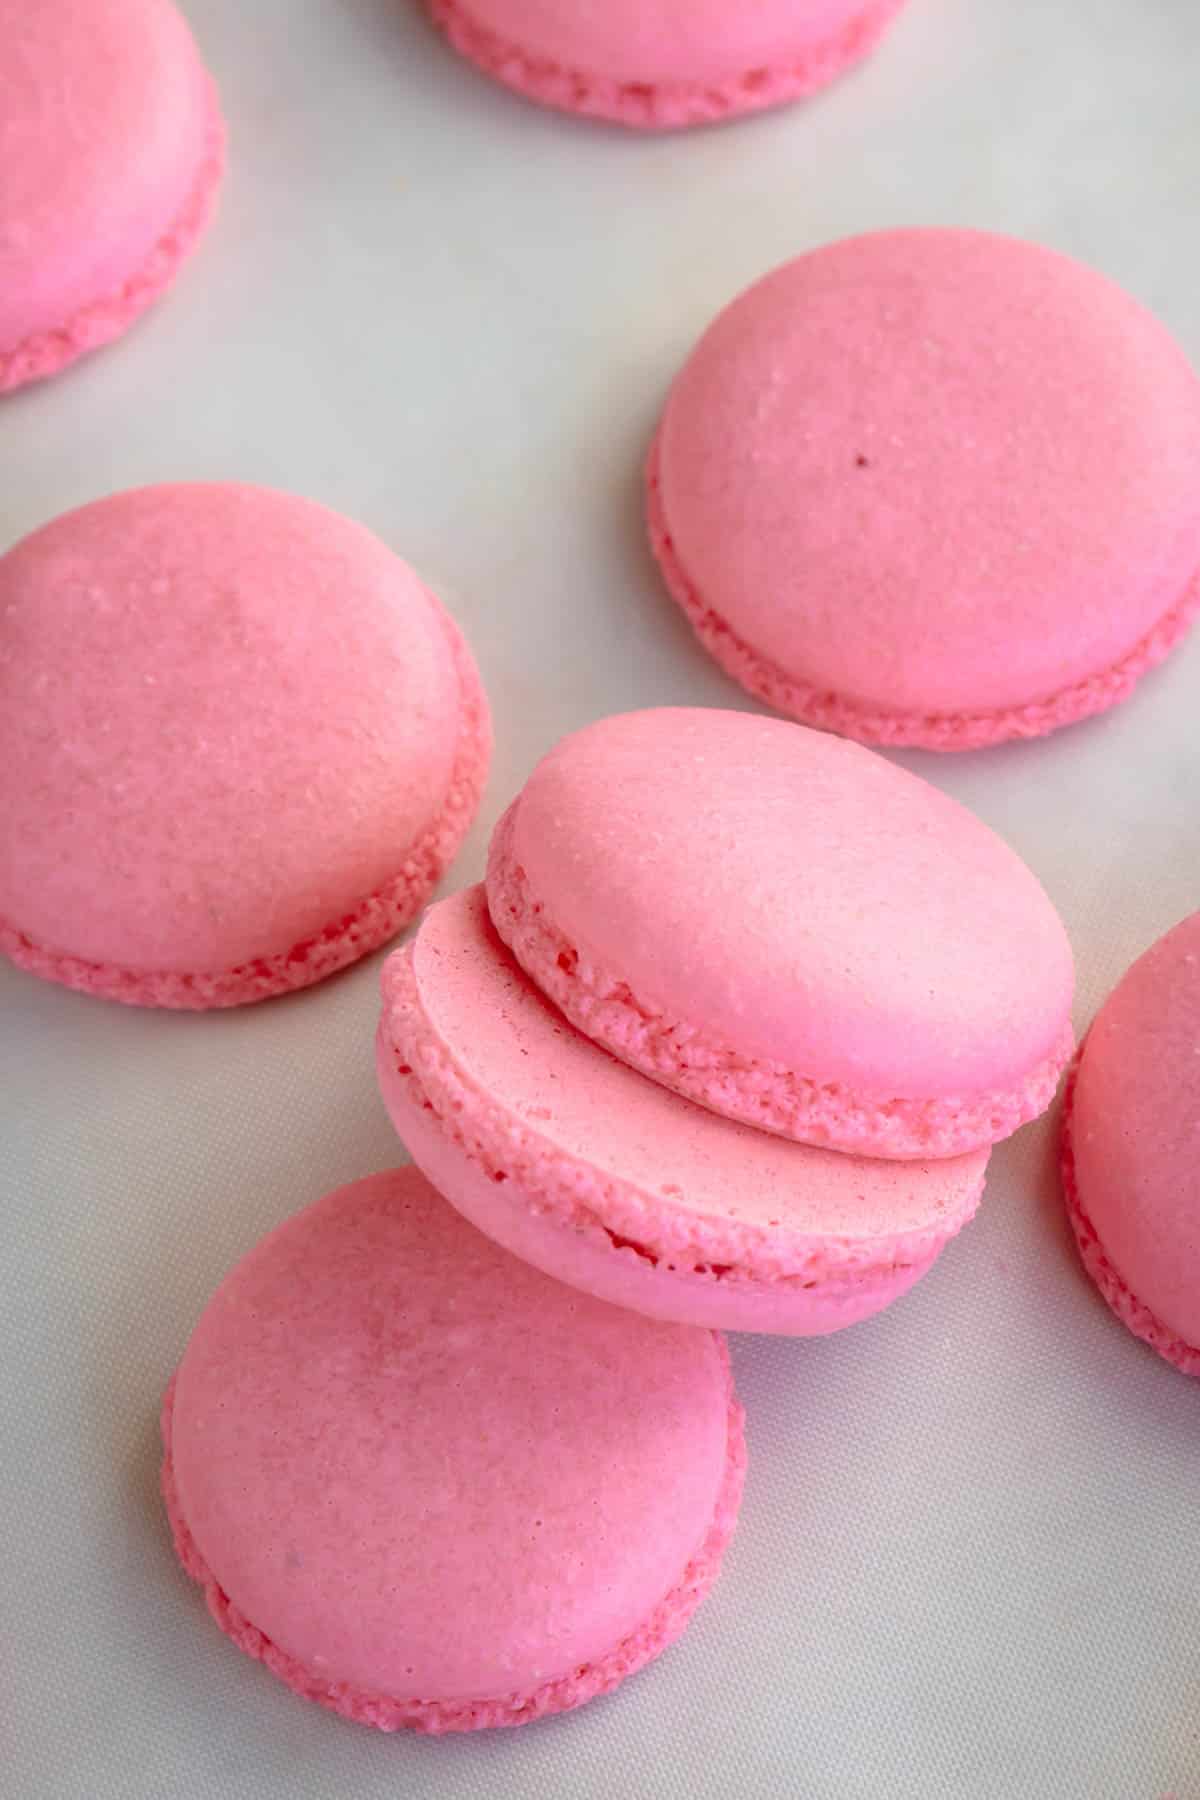
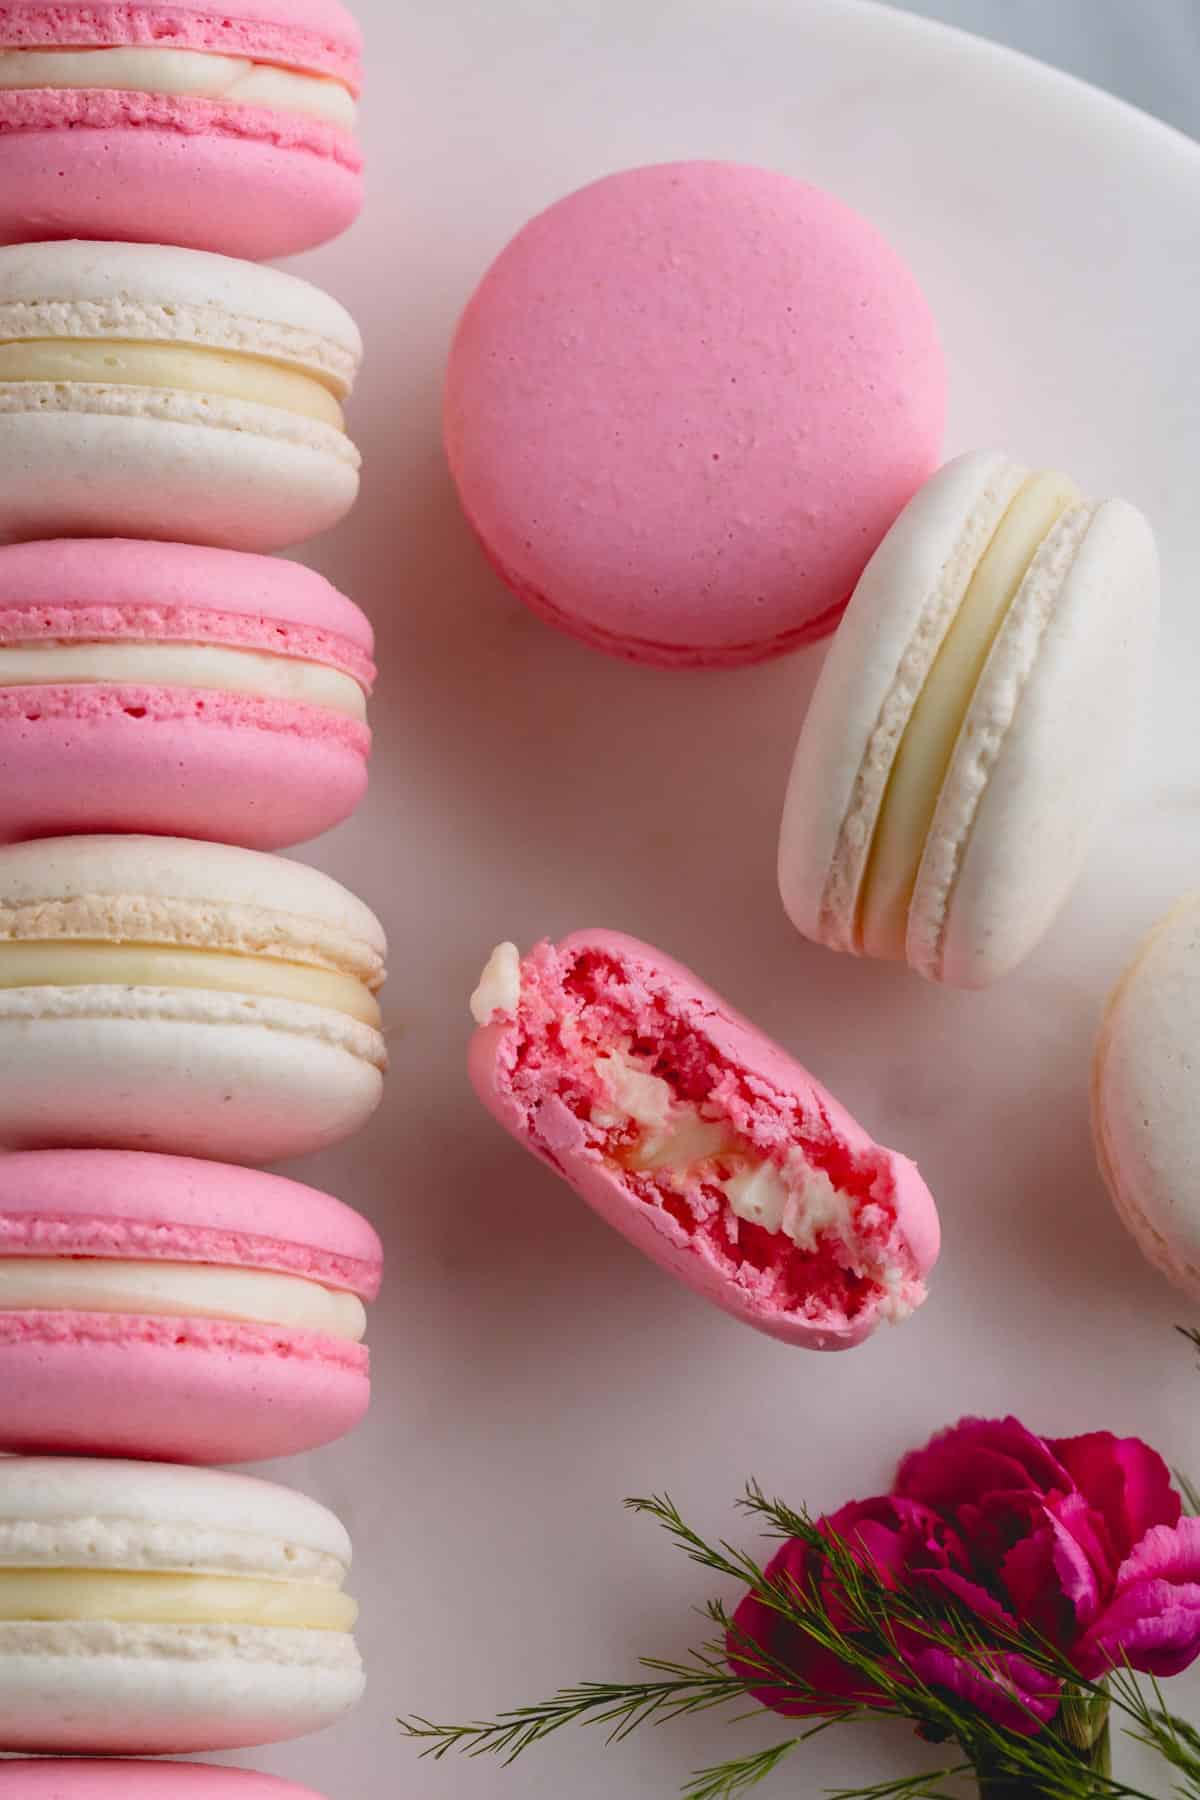
6. Assemble the macarons
Once the macaron shells are cooled completely, remove them from the baking surface. If the shells are stuck to the baking surface, the shells are either underbaked, or you need to let them cool completely.
Now, pair the shells by size and arrange them on a baking sheet, or wire rack, placing one shell bottom side up.
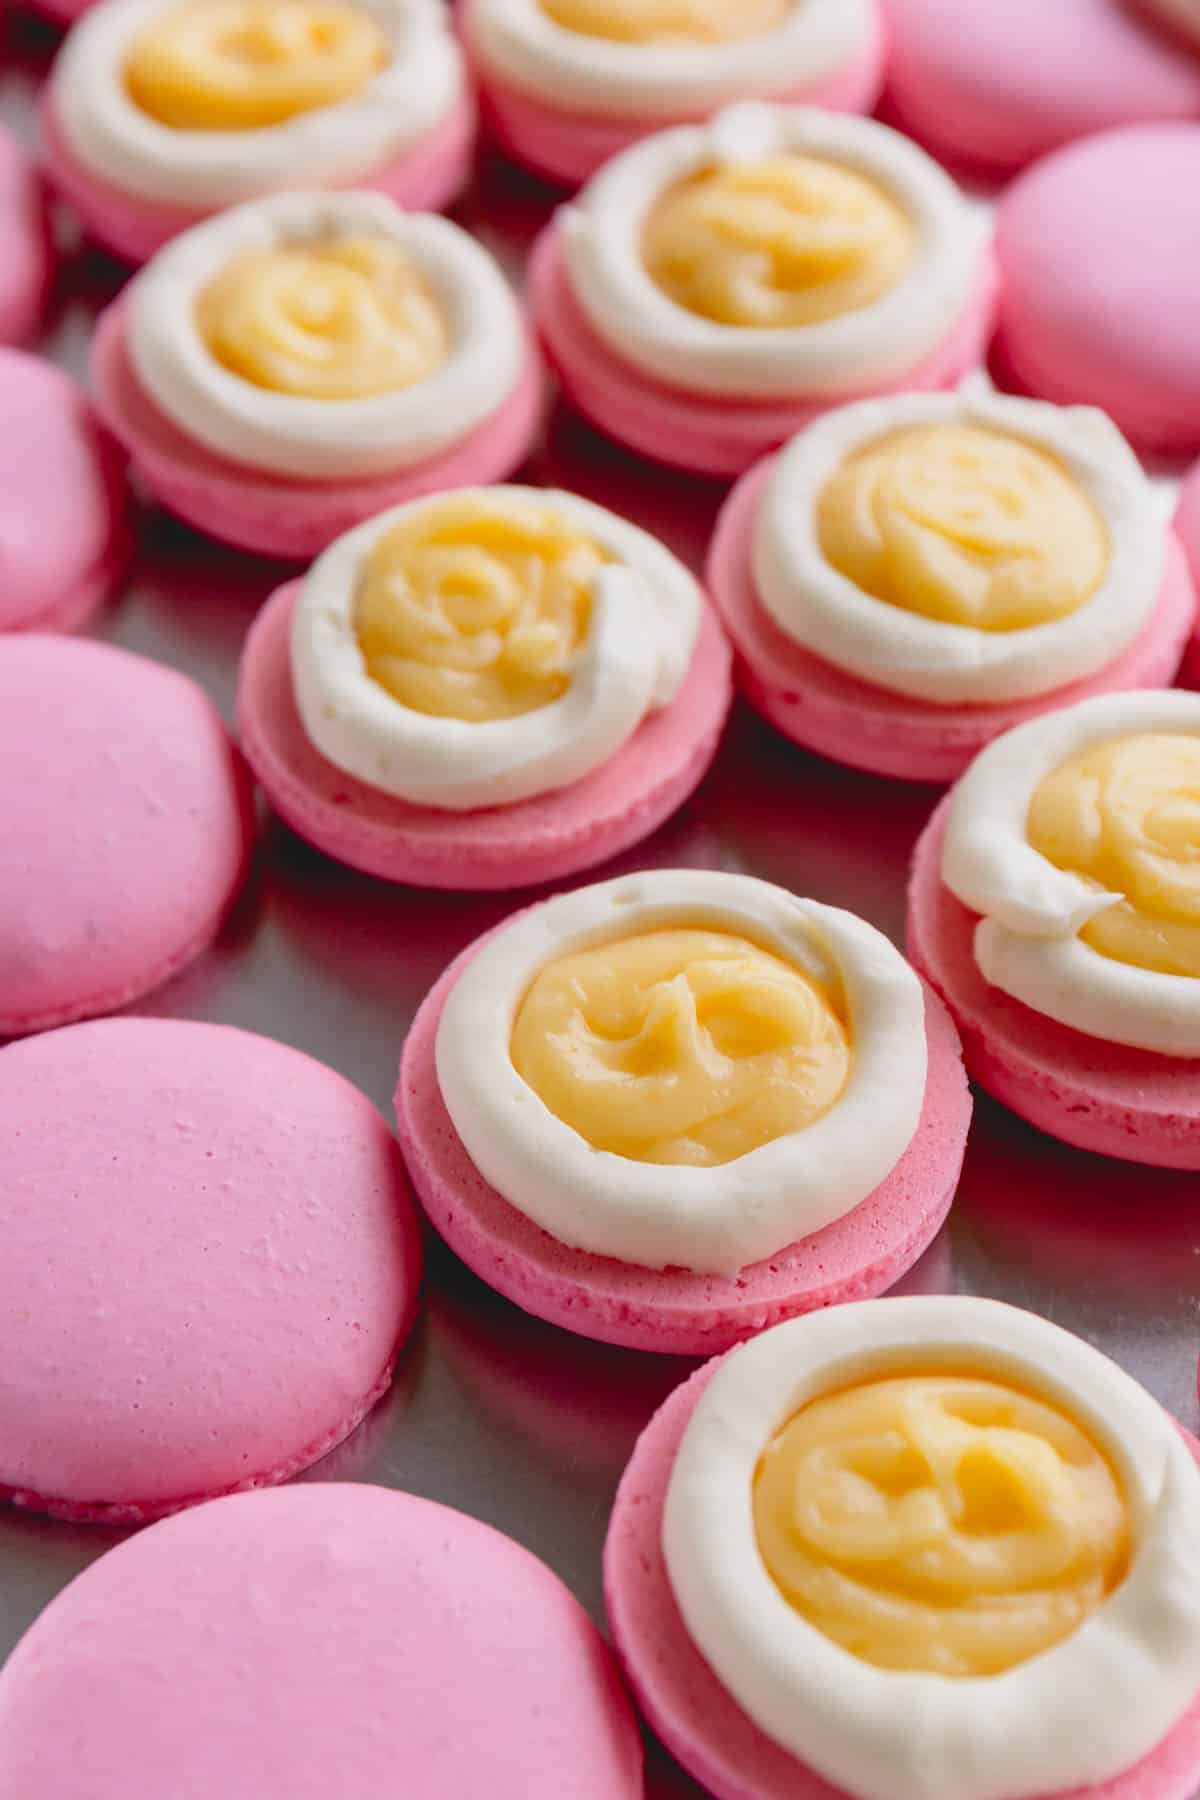
Pipe a dollop of filling on bottom shells and place the top shell over the filling and press lightly so the filling spreads till the edges.
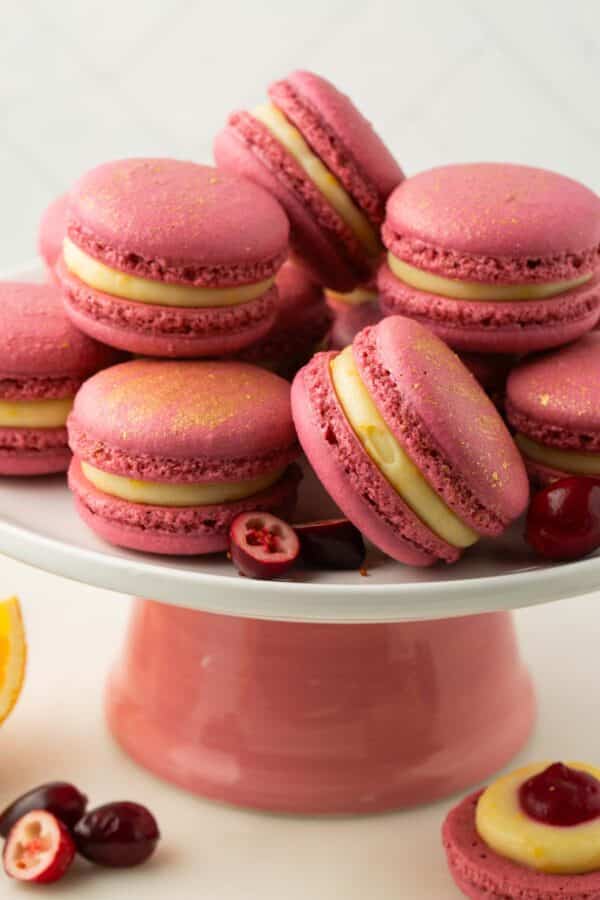
You can fill the macarons with any kind of filling. My favorite go-to’s are ganache and French buttercream. In the picture below, macarons are filled with white chocolate ganache and pineapple curd.
7. Mature the macarons
Place the filled macarons in an airtight container and refrigerate for at least 8 hours or preferably for 24 hours. This process is called maturing, which allows the filling to soften and flavor the shells.
Bring the macarons to room temperature (about 30 minutes on the counter) before serving.
French Macaron Tips for Success
As I mentioned above, macaron success is a combination of a good technique, understanding of your oven and quality of your ingredients.
Once you understand the technique and reasons behind certain steps, you’ll be well on your way to perfect macarons.
- Weighing the ingredients on a scale is crucial for setting yourself up for success. It’s so easy, and often unreliable, to measure the ingredients by volume. That’s why I provide only the metric measurements in my ingredients list. I really want you to have the best chance to succeed!!
- Stable meringue is the foundation of perfect macarons! If your meringue is weak, you’ll run into so many issues, like hollow macarons, no feet, etc. And I share my technique to achieve the most stable French meringue below.
- Macaronage is a step when we mix dry ingredients with meringue and fold the batter until perfect consistency!
- So, you can have the most reliable macaron recipe, measure the ingredients just right and fold the batter until the perfect consistency, and unfortunately, you can still FAIL, if your oven temperature is off. No matter how good your oven is, it’s important to find the sweet spot for YOUR oven. Every oven is different, and it’s totally normal for the oven temperature to vary 50°F up or down, which could make or break your macarons. That’s why I recommend getting an oven thermometer to double check the accuracy.
Check out visual Macaron Troubleshooting Guide for tips and tricks to fix or prevent common macaron issues!
Macaron Storing Tips:
Unfilled macaron shells:
- Store in an airtight container at room temperature for up to 5 days.
- Freeze in an airtight container for up to 3 months.
Filled macarons:
- Refrigerate in an airtight container for up to 5 days, depending on the filling.
- Freeze the assembled macarons in an airtight container for up to 1 month. To thaw, place the frozen macarons in the fridge and let them thaw slowly for at least 1 hour.
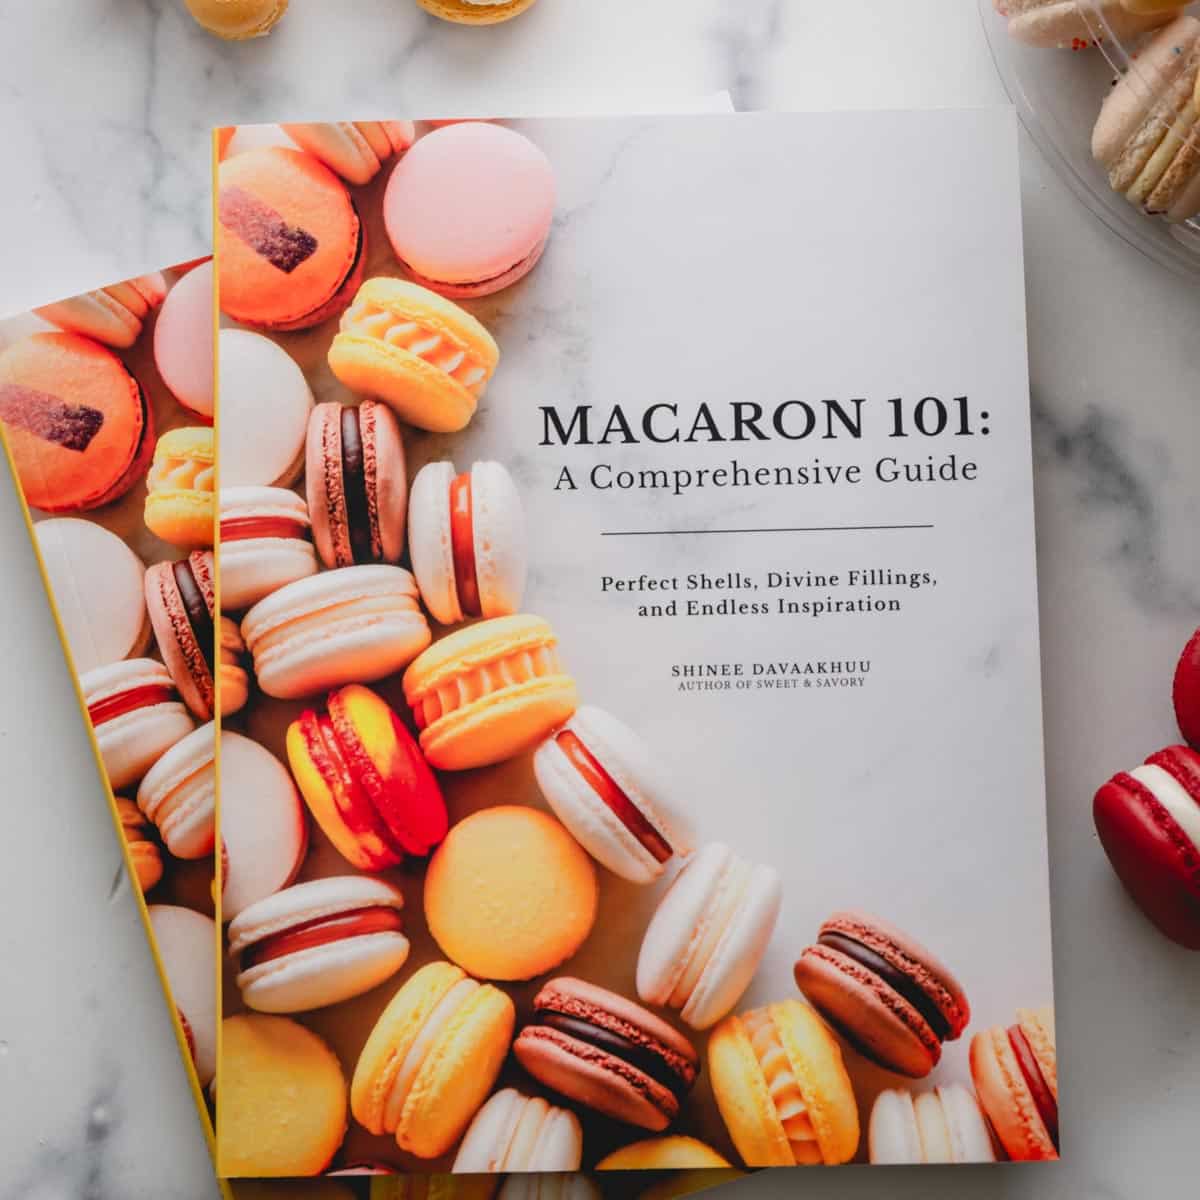
Macaron 101: A Comprehensive Guide
Master the art of French macarons and create your signature flavors!
Macaron FAQs
There are many different factors are involved in making perfect macarons. For example, the following should be done just right to achieve the desired macarons: stable meringue, proper mixing technique, low humidity, accurate oven temperature, just to name a few. That’s why it’s important to experiment and improve your technique to make perfect macarons.
Macarons can be filling with various fillings. The most common fillings are buttercream and ganache. Sometimes these fillings are paired with fruit curds and confitures. My favorite macaron fillings are chocolate Swiss meringue buttercream, easy French buttercream, peanut butter buttercream, dark chocolate ganache (1:1 ratio) and white chocolate ganache (2:1 ratio chocolate to cream).
It depends on the filling. If macarons are filled with shelf-stable filling, they don’t need to be refrigerated. However, most macarons are filled with perishable fillings, like ganache, and need to be refrigerated.
Yes, it’s cheaper to make macarons at home.
Macarons require advanced baking skills. Plus, ingredients aren’t cheap.
More Macaron Recipes:
I’ve shared so many macaron recipes on my blog, but here are my top favorites.
Easy Macaron Recipe
Ingredients
For macaron shells:
- 100 g super-fine almond flour Note 1
- 65 g powdered sugar Note 2
- 70 g egg whites at room temperature Note 3
- 75 g fine granulated sugar Note 4
- ¼ teaspoon cream of tartar optional Note 5
- ¼ teaspoon coarse kosher salt
- Gel food coloring if desired
For buttercream filling:
- 2 large egg yolks
- ¼ cup (50 g) granulated sugar
- 3 ½ tablespoons milk
- ½ cup (115 g) unsalted butter softened
- 1 teaspoon pure vanilla extract
Instructions
To make macaron shells:
- Preheat the oven to 300°F (150°C). Line 2 baking sheets with parchment paper, or teflon sheet, or silicone mat.
- To prepare dry ingredients, sift together almond flour and powdered sugar twice. (Note: If you have up to 2 tablespoons of chunky dry ingredients left in the sifter, you don't have to replace it. Simply discard those chunky bits.)
- To make meringue, in a clean mixing bowl with a whisk attachment, combine egg whites, granulated sugar, cream of tartar and salt and beat the mixture on medium speed until soft peaks form. (I set it to speed 4 on my KitchenAid stand mixer. It takes 30-40 minutes to whip the meringue, but it's well worth it for nice and full shells.)
- If you’re making colored shells, add gel food coloring at soft peak stage.
- Continue beating the meringue at the same medium speed until hard peaks form. Visual cues: Meringue should ball up inside the whisk, and when you lift the whisk, the meringue should hold a pointy end and have sharp ribs.
- To make batter, sift almond flour mixture into the meringue. Using a silicone spatula, fold the dry ingredients into the meringue until fully incorporated. Then continue to fold the batter until it’s runny enough to draw a figure eight. To test, take a small amount of batter and drop it into the bowl. If the small peaks dissolve into the batter on its own in about 10 seconds, the batter is ready. If not, fold couple more times and test again. Be careful not to over-fold the batter. (TIP: Making french macarons is all about the technique. This is one of the most crucial step. Let me try to describe the folding motion as best as I can: run the spatula clockwise from the bottom, up around the sides and cut the batter in half. If you’re beginner macaron-baker, I suggest to count every fold. It takes roughly about 50 folds to reach the proper consistency. After 50 folds, start testing the batter, and continue testing after every couple folds.)
- To pipe macaron shells, transfer the batter into a pastry bag, fitted with a round tip. (I use this Wilton 2A tip.)
- Hold the pastry bag at straight 90° angle and pipe about 1.5-inch rounds about an inch apart on prepared baking sheets. (TIP 2: Download my free macaron template. Simply pipe the batter to fill inner circle.)
- Tap the baking sheets firmly on the counter (or slap the bottom of the baking sheet with one of your hands) a few times to get rid of any air bubbles. You can also use a toothpick to burst some large air bubbles. This step ensures smooth tops.
- Let the macarons rest on the counter for 15 minutes before baking.
- To bake, bake the macarons for 15-18 minutes, one baking sheet at a time, on the middle rack. It’ll take longer for larger macarons. To test for doneness, touch a macaron lightly and try to move it. If it slides and wobbles, bake a minute or so longer. The cooked macarons should be firm to touch and the base shouldn’t move.
- Cool the macarons complete and then remove the shells from the baking surface. (TIP: Don't remove the shells while warm, you may risk breaking the shells, or the bottom might get stuck to the baking surface.)
To make the buttercream filling
- In a medium bowl, beat the egg yolks slightly with a whisk and add sugar. Continue to whisk until the mixture is pale and sugar is mostly dissolved. Stir in the milk.
- Transfer the egg yolk mixture into a small saucepan and heat over low heat, stirring frequently. Continue to cook until it’s thick like pudding, about 5 minutes.
- Transfer the mixture back to a bowl and cool it to room temperature.
- Then stir in the softened butter in three batches. Add vanilla extract and continue to mix until smooth. Transfer the buttercream into a pastry bag with round tip.
To assemble macarons
- Pair the macaron shells by size and arrange them on a wire rack. Line them up so that bottom shells are upside down.
- Pipe a dollop of filling on bottom shells. Place the top shell over the filling and press lightly so the filling spreads till the edges.
- Refrigerate the filled macarons in an airtight container for at least 24 hours to mature, which allows the filling to soften and flavor the shells.
- To serve, bring the macarons out about 30 minutes prior to serving.
⭐️ Did you make this recipe?
Please leave a review and let us know how you liked it!
Video
Tips & Notes
Nutrition
This recipe was originally published on January 13, 2013.
Excerpt from my original post from January 13, 2013:
Just a few months ago, these pretty little cookies popped on the screens everywhere I went. So dainty, colorful and tempting! Everyone was all ohs and ahs about how wonderful these treats are.
I’m curious person by nature. And since I could not find anything like this where I live (I live in the middle nowhere!), I googled the recipe for these beautiful treats. Found ton of recipes, read countless tips and tricks (apparently they are quite finicky!), drooled over many, many gorgeous photos, and I finally made them!
Oh, sweet little macarons, where have you been all my life? They were so absolutely delicious.
To make up for all the lost time without these gems, I was on the roll making them day and night. Ok, maybe a little exaggeration, but you got the idea, I was obsessed!
I can’t say I’ve perfected these delicate little cookies yet. But as you can see they’re not that bad.
Now, that I had made these gems more than handful of times and I’m pretty confident with the technique, and I thought I would share my process.
This recipe was originally published on January 13, 2013.


Do you have any tips or alterations of your recipe for baking macarons at high altitude ~6000 ft?