Adorable heart-shaped Valentine’s Day sugar cookies are decorated with bright red royal icing. Try out this easy decorating idea for beginners, and learn tips and tricks for making deep red royal icing that doesn’t bleed.

Why you’ll love this recipe:
Prepare to fall in love with this Valentine’s Day version of my go-to sugar cookie recipe.
My cut-out cookies are always rich and buttery, with perfectly crisp, golden-brown edges. Plus, they don’t puff up during baking, which makes them seriously easy to decorate with bright red royal icing.
- Beginner-friendly – My simple recipe method doesn’t require any chilling, and the red royal icing can be prepared in advance. Plus, flooding heart-shaped cookies couldn’t be easier!
- Looks – These heart-shaped cookies are love at first sight! The stunning red icing makes them impossible to resist.
- Flavor – They’re the ideal combination of sweet and buttery, with a hint of vanilla!
And before you put your heart-shaped cookie cutters away, I suggest making a batch of these raspberry sugar cookies as well!
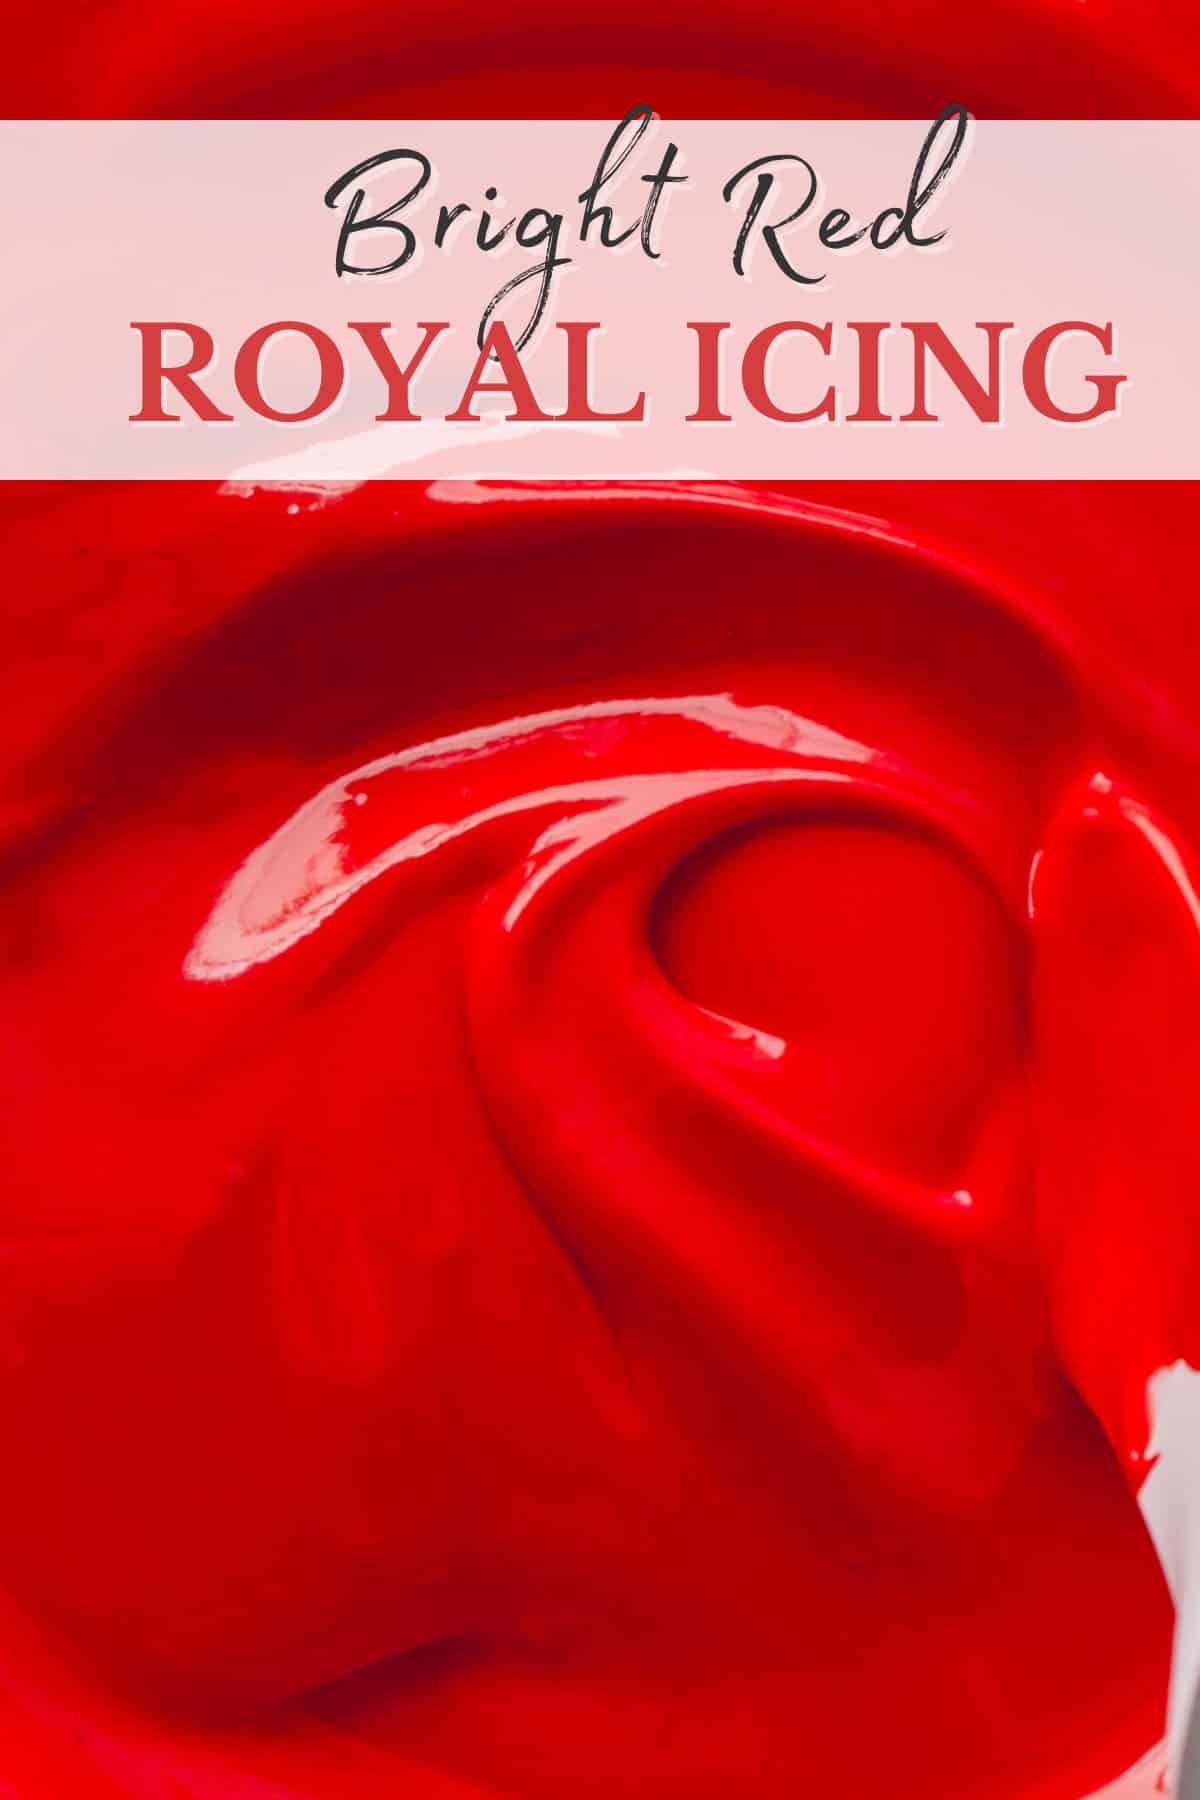
Table of Contents
- Why you’ll love this recipe:
- Valentine’s Day Sugar Cookies
- How to make these heart sugar cookies:
- How to make red royal icing:
- Tips to Achieve Deep Red Royal Icing:
- How to decorate heart shaped sugar cookies:
- How to prevent color bleed:
- Tips for Success:
- Make-Ahead Tips:
- Storing Tips:
- Sugar Cookie FAQs:
- More Valentine’s Day Recipes:
- Valentine’s Day Sugar Cookies Recipe
Valentine’s Day Sugar Cookies
These festive sugar cookies are made of 2 components:
- My go-to sugar cookies – This is my all time favorite no chill, no spread sugar cookies.
- Royal icing – My comprehensive tutorial is perfect for beginners!
I have a comprehensive step-by-step tutorial for both of these recipes, so I won’t go into details in this post.
How to make these heart sugar cookies:
1. Prepare the cookie dough
- Mix the flour, sugars, baking powder, and salt in a mixing bowl fitted with a paddle attachment.
- Add the butter, and mix on low speed until the mixture is evenly moistened and resembles wet sand, about 1-2 minutes.
- Add the egg, vanilla, and almond extract and mix until just combined, about 30 seconds.
- Divide the dough into 2 equal parts, and knead each part into a smooth ball.
2. Shape and bake the cookies
- Roll each dough ball out into a ¼-inch thick disc.
- Cut out the cookies using heart-shaped cookie cutters. Then, arrange them on the prepared baking sheets.
- Gather the scraps of dough, roll them out, and cut out more cookies. Repeat this process until all the dough is used up.
- Bake the cookies for 10-13 minutes or until the edges start to turn light golden.
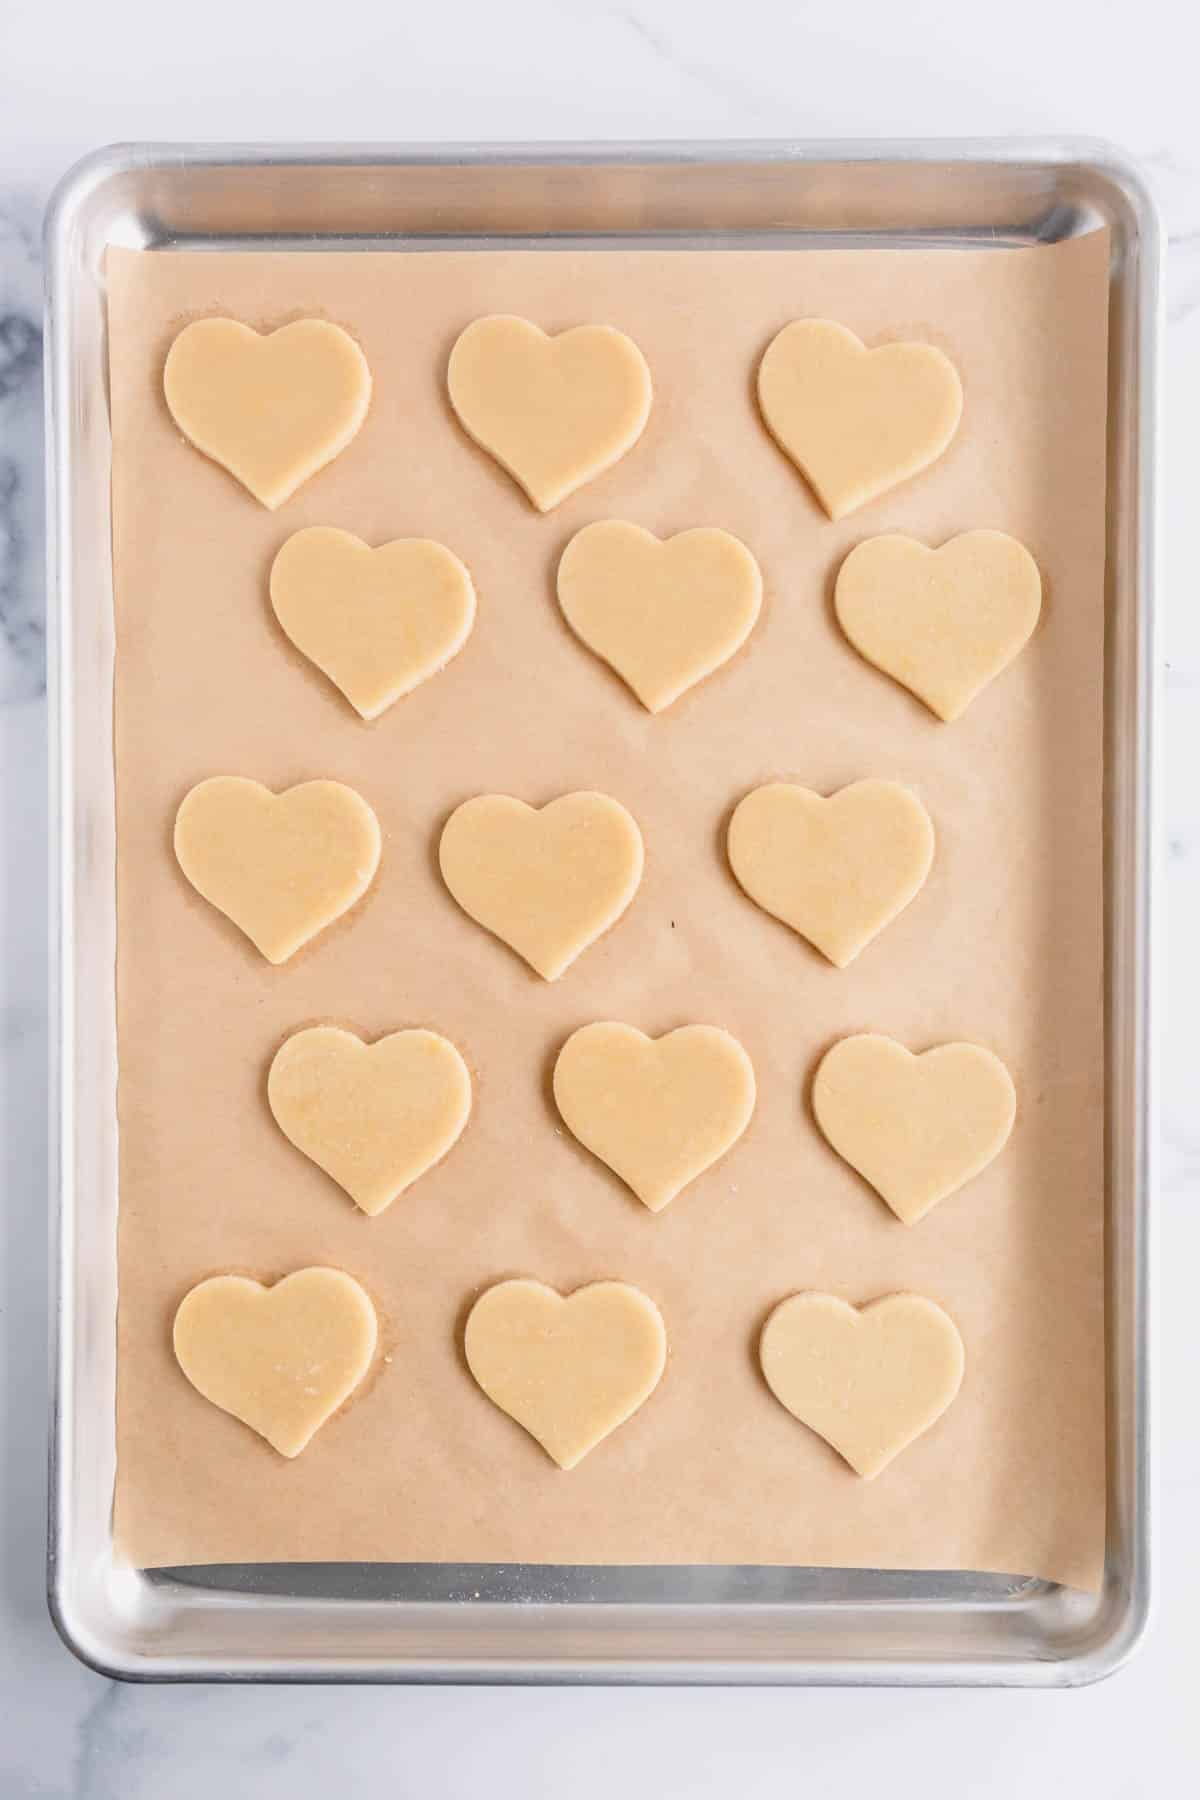
create even cookies
This adjustable rolling pin is my go-to! It’s non-stick and ensures perfectly even dough.
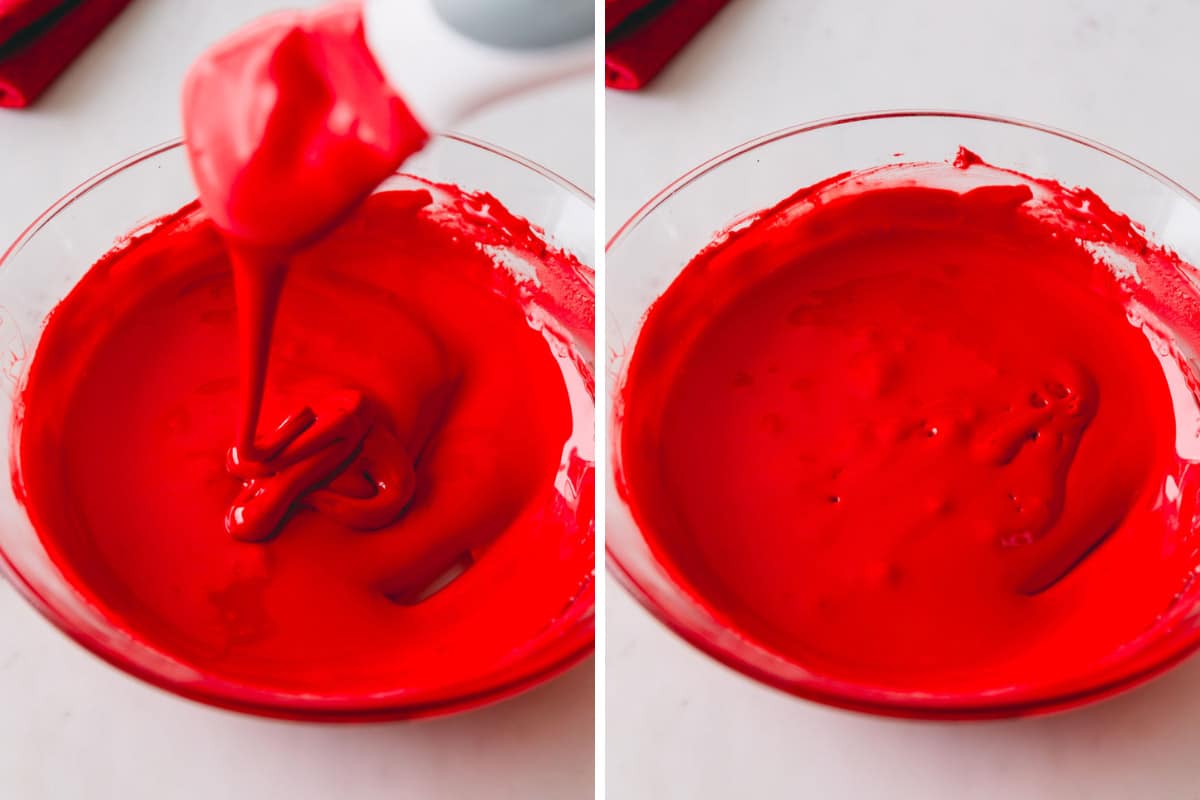
How to make red royal icing:
- Prepare a half batch of this royal icing.
- Divide the prepared icing between 2 bowls.
- Cover 1 bowl of white icing tightly with plastic wrap, and set it aside.
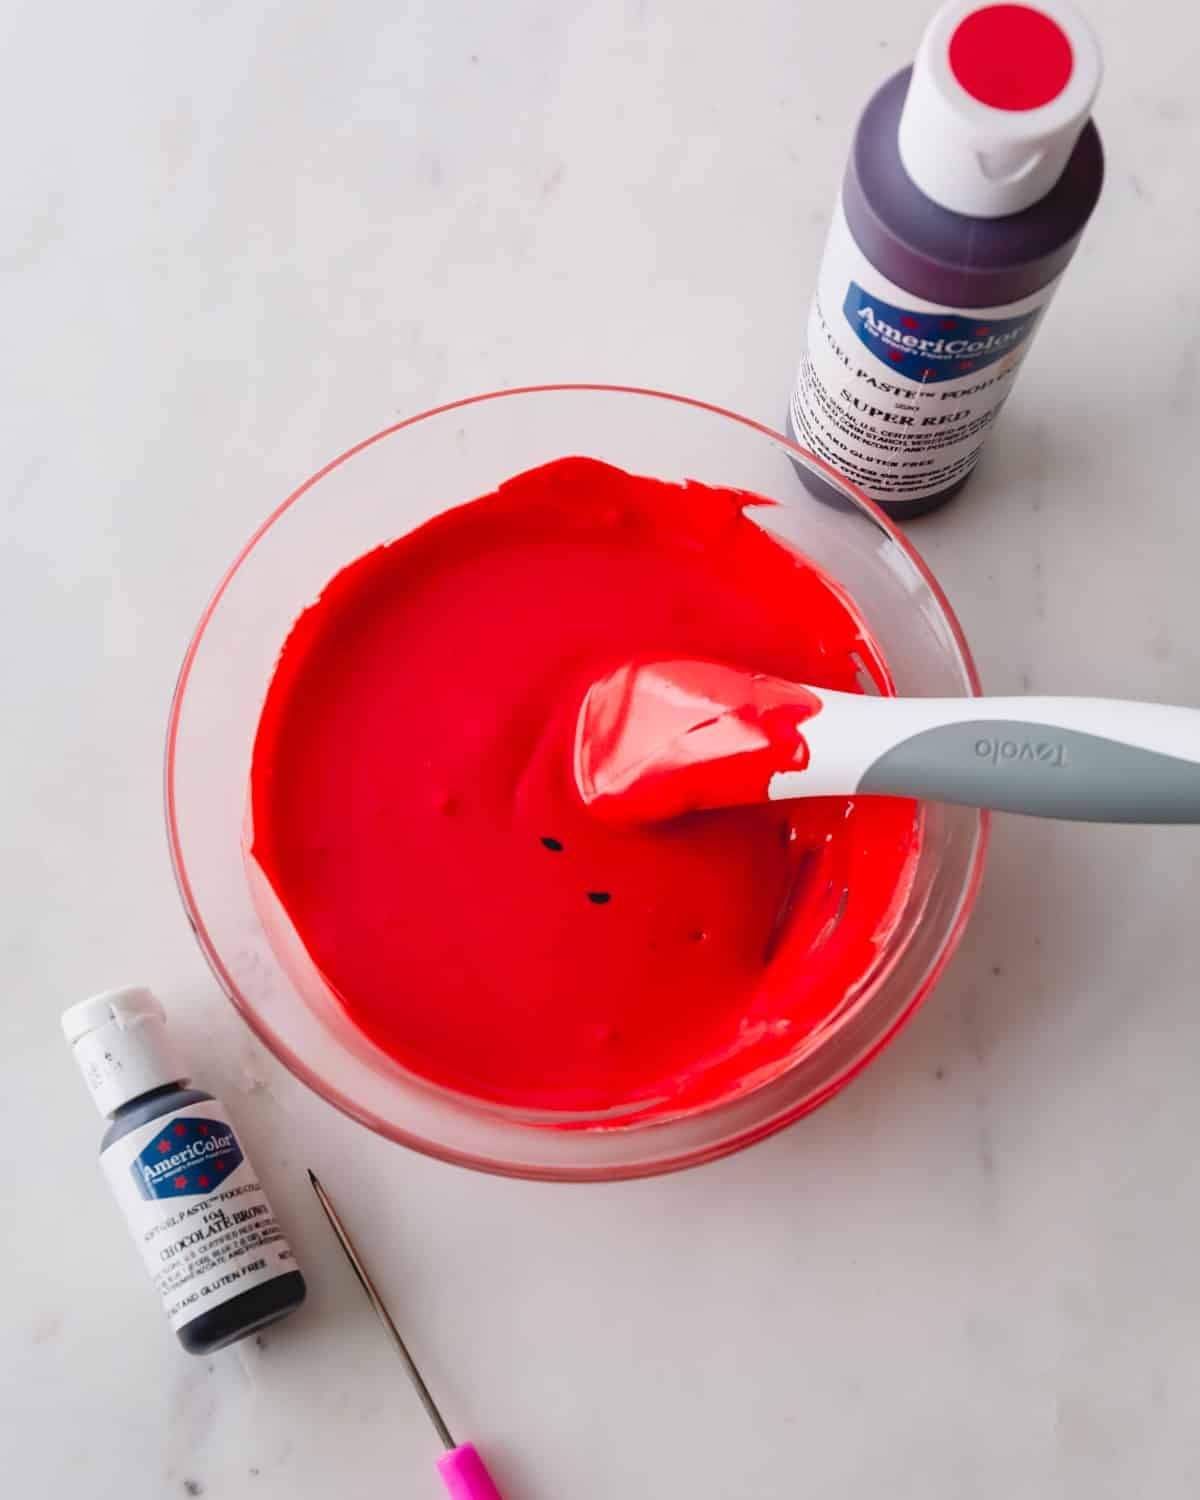
- Mix red food coloring into the second bowl of icing, and add a couple of small drops of brown food coloring to deepen the red.
Don’t add too much red coloring
Remember the color will develop over time. It’s best to make the royal icing the day before to allow the color to develop overnight. It usually darkens a shade deeper overnight.
If you add too much icing, you’ll run into bleeding issue.
Tips to Achieve Deep Red Royal Icing:
- Use Americolor Super Red gel food coloring. I recommend using gel food dye over liquid for Valentine’s Day sugar cookies because gel coloring is more concentrated, which produces a bolder color without changing the consistency of the icing.
- Add a touch of brown food coloring to the red. This deepens the red color, making it more vibrant and less pink. My red velvet cupcake recipe uses cocoa powder to achieve the same look!
- Let the frosting rest overnight for an even
- Cover the prepared icing tightly in plastic wrap, or place it in a piping bag.
- Let it sit out on the counter at room temperature.
- Stir the icing well before using it for decorating.
How to decorate heart shaped sugar cookies:
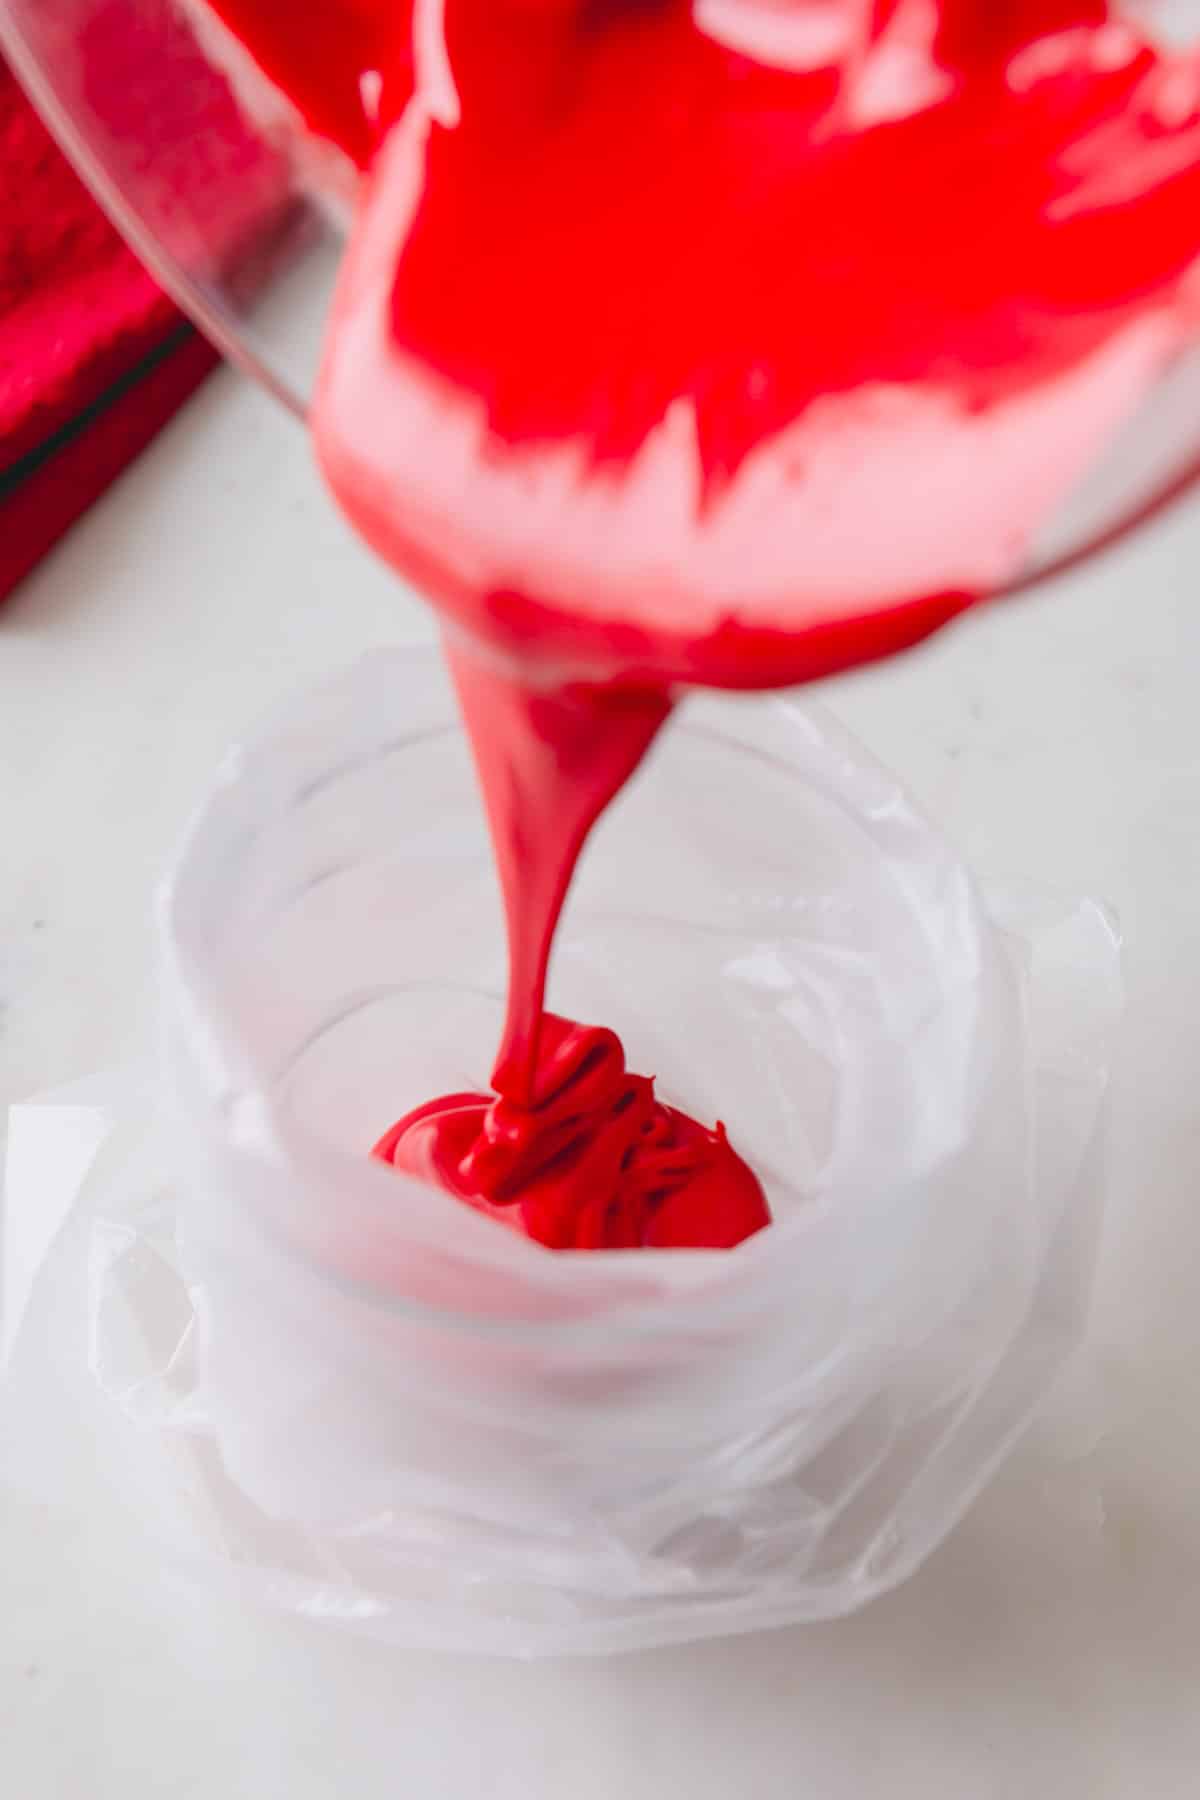
- Transfer white and red royal icing into tipless piping bags.
- And decorate your cookies however you want. Let your creativity lead you!
royal icing consistency
I don’t make separate icing for outlining and flooding. I make a hybrid consistency, meaning it’s thick enough to outline yet fluid enough to spread into a smooth frosting with a little jiggle.

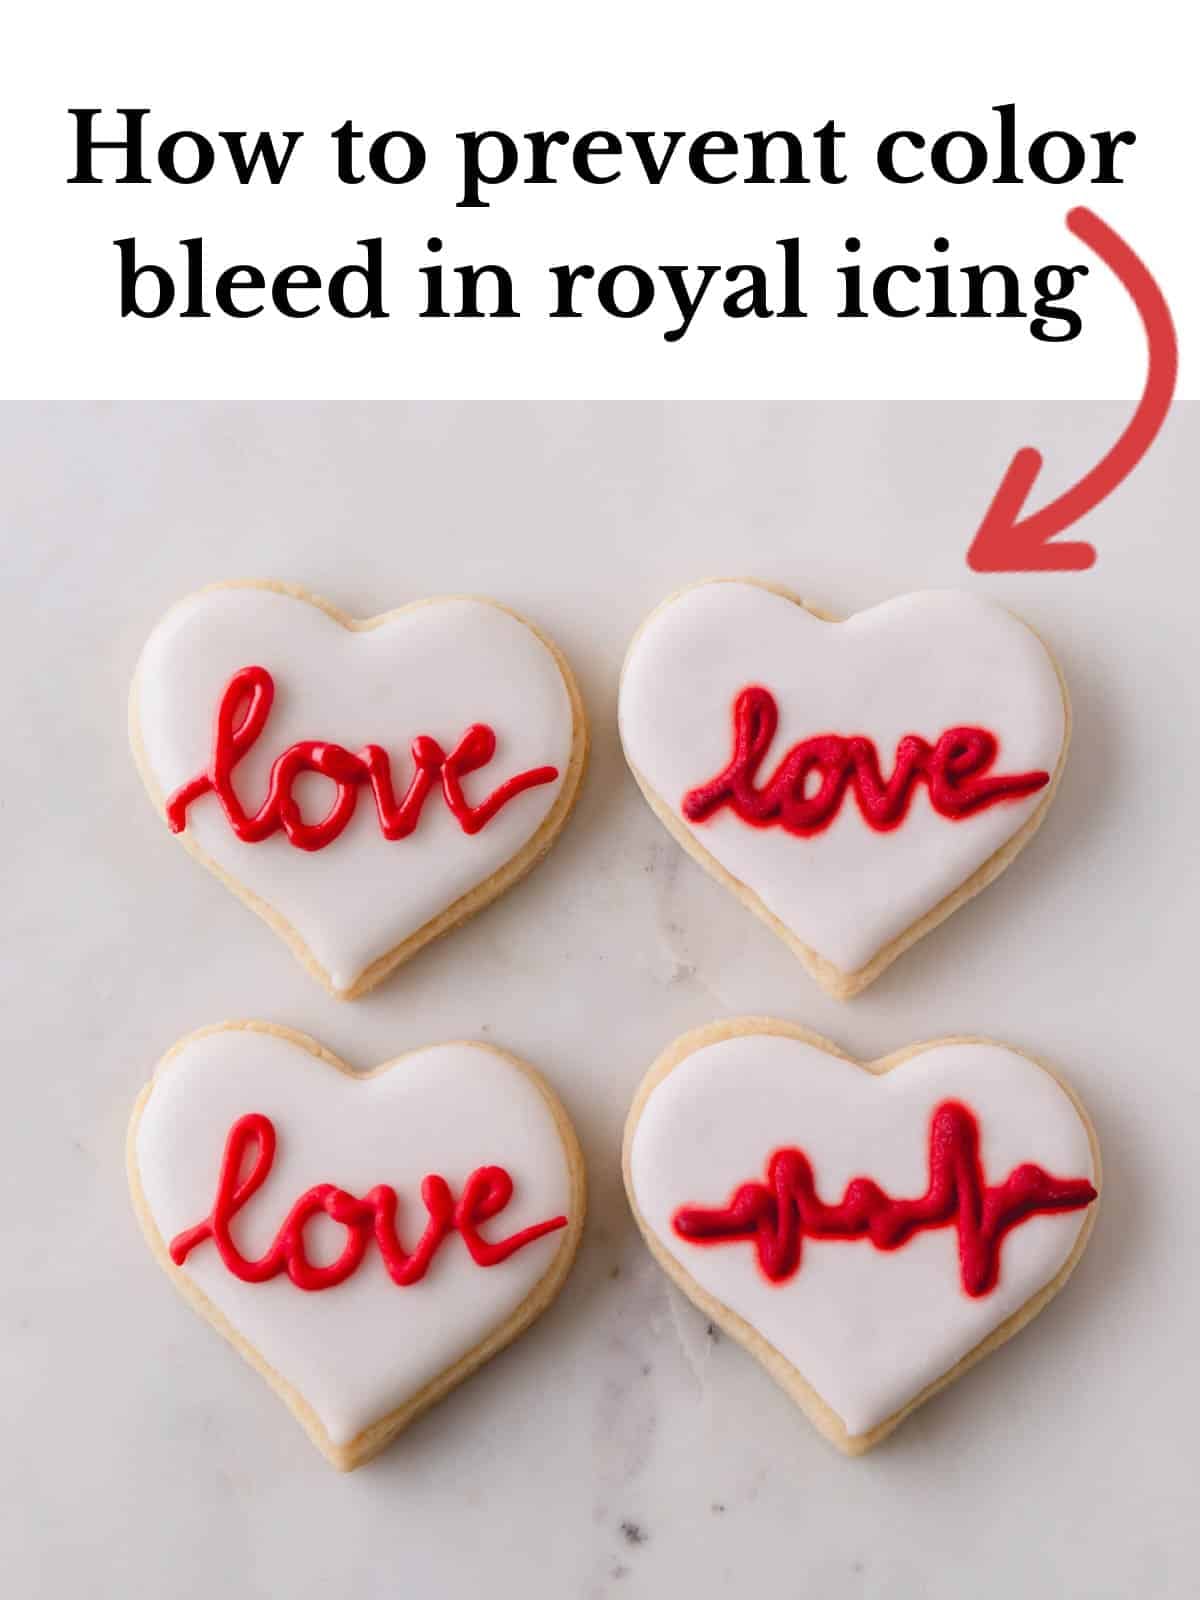
How to prevent color bleed:
- Don’t oversaturate the icing with too much food coloring. Start with a small amount of color, and gradually add more. The icing color will deepen overnight as it sits.
- Let the first layer of icing dry for about 15 minutes before adding the second layer. The first layer of icing doesn’t need to fully harden, it just needs to crust over.
- Let the decorated cookies air dry until the icing is fully set before transferring them to storage containers.
Tips for Success:
- Test your cookie dough before kneading it into smooth balls. The dough should be crumbly, but stick together when you squeeze it in your hands.
- Weigh the flour and sugars using a kitchen scale. A weight measurement will yield the most accurate results.
- Outline the cookies with royal icing before flooding the rest of the cookies with more icing. Use the same consistency of icing for flooding as you use for outlining.
- Never refrigerate plain or decorated Valentine’s Day sugar cookies. Refrigeration can cause the cookies to dry out, and condensation may lead to color bleed on decorated cookies.
Make-Ahead Tips:
If you’re planning on baking sugar cookies for Valentine’s Day, you’ll want to get started on your red royal icing at least a day in advance. This will guarantee your icing has time to turn a deep shade of red.
Cookie Dough
Prepare the Valentine’s Day sugar cookie dough up to 3 days in advance. Or, freeze it for up to 3 months.
- Flatten the prepared dough into discs, and wrap it tightly in plastic wrap before placing it in the freezer.
- Thaw frozen dough overnight in the fridge.
- Let thawed dough sit at room temperature for 15-30 minutes before rolling it out.
Icing
Mix the royal icing up to 2 weeks in advance or freeze it for up to 2 months.
- Prepared icing can be stored on the counter at room temperature or in the refrigerator.
- Thaw frozen icing overnight in the fridge.
- Let thawed icing sit at room temperature for about 30 minutes before transferring it into piping bags.
Storing Tips:
- These Valentine’s Day sugar cookies should always be stored at room temperature and never placed in the refrigerator.
- Don’t transfer decorated cookies into storage containers until the icing has fully set. This may take up to 24 hours.
- Decorated cookies will stay fresh in an airtight container for up to 1 week or can be frozen for up to 1 month.
- Thaw frozen cookies on the counter at room temperature for 8-12 hours without opening the lid. If you open the lid, condensation may build up which can cause your red icing to bleed.
Sugar Cookie FAQs:
The secret to achieving super red royal icing involves a few key steps. First, use gel food coloring. Gel food coloring is highly concentrated and produces more vibrant colored icing. Second, add a bit of brown food dye to darken the red tone further. Lastly, let the icing sit overnight. The color gets better with time.
Color bleed in icing occurs when one color bleeds (or blends) into another color. This results in blurred edges and an overall lackluster appearance. You risk color bleed if you add too much dye to your icing and don’t let your first color crust over before adding your second color.
Liquid food coloring has a water base, is sold in small squeeze bottles, and is easily found at most grocery stores. Meanwhile, gel food coloring has a water, glycerine, or corn syrup base and is sold in dropper bottles. Gel coloring is more of a specialty baking product and will probably need to be purchased online!
More Valentine’s Day Recipes:

Valentine’s Day Sugar Cookies
Ingredients
For sugar cookies:
- 3 cups (375 g) all-purpose flour
- ½ cup (100 g) granulated sugar
- ¼ cup (50 g) packed light brown sugar, Note 1
- 1 tablespoon cornstarch
- ½ teaspoon baking powder
- ¼ teaspoon coarse kosher salt
- 1 ½ (170 g) sticks unsalted butter, at room temperature
- 1 large egg at room temperature
- 2 teaspoons pure vanilla extract
- ¼ teaspoon almond extract optional
For decorating:
- ½ batch of royal icing
- Americolor Super Red gel food coloring
- Brown gel food coloring
Equipment
Instructions
TO PREPARE THE DOUGH:
- In a mixing bowl with a paddle attachment, mix flour, sugars, cornstarch, baking powder and salt.3 cups all-purpose flour, ½ cup granulated sugar, ¼ cup packed light brown sugar, Note 1, ½ teaspoon baking powder, ¼ teaspoon coarse kosher salt, 1 tablespoon cornstarch
- Add butter and mix on low speed until the mixture is evenly moistened, 1-2 minutes. The mixture should resemble wet sand.1 ½ sticks
- Add egg, vanilla, and almond extracts and mix until just combined, about 30 seconds. The dough will be crumbly, but it should stick together when you squeeze it in your hand.1 large egg, 2 teaspoons pure vanilla extract, ¼ teaspoon almond extract
- Divide the dough into 2 equal parts. Knead it into smooth balls.
- At this point, you can move on to shaping and baking the cookies right away. Or you can put the dough into plastic bags and refrigerate for up to 3 days or freeze for up to 3 months.
TO SHAPE AND BAKE COOKIES:
- Preheat the oven to 350°F (175°C). Line 2-3 baking sheets with parchment papers, or silicone mats.
- Place each dough ball on a silicone mat and roll it out into ¼-inch-thick disc. (TIP: This adjustable rolling pin helps you roll out an even dough.)
- Using heart-shaped cookie cutters, cut out the cookies and arrange them on the prepared baking sheets.
- Gather the scraps of dough, roll the dough, and cut out more cookies. Repeat until all the dough is used.
- Bake the cookies for 10-13 minutes, or until the edges start to turn light golden color.
- Cool the cookies on the baking sheet for 5 minutes, then transfer them onto a cooling rack to cool completely.
TO DECORATE THE COOKIES:
- Make the royal icing and divide it into 2 bowls. Cover white icing tightly with a plastic wrap. Add red food coloring into the other icing and mix until well combined. Add a couple small drops of brown food coloring to deepen the red.½ batch of royal icing, Americolor Super Red gel food coloring, Brown gel food coloring
- Place each colored royal icing into tipless piping bags and decorate the cookies.
⭐️ Did you make this recipe?
Please leave a review and let us know how you liked it!
Tips & Notes
– Prepare the royal icing up to 2 weeks in advance, or freeze it for up to 2 months.
– Prepare the cookie dough up to 3 days in advance, or freeze it for up to 3 months.
– Store prepared cookie dough in the fridge, wrapped tightly in plastic. Thaw frozen cookie dough overnight in the refrigerator.
– To bake, let the chilled cookie dough come to room temperature for 30 minutes before rolling, shaping, and baking as the recipe instructions state.
– To decorate, let the icing come to room temperature for 30 minutes before transferring it to a piping bag. Storing Tips:
– Once cooled, leftover decorated cookies can be stored in an airtight container at room temperature for up to 1 week.
– To prevent them from sticking together, place a piece of parchment paper between each layer.
– Freeze decorated cookies for up to 1 month.
– Thaw frozen cookies on the counter at room temperature for 8-12 hours without opening the lid. Keeping the lid closed will prevent condensation from forming.
Nutrition