• Skip to primary navigation
  • Skip to footer navigation
  • Skip to header navigation
  • Skip to privacy navigation
  • Skip to recipes navigation
  • Skip to main content
  • Skip to primary sidebar
Cook Well, Eat Well
  • Shop
  • Meet Shinee
  • Contact
Facebook Instagram Pinterest YouTube

Sweet & Savory

Cook Well, Eat Well

  • New? Start Here
  • Recipes
    • Appetizers
      • Dips
      • Deviled Eggs
      • Meatballs
      • Meat-lovers
      • Savory Crepes
      • Seafood
      • Vegetarian
    • Desserts
      • Bars & Brownies
      • Cakes
      • Cheesecakes
      • Chocolate
      • French Macarons
      • Pastries
      • Pies
    • Dinner
    • Drinks
      • Sangria
    • Salads
    • Seasonal
      • 4th of July
      • Easter
      • Christmas
      • Cinco de Mayo
      • Game Day
      • Halloween
      • New Year’s Eve
      • Thanksgiving Recipes
      • Valentine’s Day
  • Discover
    • Ingredients
    • Tools
  • Learn
    • Baking Basics
    • Cooking Basics
    • Advanced Techniques
    • How-To’s
  • Share
    • Seasonal
    • Party Planning 101
  • Facebook Instagram Pinterest YouTube
    Subscribe To Updates
Home » Red Velvet Cupcakes

Red Velvet Cupcakes

Skip to Recipe Print Share
Share on:
Published: 1/15/2020Updated: 8/10/2020
This post may contain affiliate links. Read full disclosure
7219shares
  • Share
  • Tweet

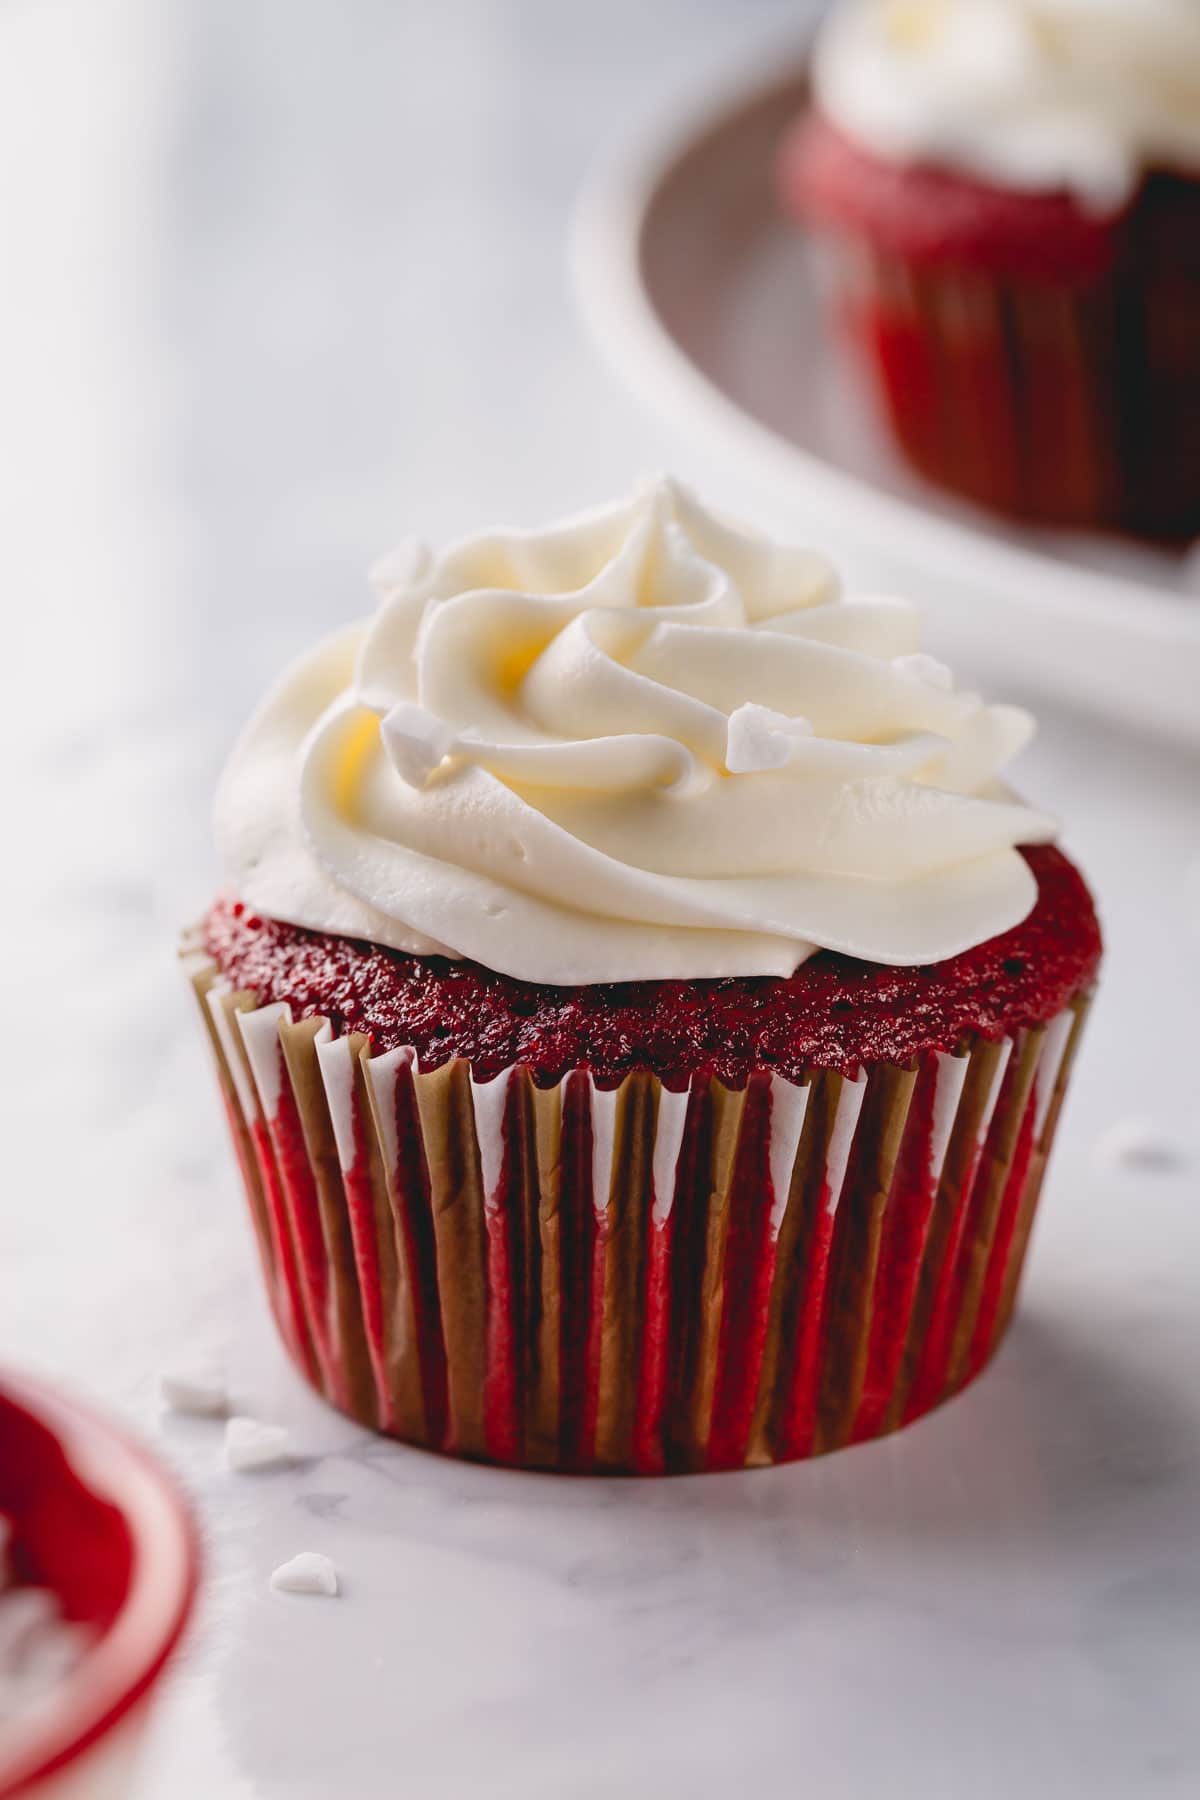
These classic red velvet cupcakes have a smooth velvety texture with buttery soft crumbs. Paired with tangy cream cheese frosting, these homemade cupcakes are simply irresistible!
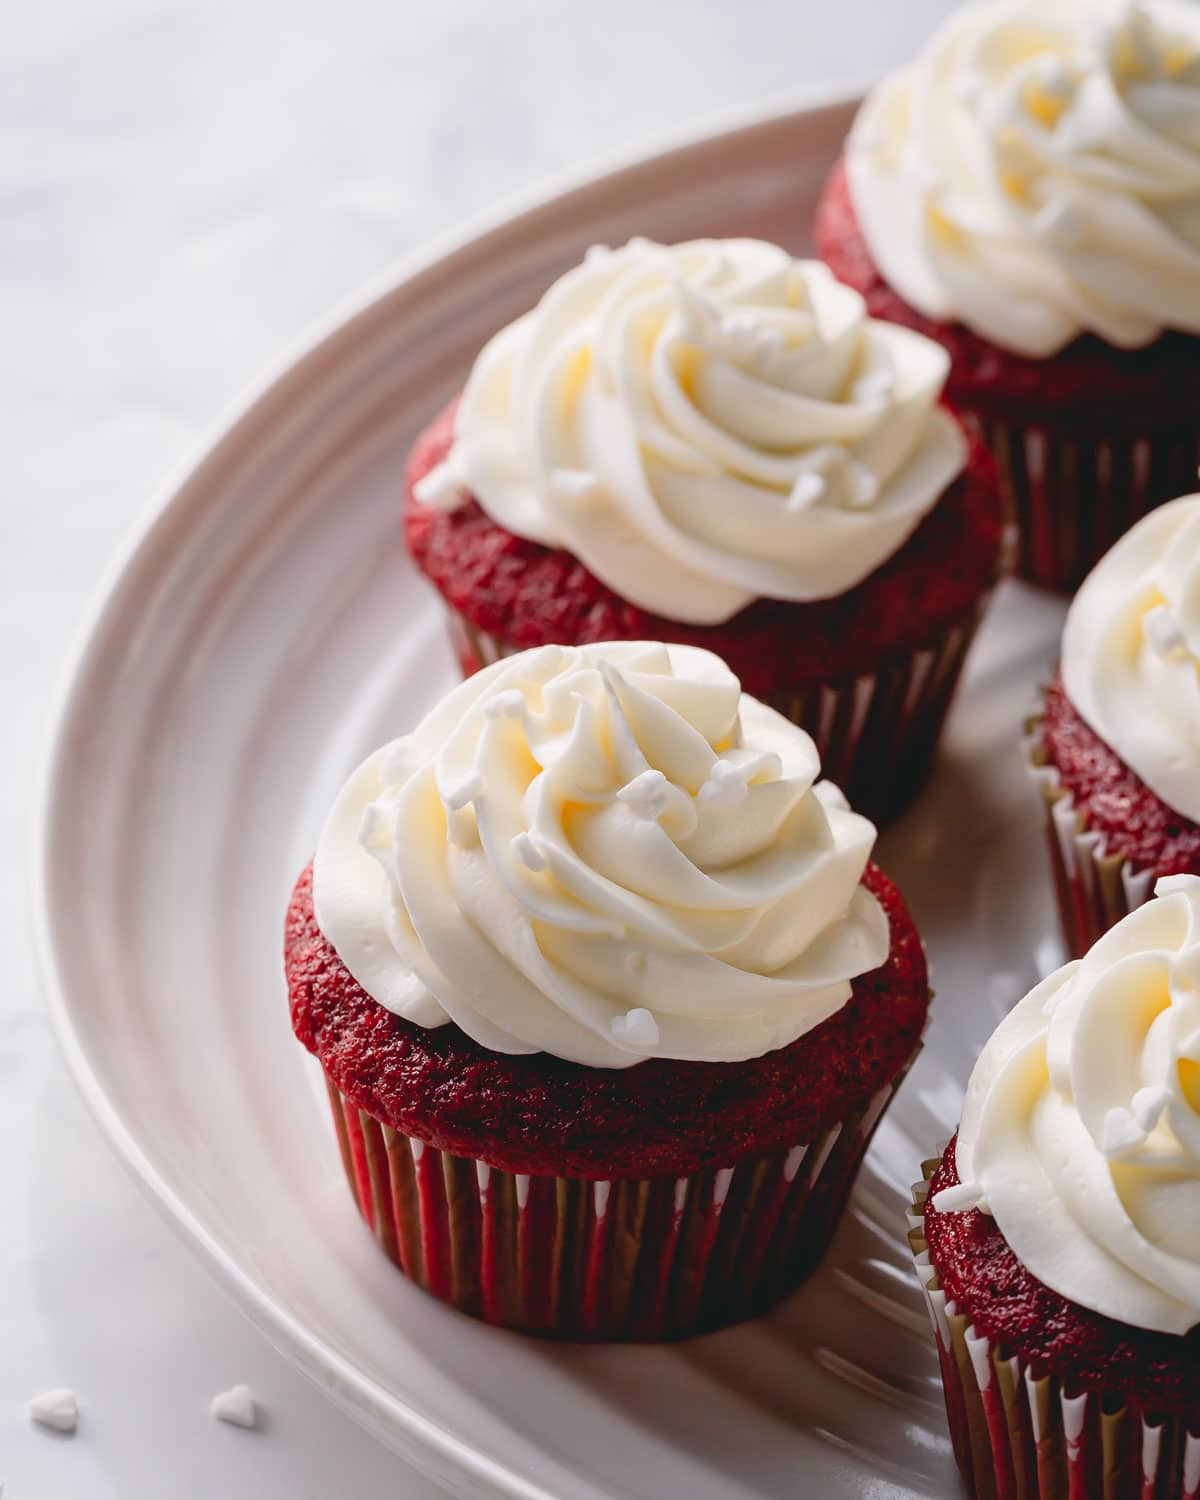
These classic red velvet cupcakes have a smooth velvety texture with buttery soft crumbs. Paired with tangy cream cheese frosting, these homemade cupcakes are simply irresistible! #redvelvetcupcakes

Anyone who knows me will tell you that I love pretty much anything red. However, the color of this cake is not the only reason I love it so much.

And no, red velvet cake is not just a chocolate cake tinted with red color!! It’s so much more!

When done right, red velvet cake has a smooth velvet-y texture with soft buttery crumbs. It has just a hint of cocoa without overpowering chocolate flavor. And what really completes these cupcakes is, of course, sweet and tangy cream cheese frosting.

And I’m about to show you how to make absolutely perfect red velvet cupcakes from scratch.  
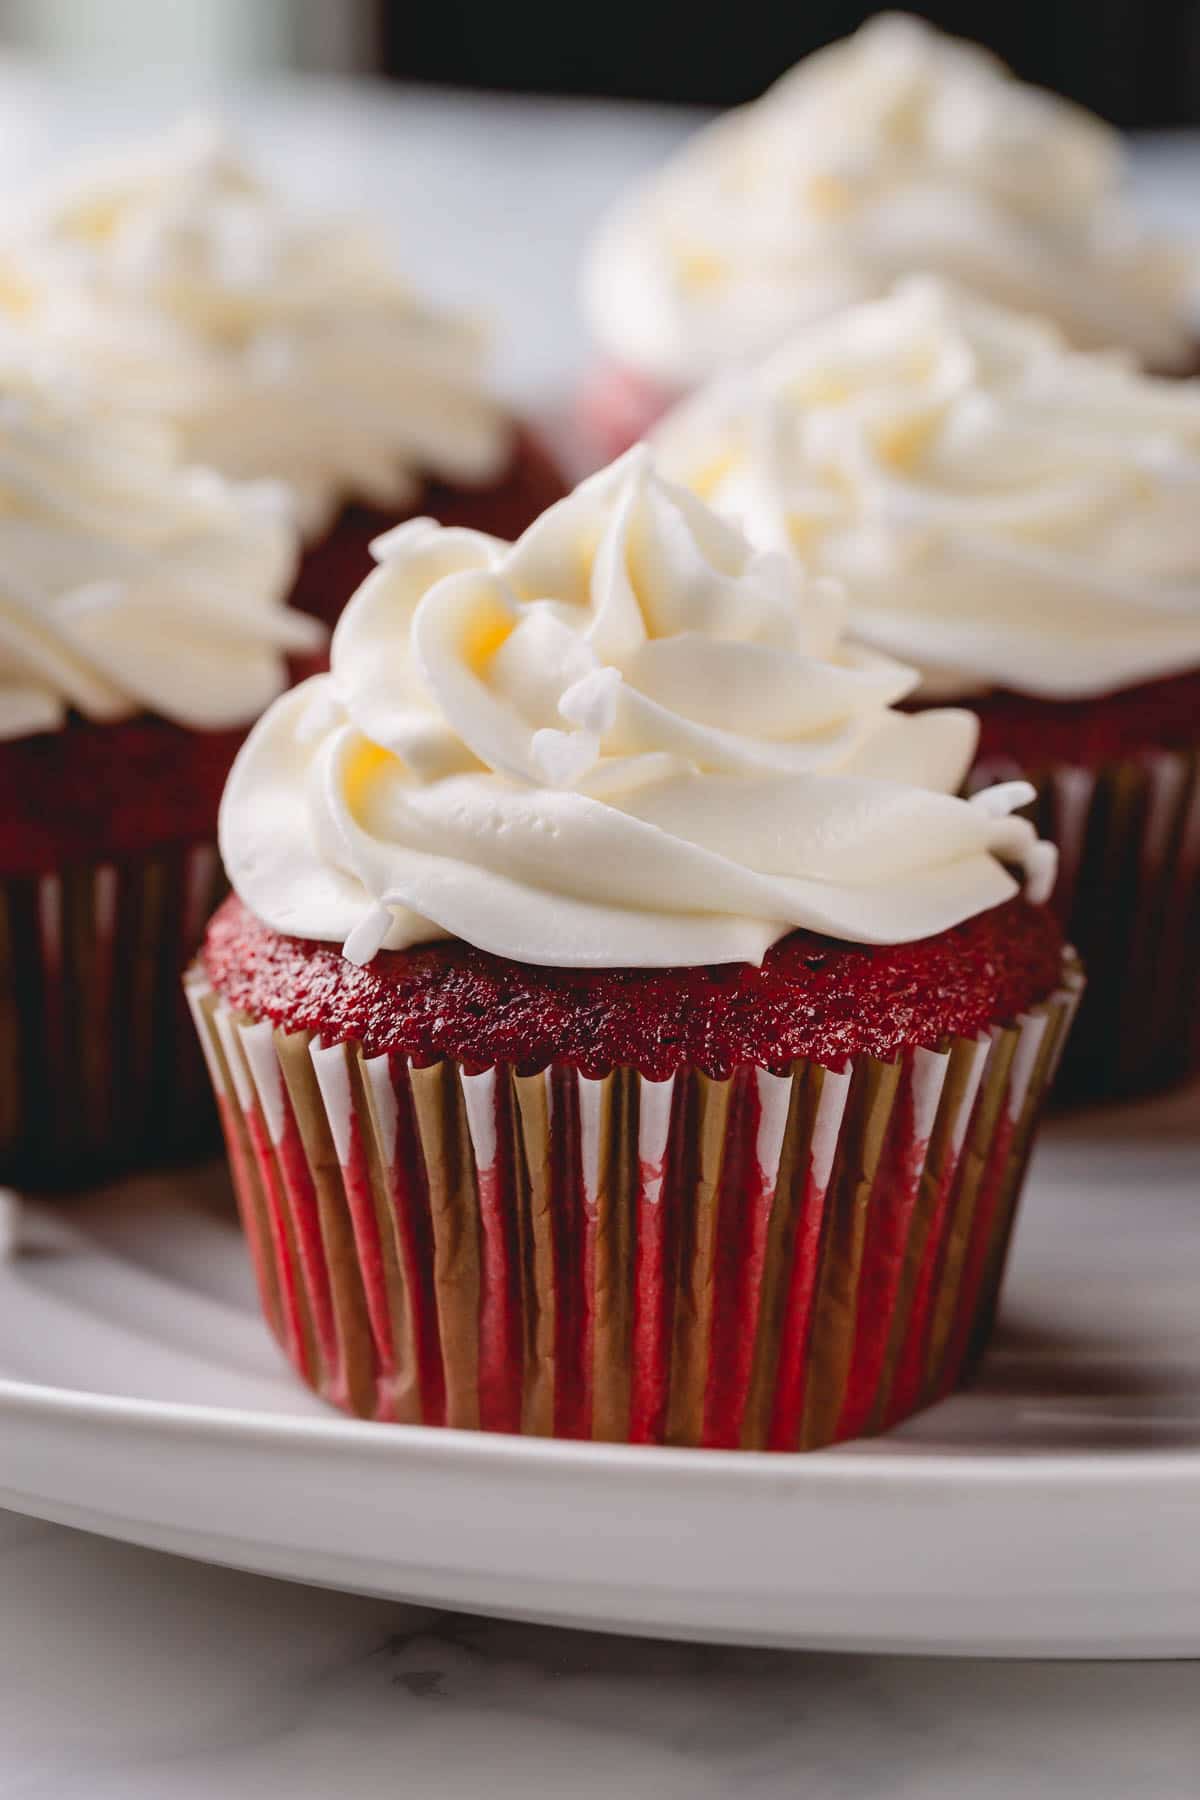
These classic red velvet cupcakes have a smooth velvety texture with buttery soft crumbs. Paired with tangy cream cheese frosting, these homemade cupcakes are simply irresistible! #redvelvetcupcakes

Contents hide
1 WHY RED VELVET CUPCAKES ARE RED?
2 WHAT RED VELVET CUPCAKES ARE MADE OF?
2.1 Food Coloring
2.2 Cocoa Powder
2.3 Buttermilk
3 HOW TO MAKE RED VELVET CUPCAKES
4 MAKE-AHEAD TIPS
5 HOW TO STORE CUPCAKES
6 Red Velvet Cupcakes
6.1 Ingredients
6.1.1 For cupcakes:
6.1.2 For cream cheese frosting:
6.2 Instructions
6.3 Tips & Notes:

WHY RED VELVET CUPCAKES ARE RED?

Traditionally, red velvet cakes didn’t call for any artificial food coloring to get that bright red color. It was actually a natural result of combining vinegar with cocoa powder.

Cocoa powder (and other fruits and vegetables, like purple cabbage, plums, blueberries, raspberries) naturally contain anthocyanins, a pigment that changes the color due to pH level. So back in the day, when natural cocoa powder was mixed with acidic ingredients like vinegar and buttercream, common ingredients of classic red velvet cake, the cake batter naturally turned red. 

Nowadays, cocoa powders are processed with acid-neutralizing agent and it doesn’t react to acidic ingredients as it used to. That’s why we have to add food coloring to get that red color.

These classic red velvet cupcakes have a smooth velvety texture with buttery soft crumbs. Paired with tangy cream cheese frosting, these homemade cupcakes are simply irresistible! #redvelvetcupcakes

WHAT RED VELVET CUPCAKES ARE MADE OF?

To makes these soft and velvet-y cupcakes, you’ll need a few simple ingredients: flour, sugar, cocoa powder, salt, egg, vegetable oil, buttermilk, vanilla extract, baking soda and white vinegar.
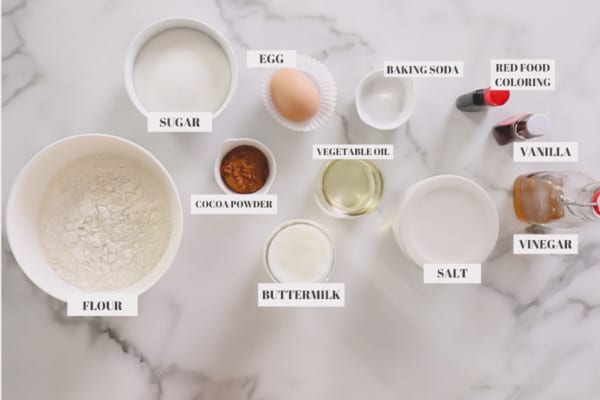
Food Coloring

Plus, you’ll need red food coloring to give your cupcakes a burst of red! Either liquid or gel food coloring will work for this recipe.

To achieve the level of brightness of my cupcakes, you’ll need:

  • about 1 tablespoon of liquid food coloring
  • or about 1 teaspoon of gel food coloring

Cocoa Powder

When it comes to cocoa powder, I recommend using unsweetened natural cocoa powder. (<- affiliate link to my go-to cocoa powder!)

Dutch-processed cocoa powder has a darker color, which may result darker cupcakes. Here’s an excellent article on difference between natural and dutch processed cocoa powder.

Buttermilk

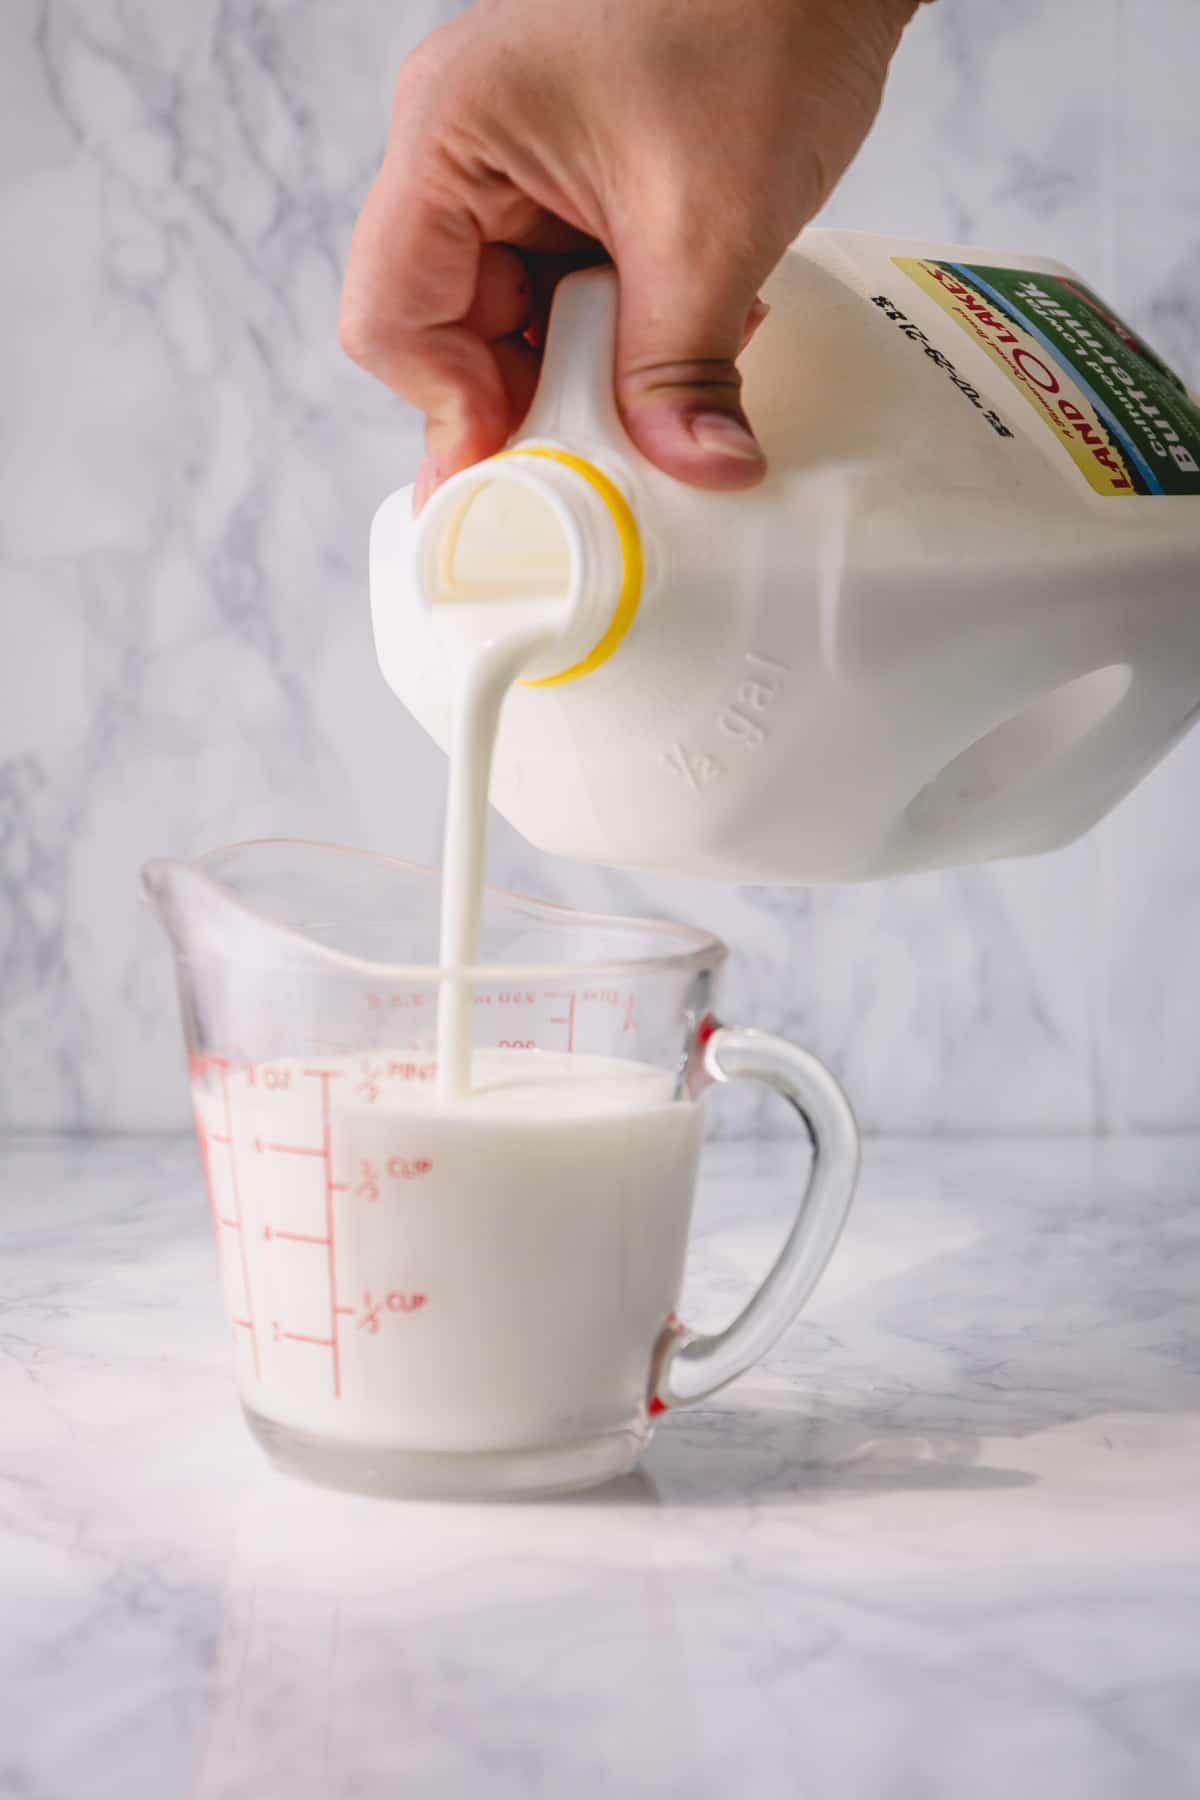
If you’re wondering whether you can make these red velvet cupcakes without buttermilk, the answer is “no”. Well, technically, you can, of course!

But you won’t get that beautiful velvet-y texture, moist and soft crumbs and a slight tang. Basically, you’ll miss out on the signature taste and texture of these classic cupcakes.

These classic red velvet cupcakes have a smooth velvety texture with buttery soft crumbs. Paired with tangy cream cheese frosting, these homemade cupcakes are simply irresistible! #redvelvetcupcakes

HOW TO MAKE RED VELVET CUPCAKES

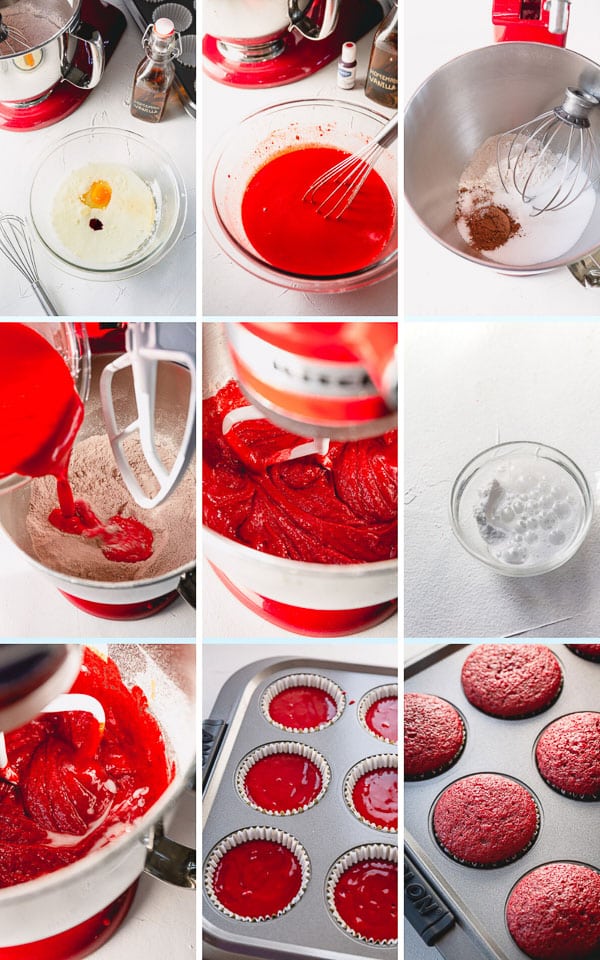
It’s really easy to make these stunning cupcakes. In a nutshell:

  1. Mix dry ingredients.
  2. Mix wet ingredients.
  3. Combine dry and wet ingredients.
  4. Stir in baking soda/vinegar mixture.
  5. Bake!

Here’s my ultimate cream cheese frosting tutorial with step by step photos and troubleshooting guide.

Step by step photo directions to make absolutely perfect red velvet cupcakes... #redvelvetcupcakes

MAKE-AHEAD TIPS

You can make both cupcakes and frosting in advance.

If making 1 day in advance, you can store the cooled cupcakes in an airtight container at room temperature, and refrigerate the frosting, covered, until ready to decorate the cupcakes.

I recommend frosting the cupcakes preferably right before serving, or a few hours prior.

These classic red velvet cupcakes have a smooth velvety texture with buttery soft crumbs. Paired with tangy cream cheese frosting, these homemade cupcakes are simply irresistible! #redvelvetcupcakes

HOW TO STORE CUPCAKES

  • Store unfrosted cupcakes at room temperature, covered, for 1-2 days.
  • You can also freeze unfrosted cupcakes in an airtight container for up to 3 months. Thaw overnight in the refrigerator.
  • Store leftover cupcakes in the refrigerator, covered, for up to 3 days. Cover the cupcakes with a plastic wrap to prevent them from drying out.
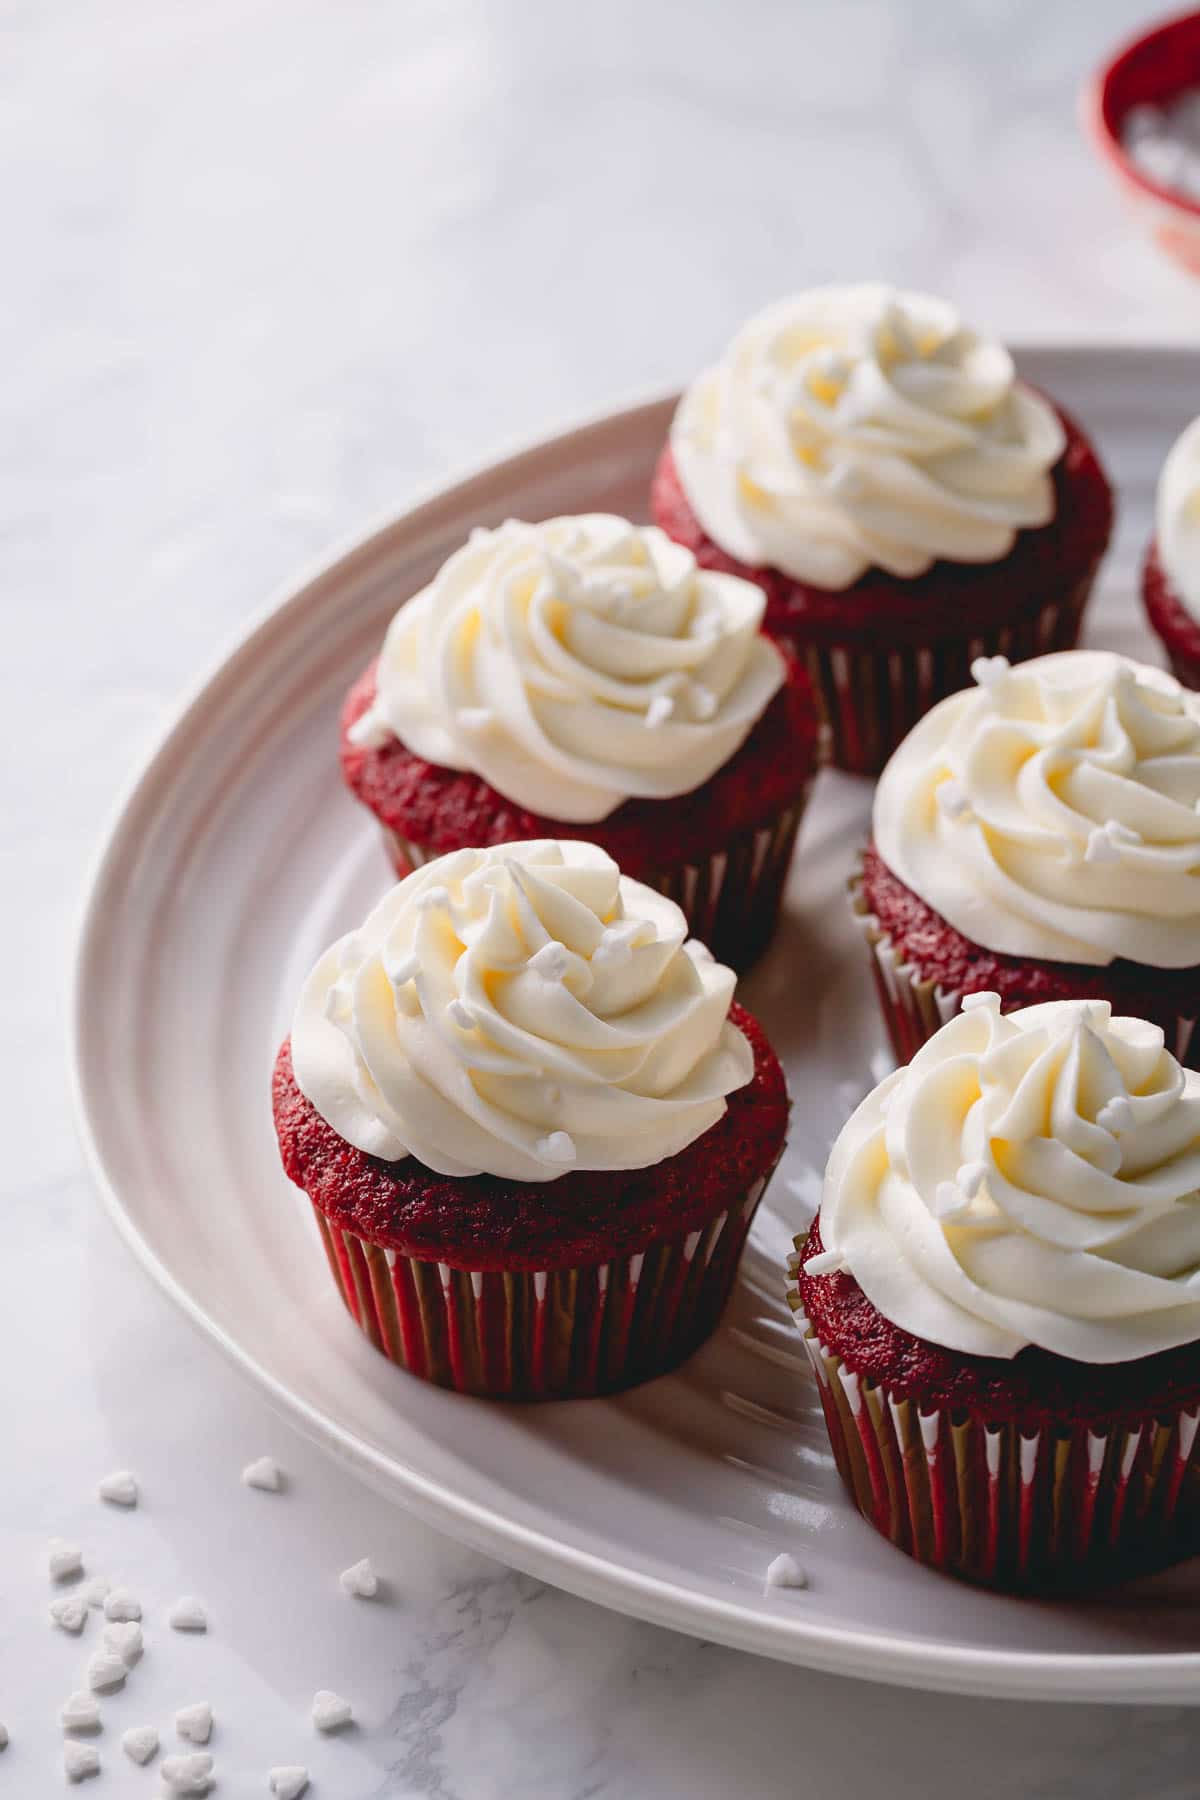
These classic red velvet cupcakes have a smooth velvety texture with buttery soft crumbs. Paired with tangy cream cheese frosting, these homemade cupcakes are simply irresistible! #redvelvetcupcakes

These classic red velvet cupcakes have a smooth velvety texture with buttery soft crumbs. Paired with tangy cream cheese frosting, these homemade cupcakes are simply irresistible! #redvelvetcupcakes

Hope you enjoy this recipe and let me know what you think. 🙂
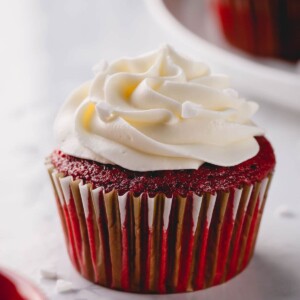
Red Velvet Cupcakes

These classic red velvet cupcakes have a smooth velvety texture with buttery soft crumbs. Paired with tangy cream cheese frosting, these homemade cupcakes are simply irresistible!
4.47 from 13 votes
serves: 12 cupcakes
Prep: 15 minutes
Cook: 20 minutes
Print
Leave a Review

Ingredients

For cupcakes:

  • 1 ½ cups 190gr all-purpose flour
  • 1 cups 200gr sugar
  • 1 tablespoons natural unsweetened cocoa powder Note 1
  • ¼ teaspoon salt
  • 1 large egg at room temperature
  • ½ cup 120ml vegetable oil
  • ¾ cup 180ml buttermilk, at room temperature (Note 2)
  • 1 tablespoon liquid red food coloring or 1 teaspoon gel food coloring (Note 3)
  • 1 teaspoon pure vanilla extract
  • ½ teaspoon baking soda
  • ½ teaspoon white distilled vinegar

For cream cheese frosting:

  • 8 oz 225gr cream cheese, at room temperature
  • ¼ cup 55gr unsalted butter, at room temperature
  • 2 cups 250gr powdered sugar
  • 1 teaspoon pure vanilla extract
  • 1/8 teaspoon kosher salt
Note: I test all my recipes with both measurements for the most precise and accurate result!

Instructions

  • To make the cupcakes, preheat the oven to 350 degrees F (175 degrees C). Line muffin pans with paper cupcake liners.
  • In a medium bowl, whisk together flour, sugar, cocoa and salt. Set aside.
  • In a large mixing bowl with paddle attachment, beat the egg, vegetable oil, buttermilk, red food coloring, and vanilla extract until well combined.
  • Add prepared dry ingredients and mix until smooth, about a minute.
  • In a small dish, mix together baking soda and vinegar. While the soda/vinegar mixture is bubbling, add it to the batter and mix it well.
  • Using a large cookie scoop, fill the cups 2/3 of the way.
  • Bake for about 18-20 minutes, or until inserted toothpick comes out clean.
  • Cool the cupcakes for 5 minutes in the pan. Then transfer onto a wire rack to cool completely.
  • To make the frosting, in a mixing bowl with paddle attachment, beat cream cheese and butter on medium high speed until fluffy, about 1 minute.
  • Add powdered sugar and beat on low speed for a minute. Then increase the speed to medium high and continue to beat until smooth and fluffy, about 3 minutes.
  • Stir in vanilla extract and salt. Whip again until incorporated, 30 seconds.
  • Transfer the frosting into a pastry bag, fitted with decorative tip (I used this __ tip).
  • Frost the cooled cupcakes preferably right before serving, or a few hours prior.

Tips & Notes:

For step-by-step photos and additional notes, read the post above.
Note 1: It's best to use natural cocoa powder for these cupcakes, as Dutch-processed cocoa powder has a darker color, which may result darker cupcakes.
Note 2: If you don't have buttermilk on hand, make a homemade version: stir in 1 teaspoon white vinegar or lemon juice into ¾ cup milk. Let it sit for 5 minutes.
Note 3: Feel free to adjust the amount of food coloring as it's totally up to you how much food coloring to use. The provided amount is to achieve the level of brightness you see on my photos.
Storing Tips:
  • Store unfrosted cupcakes at room temperature, covered, for 1-2 days.
  • You can also freeze unfrosted cupcakes in an airtight container for up to 3 months. Thaw overnight in the refrigerator.
  • Store leftover cupcakes in the refrigerator, covered, for up to 3 days.
* Disclaimer: All nutrition information are estimates only. Read full disclosure here.
Author: Shinee
Did you make this?Show me your creation! Tag me @shineshka and hashtag it #sweetandsavorybyshinee!
  • Facebook
  • Twitter
  • Yummly

This recipe was originally published on December 3, 2013 and updated on January 16, 2019.

My Favorite Red Velvet Cupcakes
Original image from 2013

Related Recipes

  • Ultimate Cream Cheese Frosting
  • Red Velvet Crepe Cake
  • Red Velvet Macarons
  • Ultimate Cream Cheese Frosting

Never Miss a Recipe!

Subscribe and receive my FREE Portion Planning Cheat Sheet for Cocktail and Dinner Parties.

Subscription Preferences
Previous Post
3-Ingredient Bacon Jalapeno Poppers
Next Post
Beef Bone Broth

Reader Interactions

Leave a Review Cancel reply

Your email address will not be published. Required fields are marked *
Made this? Rate this recipe:


This site uses Akismet to reduce spam. Learn how your comment data is processed.

  1. Kaitlyn says

    Posted on 8 March 2021 at 9:30 am

    3 stars
    Pretty good, but the cupcake doesn’t have much flavor.

    Reply
  2. Heather says

    Posted on 16 February 2021 at 5:46 am

    5 stars
    Absolutely delicious! My family and I loved them (:

    Reply
    • Shinee says

      Posted on 18 February 2021 at 2:54 pm

      Yay, so happy you all loved it. Thank you, Heather!

      Reply
  3. Deborah says

    Posted on 26 January 2021 at 3:52 pm

    5 stars
    These are amazing!!!! So easy to make. Can you freeze these with the icing on?

    Reply
    • Shinee says

      Posted on 27 January 2021 at 10:10 pm

      Hi, Deborah! So happy you loved the cupcakes!!! I’ve never frozen frosted cupcakes, and I don’t usually recommend it.

      Reply
  4. Frederick says

    Posted on 5 January 2021 at 4:49 am

    5 stars
    Delicious

    Reply
    • Shinee says

      Posted on 5 January 2021 at 2:10 pm

      Thank you!

      Reply
  5. John says

    Posted on 14 December 2020 at 5:39 am

    5 stars
    I made these and they turned out great! This is a very good recipe. Thank you for sharing it!

    Reply
    • Shinee says

      Posted on 15 December 2020 at 9:41 am

      Awesome!! Thank you for your feedback, John!

      Reply
  6. Mary Claire says

    Posted on 23 October 2020 at 6:38 pm

    5 stars
    It was spectacular , and tasted delicious. I will definitely be making these again.

    Reply
  7. Chrisann says

    Posted on 10 October 2020 at 6:43 pm

    Made these today and theybwere amazing. The only thing I did differently was sift my flour and cocoa powder. Big hit! The cream cheese frosting amazing. Thank you for sharing.

    Reply
    • Shinee says

      Posted on 10 October 2020 at 11:13 pm

      Yay, so happy you tried and loved my red velvet cupcake recipe. Thank you so much for your feedback, Chrisann!

      Reply
  8. Kelsey says

    Posted on 3 September 2020 at 8:05 pm

    Followed the recipe exactly. It was delish! Very moist and pretty fluffy. The icing is a tad runny but still holds it shape rather well while piping. It is also hot in Alabama so that probably didn’t help matters. A little extra powered sugar for the hot summers in the south!

    Reply
    • Shinee says

      Posted on 3 September 2020 at 10:15 pm

      So glad you liked this recipe, Kelsey. Thank you for sharing your feedback!!

      Reply
  9. Caitlin Welch says

    Posted on 24 December 2019 at 5:54 am

    5 stars
    Wonderful recipe!! Very pleased with the outcome! I made them in mini cupcake form for my Christmas goodie box to friends. Will definitely use this recipe again! 

    Reply
    • Shinee says

      Posted on 24 December 2019 at 9:47 am

      Oh, I’m so happy you enjoyed the recipe, Caitlin. Thank you for your feedback!!

      Reply
  10. Robin says

    Posted on 11 December 2018 at 10:19 am

    5 stars
    Oh My Goodness. I have made alot of red velvet desserts using many different recipes. I received so many compliments when I used this recipe. I this only thing that is different from other recipes is mixing the baking soda & vinegar separately. It made all the difference in the world when it comes to taste & texture. Sooo good! For some stupid reason I did not save this recipe when I made it. I have been searching for it ever since lol 2 weeks later, I found it, saved it, printed it, laminated it & put it in a safe place lol. This will be the only RV recipe I use from now on. I did use my own CC buttercream recipe which is the best!!

    Reply
    • Shinee says

      Posted on 11 December 2018 at 2:01 pm

      Hi, Robin! So glad you fount the recipe after all! And thank you for your feedback. Seemingly little things sure make a big difference in baking, don’t they? 😉

      Reply
    • Greg says

      Posted on 29 July 2020 at 4:31 pm

      5 stars
      I’ve tried the recipe and its absolutely good. I wanted to double the recipe and make it a proper cake, how to do it? Should I just double everything or do I need to do some tweaks on the recipe? Thanks!

      Reply
      • Shinee says

        Posted on 29 July 2020 at 10:41 pm

        Hi, Greg. Yep, you can basically double the recipe. Here’s my red velvet cake version: https://www.sweetandsavorybyshinee.com/super-tall-red-velvet-layer-cake/

        Reply
  11. Madlena says

    Posted on 8 March 2018 at 4:14 am

    3 stars
    Hello.
    Cupckakes was ok, they came out nice, but the frosting sucks. It is tasty. but so runny. I will use it in my next cake, but it not for cupcakes. 🙁

    Reply
    • Shinee says

      Posted on 14 March 2018 at 9:44 pm

      Hi, Madlena. Thank you for your honest feedback.

      Reply
  12. Paige says

    Posted on 20 December 2017 at 4:20 pm

    2 stars
    Definitely didn’t like your frosting recipe – it was incredibly runny, even after refrigeratorating. Yes, I used Philadelphia cream cheese in the block – always do. Still way too runny and it greatly decreased the aesthetics of the cupcake. Back to my original frosting recipe I go. 

    Reply
    • Shinee says

      Posted on 22 December 2017 at 9:52 am

      Hey, Paige. I’m sorry your frosting didn’t turn out. You didn’t decrease the sugar amount, right? This’s a no fail cream cheese frosting recipe that I always use. I even used it for a friend’s wedding cupcakes, and they were beautiful, just like the cupcakes on the picture here.

      Reply
    • Ginni says

      Posted on 15 July 2018 at 6:07 pm

      I left the whipping cream out and had the perfect frosting for piping.  You can always use a tiny bit of milk if it’s too thick.

      Reply
  13. Charmain Aranha says

    Posted on 19 October 2017 at 5:39 pm

    5 stars
    I made it and everyone loved it. I want to do more but I’m afraid to double the recipe. Have you ever doubled it, and if so did you get the same results?

    Reply
    • Shinee says

      Posted on 19 October 2017 at 9:20 pm

      I’ve doubled the recipe and it works fine. I have once made this for a friend’s wedding, so I needed to double. But I wouldn’t recommend tripling. 🙂

      And I saw your photo of your cupcakes. They’re gorgeous. Thanks for sharing it!

      Reply
      • Charmain Aranha says

        Posted on 20 October 2017 at 5:40 pm

        Thank you! I will most definitely try more of your recipes. I love the simplicity of this one.

        Reply
      • Rhonda Perry says

        Posted on 30 November 2017 at 8:24 am

        Hello I have made this recipe several times and I must say it gets better every time! My family loves them! I have a question. Can this recipe be doubled and made as a cake instead of cupcakes and still have the same moist flavor and texture? 

        Reply
        • Shinee says

          Posted on 30 November 2017 at 11:08 am

          Hi, Rhonda! So happy you love these cupcakes!! Yes, you can do that. I actually shared the cake version here too. https://www.sweetandsavorybyshinee.com/super-tall-red-velvet-layer-cake/. And thank you for sending the photo of your beautiful cupcakes!

  14. Josephine says

    Posted on 29 March 2017 at 5:08 pm

    I was so excited to try this recipe because Red Velvet is my absolute favorite! I was disappointed with these 😔 I followed the recipe 100% and I have to say my family and I all agree this tasted nothing like red velvet ! It was more like a vanilla dyed red and the frosting was delicious but did not hold.

    Reply
    • Shinee says

      Posted on 29 March 2017 at 11:05 pm

      Hi, Josephine! I’m sorry to hear you were disappointed with the cupcakes. I’m surprised that they taste more like vanilla, despite the addition of cocoa powder. Anyway, I appreciate your feedback and thanks for trying my recipe!

      Reply
  15. Fatuma kaviiri says

    Posted on 5 March 2017 at 11:54 am

    I’ve just made these cupcakes for my daughters cake sale in school,everyone loved them to the point of asking for mums number…thank you so delish

    Reply
    • Shinee says

      Posted on 5 March 2017 at 9:41 pm

      Aww, Fatuma! Thank you for your feedback, it made my day! I’m so happy to hear the cupcakes turned out great. Hope you won’t get too many calls, asking for more cupcakes. 😉

      Reply
  16. Anastasia says

    Posted on 10 February 2017 at 8:06 pm

    Frosting tastes awesome! The cupcakes themselves came out looking great but were a bit heavy, not as light as I’d want a cupcake to be. The egg and buttermilk I used were not at room temperature, could this have been the cause? Otherwise the recipe was awesome, great instructions and super easy to follow for a beginner like me!

    Reply
    • Shinee says

      Posted on 13 February 2017 at 11:55 am

      Hi, Anastasia! So glad you tried my recipe and thank you for your honest feedback. Having egg and buttermilk at room temperature aids the batter to blend better, thus it does affect the texture of the cake. Next time try to bring those ingredients to room temperature before baking and see if there’s difference. Also, don’t mix the batter for too long after you add flour, otherwise too much gluten will form and will make the cake denser.

      Reply
  17. Sarita says

    Posted on 28 January 2017 at 9:48 am

    Hi Shinee, 

    I’ve been searching for a red velvet rfor cite for ages… and yours seems perfect! Just one question though… I live in Portugal and do not get any other vinegar other than white wine vinegar! Can white distilled vinegar be substituted with white wine vinegar? If not can you give me another alternative, I did notice your comment earlier about baking soda and white distilled vinegar replacing baking powder!

    Awaiting your reply as I want too make these soon….they are so yummy! 

    Thank you very much xx

    Reply
  18. Lauren says

    Posted on 1 December 2016 at 6:54 pm

    Hi Shinee,

    It has taken me so long to find a perfect red velvet recipe and this one is it! The cupcakes came out incredibly moist and delicious. Thanks for sharing 

    Reply
  19. nina says

    Posted on 3 March 2016 at 7:02 am

    How did you achieve the bright red color of the cupcakes? Mine turn almost brown everytime 🙁

    Reply
    • Shinee says

      Posted on 3 March 2016 at 10:50 am

      Hi, Nina! What kind of food coloring are you using? I use this McCormick liquid red food coloring and I get that beautiful bright color every time.

      Reply
  20. Kathy says

    Posted on 10 September 2015 at 9:01 pm

    Hi! I made the cupcakes and they turned out amazing! I want to bake a birthday cake in round 9inch pan… Would this recipe work? What are your thoughts on how to bake in oven and temp? Thanks!! 

    Reply
    • Shinee says

      Posted on 12 September 2015 at 10:23 am

      Hi, Kathy! I’m so glad you tried the cupcakes. I’ve never tried making the cake version out of this recipe though. But I don’t see why you couldn’t. I’d bake the cake at 350°F for 20 min and check for doneness by inserting a toothpick in the center. Hope this helps.

      Reply
Older Comments

Primary Sidebar

Welcome!

Hi, I’m Shinee! I’m so happy you’re here! I believe anyone can cook restaurant-quality food at home! And my goal is to help you to become a confident cook with my easy-to-follow recipes with lots of tips and step-by-step photos.

New? Start Here

Browse Specialties

Main Dishes Side Dishes Appetizers Salads Breads & Pastries Cakes Macarons Drinks Browse All
Portion Planning 101
Free Dinner Party Cheat Sheet
Download Now

Easy and Healthy Dinners

salad:

Chicken Quinoa Salad

Stuffed chicken roll-ups with asparagus and cheese and smeared with fragrant pesto - an effortlessly impressive and satisfying main dish, or even an appetizer!

chicken:

Stuffed Chicken Roll-Ups

seafood:

Baked Salmon Cakes

chicken:

Spicy Chicken Skewers

seafood:

Garlic Butter Shrimp

seafood:

Seared Ahi Tuna

Facebook Instagram Pinterest YouTube

Never Miss A Recipe

Subscribe and receive my FREE Portion Planning Cheat!

Send Me:
  • Discover
    • Recipe Index
    • Tools & Gadgets
    • Ingredients
  • Learn
    • Baking Basics
    • Cooking Basics
    • Advanced Techniques
  • Share
    • Holidays
    • Appetizers
    • Party Planning 101
  • Back To Top
  • About
  • Work With Me
  • Privacy Policy
  • Contact
© 2013-2021 Sweet & Savory Site Credits Designed by Melissa Rose Design Developed by Once Coupled Exclusive member of Mediavine Food
Opens in a new window Opens an external site Opens an external site in a new window

Subscribe and Receive My FREE Portion Planning Cheat!

Send Me: