
Master the art of royal icing with this complete tutorial with step-by-step photos and tips on getting the right consistency. This proven 4-ingredient royal icing recipe makes the most gorgeous fluffy royal icing with a soft bite.

What is royal icing?
Royal icing is an icing that hardens as it dries! The base of a royal icing is whipped egg whites or meringue powder and powdered sugar.
The mixture whips into a light, glossy, and bright white icing that’s ideal for decorating sugar cookies, gingerbread houses, and more!
You can color the icing to make festive and bright shades for fun and elaborate designs.

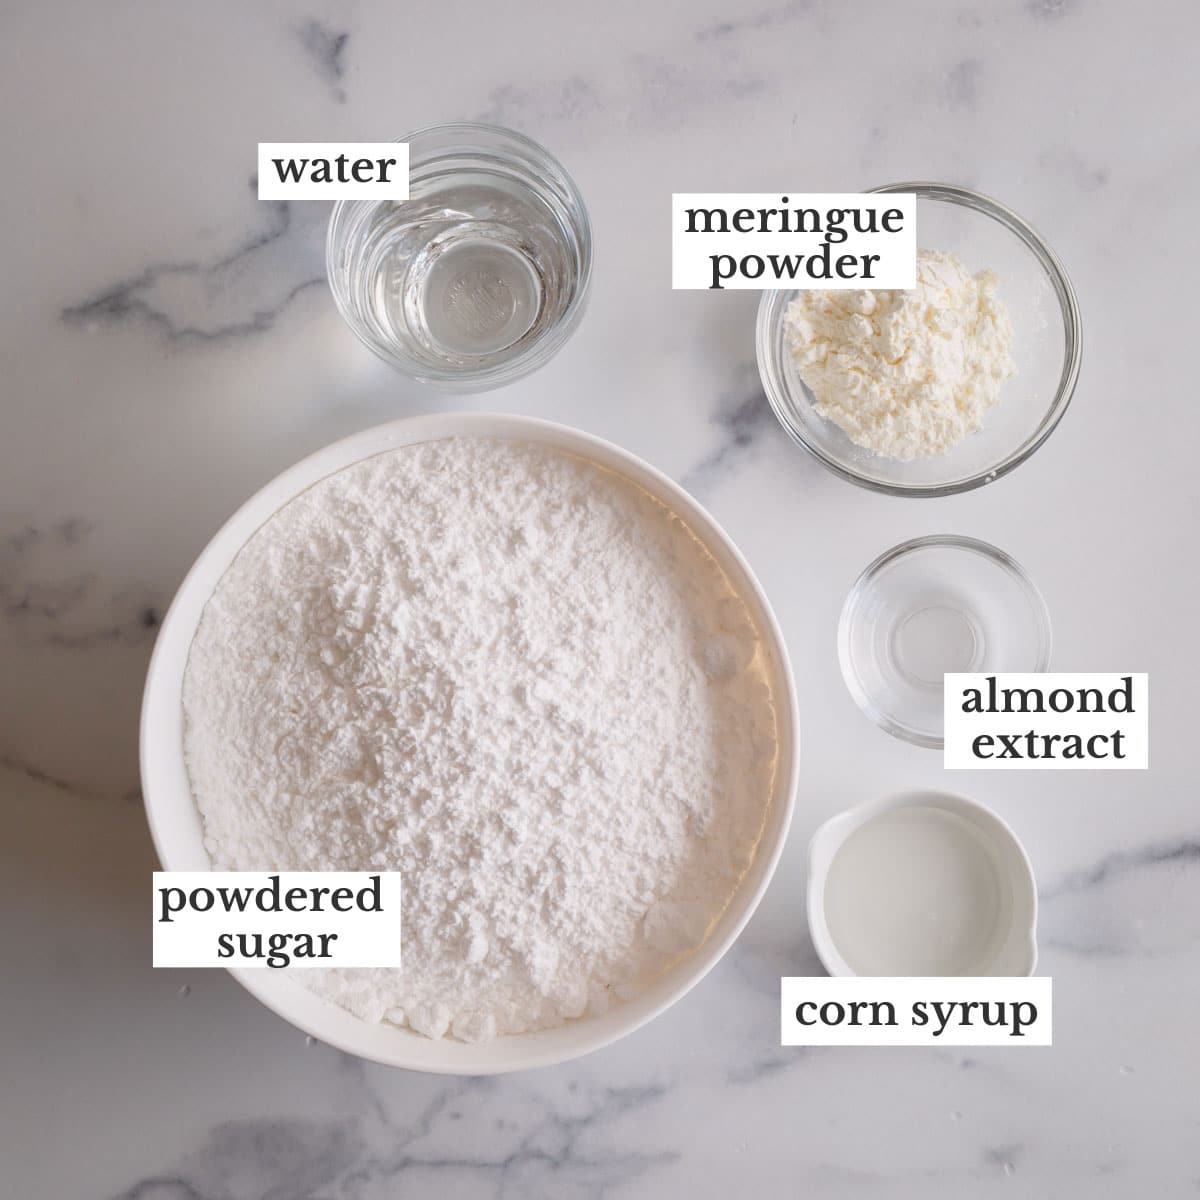
Royal Icing Ingredients:
- Meringue powder is a dry, powdered substitute for egg whites. It’s convenient because it eliminates the need to use raw egg whites, reducing the risk of foodborne illnesses associated with consuming raw eggs. My go-to meringue powder brand is Genie’s Dream. You can find meringue powder at your local craft store in the cake decorating section.
- Water is used to revive the meringue powder into a meringue and to thin out the icing so it’s not too thick. Royal icing thickens as you whip it.
- Powdered sugar – For a silky smooth consistency!
- Corn syrup – While it’s an optional ingredients, a tablespoon of corn syrup gives the icing a soft bite and a nice sheen.
- Almond extract – If you don’t like the flavor of almond extract, you can swap it with vanilla.
Meringue powder vs Powdered egg whites
Meringue powder and powdered egg whites are similar, but not the same!
Both are made from dried egg whites, but meringue powder contains cornstarch, sugar, and cream of tartar as well. These additional ingredients give you a stable and light meringue.
Useful Tools:
Royal icing is easy to make, but requires a few tools to be successful.
- Electric mixer – Whipping egg whites by hand is tiresome at best! Use a stand mixer or electric hand mixer for best results.
- Tipless piping bags – I buy them online. But you can buy disposable piping bags at your local craft store or make your own with parchment paper. Technically, you can use tips and couplers, but I find it much easier to achieve fine lines without them.
- Food coloring – I prefer gel food coloring. It’s a thick gel so it won’t mess up the consistency of the icing and gives you a brighter hue. You can find gel colors in nearly any shade! If you’re aiming for a light pastel, use a toothpick or scriber to add a tiny amount of coloring. Keep in mind, like paint the icing will dry slightly darker than it is.
- Scriber – You can purchase this handy tool at your local craft store or on Amazon. Mine came with the tipless piping bags. It looks like a pen with a needle on the end of it. A scriber makes it easy to move the royal icing into corners and tiny edges. A toothpick isn’t as easy to use, but works in a pinch.
How to make royal icing:
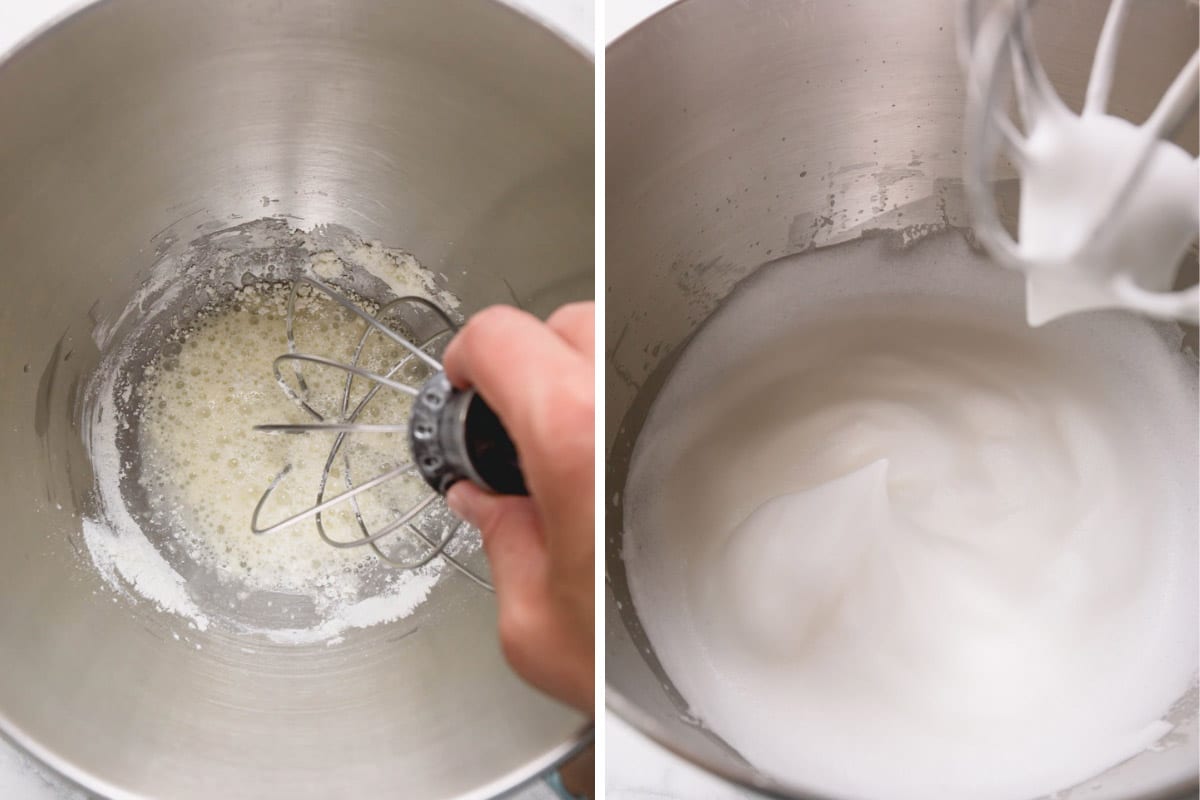
1. Prepare the meringue
- Hand mix the meringue powder and water until frothy in the bowl of a stand mixer. And let it sit for 5 minutes.
- Whisk the mixture on medium speed with the whisk attachment until soft peaks form, about 2 minutes. Soft peaks flop over and curl downwards when you pick up the whisk.
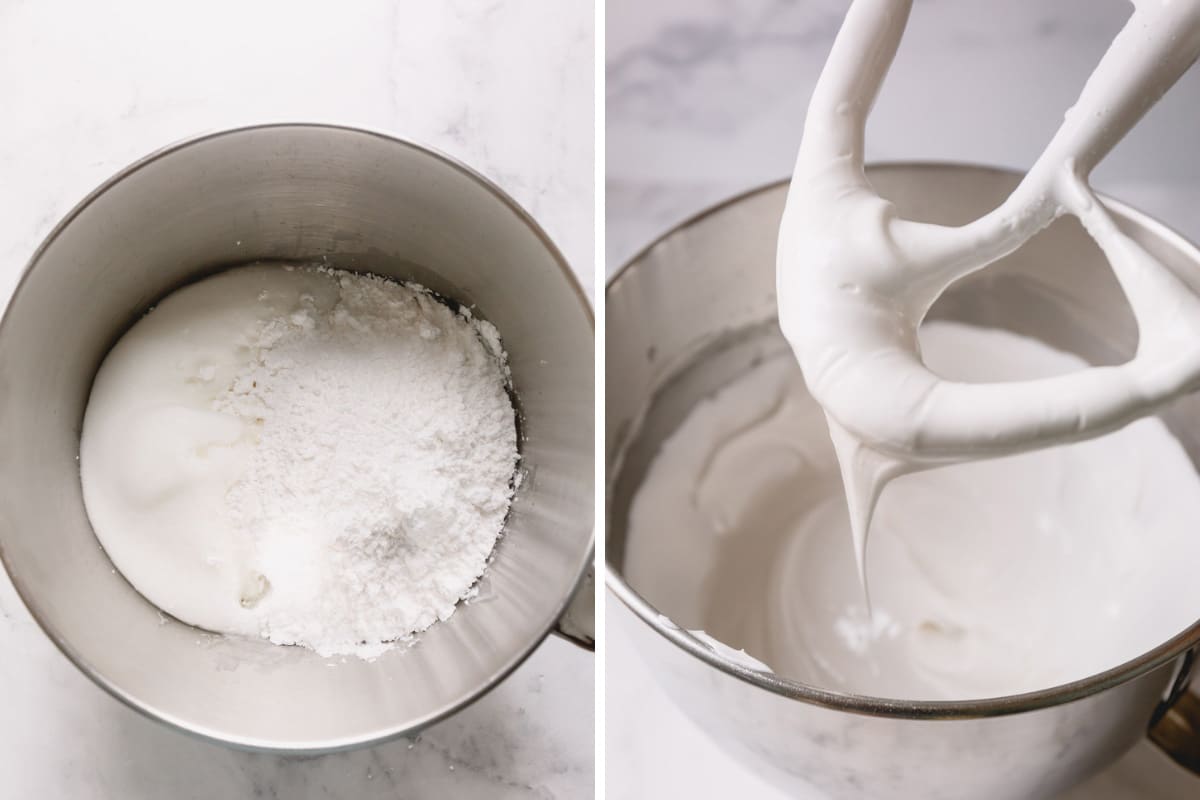
2. Make the icing
- Add the powdered sugar, corn syrup, and almond extract to the meringue.
- Switch to the paddle attachment and whip the icing on low (speed 2) until smooth, about 1 minute. The icing thickens as you whip it.
At this stage, I prefer to make a thick royal icing, like toothpaste consistency, so that I can fine-tune the consistency later in small batches when adding food coloring.
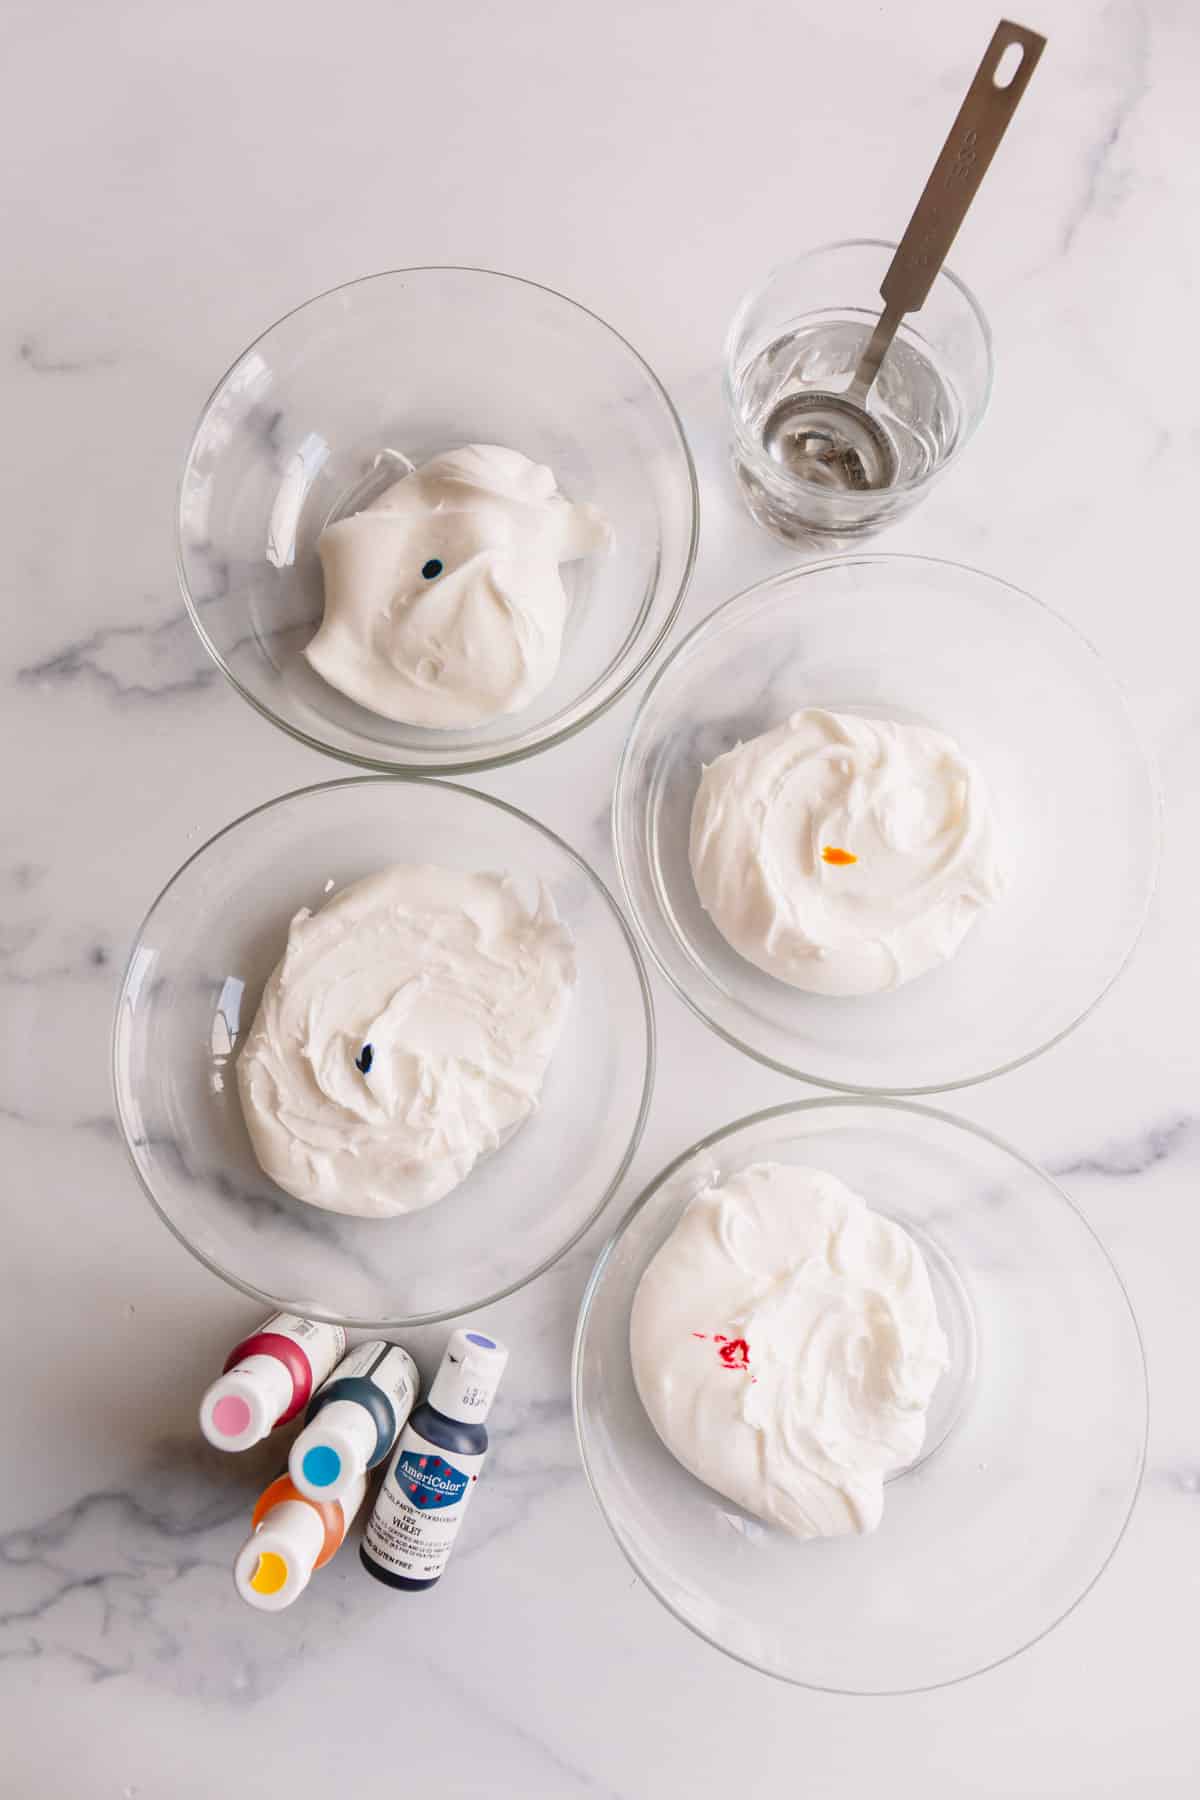
3. Add food coloring
- Once the base royal icing is done, divide the icing into separate bowls to color and adjust the consistency further. TIP: Cover each bowl with a plastic wrap to prevent drying out.
- For nice pastel colors, use a toothpick (or a scribe) to swipe a small amount of food coloring.
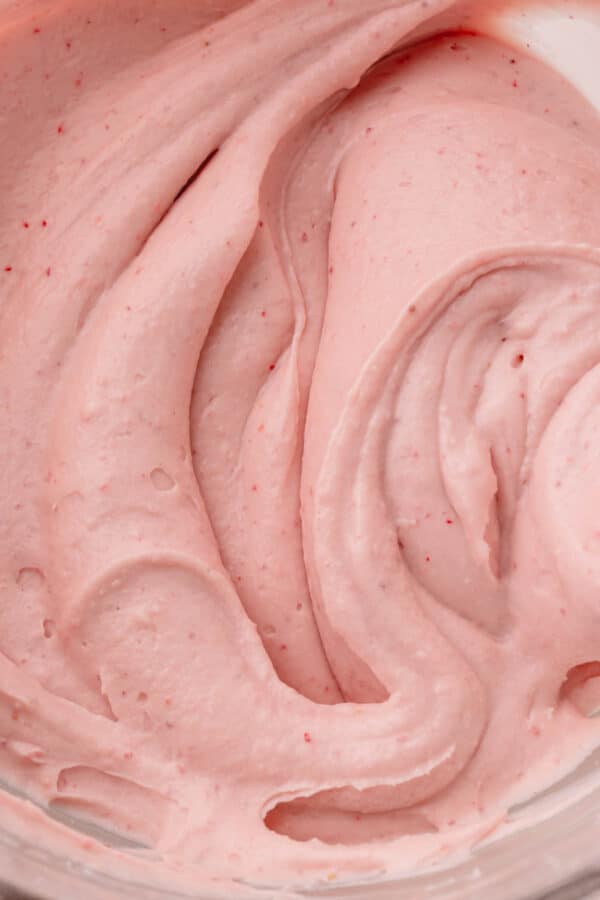
- For richer color, be sure to let the icing rest for 10-15 minutes, or overnight, to let the colors develop. This is exactly how I make my bright red royal icing.
one bowl method
Use one bowl to mix multiple colors of royal icing in the same bowl. Simply start with the lightest color and scrape the bowl well with a silicone spatula. Here, I started with yellow, then orange, blue, and finally purple icing.

Royal Icing Consistency
Outline vs Flood consistency
There are 2 common consistencies of royal icing: outline and flood consistency.
- Outline consistency is a thicker royal icing used for piping an outline around the edges of cookies. This consistency is also great for creating intricate designs and writing.
- To test: When you let the icing fold on itself, it doesn’t melt into itself on its own. Only when you give it a good shake, it’ll smooth out.
- Flood consistency is a thinner royal icing used to fill in the design.
- To test: Scoop the icing and let it drop off the spatula. If the icing slowly runs off the spatula in a continuous ribbon, it’s perfect! If the icing plops in one chunk and stops, add a little bit of water to thin it out.
Hybrid consistency
However, I find it cumbersome to mix different consistencies of each color of royal icing to decorate cookies.
That’s why prefer to make a hybrid royal icing. It’s thick enough to pipe an outline and thin enough to fill the cookies.
Test the consistency
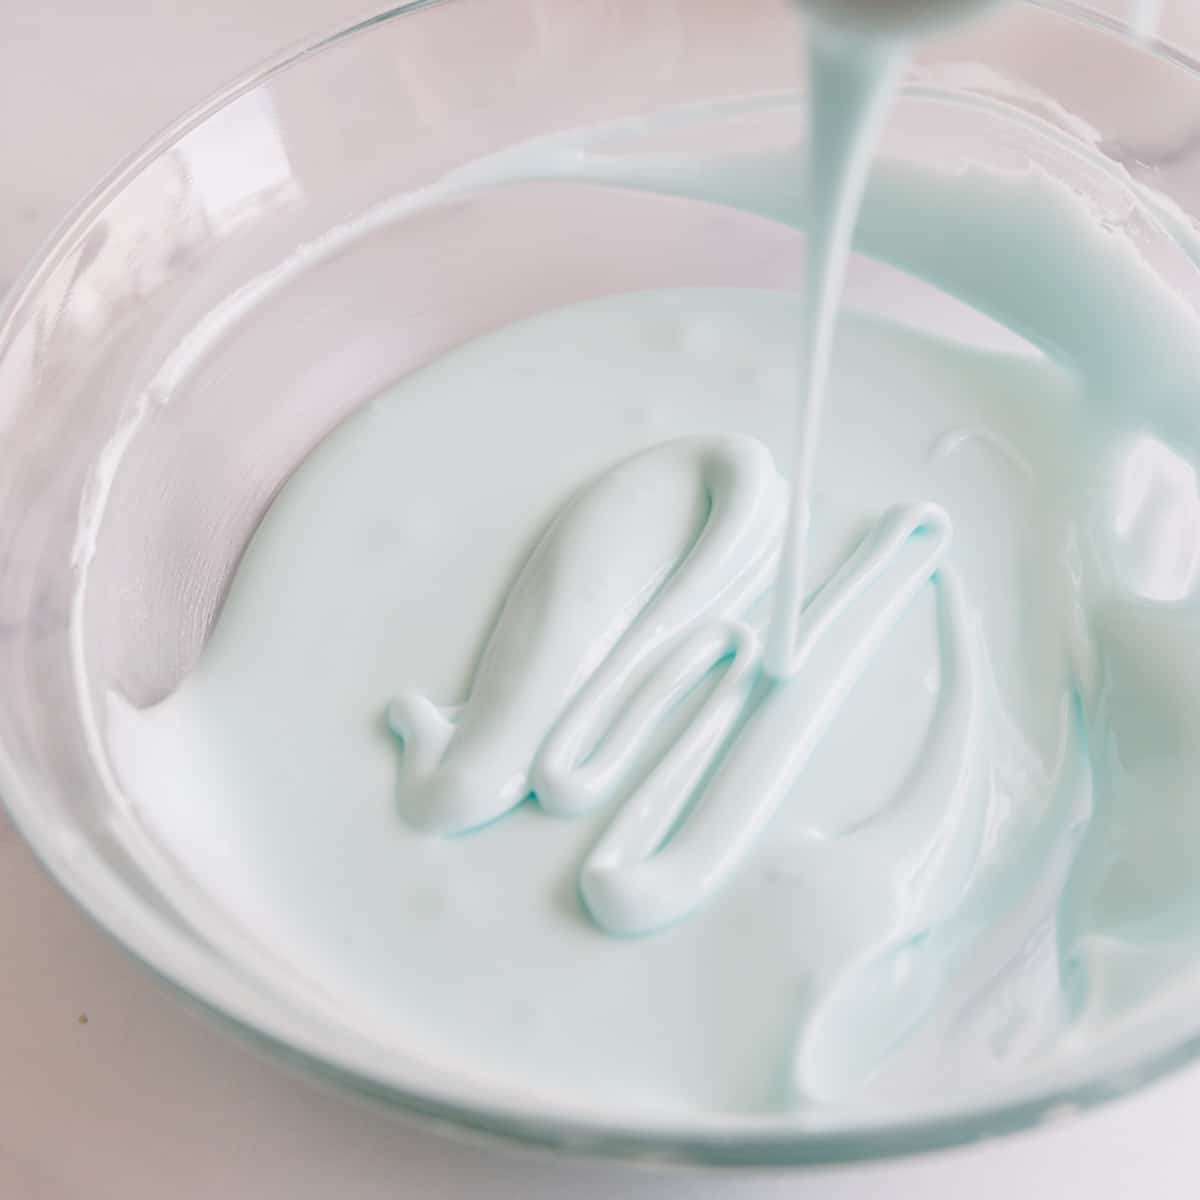
The consistency of the hybrid royal icing is like a thicker honey. Here’s how to test it:
- Scoop the icing with a spatula and let it drop back into the bowl.
- Observe. The icing should slowly fall into a continuous ribbon. The ribbon melts into itself within about 15 seconds or with a couple of gentle shakes.
How to decorate with royal icing
Transfer the prepared royal icing into piping bags. I use tipless piping bags for royal icing and cut a teeny-tiny corner at the tip. You need a small hole, so start small. You can always cut more if you need to, but you can’t go back if you cut too much.
To pipe an outline, hold the piping bag slightly over the cookies, ensuring the seam is on the bottom, and squeeze from the top of the bag. Let the icing fall in place as you slowly lead the piping bag.


To flood the design, immediately after piping the outline fill the center with more icing. Use a scribe tool (or a toothpick) to spread the icing evenly. You can also slightly poke into the cookie with a scribe and shake the cookie to smooth out the icing.
Decorate one cookie at a time. Pipe an outline first and immediately flood it for smooth icing.
It’s all about how you squeeze
How much pressure you give when you squeeze the piping bag determines how much icing comes out. With a gentle squeeze, you can outline the cookies. And to flood the cookies, squeeze the bag with more pressure to fill the design.


Tips for Success:
- I prefer one consistency for outlining and flooding, aka hybrid consistency.
- You can flavor the icing with different extracts, such as vanilla, almond, peppermint, etc. Use about ¼ teaspoon per batch.
- Don’t overmix the icing, or the protein structure of the egg whites weaken and the icing won’t set properly.
- Let the icing dry completely before stacking and storing. It could take 8-24 hours, depending on humidity. I let mine dry overnight.
- Always store the icing in an airtight container to prevent the top from drying out. Cover the rest of the icing with plastic wrap when working in small batches to color the icing. If little bits of dried icing get mixed into wet icing, the icing will get stuck when you try to pipe it!
- Transfer the icing into a piping bag and decorate your cookies. Don’t overfill the piping bag or it will be harder to pipe.
- You can use piping bag ties to prevent the icing from oozing out the top of the bag. This is especially helpful when you’re using lots of colors and switching between them.
Storing Tips:
Store royal icing in an airtight container for up to 2 weeks. You can store it on the counter or in the refrigerator.
Royal icing is freezer-friendly! If you’re not planning to use up the royal icing within a week or two, place it in an airtight container and freeze for up to 2 months.
Keep them airtight
I store the leftover royal icing in the piping bags. Clip the cut end of the piping bags with a clip and place the leftover icing in an airtight container, or a freezer bag.
When ready to use, thaw the icing completely. Transfer into a clean bowl and re-mix the icing before re-bagging and decorating the cookies.
It’s normal for the icing to separate in the piping bag, the water separates during storage and pools down on the bottom. That’s why it’s important to mix the icing well before re-using.

Troubleshooting Common Royal Icing Issues:
Royal icing stays wet and never dries
The culprit is most likely over-whipped icing. Over mixing weakens the protein structure of the meringue.
Royal icing has craters when it dries
Craters or tiny holes are bound to happen sometimes! It could be from overmixing, or it could be how you piped the icing. An easy fix – use the scribe tool to pop any bubbles you see so they can settle back into the icing before it dries.
Royal icing wrinkled during drying
The culprit is poor air circulation while they dry. Do NOT cover the cookies with wet icing. Let them air-dry longer than you think they need to. The cookies shouldn’t dry out during this time.
The royal icing is too hard after it’s set
Too much meringue powder will cause the icing to set too hard. If you follow this recipe exactly, you shouldn’t have this issue!
Royal icing is dull
When the icing dries slowly, it gets dull. If you want a glossy sheen, try placing the iced cookies next to a fan for the first 15 minutes or so. Also, don’t skip the corn syrup! Corn syrup creates a shinier icing.
Royal Icing FAQs:
Regular icing doesn’t harden like royal icing. With regular icing, the top layer of the icing forms a thin crust but it’s easy to mess up. If you accidentally touch it or layer the cookies, the icing will smudge. With royal icing, once the icing hardens it doesn’t smudge or move around. This allows you to pipe elaborate designs!
The egg whites in the meringue powder cause the icing to harden as it dries!
Royal icing is an ideal choice for those who want to create colorful and elaborate designs that won’t smudge. You can let one layer dry before you add more details to ensure the design is flawless.

How to Make Royal Icing
Ingredients
- 3 tablespoons (18 g) meringue powder
- 3 oz (88 ml) water plus more if needed Note 1
- 16 ounces (450 g) powdered sugar
- 1 tablespoon (10 g) corn syrup Note 2
- ¼ teaspoon almond extract Note 3
Equipment
- stand mixer with the whisk and paddle attachment
Instructions
- In a large mixing bowl with a whisk attachment, hand mix meringue powder and water until frothy. Let it sit for 5 minutes.
- Whisk the mixture on medium speed until soft peaks form, about 2 minutes.
- Add the powdered sugar, corn syrup, and almond extract to the meringue.
- Switch to the paddle attachment and whip the icing on speed 2 until nice and smooth, about 1 minute. The icing will thicken as you whip it. Don’t over-whip it!
- Check the consistency of the royal icing by scooping it and letting it drop into a ribbon. If it melts back into the rest of the icing within 10 seconds, it’s perfect. If it’s too thick, add a little water, ½ teaspoon at a time, until you reach the desired consistency. If it’s too runny, whip it a little longer, or add more powdered sugar.
⭐️ Did you make this recipe?
Please leave a review and let us know how you liked it!
Tips & Notes
Note 2: Corn syrup adds a nice sheen and gives the icing a soft bite. Note 3: You can use any flavoring extracts, such as vanilla (1 teaspoon), peppermint, etc. Storing Tips:
– Store royal icing in an airtight container for up to 2 weeks. You can store it on the counter or in the refrigerator.
– Royal icing is freezer-friendly! If you’re not planning to use up the royal icing within a week or two, place it in an airtight container and freeze for up to 2 months.
– When ready to use, thaw the icing completely. Transfer into a clean bowl and re-mix the icing before re-bagging and decorating the cookies. It’s normal for the icing to separate in the piping bag, the water separates during storage and pools down on the bottom. That’s why it’s important to mix the icing well before re-using.
Nutrition


Devem ser uma delicia…!!!! Obrigada Shinee…se não tiver pó de merengue. ,como faço com claras ?????