Chocolate-dipped strawberries are simple yet delicious treats to decorate cakes and cupcakes, or even just enjoy as a snack! While it’s an easy process, here are a few secrets to achieving a flawlessly smooth and shiny chocolate finish without gray streaks, or a sticky mess!
Pin this now to find it later
Pin ItWhy you’ll love this recipe:
I’m a big fan of fresh strawberries, especially when dipped in chocolate! There’s nothing better than ripe, juicy strawberries covered in rich, velvety chocolate.
While chocolate covered strawberries are a fantastic dessert all on their own, they can also be a garnish for treats like Strawberry Chocolate Cupcakes.
- Easy – You only need two main ingredients and a handful of tips and tricks for success.
- Popular – Strawberries covered in chocolate are perfect for holidays, anniversaries, or a simple weeknight dessert.
- Delicious – Sweet strawberries and silky smooth chocolate that has the perfect amount of “snap” when you bite into it!
After mastering this easy recipe for chocolate covered strawberries, you’ll never be tempted to purchase store-bought varieties again!

Key Ingredient Notes:
High-quality ingredients are always important because they significantly improve the taste and texture of whatever you’re making. However, quality is even more important when your recipe only calls for two ingredients like these chocolate covered strawberries.
- Strawberries – Fresh, perfectly ripe, firm strawberries (with the stems intact) are key. Frozen strawberries or strawberries that have become overly ripe and mushy will not work.
- Chocolate – I recommend using high-quality couverture chocolate for the best flavor and texture. Couverture chocolate is a superior form of chocolate with a higher percentage of cocoa butter, making it ideal for tempering and dipping. However, I’ve also had great success with a grocery store staple Ghirardelli baking chocolate bar!
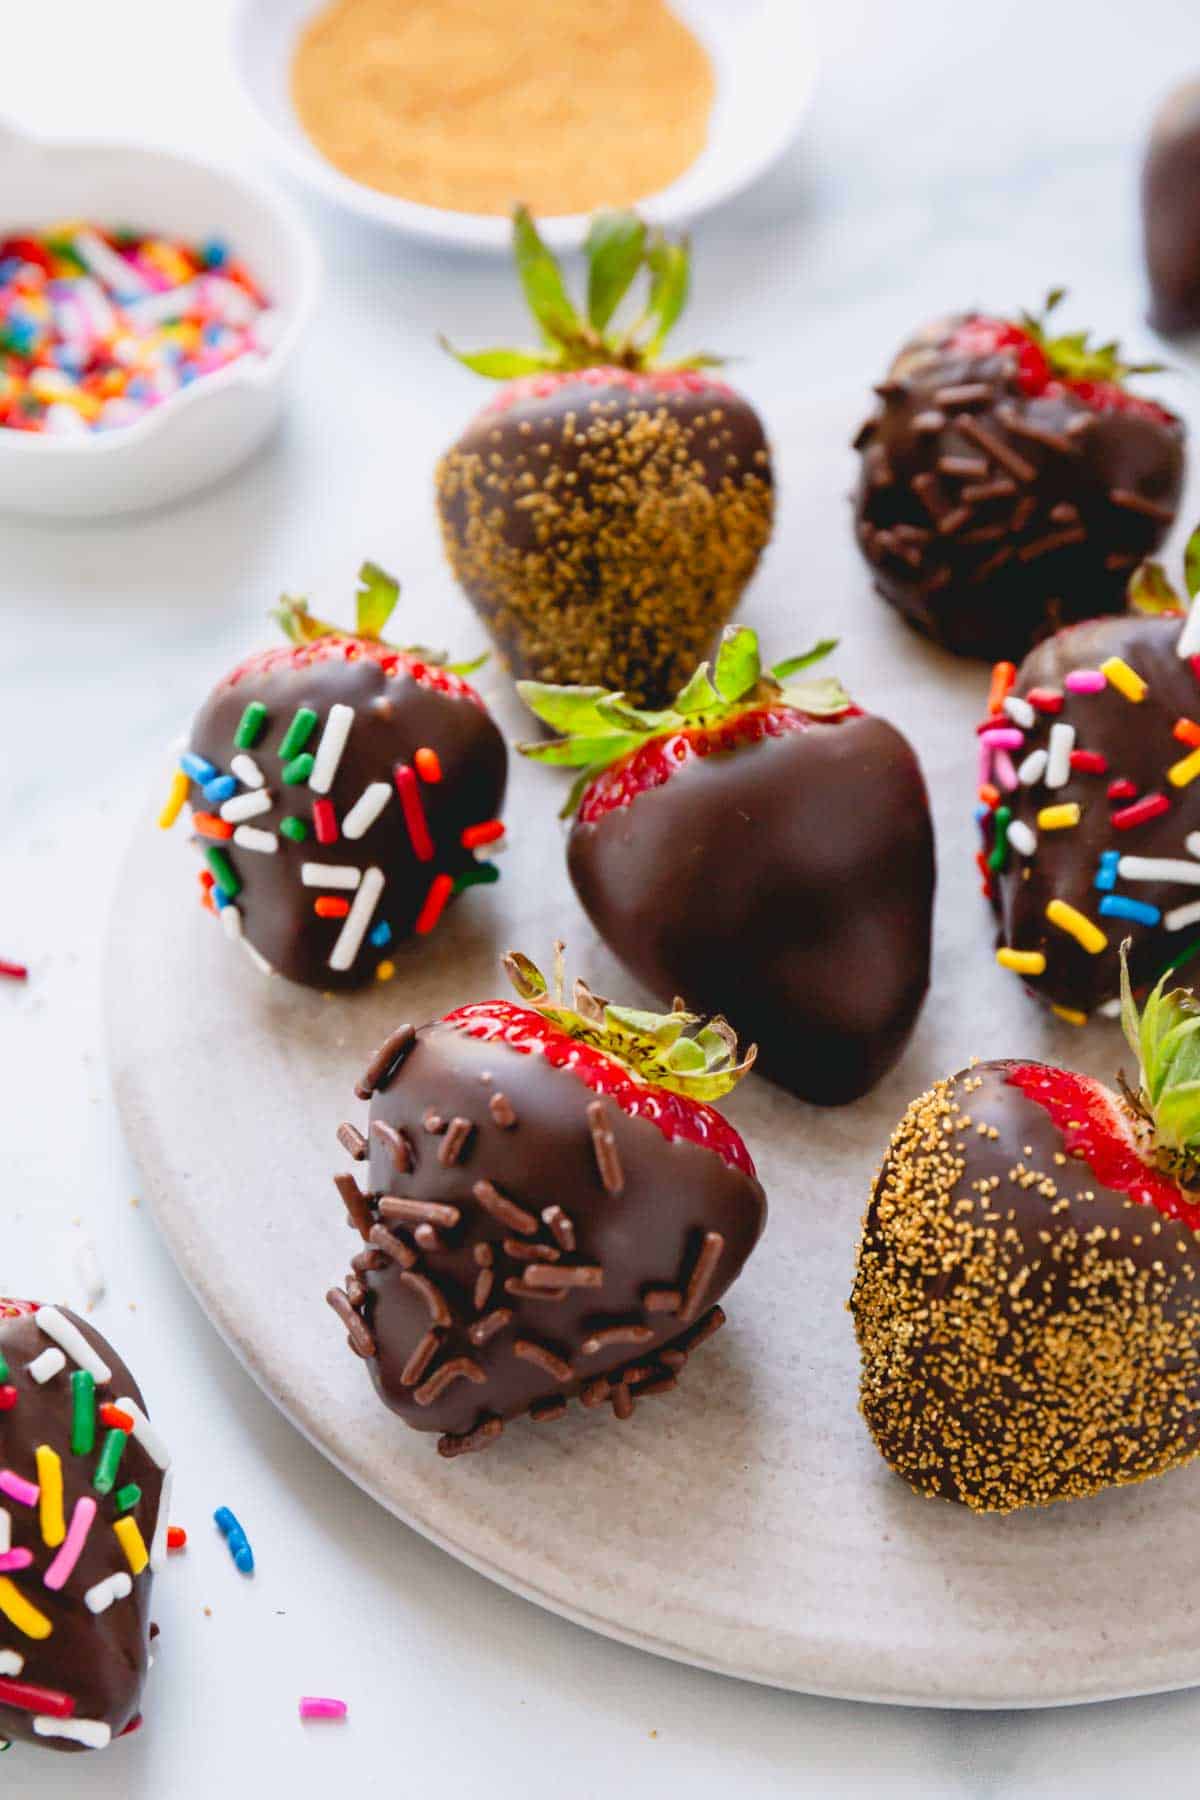
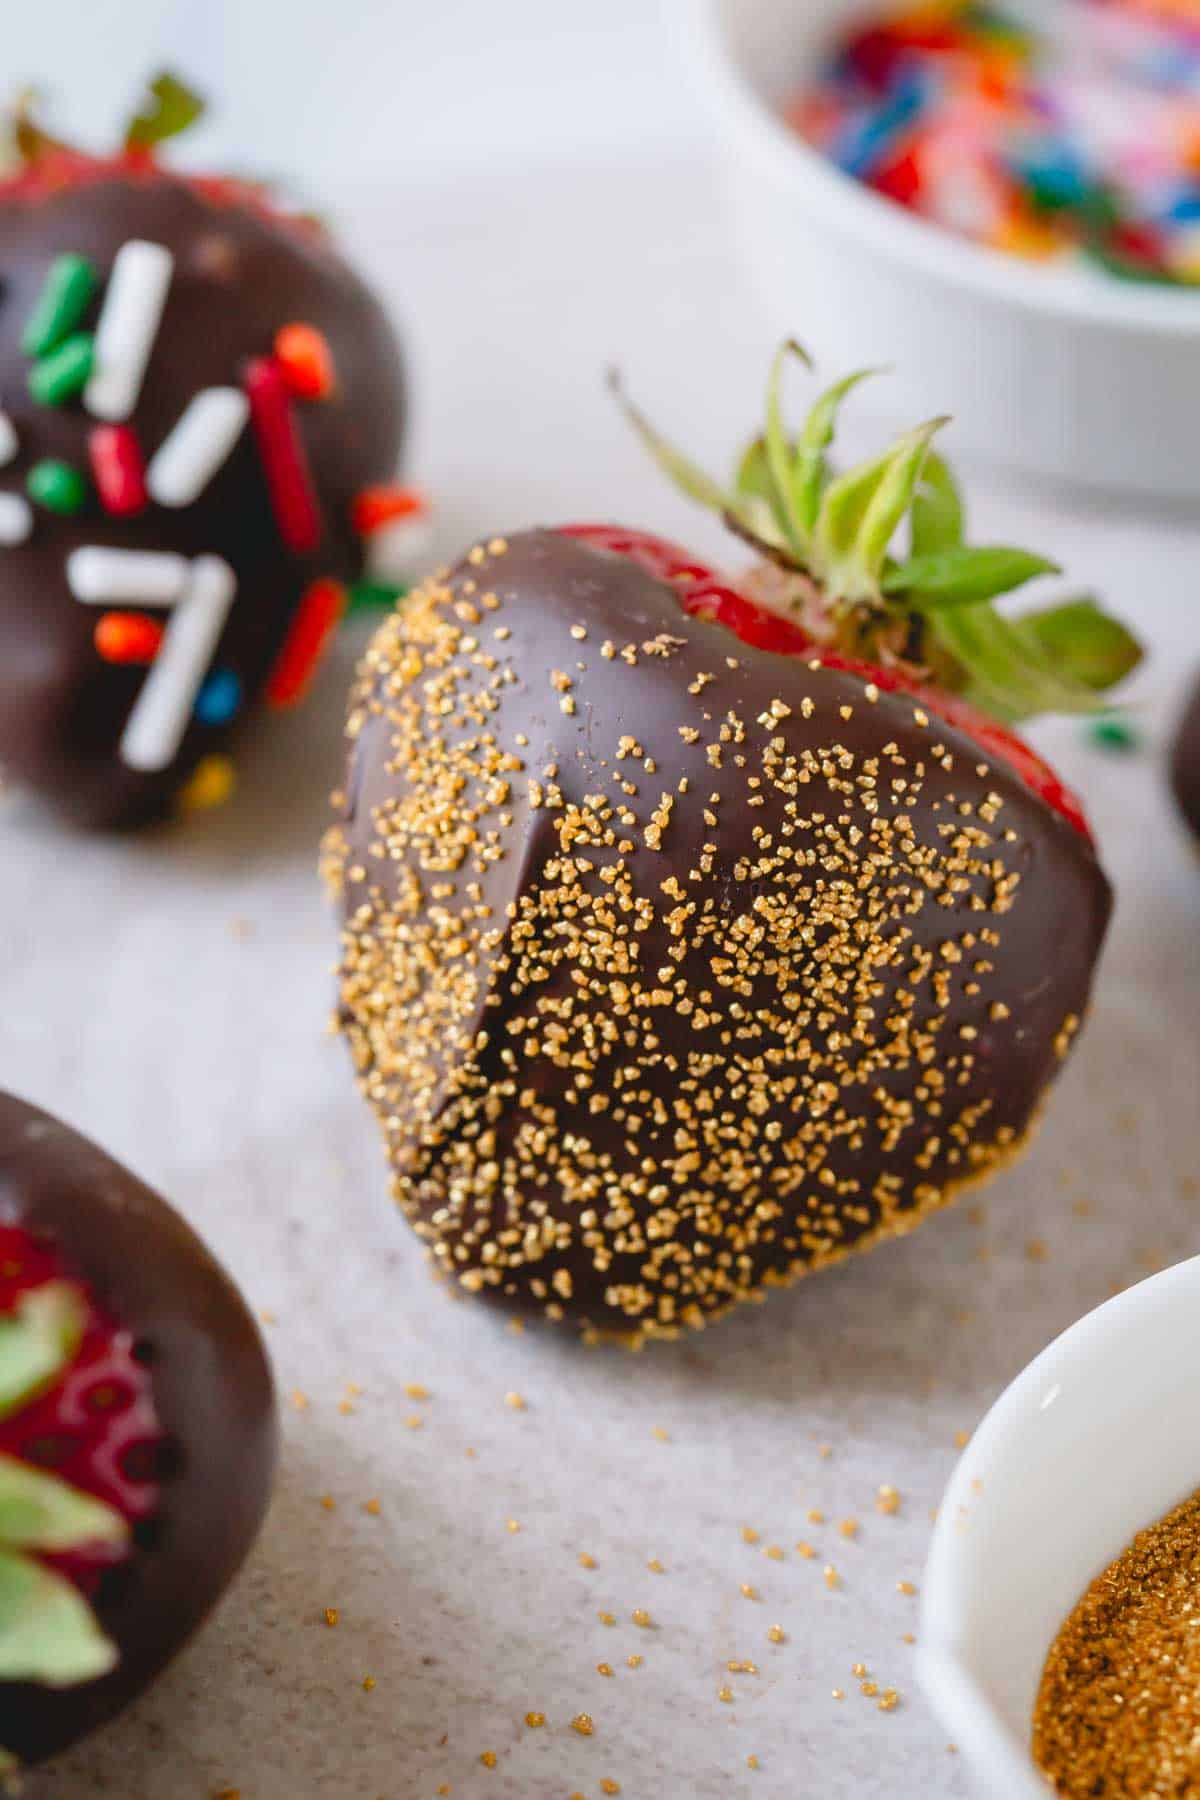
- Toppings – Extra toppings are optional, but I highly recommend adding them! Crushed nuts, sprinkles, shredded coconut, chocolate shavings, or even just a drizzle of extra chocolate adds a nice touch.

How to make this chocolate covered strawberries recipe:
1. Prepare the strawberries
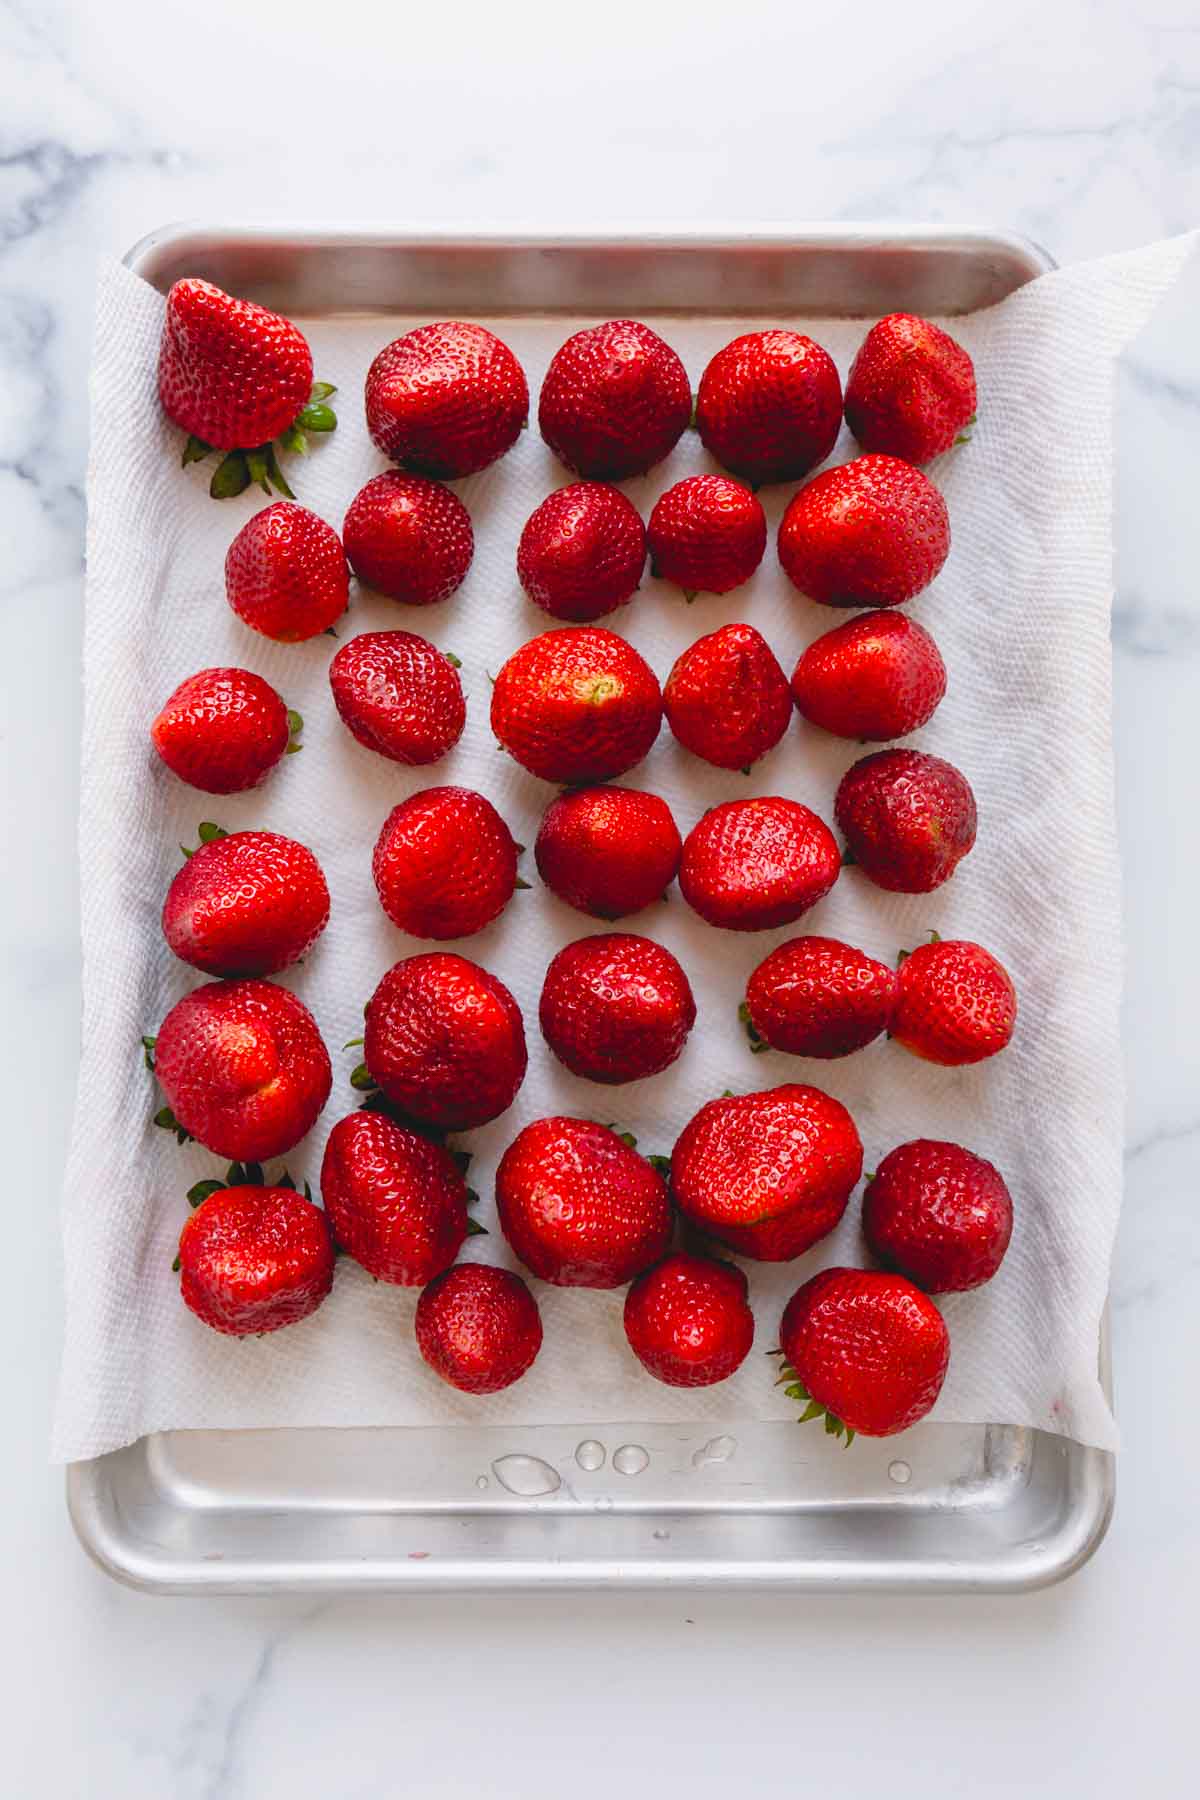
Before you get started, wash the strawberries and let them thoroughly dry. Lay them in a single layer on a baking sheet lined with a paper towel until they have completely dried.
Then, prepare a second baking sheet lined with a silicone mat or wax paper.
Don’t skip this step!
Make sure the strawberries are completely dry and at room temperature before dipping them in chocolate.
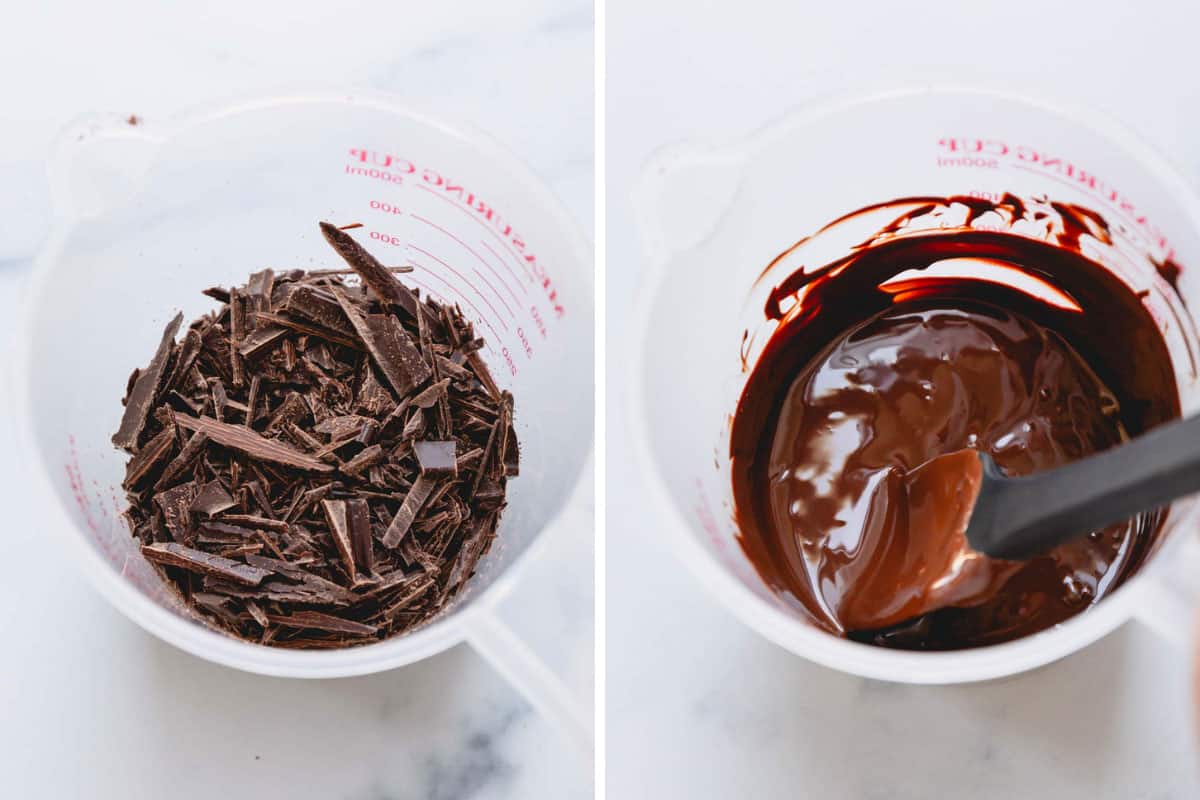
2. Melt the chocolate
- Chop the chocolate into small pieces, and place it into a plastic or silicone bowl. I do not recommend using a glass bowl!
- Microwave the chocolate for 1 minute at 100% power (in a 1000Watt microwave).
- Stir the chocolate well, and microwave it for an additional 10 seconds at 100% power. Continue to microwave the chocolate in 10-second increments, if needed, until the chocolate is fully melted.
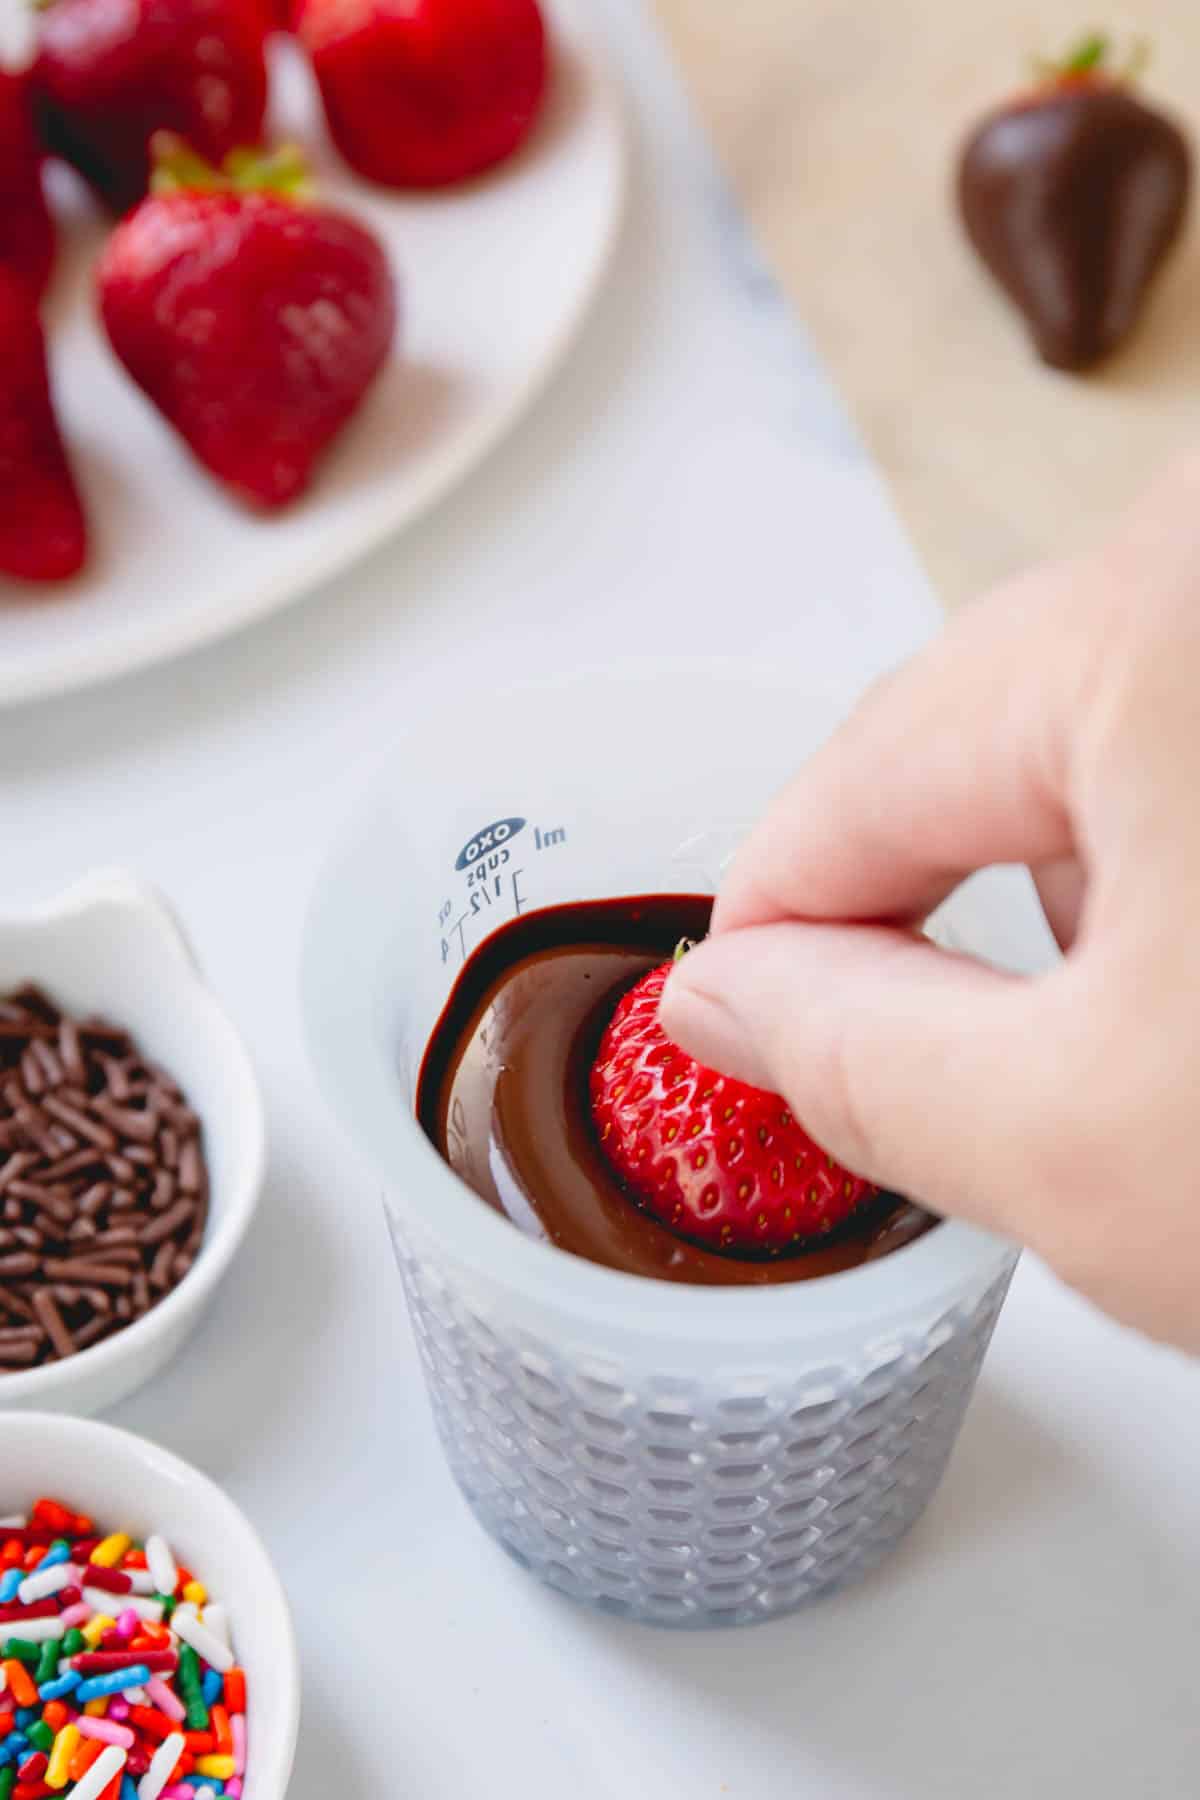
3. Dip and decorate
- Dip the strawberries. When the chocolate is fully melted and smooth, hold a clean strawberry by the stem, and dip it into the melted chocolate. Don’t dunk it in completely! You want to cover the strawberries about 75% of the way with chocolate. Let any excess chocolate drip off.
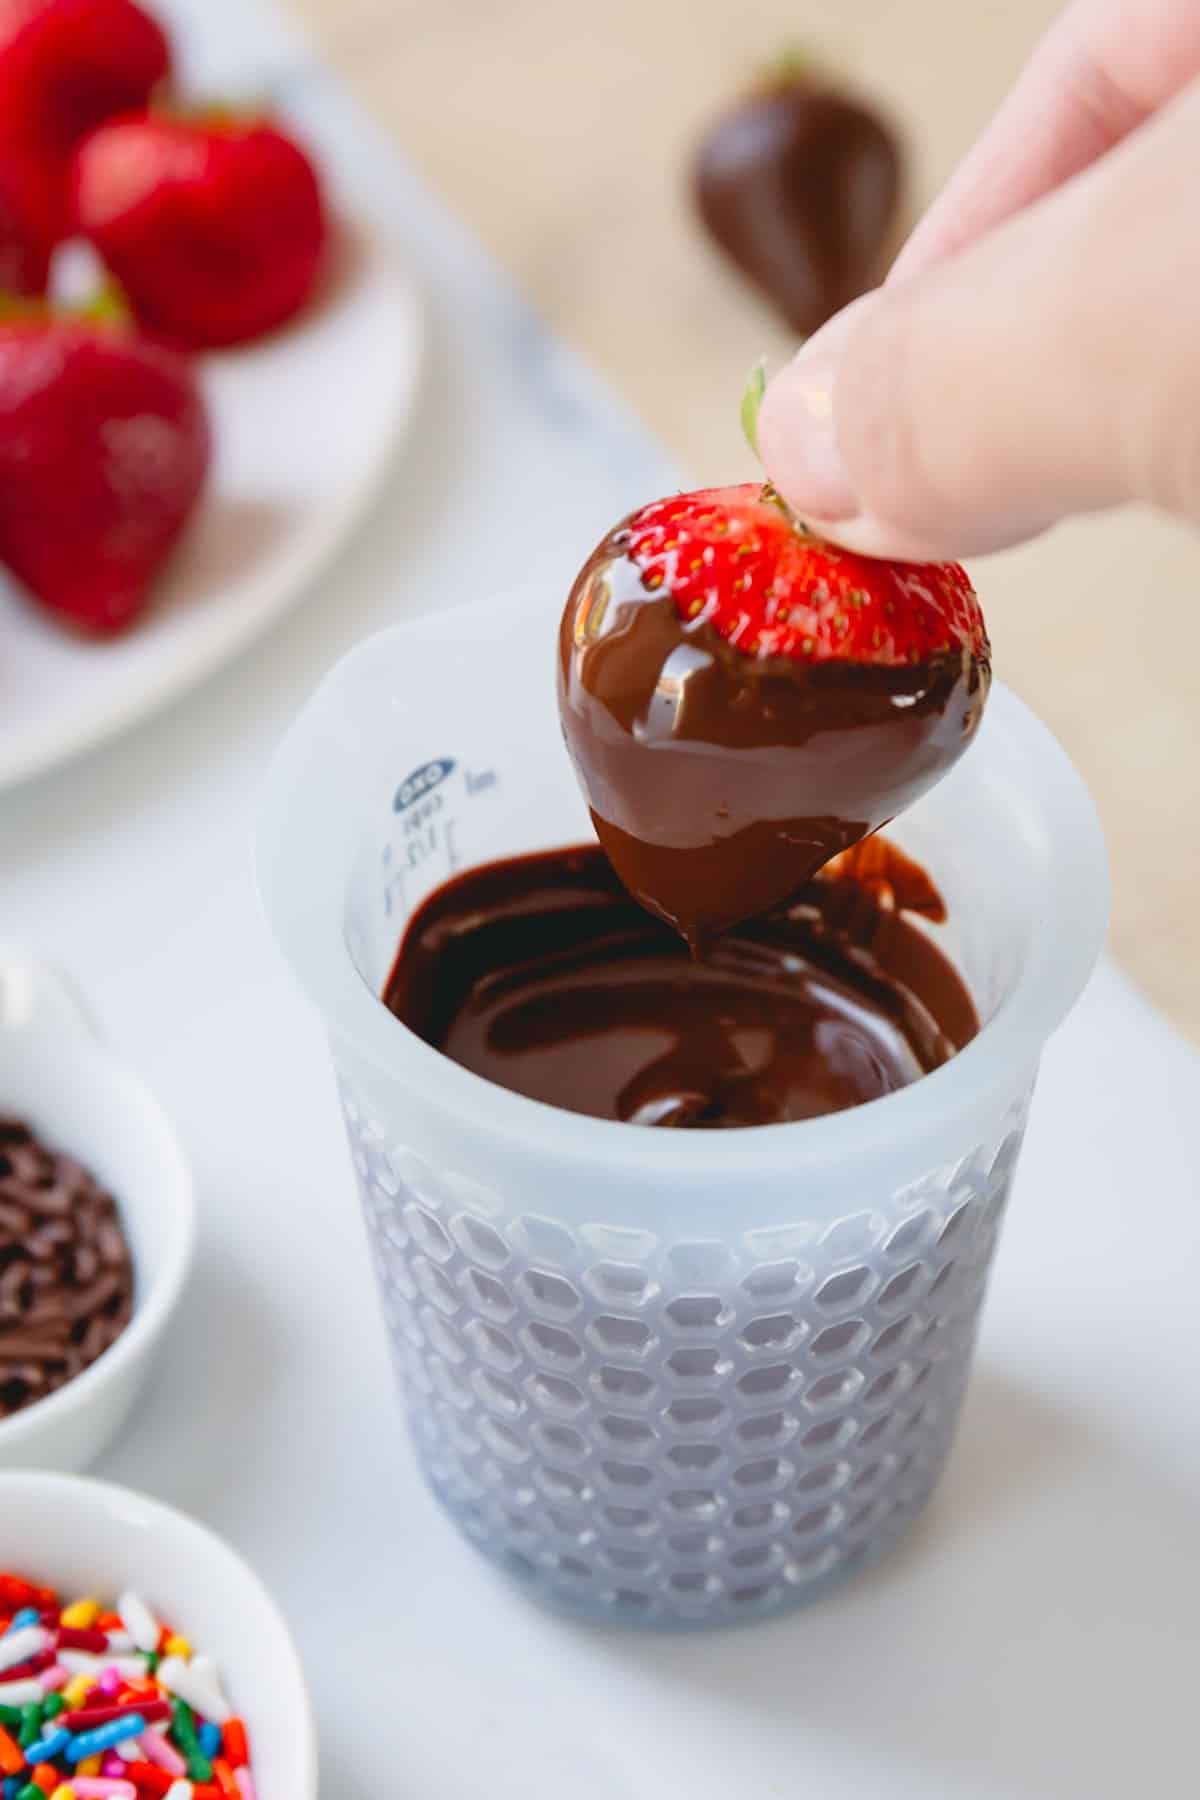
- Add any toppings to your strawberries while the chocolate is still wet by rolling the fruit in your chosen toppings or lightly sprinkling them on top.
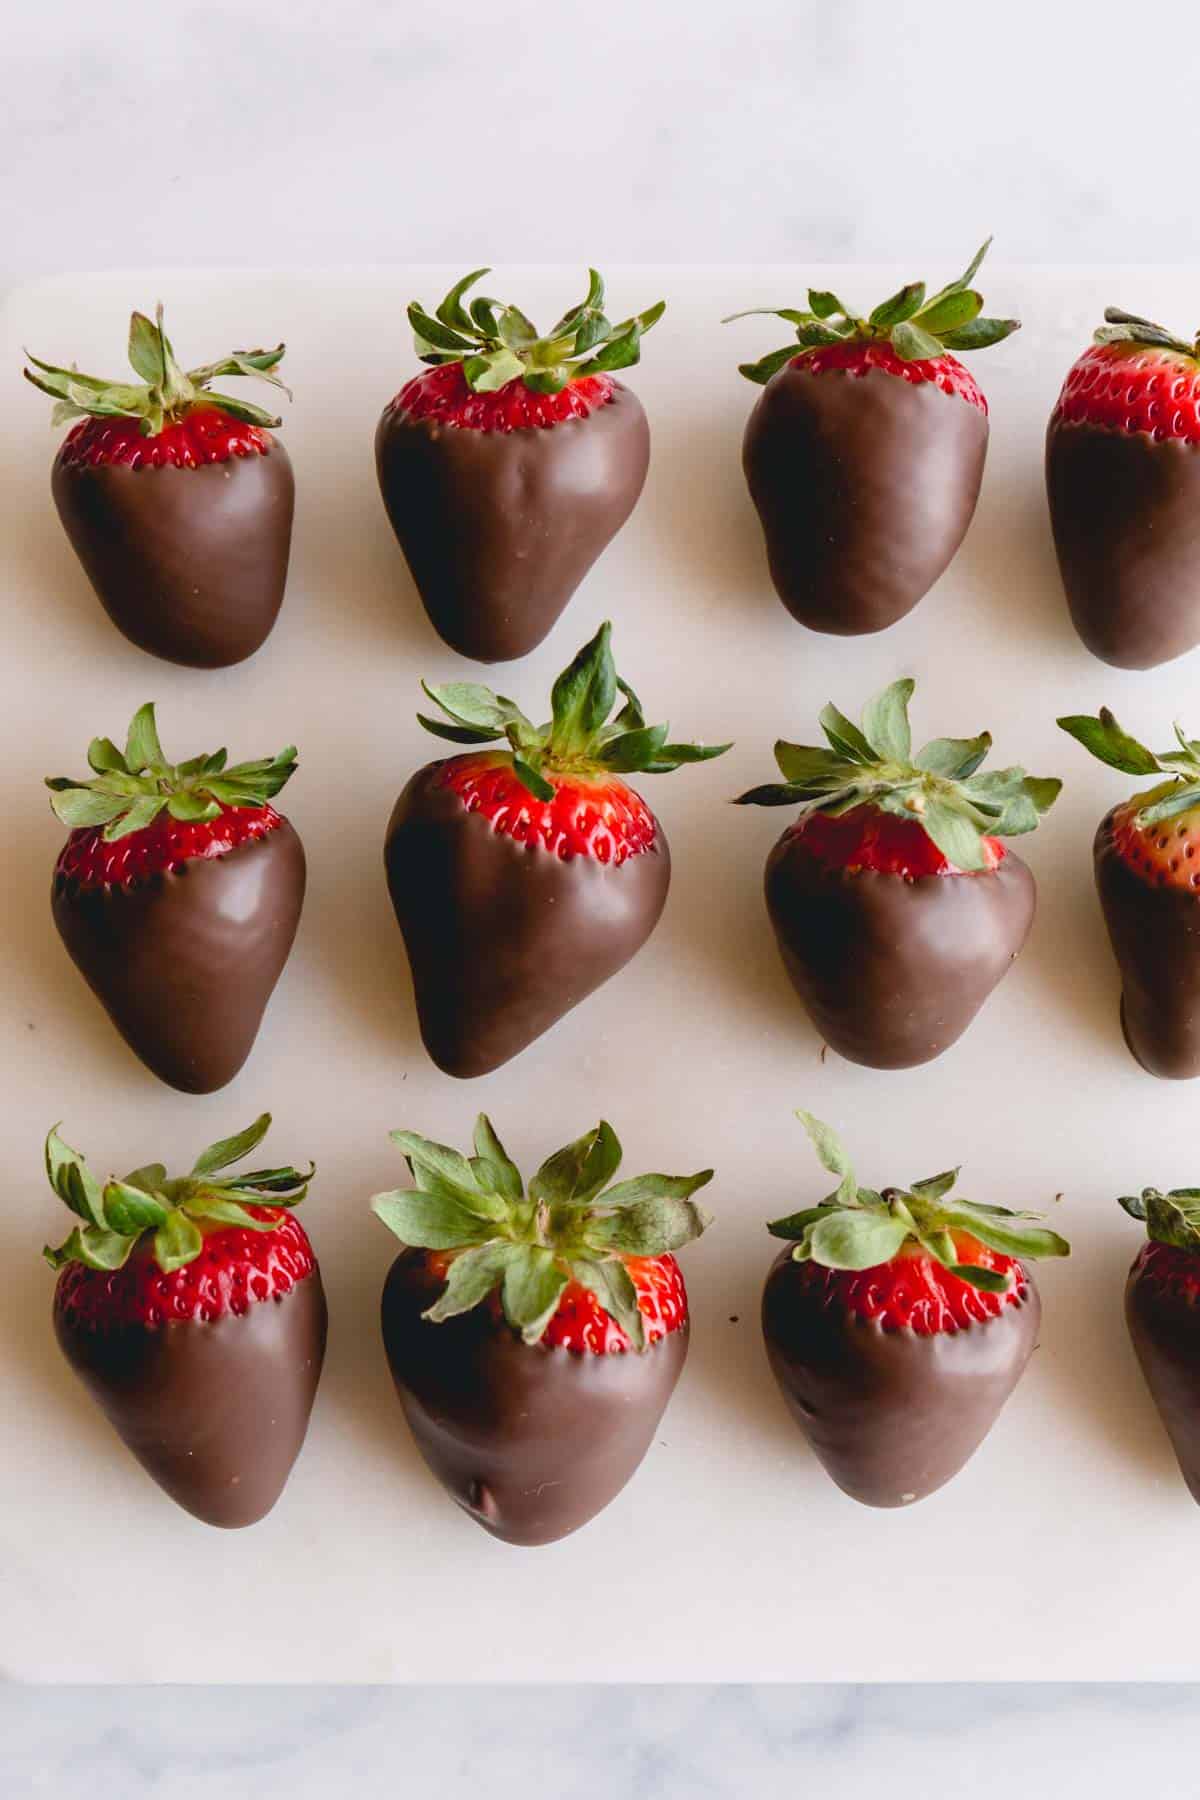
- Transfer the dipped strawberry to the prepared baking sheet. Repeat this process with the rest of the strawberries.
- Cool the chocolate strawberries at room temperature until the chocolate has fully set.

Tips for Success:
- Allow your washed strawberries to dry at room temperature, not in the refrigerator! Cold strawberries will sweat when they come into contact with warm chocolate. This will result in the chocolate not sticking to the fruit.
- Do not use chocolate chips. Chocolate chips contain stabilizers to make them hold their shape when heated up. Therefore, they do not melt easily.
- If you’re using real chocolate bars – like semi-sweet chocolate, milk chocolate, or white chocolate, tempering is key for a proper set and flawless finish! Tempering chocolate is a complex process. But my secret is to melt the chocolate without breaking its temper by gently heating the chocolate up in the microwave and stirring in between each heating increment.
- When tempering, do not allow any water to come into contact with the chocolate. This will cause chocolate to seize up. You also do not want to let the chocolate burn!
- If you don’t want to bother with tempering the chocolate, feel free to use melting wafers or chocolate almond bark instead.
Make-Ahead Tips:
You can wash, dry, and let your strawberries come up to room temperature in advance. Strawberries will stay fresh on the counter for 1-2 days.
Storing Tips:
- Chocolate covered strawberries do not need to be refrigerated. It’s actually better to leave them out of the refrigerator and store them in a cool, dark place in your kitchen.
- If stored in the refrigerator, condensation can occur on the outside of the strawberries, altering the taste and texture of the chocolate.
- Ideally, chocolate covered strawberries should be eaten the same day they’re made.
FAQs:
Strawberries must be completely dry and at room temperature in order for the melted chocolate to stick to the strawberries.
No, strawberries should be brought up to room temperature before dipping them into chocolate.
No, I don’t recommend freezing chocolate covered strawberries, as they will become very mushy when you thaw them. Unless you want to eat them as a frozen dessert!
Chocolate covered strawberries are best when stored at room temperature in a cool dark place in your kitchen.
More Strawberry Recipes:

Chocolate Covered Strawberries
Ingredients
- 8 oz (225 g) fresh strawberries
- 4 oz (115 g) chocolate bar Note 1
Optional toppings:
- crushed nuts, sprinkles, shredded coconut, etc.
Equipment
- 2 baking sheets
- 1 silicone mat or wax paper
- 1 plastic or silicone bowl
Instructions
- Wash and arrange the strawberries on a baking sheet lined with a paper towel in a single layer. Let them dry thoroughly. It’s important to have them completely dry before dipping them in chocolate. (TIP: Make sure the strawberries are at room temperature before you begin dipping them in chocolate.)8 oz fresh strawberries
- Prepare another baking sheet or tray lined with a silicone mat, or wax paper.
- Chop the chocolate into small pieces and place it into a plastic or silicone bowl. (I don’t recommend using a glass bowl.)4 oz chocolate bar
- Microwave the chocolate for 1 minute at 100% power (for 1000Watt microwave!).
- Then stir it well and microwave for 10 seconds at 100% power. Continue to microwave it at 10-second increments until the chocolate is fully melted.
- Once the chocolate is melted and smooth, hold a strawberry by the stem and dip it into the chocolate, covering it about three-quarters of the way. Allow the excess chocolate to drip off.
- If desired, roll the chocolate-covered strawberry in your chosen toppings while the chocolate is still wet.crushed nuts, sprinkles, shredded coconut, etc.
- Place the dipped strawberry onto the prepared baking sheet or tray.
- Repeat the process with the remaining strawberries.
- Let the chocolate-covered strawberries cool at room temperature until the chocolate sets, about 3-5 minutes. Get creative with your toppings and even drizzle additional chocolate over the strawberries for an extra touch.
⭐️ Did you make this recipe?
Please leave a review and let us know how you liked it!
Tips & Notes
– Ideally, chocolate covered strawberries should be eaten the same day they’re made.
– If needed, store your chocolate covered strawberries in an airtight container at room temperature in a cool, dakr place.
– You can freeze leftovers for up to 3 months, but they will become soggy once thawed. So, it’s best to enjoy them as a frozen treat.
Nutrition