
Homemade lemon curd is easy to make and such a treat. It’s tart and sweet, lusciously smooth and creamy – the perfect ingredient to add to so many desserts. With 4 simple ingredients and 30 minutes, it’s not as difficult as you might think!
Reader Danielle said: “This recipe is so easy. It came out amazing and silky. Now I have to decide what to make with it. If I don’t eat it all. I’ve really enjoyed your recipes. I have made several of yours.”
I love pretty much anything lemon, especially lemon desserts. And often with those comes a beautiful, creamy, tart, and sweet homemade lemon curd. While you can buy it at the store, did you know it’s actually so easy to make at home in about 30 minutes (and way more delicious too!)?
Funny story of how I learned to make lemon curd; I went overboard and bought a case of lemons that was 35 pounds! In effort to use them up, I perfected how to make the curd and now have used it in so many dessert recipes like lemon tiramisu and my lemon layer cake.
Reader review: “This was really easy and tasted very good. I doubled it and made hand pies. They were great!” -Michele
Table of Contents
What is lemon curd?
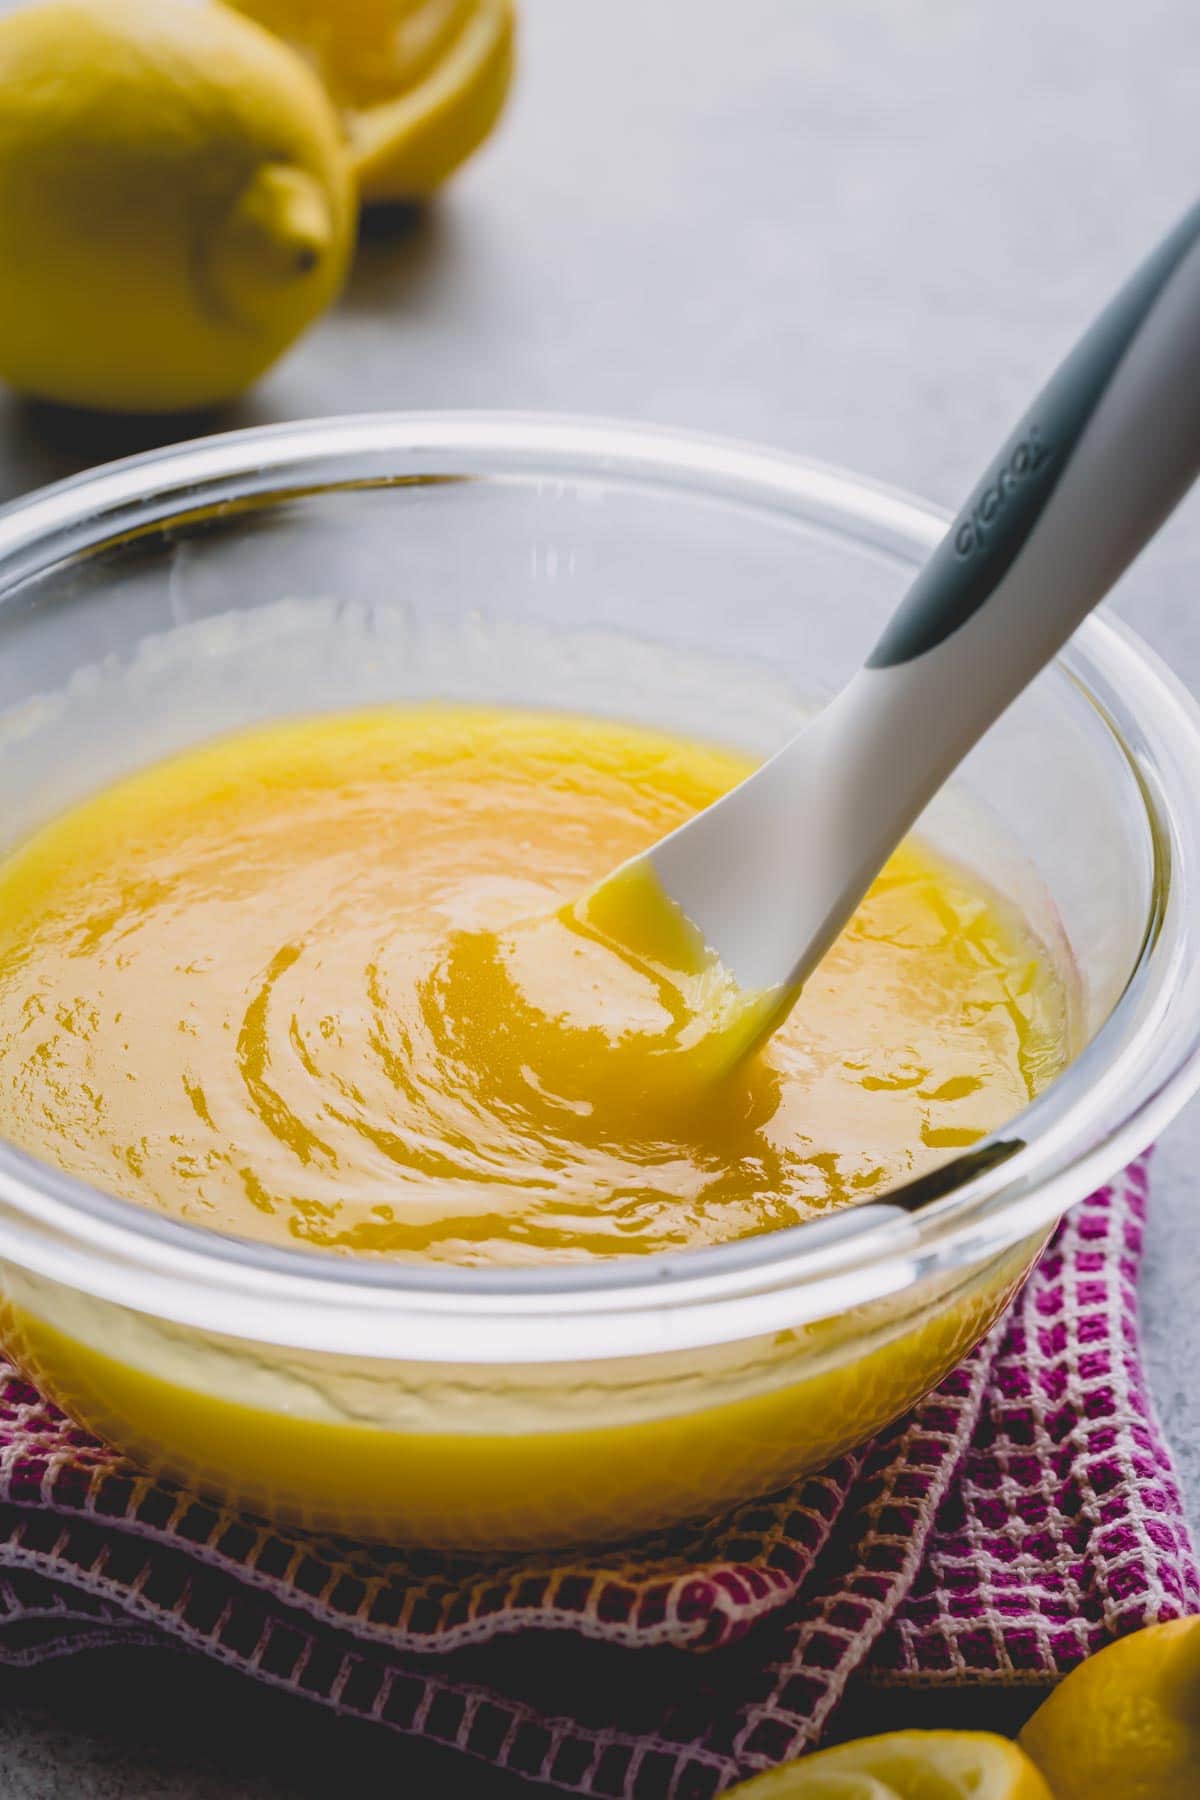
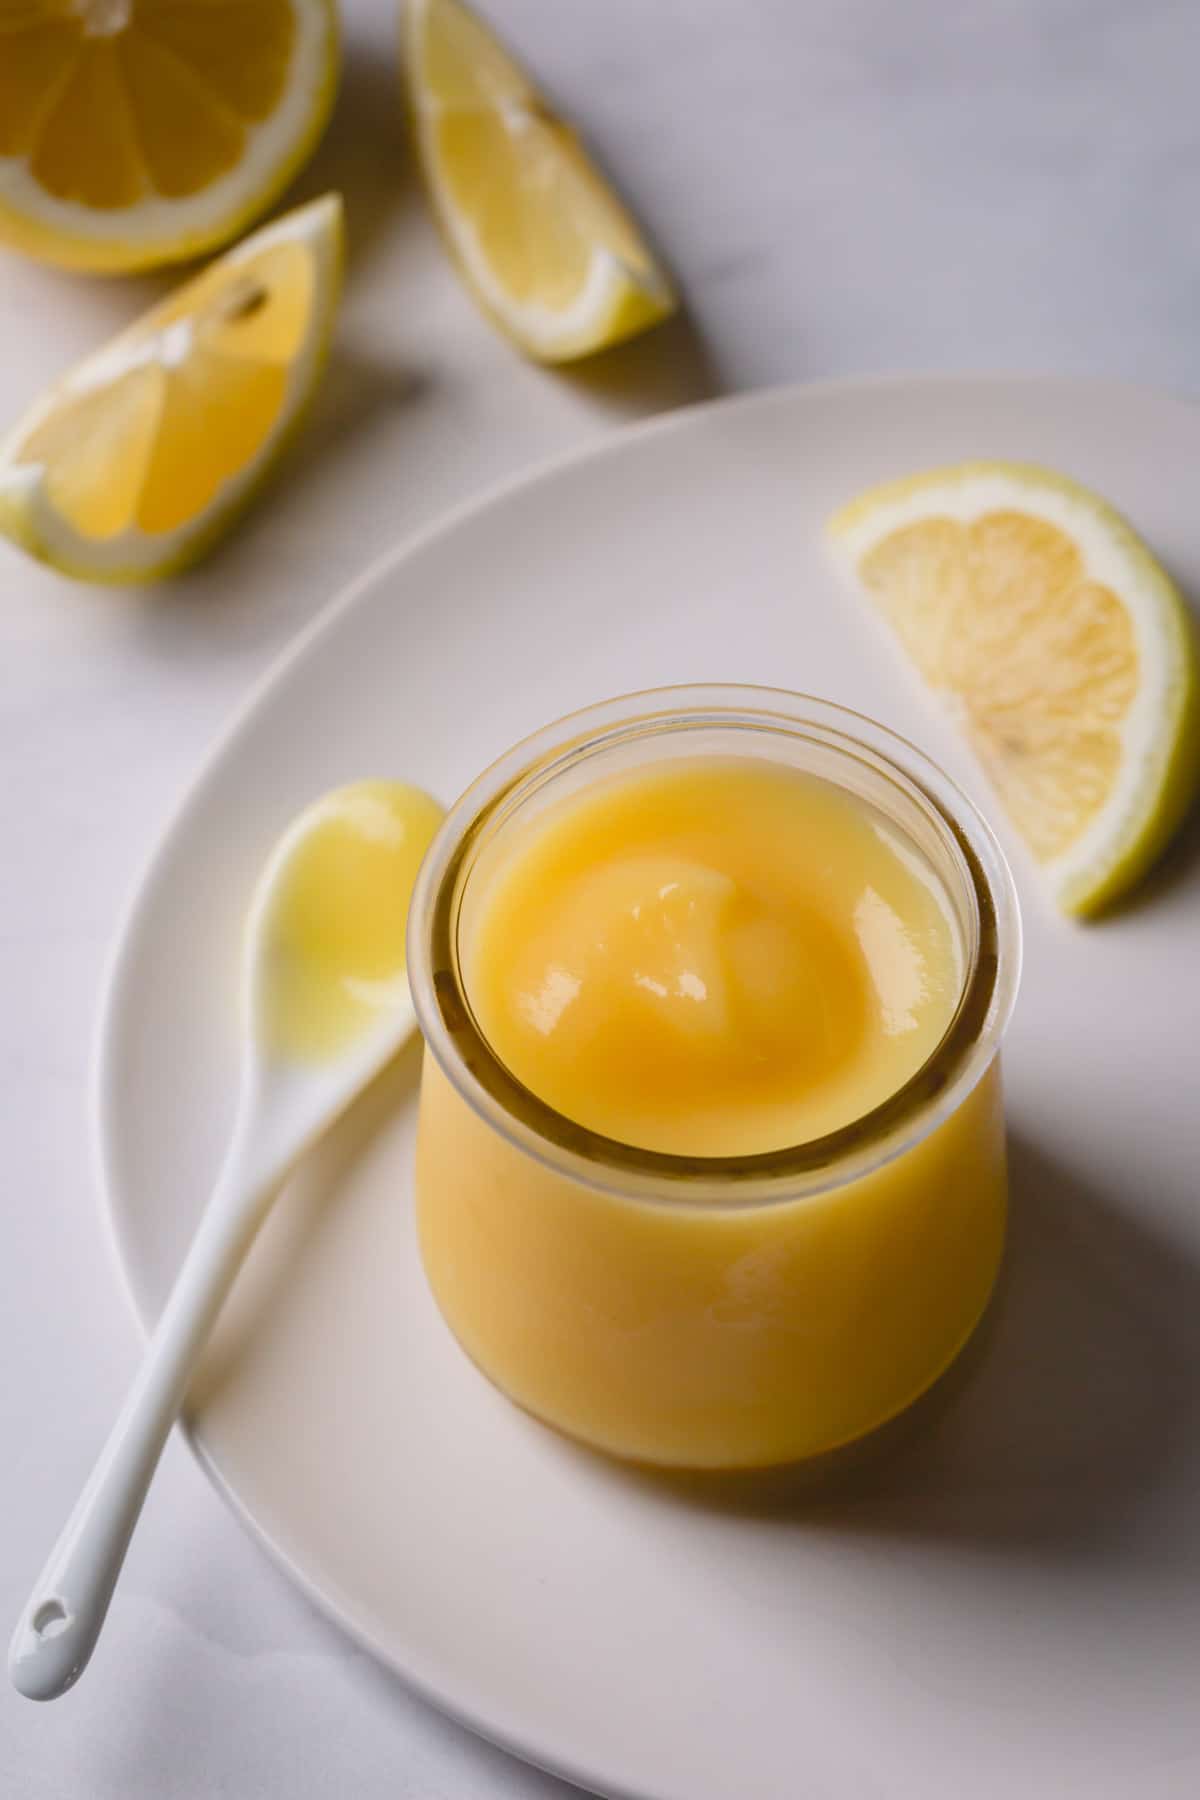
Technically, lemon curd is a custard-like citrus sauce, almost like a pudding, but better. It’s smooth and creamy, tart and sweet, thanks to eggs, sugar, and freshly squeezed lemon juice.
Lemon curd is an ideal filling for many pastries, like creme puffs, cakes and such. If you’re a true lemon lover, you’ll appreciate that tangy rich lemon bite. And if you’re like me, you’ll enjoy it by a spoonful!
Why you’ll love this recipe
- So much better than store-bought. This lemon curd recipe is so easy to make and tastes 100x better than a store-bought curd!
- Uses whole eggs to avoid waste! Unlike many lemon curd recipes out there, my recipe calls for whole eggs, instead of just egg yolks, and produces the same rich and creamy curd.
- Only 4 pantry ingredients. Yes, it’s that simple. No complicated steps (no double boiler required!) or ingredients here!
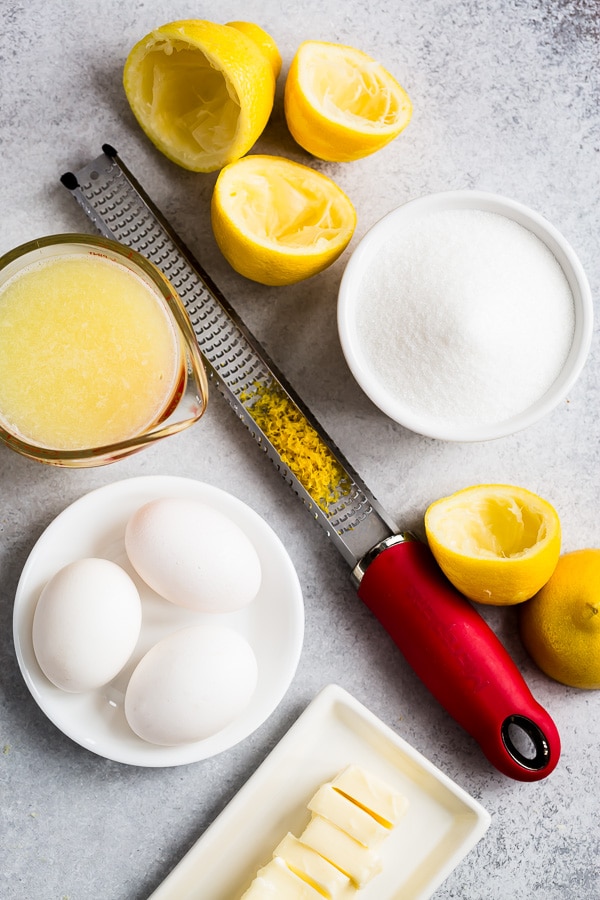
Key Ingredient Notes
- Lemon juice – For the best flavor, use freshly squeezed lemons rather than bottled juice. Bottled varieties can taste dull or slightly bitter. Choose lemons that feel heavy for their size, which usually means they’re juicier. You’ll need 4-5 medium lemons. Room temperature lemons release more juice, and rolling them firmly on the counter before cutting can help extract every drop.
- Lemon zest adds concentrated citrus oils and boosts the fresh lemon flavor without adding extra acidity. It gives lemon curd a more vibrant, aromatic taste that makes it feel truly homemade. Use a microplane or fine grater to remove only the yellow outer layer of the peel, avoiding the white pith underneath, which can taste bitter.
- Eggs are what transform lemon juice, sugar, and butter into a silky, custard-like curd. The yolks provide richness, color, and thickening power, while whole eggs create a smooth, creamy texture. Fresh eggs work best because they emulsify more easily and create a richer flavor. To prevent curdling, whisk the eggs thoroughly before cooking and cook the mixture gently over medium-low heat while stirring constantly.
- Sugar balances the tartness of the lemons and helps create the smooth texture that lemon curd is known for. It also helps stabilize the eggs during cooking, reducing the risk of scrambling. Standard granulated sugar is the best choice because it dissolves evenly and keeps the curd silky.
- Butter adds richness, smoothness, and a luxurious mouthfeel to lemon curd. It softens the sharpness of the lemon and creates the velvety finish that makes the curd so irresistible. Unsalted butter is recommended so you can control the flavor more precisely. For the smoothest texture, add the butter gradually while the curd is still warm but not hot, allowing it to melt and fully emulsify into the mixture. High-quality butter with a higher fat content will give the curd an especially rich and creamy finish.
Always use fresh lemon juice
Avoid the pre-bottled lemon juice, it has a duller flavor and won’t be as vibrant in the curd.
How to make lemon curd
Let me walk you through the entire process, step by step!
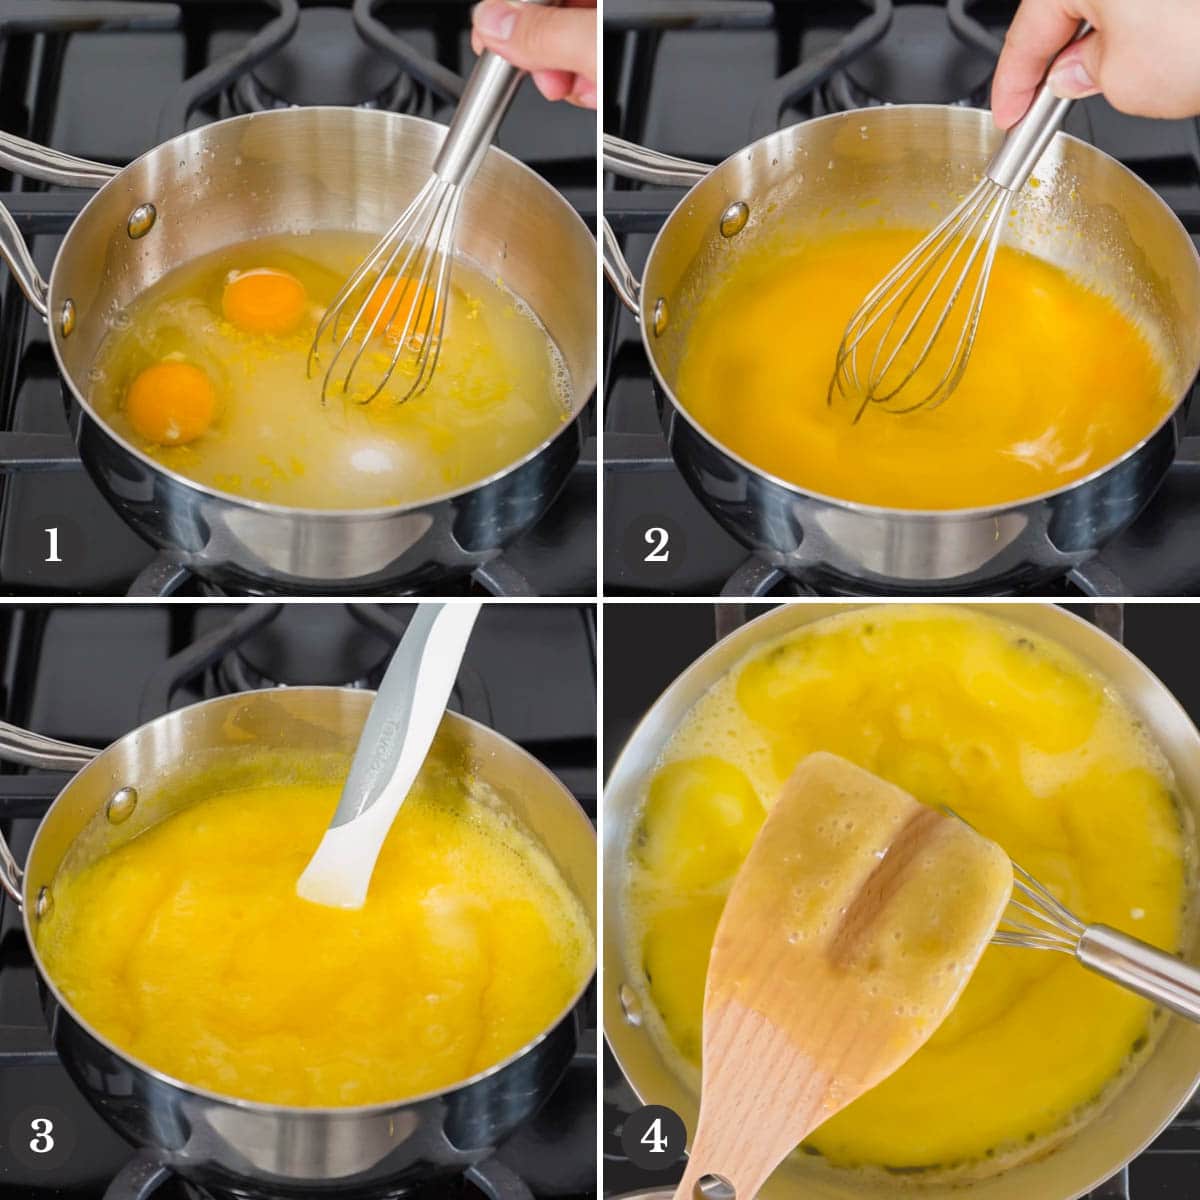
1. Cook the curd
- First, whisk all the ingredients in a saucepan before turning on the heat. That way, you’ll prevent scrambling the egg whites.
- Then turn on the heat to medium-low and cook the mixture, whisking continuously.
- In about 8-10 minutes, the mixture will thicken and bubble up.
- The curd is ready once it reaches 170°F. Another way to test is to run your finger on the back of a wooden spoon dipped in the curd. If the trail stays, it’s ready!
Stirring constantly is key
Stir the mixture continuously to prevent scorching it on the bottom and to prevent the eggs from cooking (no scrambled eggs here!).
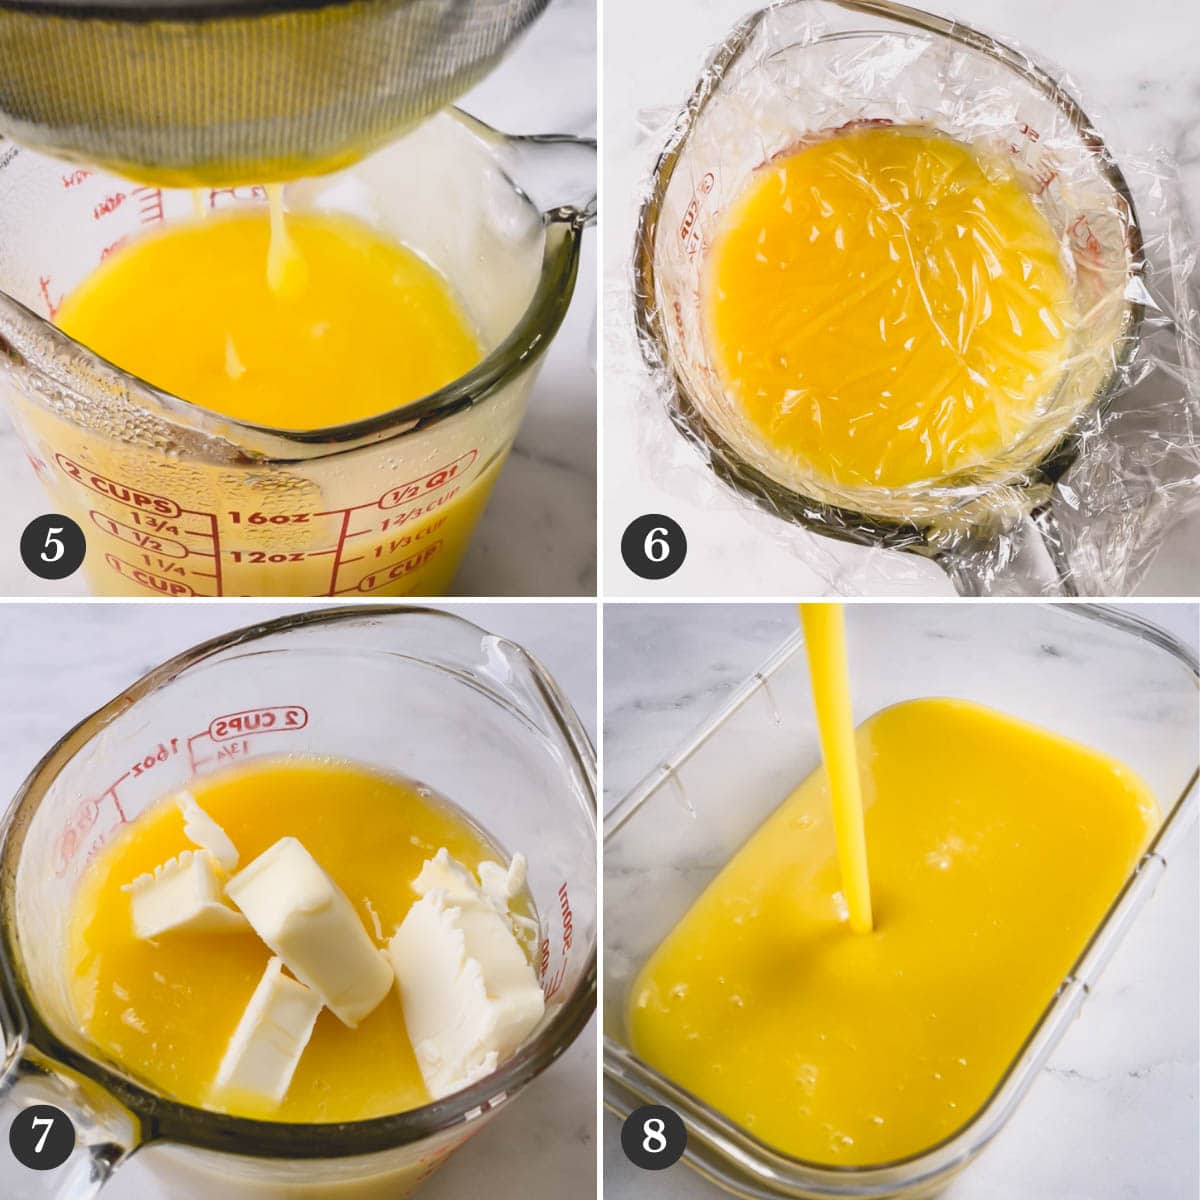
2. Cool and add butter
- For a lusciously smooth texture, pour the curd through a sieve into a bowl.
- Then cover the curd with plastic wrap, making sure it touches the entire surface. This prevents an unappealing film over the curd. Let the curd cool for 10-15 minutes.
- Add the butter and stir until fully incorporated.
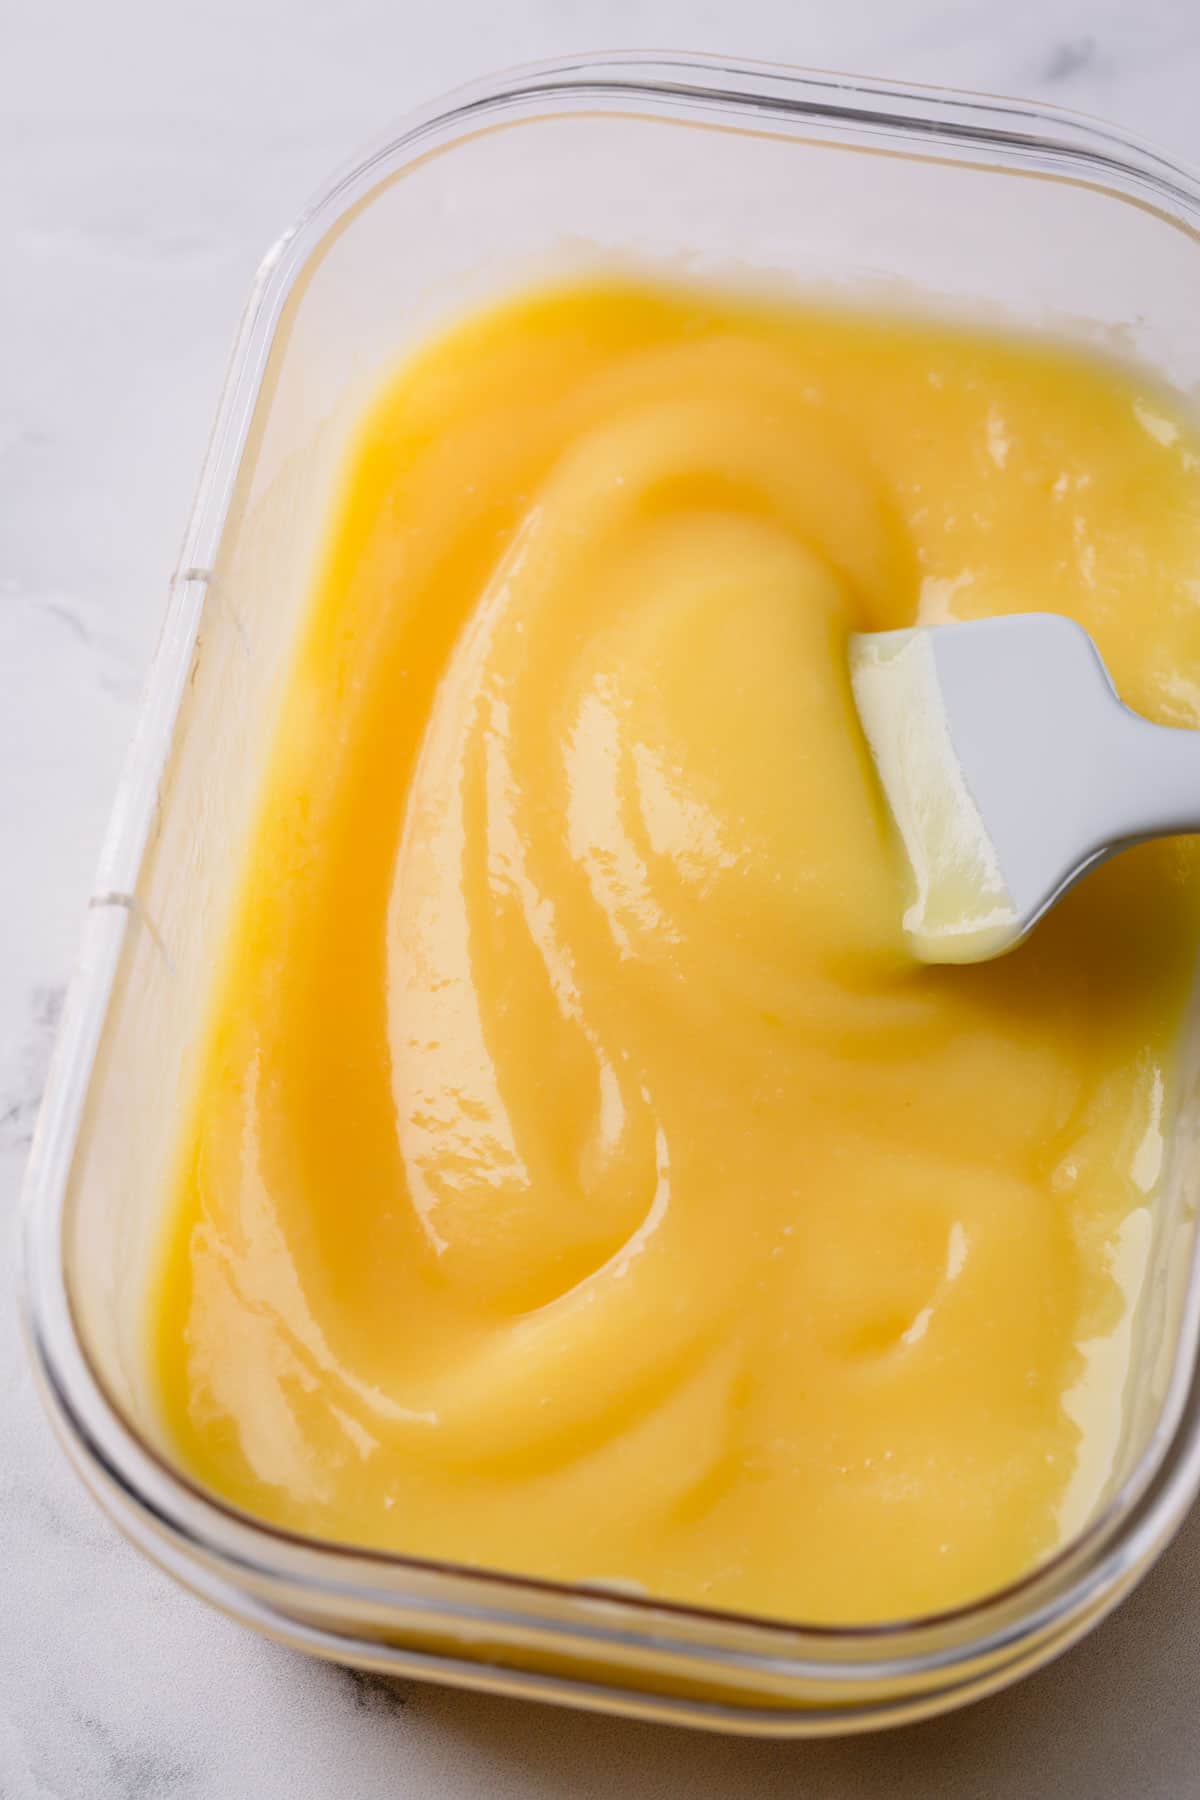
- Pour the curd into an airtight container, cover with plastic wrap to touch, and refrigerate it until ready to use.
Expert Tips
- Don’t rush through this process or you’ll end up with scrambled eggs. If you cook the mixture over medium to high heat, or don’t stir constantly, then you risk the change of cooking the eggs.
- Continuously whisk the lemon curd mixture while cooking. No need to whisk vigorously though, just keep stirring slowly while the mixture heats through and cooks
- Cool the curd before adding butter. It’ll prevent the butter from melting into liquid and keeps the curd lusciously creamy!
- If you did slightly scramble your eggs, don’t worry. The fine mesh sieve should strain out any little pieces.
- Cover the curd with plastic wrap to touch to prevent any film forming on top.
- If you’re curd seems thin, chill it first and then check the consistency. It thickens considerably in the fridge.
- Swap lemon juice for another citrus juice. You could make lime curd, orange curd, or even grapefruit curd too!
Ways to use lemon curd
There are absolutely endless ways to use a jar of lemon curd. Some of my favorite ways are:
- Curd and English scones are a classic way to serve lemon curd.
- Drizzling it over pancakes, angel food cake, pound cake, and cupcakes.
- For brunches, lemon Chantilly parfaits would be a huge hit!
- Homemade lemon curd is fabulous for filling cakes, like my lemon layer cake, Pavlova, or macarons.
- Serve it over ice cream, yogurt, or even a toast!
- If straight lemon curd is too much for you, mix it with whipped cream and fill creme puffs, tartlets, or a crepe cake.
- And last but certainly not least, you can use your lemon curd in this lemon raspberry cheesecake bars (my fave!).
Storage
Store the curd in an airtight container in the refrigerator for up to 2 weeks. Or freeze it for up to 2 months.
This homemade lemon curd is a great recipe to make for meal prep to use like a jam on so many breakfast or snack recipes throughout the week. It also makes a wonderful hostess gift if you are going to any parties.
FAQs:
I admit, the lemon curd never tastes eggy to me, but I’m not particularly sensitive to egg flavor. Typically, refrigerating homemade lemon curd overnight minimizes the eggy taste.
Avoid using reactive metal saucepan and whisk. Stick with stainless steel. Also, taste the curd after refrigerating overnight, as it may help to improve the metallic taste.
You probably didn’t cook it long enough in the saucepan before cooling. Carefully heat it again over medium-low heat while whisking constantly to further thicken before cooling.
More lemon dessert recipes
Homemade Lemon Curd
Ingredients
- 3 large eggs
- 1 cup (200 g) granulated sugar
- 1 cup (240 ml) freshly squeezed lemon juice Note 1
- 1 tablespoon lemon zest Note 2
- 5 tablespoons (70 g) unsalted butter cubed Note 3
Helpful Equipment:
Instructions
- In a medium saucepan, whisk together eggs, sugar, lemon juice and lemon zest for a minute.
- Turn on the heat to medium-low and cook the mixture, whisking constantly, until it reaches 170°F (75°C), 8-10 minutes. The mixture will be thick, and it'll leave a trail if you run a finger on the back of the spoon dipped in curd.
- Remove from heat. Place a mesh sieve over a bowl and run the curd through it. It makes the curd silky smooth!
- Then cover the curd with plastic wrap, making sure it touches the entire surface. This prevents an unappealing film over the curd. Let the curd cool for 10-15 minutes.
- Add butter and stir until the butter is fully incorporated.
- Pour the curd into a airtight container, cover with plastic wrap to touch and refrigerate it until ready to use.
⭐️ Did you make this recipe?
Please leave a review and let us know how you liked it!
Tips & Notes
– Store the curd in an airtight container in the refrigerator for up to 2 weeks.
– Or freeze it for up to 2 months.
Nutrition

This recipe was originally published on May 8, 2015.


This recipe is so easy.It came out amazing and silky.Now I have to decide what to make with it.If I don’t eat it all.I’ve really enjoyed your recipes.I have made several of yours.
Hi, Danielle!! Thank you so much for choosing my recipes and for your feedback!! There’re so many ways to enjoy lemon curd. You can fill lemon cupcakes, these raspberry lemon mini tartlets are so adorable (and delicious!), or you can add it to your yogurt, or make a chantilly parfait. Enjoy!!
My daughter thought it was a smidge tart so we added an extra 1/4 cup of sugar. Delicious! Not sure if this will last until we make our cake – we want to devour it! Thanks for the recipe 😀
Yay, so happy you loved the recipe. Thank you for your feedback, Jes and Caroline. Hope you have enough curd left for your cake. 😉
Hello Shinee
Can you tell me how long this would last in the refrigerator and are you able to freeze it and use it later? I don’t recall seeing the quantity (cups) your recipe makes?
Thank you!
Jenny
Hi, Jenny. You can store the lemon curd in the fridge for up to 2 months. Make sure it’s in an airtight container. And yes, lemon curd also freezes well. I’ve frozen lemon curd and it’s just as great as fresh one. This recipe makes about 2 cups of lemon curd.
I was daunted by other lemon curd recipes, but yours was so easy to make. Mine came out a little too tart, but still delicious. I guess we’re used to the sweeter store-bought kind. And I confess, I screwed up because I guess I didn’t hit 170 degrees (my bad) and it didn’t thicken overnight, but I heated it in the microwave and that corrected the problem. So the recipe seems pretty fool-proof!
That’s awesome, Jen!!! So glad it worked out. Thank you for sharing your feedback.
This is excellent! The tarter the better! Used Meyer lemons from my tree. Love that whole eggs work so well. I actually prefer this recipe than the yolk only ones, and adding the butter from the beginning just makes the preparation much more efficient. I’ve made this recipe 3 times now (given as gifts) and it’s fail proof.
Hi, Michelle!! So, so happy to read your feedback!! Thank you for trying my recipe and sharing!!
This was really easy and tasted very good. I doubled it and made hand pies. They were great!
Hi, Michele! So glad you enjoyed the lemon curd. Hand pies sounds delicious!
I had lemon curd once on a cruise and it was just delightful, it really made me like lemon flavored things more. I wish I knew what you were doing with 35 pounds of lemons though LOL
Haha that was a bit overwhelming amount of lemons, to be honest, Carmella. But I didn’t waste a single one. We had lots of lemon meringue pies, lemonade and, of course, lemon curd. 🙂
Thank you so much for your recipe, I will give it a try. Mine is similar with a couple of differences. I use one more whole egg and 1/4 cup corn starch. Mine comes out a bit grainy and I think that it might be the corn starch. I have had a problem with cooking it too long or not long enough which makes it to thick or too runny. I love the idea of using a thermometer, takes the guess out. Do you think it will be thick/firm enough for a lemon tart?
PS: Meyer Lemons are fabulous for lemon curd!
Hi, Rosann! I just recently learned that cornstarch does give grainy texture to the mixture when combined with an acidic juice. Try using tapioca starch in place of cornstarch. But this curd isn’t thick enough for tart, but tapioca starch will help. And yeah, dying to try meyer lemon. Can you believe I’ve never tried it? We don’t have that around here. 🙁
Are you saying that the curd will be runny instead of thick? I thought the eggs were used to thicken the curd. I wanted to use this recipe for little lemon curd tarts but I don’t want a runny curd when you bite into it. If you used tapioca starch to thicken it, how much would you recommend using?
Hi, Dianna. I wouldn’t say it’s really runny curd, because it does thicken when it’s cooled completely. But if you’re looking for something that sets like lemon meringue pie, this curd won’t do that. It’s more scoopable, than sliceable. (I just made up some words, but hope that makes sense.)
Shinee,
I am so excited to make this recipe and then the lemon raspberry tartlets! I just had two questions….
The picture shows using a strainer to remove any lumps. Is this also to remove the lemon zest as well? Would the zest give it a bitter taste if left in? Just curious ????
Oops, forgot to mention that step in the recipe. Thanks for asking, Elizabeth. Straining removes the lumps, if any, and makes it even more silky smooth. If you zest the lemon on microplane, it should be pretty tiny abd it pretty much disintegrates in the curd. Also make sure to zest just the outer layer of skin, which shouldn’t make the curd bitter. If you go too far into white part of the skin, then yeah it’ll get bitter. Hope you enjoy the curt and tartlets!! Let me know. 🙂
I know it’s 10 years too late but I just wanted to share what I do. I use a different recipe though I do plan on using this one soon because it uses whole eggs only, yay, but for the one I make I do add some of the zest while it’s cooking then once it’s strained I add some fresh zest and mix it in. I like having that extra tartness the 2nd batch of zest adds to my curd. As for the texture it adds. I’ve never been bothered by it nor has anyone who’s had my curd. It’s really personal preference. Maybe give it a shot, if you haven’t yet lol, and see how you like it. I’ve tried it both ways but I always land out adding the extra zest. I’m really looking forward to this recipe. So far no one has mentioned anything about it tasting eggy. I just made a double batch of lemon curd from a recipe I’ve never used before. It’s good but it’s far too eggy for my preference. It’ll get used up but I don’t plan on using that recipe again. This one will be the next one I try for sure 😊