Homemade Chocolate Cake Pops (From Scratch)
This post may contain affiliate links. Read full disclosure.
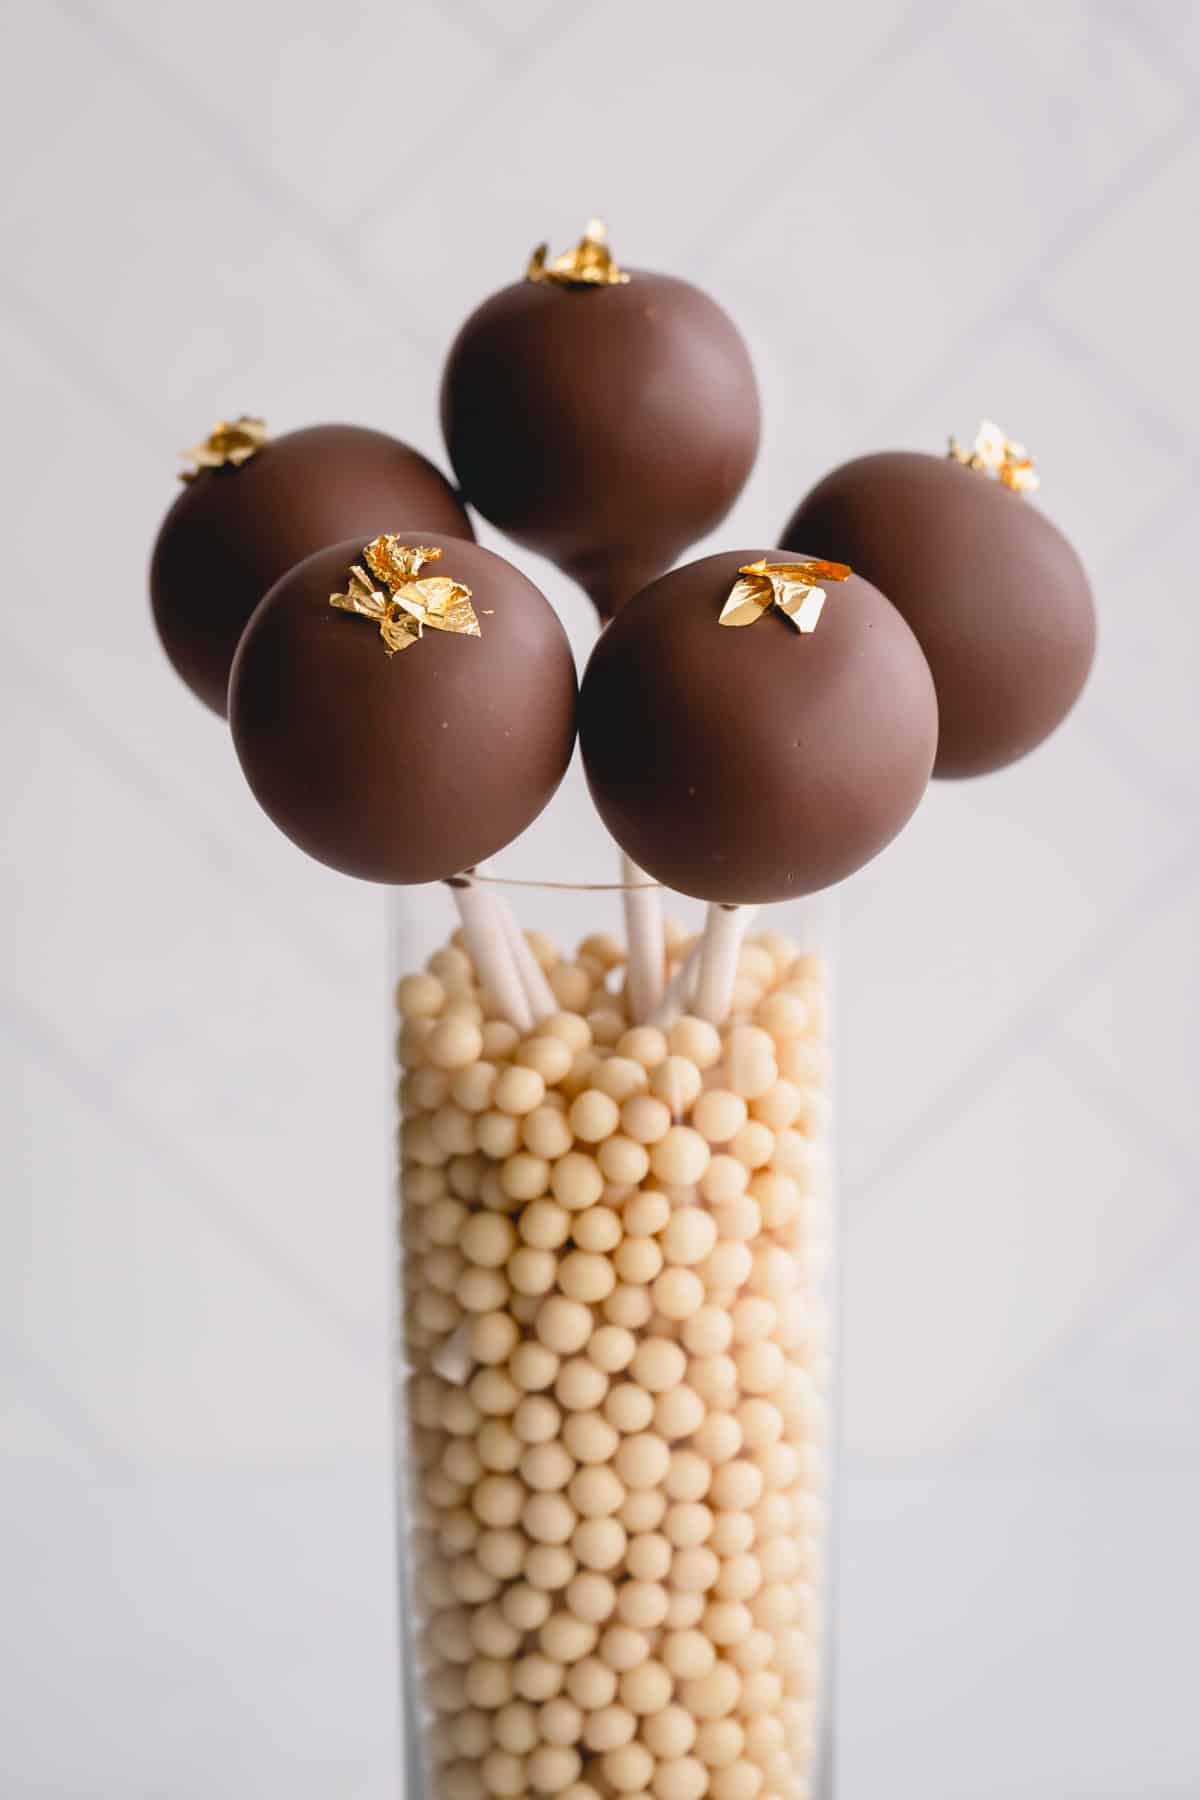
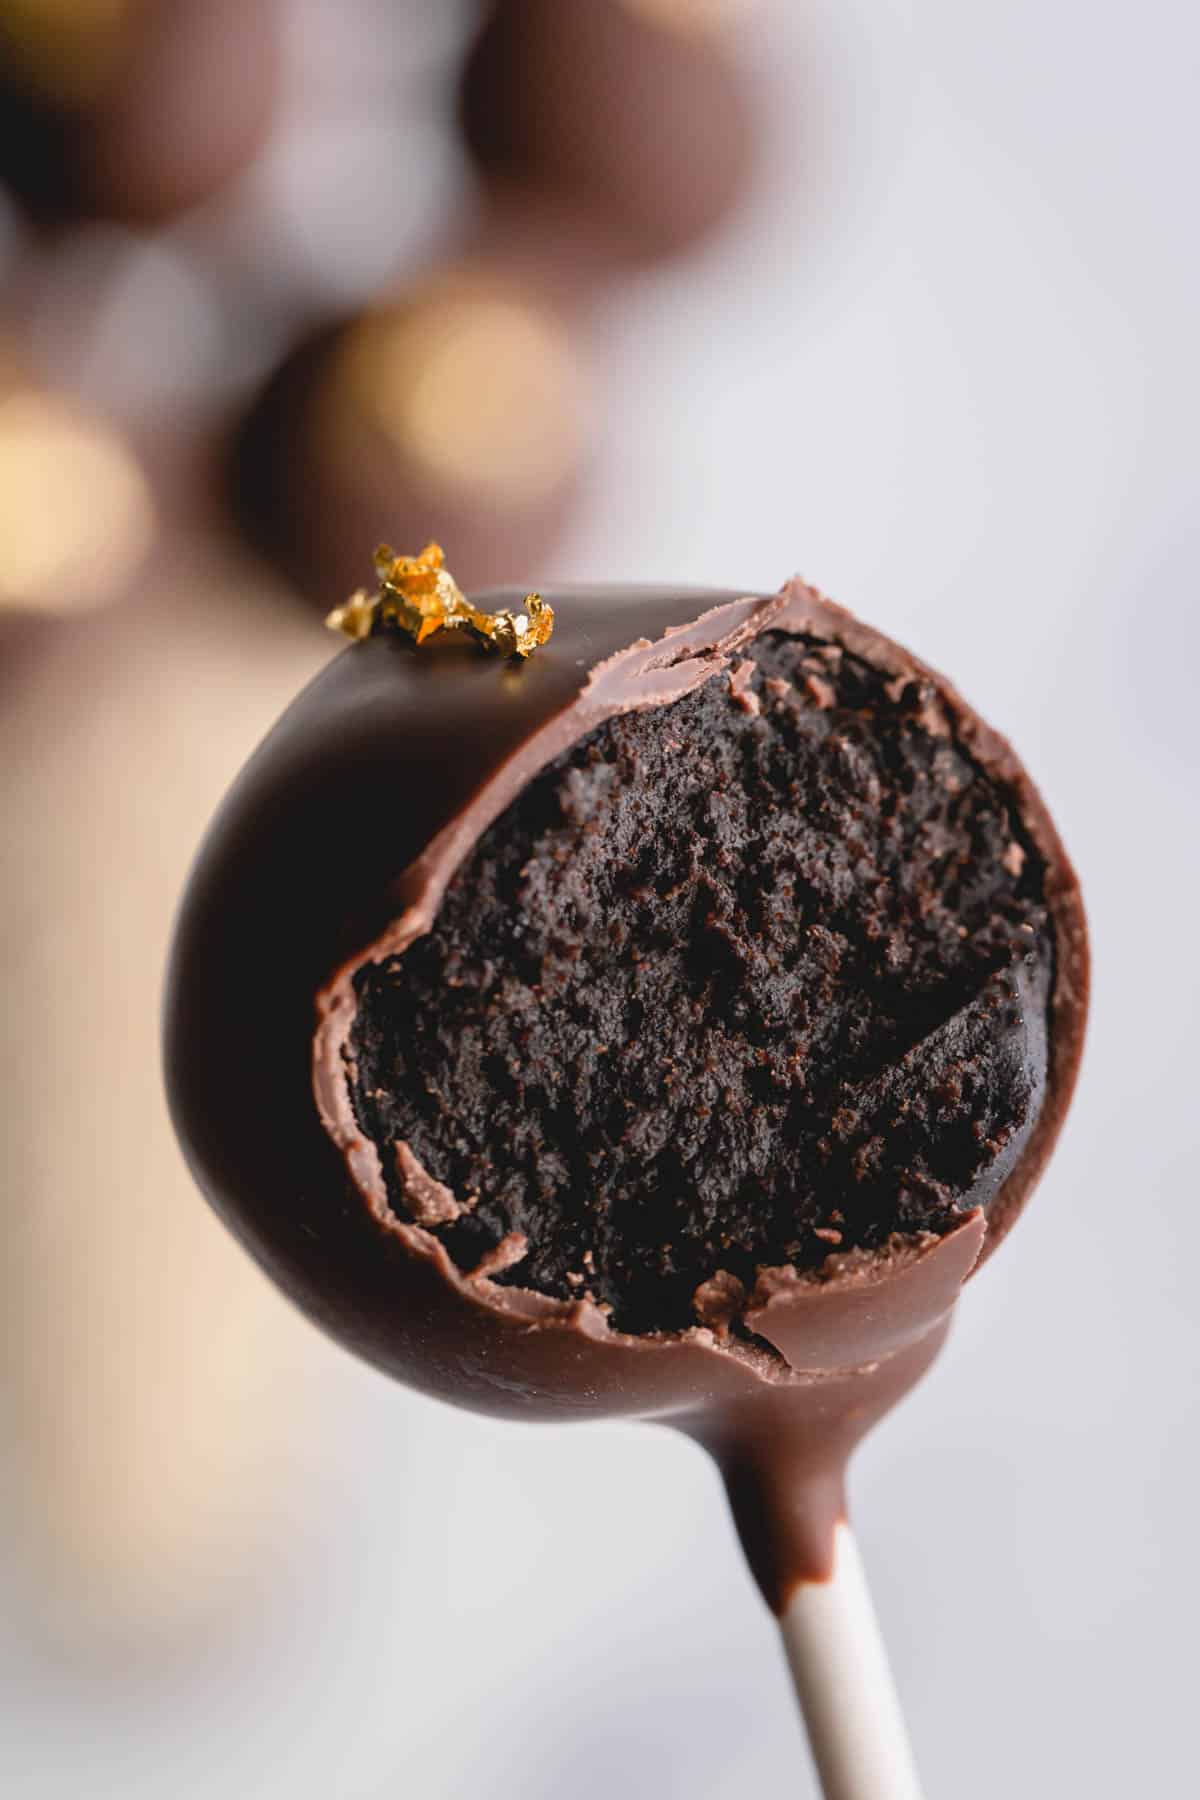
These homemade chocolate cake pops are made completely from scratch! They have an intense chocolate flavor and fudge-like texture. Dress them up for birthdays, baby showers, and more.

Why you’ll love this chocolate cake pop recipe:
Cake pops are adorable, whimsical treats for birthday parties and special celebrations!
You can dress them up with sprinkles, jimmies, and crushed candies, or dip them in a brightly colored coating.
This chocolate cake pop recipe is…
- super simple to make
- delightfully decadent
- and budget-friendly!
Plus it’s a perfect project if you have kiddos who love to help. Older kids can dip the pops, and the younger ones can add the sprinkles.
No one could resist a chocolate cake pop!
Key Ingredient Notes:
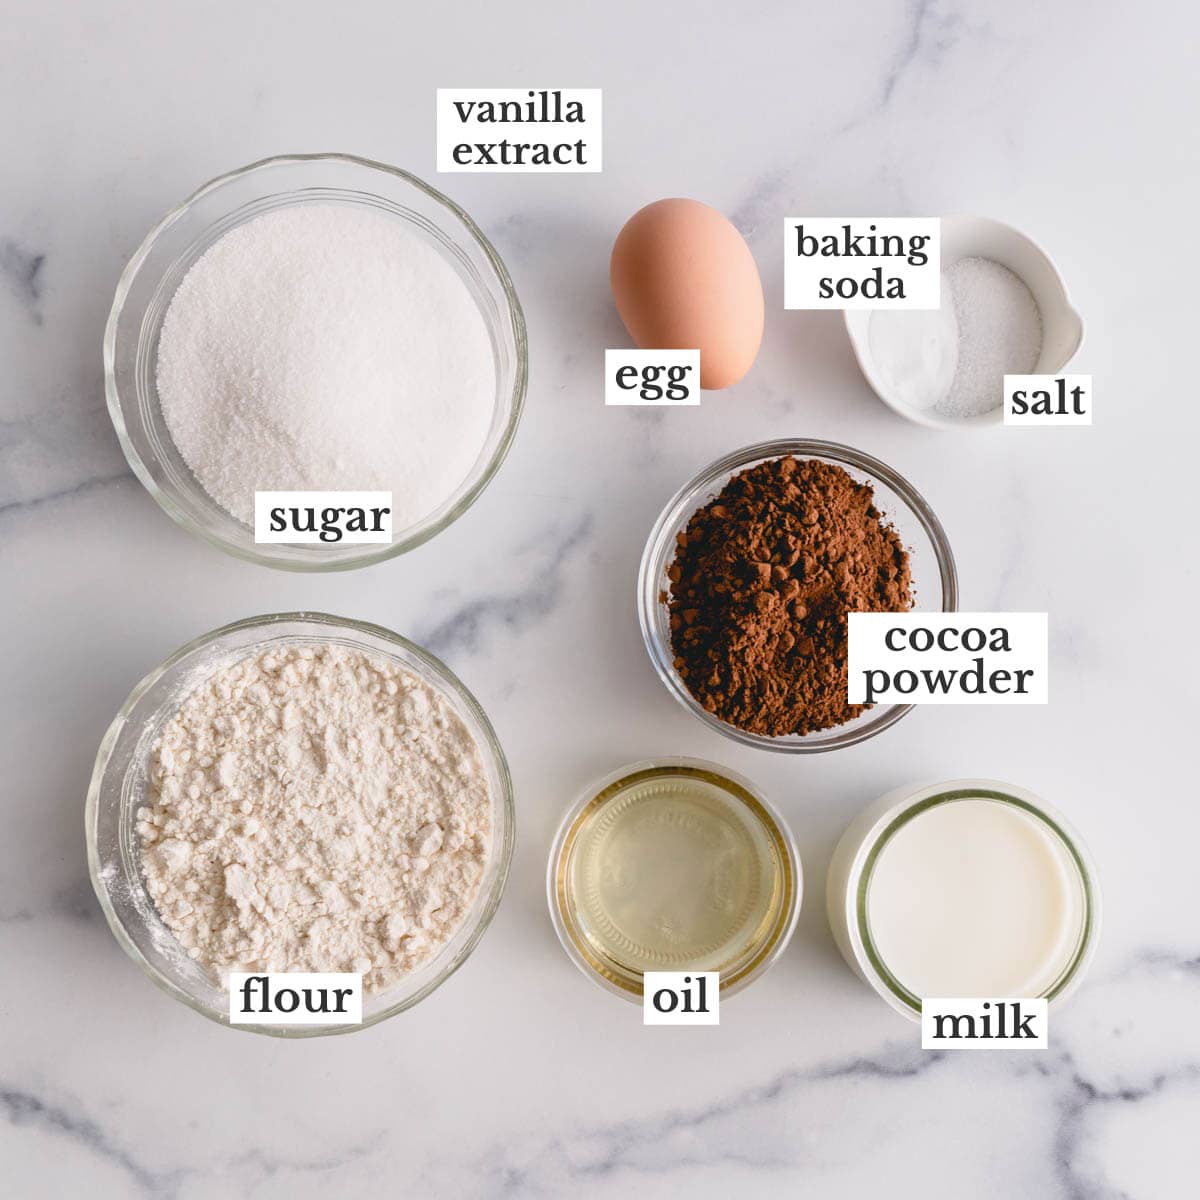
1. For the chocolate cake:
- All-purpose flour – I highly recommend a kitchen scale for measuring flour. It’s far more accurate than measuring cups. If you don’t have one, use the spoon and level method. Spoon the flour into the measuring cup, then level it off with the flat edge of a butter knife.
- Unsweetened cocoa powder – You can use natural or dutch-processed cocoa powder in this recipe. Dutch cocoa has an intense, dark chocolate flavor to it.
- Milk or coffee – Milk adds richness to the cake, whereas coffee enhances the chocolate flavor. Both work great, so use whatever you have on hand.
- Vegetable oil keeps the cake nice and moist!
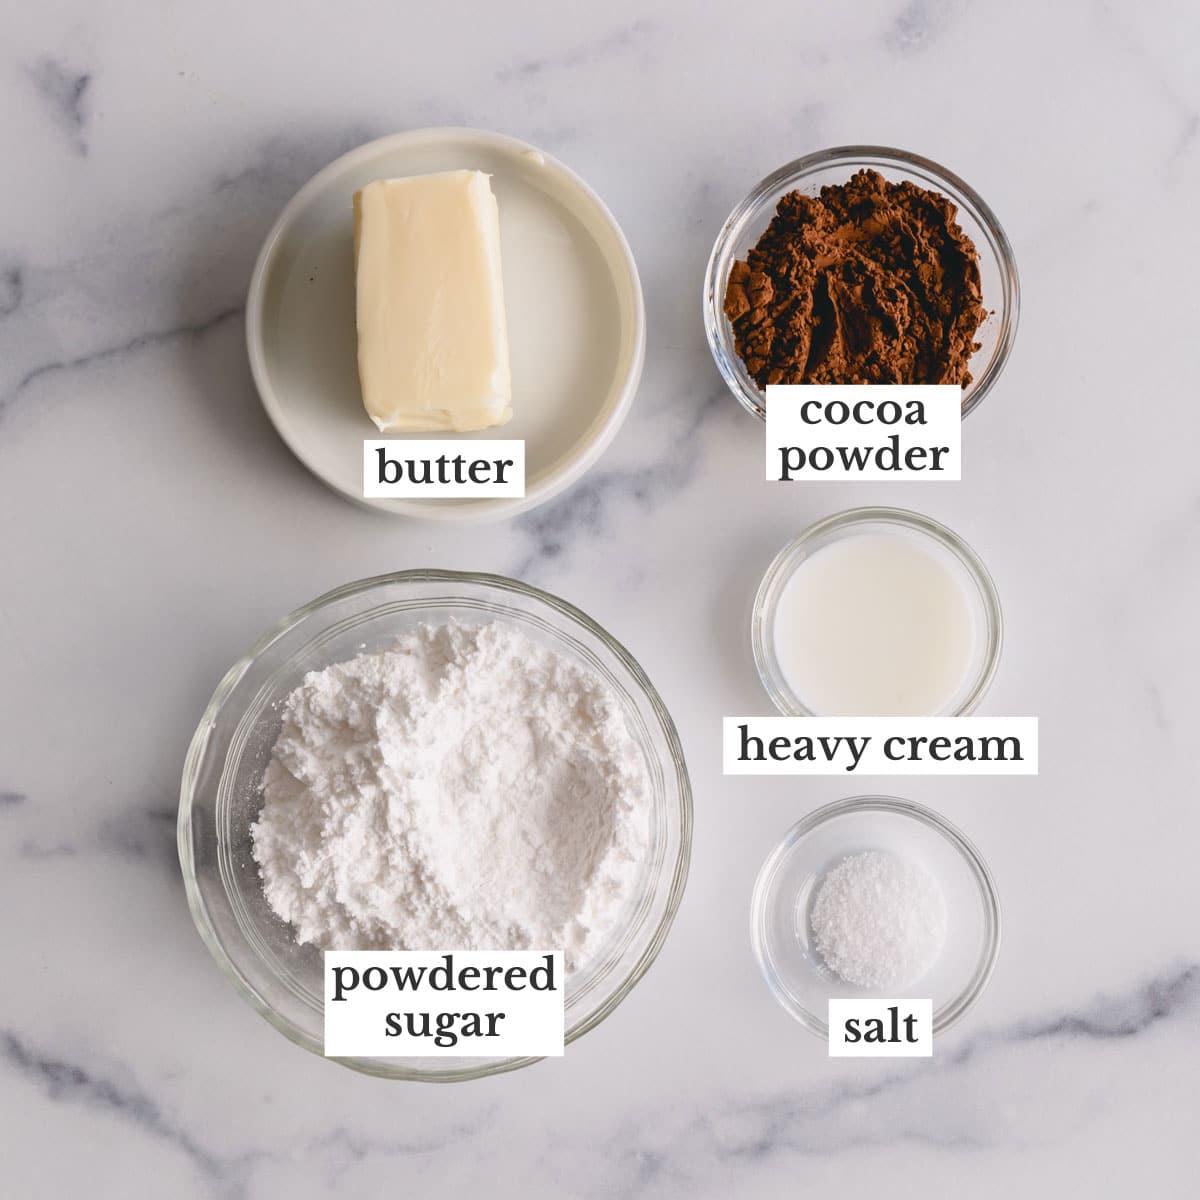
2. For the frosting & coating:
- Butter – Homemade frosting with real butter is the way to go! It’s far better than store-bought frosting.
- Powdered sugar – For a sweet, silky smooth texture!
- Heavy cream – Heavy cream produces a creamier consistency than milk does. If you don’t have heavy cream, whole milk works fine too!
- Almond bark – I prefer almond bark for coating cake pops! It has the best consistency which makes for easy dipping. Melting wafers can be a bit thick, and chocolate is finicky and needs tempering.
How to make these cake pops:
1. Make the chocolate cake:
- In the bowl of a stand mixer with the paddle attachment, combine the dry ingredients. Mix until well combined.
- Add the wet ingredients to the dry and mix until the batter is smooth. Don’t overmix! Pour the cake batter into a 9-inch cake pan lined with parchment paper.
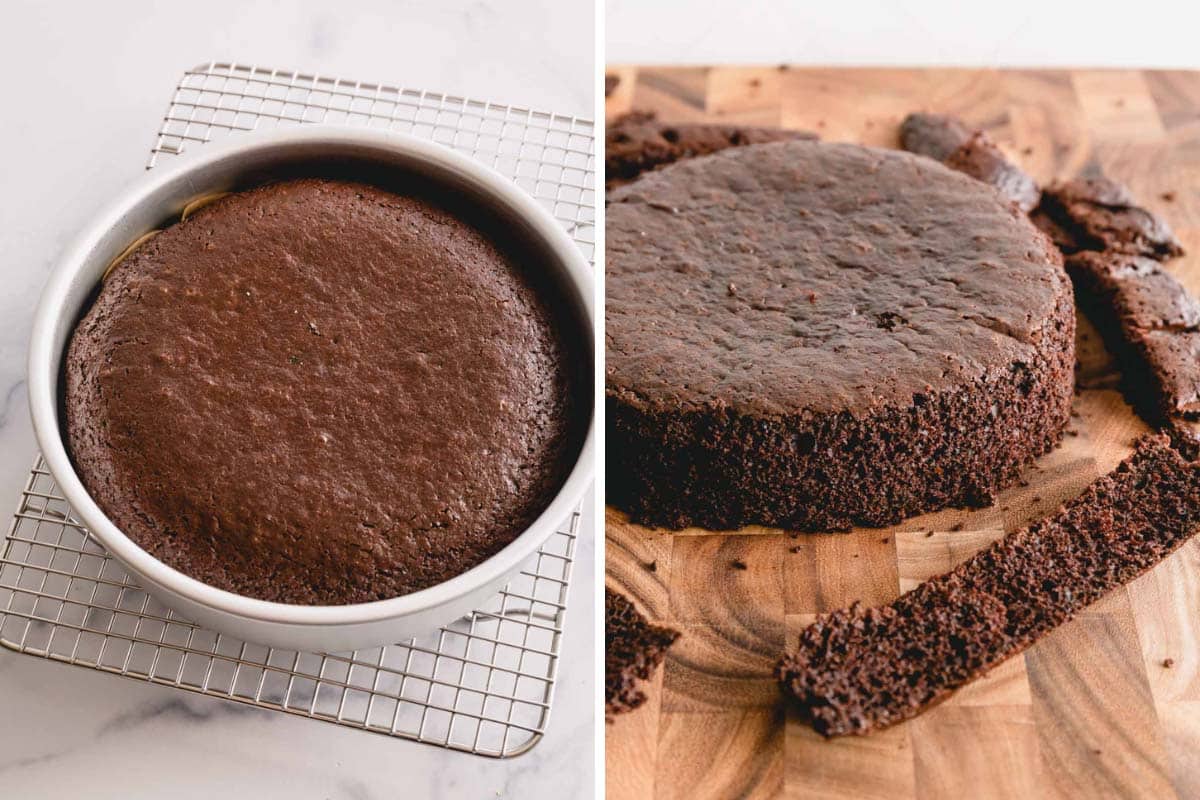
- Bake for about 20 minutes, or until an inserted toothpick comes out clean.
- Once cooled, cut the edges of the cake for ultra-tender cake pops.
2. Make the chocolate buttercream:
- In the bowl of a stand mixer with the whisk attachment, whip the room temperature butter until light and fluffy. A hand mixer and a large bowl work great too!
- Add the powdered sugar and cocoa powder, then beat for 1 minute. Start on low speed so the sugar doesn’t poof outside of the bowl.
- Add the heavy cream and salt, then beat for another 30 seconds.
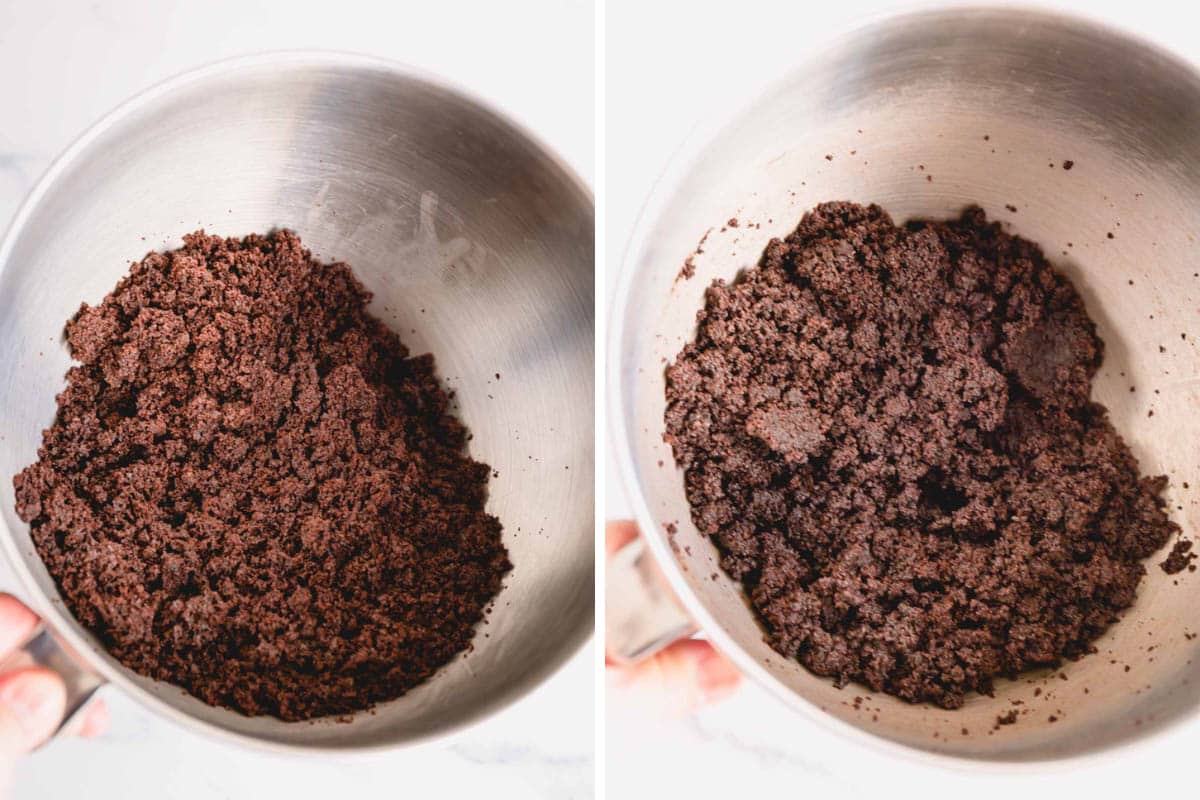
3. Make the chocolate cake balls:
- Place the cooled cake into the mixing bowl with paddle attachment and crumble the cake into fine pieces.
- Add the chocolate frosting and mix on medium-low speed until completely incorporated.
- Use a small cookie scoop to form the cake mixture into 1.5-inch balls and arrange them neatly on a baking sheet. Don’t make the cake balls any bigger or the sticks won’t support their weight.
- Refrigerate for at least 2 hours or overnight. If you try to dip them immediately, you’ll have a mess on your hands!
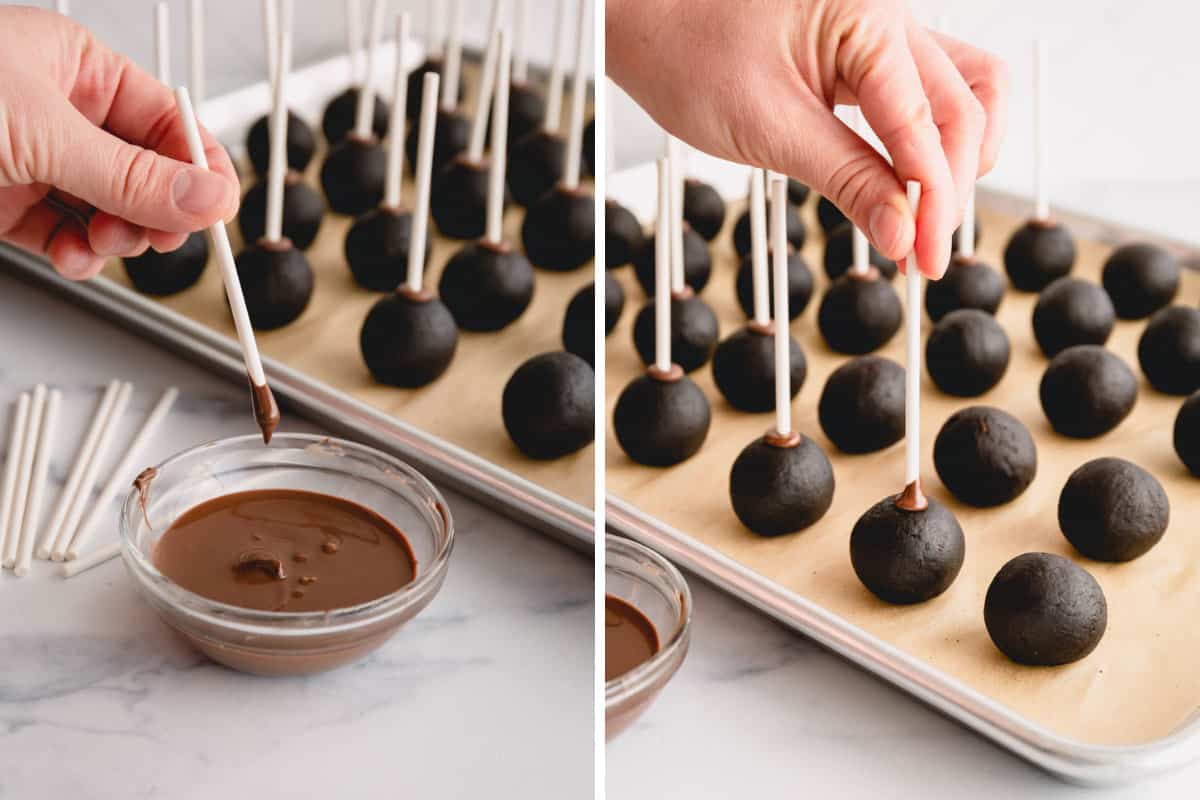
4. Dip the cake pops:
- In a small microwave-safe bowl or cup, melt a small amount of almond bark in the microwave.
- Dip each cake pop stick 1/2-inch deep into the melted bark, then insert the stick into a chilled cake ball. Repeat this process until all the cake balls have sticks, then put them back in the fridge.
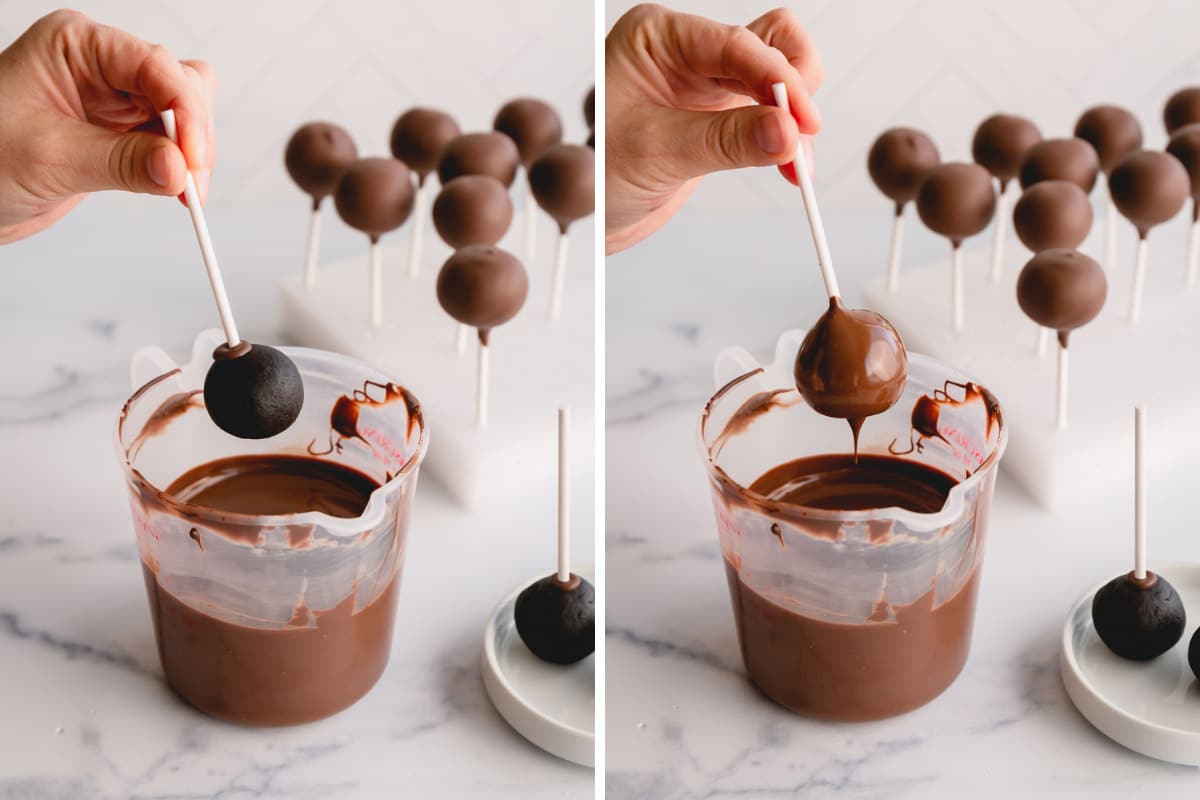
- In a 2-cup measuring cup, melt the rest of the almond bark in the microwave until smooth and silky.
- Remove ten cake balls from the fridge and dip each cake ball into the melted chocolate, letting the excess chocolate drip off.
- Place the dipped cake pops upright into a cake pop stand or a large piece of Styrofoam block.
- Repeat with the remaining cake balls.
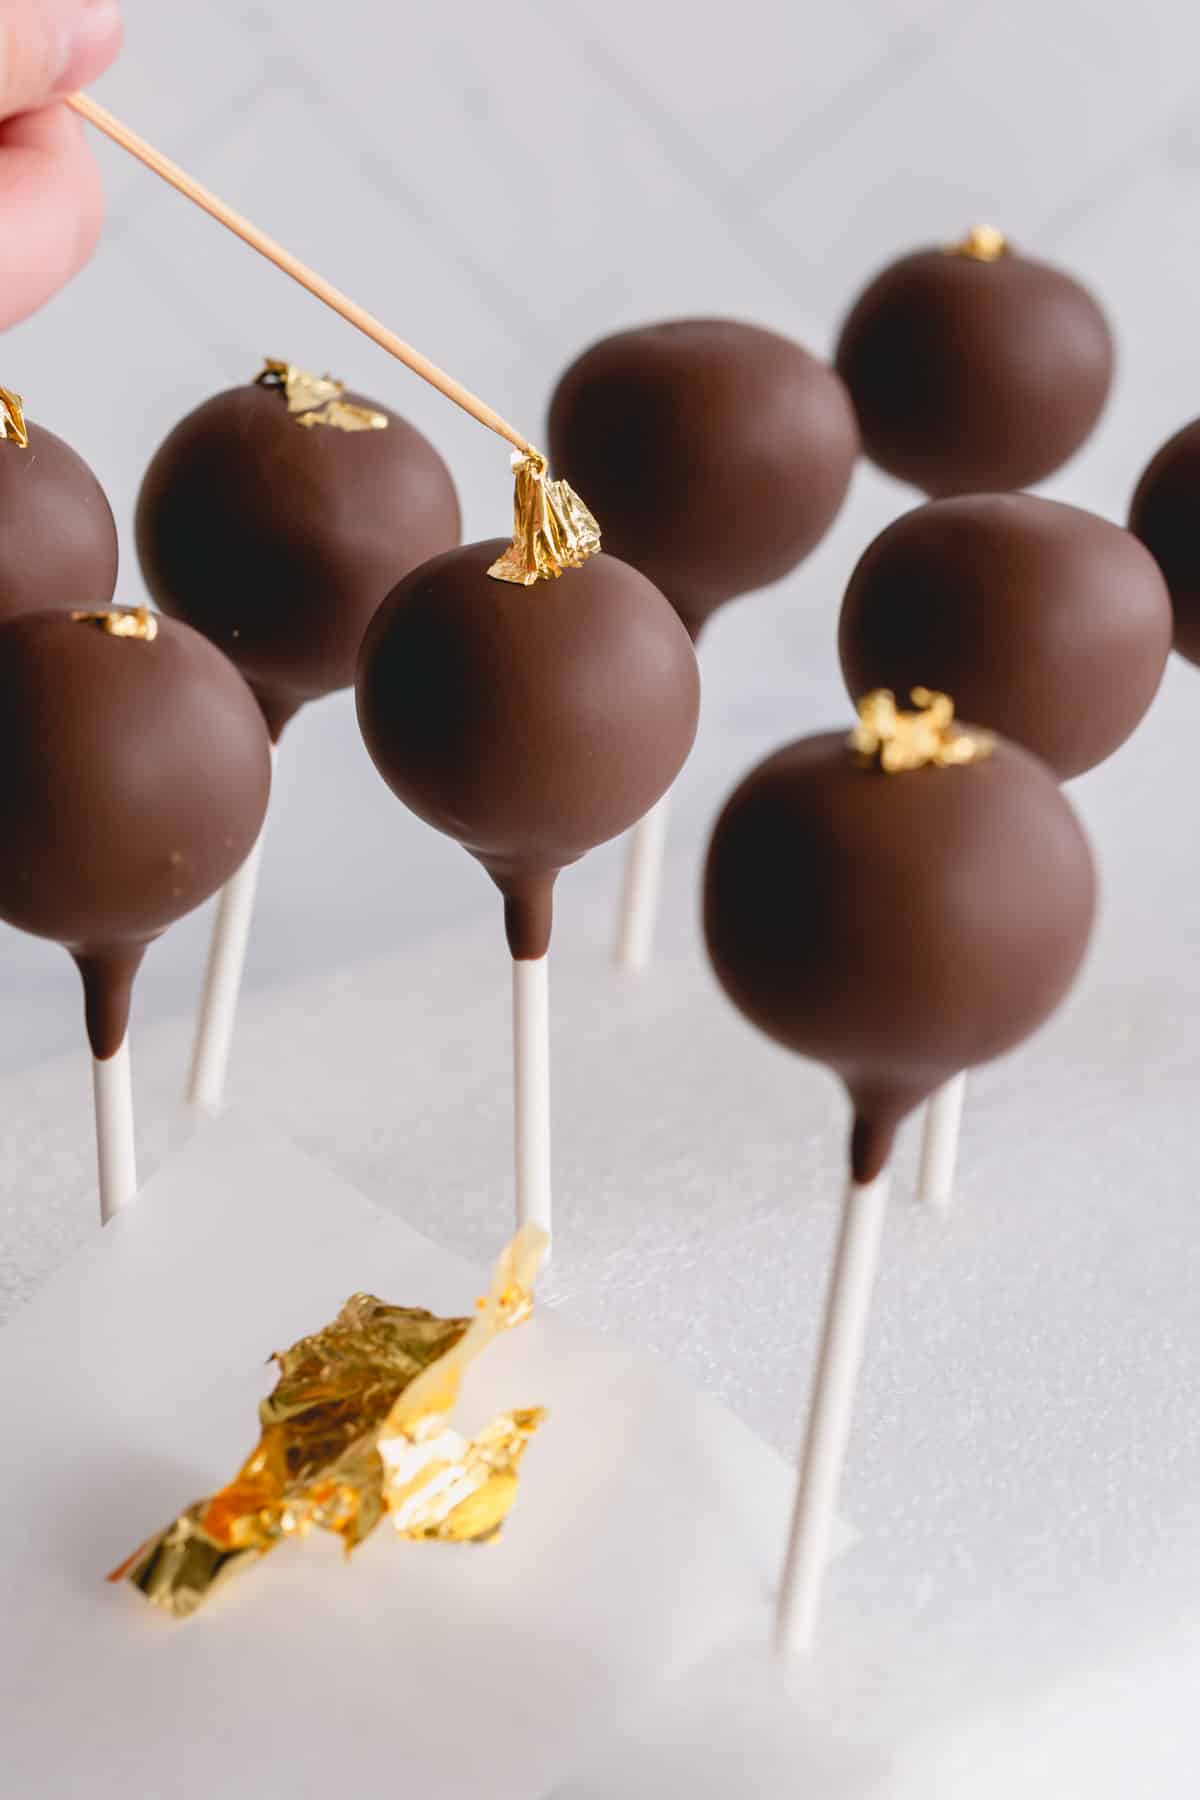
5. Decorate the cake pops
- Decorate with sprinkles and jimmies immediately while the chocolate coating is still wet.
- If you want to decorate with gold leaf, let the coating dry completely. Then carefully place a piece of the gold leaf using a toothpick.
- Let the cake pops dry for at least an hour before packaging.
Tips for Success:
- Temperature is crucial for easy dipping. Warm cake balls fall apart and frozen ones crack. Make sure they’re chilled and firm for easy dipping and no cracking!
- Let the excess melted bark drip off the cake pops before you stand them up. This prevents a stodgy, thick coating and dripping down the sides.
- For uniform cake balls, use a small portion scoop. Don’t make the cake pops too big, or they’ll likely fall off the sticks!
- For a colored coating, use vanilla almond bark and oil-based food coloring. Water-based food coloring will make the melted bark clump!
Make-Ahead Tips:
- Cake pops are easiest to make if you think ahead! The cake balls should be chilled and firm for easy dipping. This means you can make them ahead of time for less mess and more fun!
- Undipped cake balls can be stored in the refrigerator for up to 3 days. Dipped pops last for an entire week in the fridge. This gives you plenty of time to make them ahead for a party or celebration!
Decorations & Sprinkles:
- Fun colors – If you want brightly colored pops, use candy melts instead. They come in virtually every color! If the consistency isn’t smooth or thin enough, stir in a half teaspoon of vegetable oil. White chocolate also works perfectly!
- Toppings – While the cake pops are still wet, sprinkle them with fun toppings! Try jimmies, sugar pearls, sanding sugar, crushed candies, candy eyes, or festively shaped sprinkles. Check your local craft store for mini royal icing decorations!
- Sticks – Once you’ve got the hang of cake pops, try swapping the sticks for colorful paper straws!
- Edible markers – This works best with a white coating, but you can draw cute faces or add details with these.
- Holders – Get creative with your stand. You can use glass jars filled with candies and sugar pearls, or make your own stand.
Storing Tips:
- Store dipped cake pops in the refrigerator in an airtight container for up to one week.
- Chocolate cake pops are freezer-friendly! Wait until they’ve dried completely, then transfer them to a Ziplock bag or freezer-safe container. Thaw and enjoy within 2 months.
- Thaw frozen cake pops in the refrigerator overnight to prevent cracking. Just be very careful with them!
FAQs:
My favorite coating for cake pops is chocolate almond bark. It has a thin consistency and sets up with no issues.
Candy melts work too, but are a little finicky and harder to deal with. Regular chocolate works, but needs tempering to set up properly.
Yes! It’s important the cake balls are chilled and firm before you dip them, or they will fall apart! Chill the cake balls for at least 2 hours before you plan to dip them.
Yes, chopped chocolate or chocolate chips can be used to dip cake pops.
However, chocolate needs to be tempered properly to set up firm with a nice sheen. Untempered chocolate melts too quickly for cake pops and candies.
Chocolate Cake Recipes:

Chocolate Cake Pops
Ingredients
Chocolate Cake:
- 1 cup (125 g) all-purpose flour
- ¾ cup (150 g) granulated sugar
- ¼ cup (30 g) unsweetened cocoa powder Note 1
- ½ teaspoon baking soda
- ½ teaspoon coarse kosher salt
- ½ cup (120 ml) milk or coffee Note 2
- 1 large egg
- ¼ cup (60 ml) vegetable oil
Frosting:
- 6 tablespoons (85 g) unsalted butter at room temperature
- 1 cup (120 g) powdered sugar
- 2 tablespoons (15 g) unsweetened cocoa powder
- 2 teaspoons heavy whipping cream
- ¼ teaspoon coarse kosher salt
For coating:
- 25 cake pop sticks
- 16 ounces chocolate almond bark Note 3
Equipment
- 9-inch round cake pan
- stand mixer with the paddle attachment
- baking sheet
Instructions
To make the chocolate cake:
- Preheat the oven to 350°F (175°C). Line a 9-inch round cake pan with parchment paper.
- In a mixing bowl with the paddle attachment, combine flour, sugar, cocoa powder, baking soda and salt. Mix on low speed for 30 seconds, or until everything is well combined.
- Add milk, egg, and oil. Mix the batter just until smooth, about 15 seconds.
- Pour the batter into the prepared baking sheet. Bake for about 25 minutes, or until an inserted toothpick comes out clean.
- Let the cake cool completely in the pan set on a wire rack. Then invert the cake onto a cutting board and slice off thin outer edges of the cake.
To make the chocolate frosting:
- In a large mixing bowl with the whisk attachment, whip the butter until fluffy.
- Add powdered sugar and cocoa powder and beat it well until well combined, about 1 minute. Start on low speed and gradually increase it to medium-high.
- Stir in heavy cream and salt and mix another 30 seconds.
To make cake pop mixture:
- In a large mixing bowl with paddle attachment, crumble the cooled cake.
- Add the frosting and mix it well into the cake crumbs on medium low speed. Make sure there’s no dry cake visible.
To form cake balls:
- Using a small cookie scoop, divide the cake pops into 1.5-inch balls and arrange them on a lined baking sheet.
- Refrigerate for 2 hours, or overnight.
To coat the cake balls:
- Melt a small amount of chocolate almond bark in the microwave.
- Dip the cake pop sticks into the melted almond bark about ½-inch deep, then insert it into the chilled cake balls. Continue this process until all the cake balls have a stick. Put them back into the fridge.
- Melt the remaining chocolate almond bark in a 2-cup measuring cup in the microwave until nice and smooth.
- Bring out about 10 cake balls at a time. Dip each cake ball into the melted almond bark until it’s fully covered, including the base. Gently shake it to let the excess coating drip off. And place the cake pops upright into a Styrofoam, or box, or special cake pop stand.
- Repeat with the remaining cake balls. Be sure to bring about 10 cake balls out of the refrigerator at a time, or cake balls will fall out of the stick it they warm up at room temperature.
- Let the cake pops set for about an hour before packaging.
⭐️ Did you make this recipe?
Please leave a review and let us know how you liked it!
Tips & Notes
– Store dipped cake pops in the refrigerator in an airtight container for up to one week.
– Chocolate cake pops are freezer-friendly! Wait until they’ve dried completely, then transfer to a Ziplock bag or freezer-safe container. Thaw and enjoy within 2 months.
– Thaw frozen cake pops in the refrigerator overnight to prevent cracking. Just be very careful with them!
Nutrition