This post was originally published on August 17th, 2013.
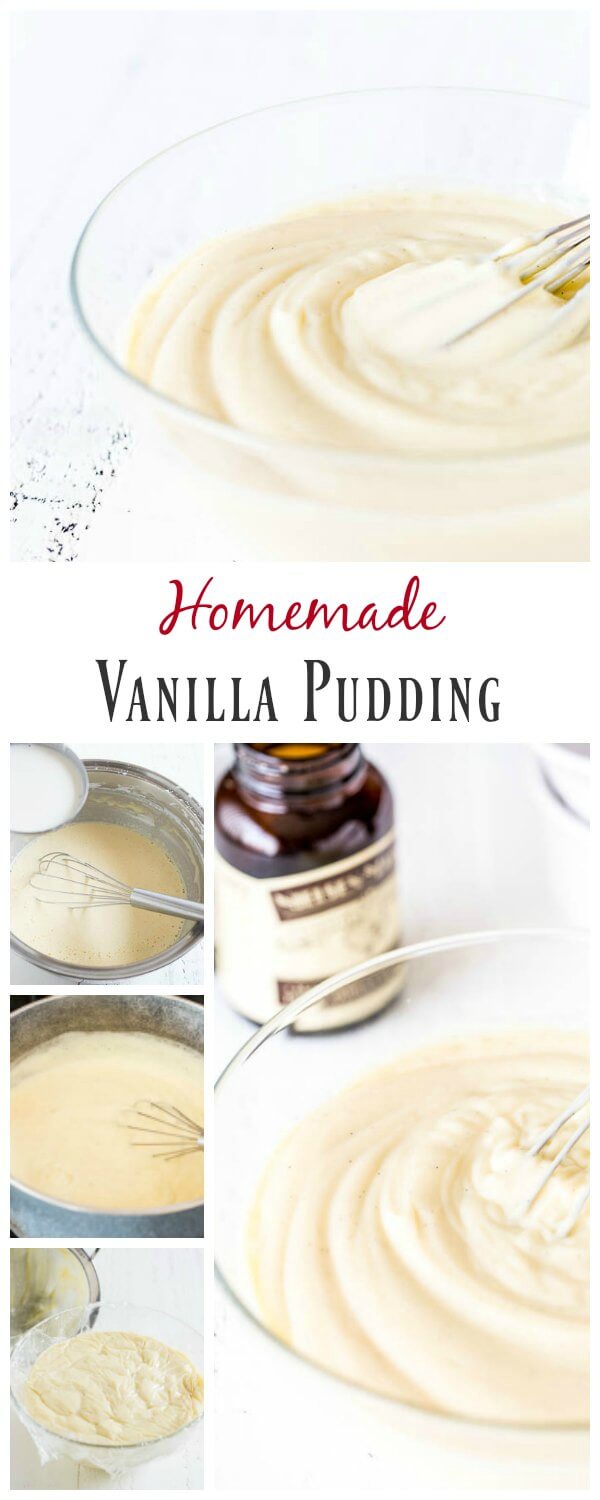
Silky smooth and irresistibly rich, this homemade vanilla pudding is completely from scratch and takes less than 20 minutes. There’s nothing blah about this simple vanilla pudding!
I promise, making a homemade pudding from scratch is so very easy! And it requires simple ingredients that you’ll probably find in your pantry and fridge right now.
Growing up in Mongolia, we didn’t have much pre-made, boxed and ready-to-use food. The only thing I can remember is powdered drink mixes, called “Invite+”, equivalent to kool-aid. Loved those so much!! But that was probably the only pre-packaged stuff we used in the kitchen.
I’ve watched my mom cook simple and quick dinners after work on weeknights and treat us, kids, to flaky, buttery Russian cake “Napoleon”, or chocolate eclairs, or marshmallows from scratch on the weekends. Everything was made from scratch. I remember one time making marshmallows with mom’s friends. Men took turns beating the mixture by hand, and we kids couldn’t wait to eat them as they were setting! Crazy, but it was also so much fun!
Anyway, that making-things-from-scratch mentality is stuck with me to this day. I have a hard time purchasing boxed stuff, when the homemade version is so much better. Don’t get me wrong, I love the convenience of cake mixes, frozen tortellini, canned tomatoes, boxes of broth. Not all the time, but there’s always time and place for those things.
Ok, enough of that, let’s talk about making the most luxuriously smooth and rich homemade pudding.
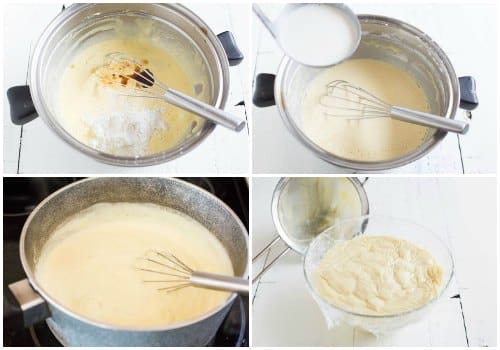
First, we’ll scald milk and heavy cream. Scalding basically means slowly heating milk and bringing it to almost boiling point. But the important thing is NOT to boil it, or it’ll burn on the bottom and get burnt taste.
While the milk is heating up, we’ll whisk egg yolks with sugar, cornstarch, salt and vanilla extract- I also added vanilla bean paste for extra flavor and pretty flecks– until it’s nice and thick.
And before adding it into the hot milk, we first need to temper the egg yolk mixture. Tempering egg yolks means mixing it with a little bit of hot mixture to slowly heat it up, while whisking it non-stop. That way eggs are not scrambled when added to a hot mixture.
To sum it up, 2 key tips for making homemade vanilla pudding are 1. low and slow is the way to go, 2. whisk, whisk and whisk.
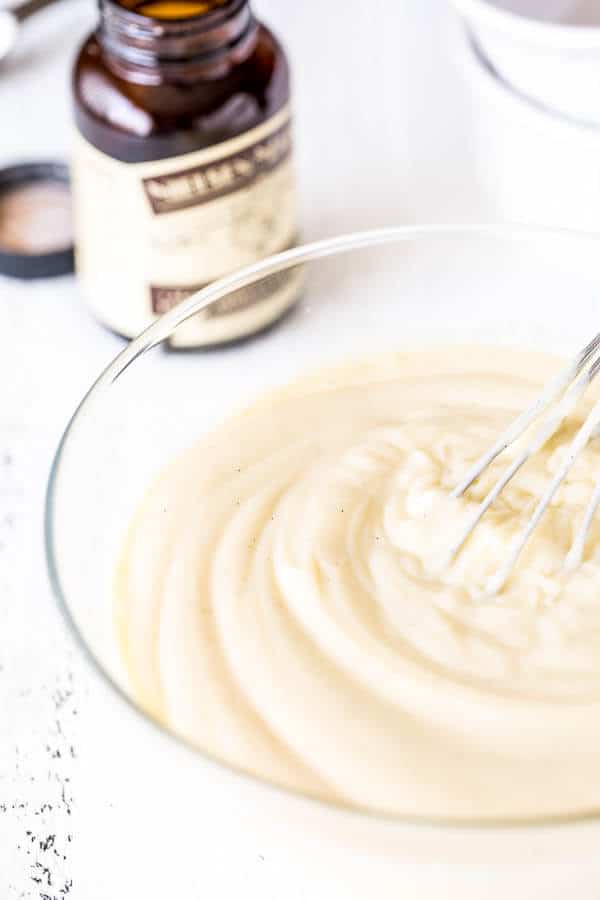
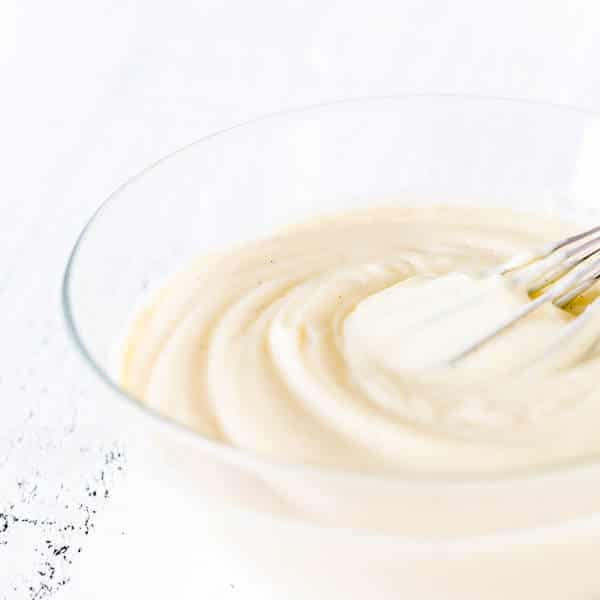
Oh and one more tip for extra smooth texture, run the pudding through a sieve. And don’t forget to cover it with a plastic wrap so it touches every inch of the surface. Trust me, you don’t want that awful film forming on top.
Now, wasn’t that easy?
You can serve the pudding with some fresh fruits, toasted nuts and/or whipped cream, or you can make a banana cream pie- this recipe makes perfect amount for one 9-inch pie- or whatever recipe that calls for a pudding.
One thing I know for sure is that you’re gonna love every drop of this delicious vanilla pudding!

Homemade Vanilla Pudding
Ingredients
- 2 cups 480ml whole milk (2% will work too)
- ½ cup 120ml heavy (whipping) cream
- 1/3 cup 65gr sugar
- 3 egg yolks
- 3 ½ tablespoons cornstarch
- 1 tablespoon pure vanilla extract
- 1 tablespoon vanilla bean paste
- ¼ teaspoon kosher salt
Instructions
- In a heavy bottomed saucepan, combine milk and heavy cream. Slowly bring it to a simmer over medium heat, stirring frequently. This’s called scalding the milk. Once you see small bubbles appearing on the surface, remove it from heat. Be careful not to boil it though, or it’ll scramble the eggs in step 3.
- In a medium bowl, combine egg yolks, sugar, cornstarch, vanilla extract, vanilla bean paste and salt. Whisk the mixture until creamy and doubled in size.
- To temper the egg mixture, slowly add 1 cup of scalded milk into the egg yolk mixture, while constantly whisking the mixture.
- Transfer the tempered egg mixture into the remaining scalded milk. Cook the mixture over medium heat, stirring constantly for 8-10 minutes, or until the mixture is nice and thick.
- Run the custard through a sieve for extra smooth texture.
- Cover it with a plastic wrap so that it touches the surface of the pudding. This’ll prevent a layer of film from forming on top. Chill the pudding for at least an hour before serving. But if you’re like me and prefer your pudding warm, by all means dig in!
Tips & Notes
Nutrition


I made this the other day. Taste was great, but the texture was strange.
Thank you for your feedback. What was the texture like?
I made this today and I call it a great success! I don’t have vanilla beans, unfortunately, but even without, it was wonderful. Thank you for the recipe! It will be my “go-to”.
Yay, so happy you liked it, Michaela. Thank you so much for your feedback!
how long will this pudding keep in the fridge?
Hi, Eliza. Sorry for delay in my response. It should be fine for up to 3 days in the fridge.
This pudding looks awesome! I love the simplicity here 🙂
Thanks, Medha! Simple is good. 🙂