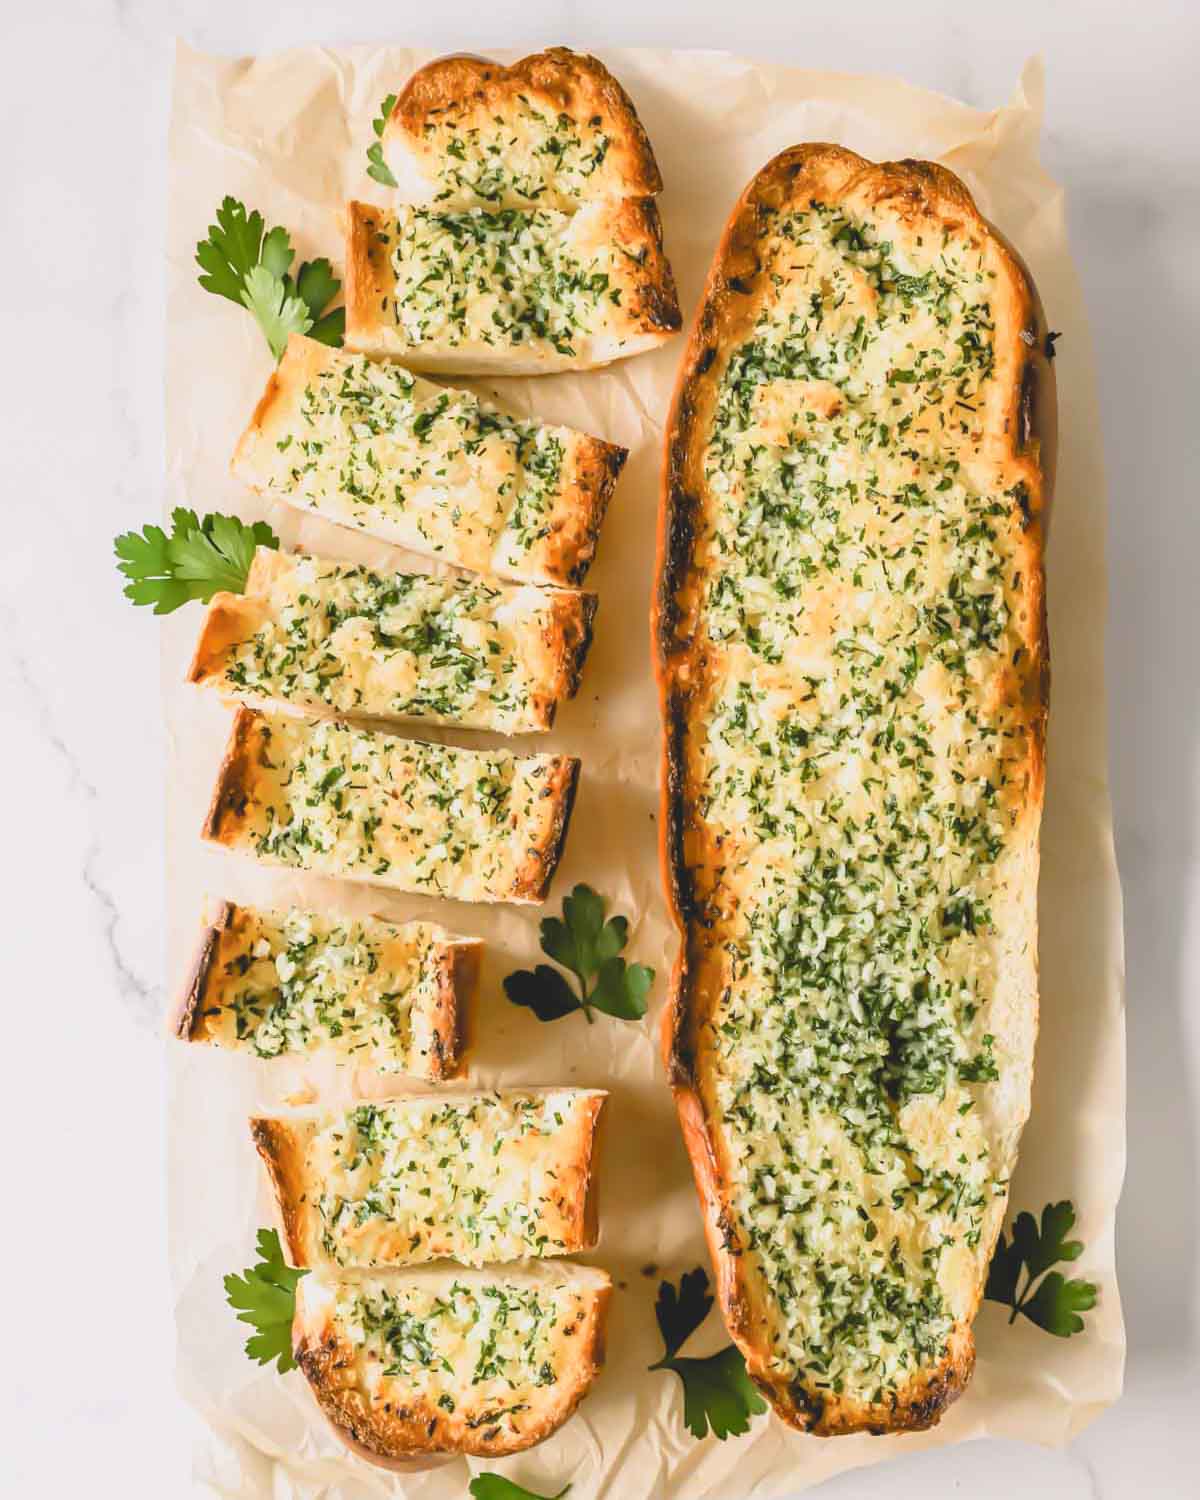
Make perfectly toasted homemade garlic bread topped with herbed butter and fresh garlic in just 20 minutes. This easy garlic bread recipe is the best you’ll ever make!
Why you’ll love this recipe:
Once I began making garlic bread from scratch, I stopped buying store-bought frozen loaves!
Garlic bread is quick and easy to make! And nothing beats the fresh flavors, crispy texture, and mouth-watering aroma while it bakes!
- Taste: Fresh garlic, aromatic herbs, and rich butter infuses the soft bread for an addicting snack/side dish!
- Texture: The top of the toasted bread has the most satisfying crunch, while the inside remains soft and fluffy.
- Crowd-pleaser: Garlic bread is the epitome of comfort food and a side dish that nobody will pass up!
Pair it with pesto ricotta stuffed pasta shells or easy shrimp scampi for an irresistible Italian dinner.

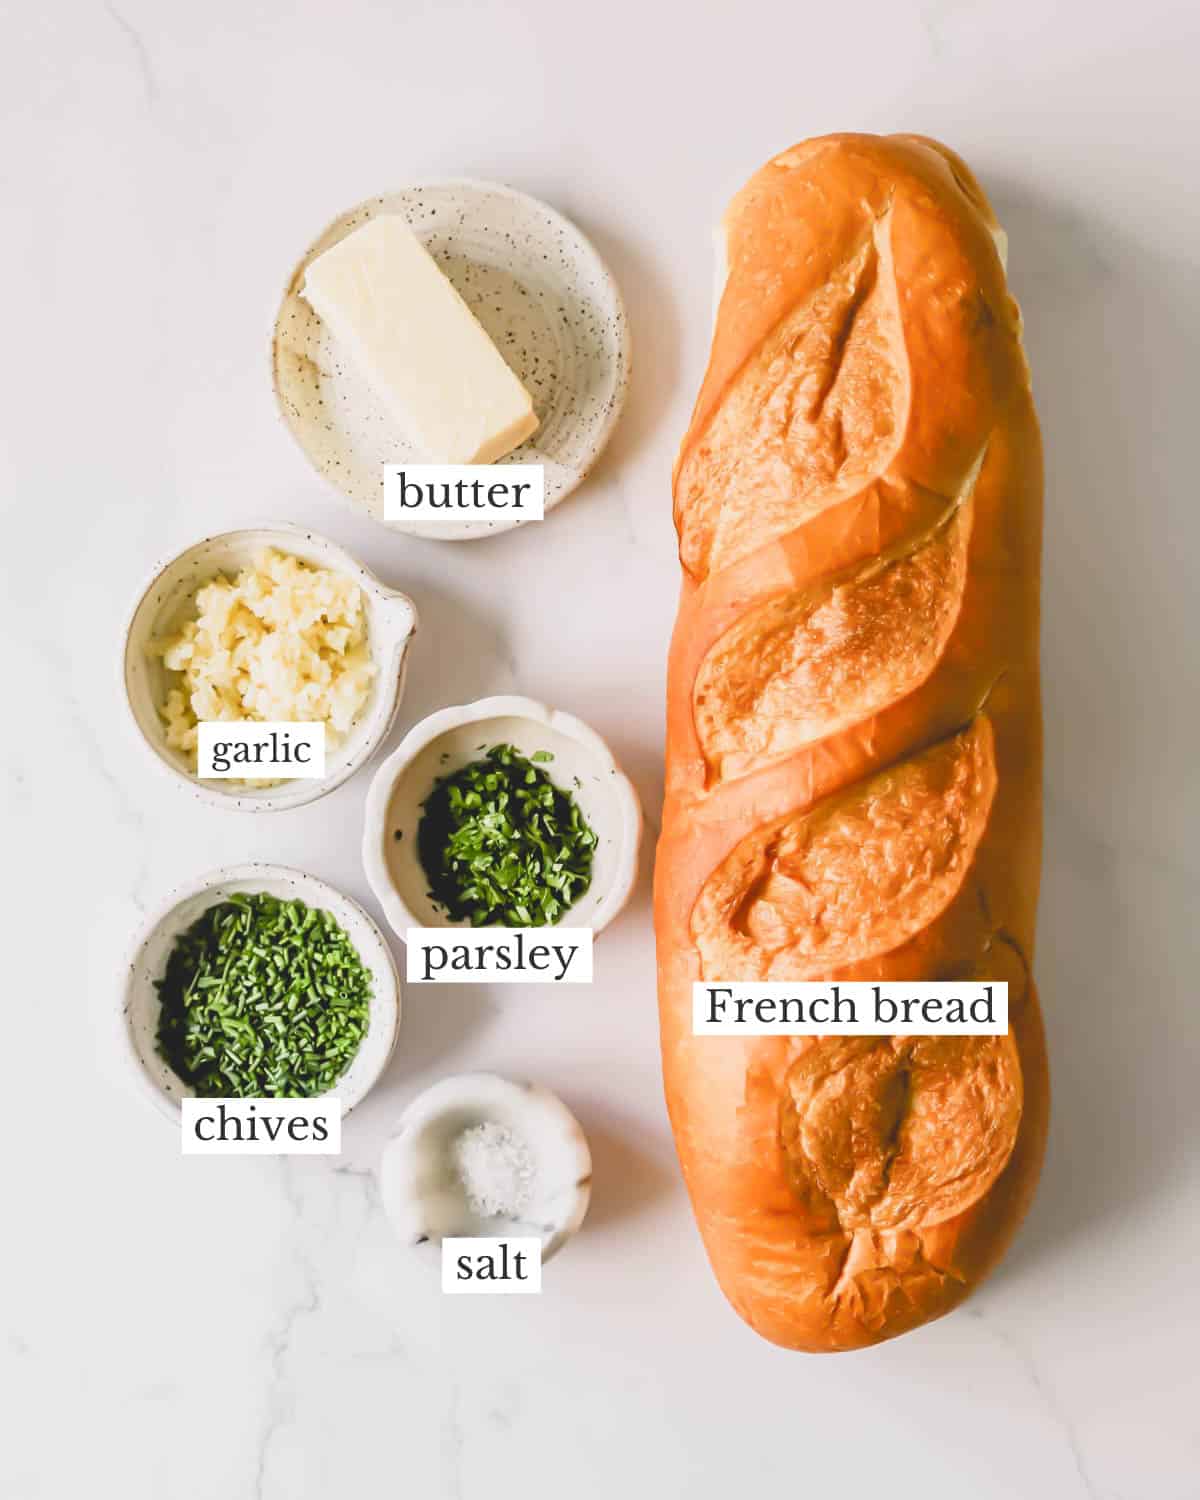
Key Ingredient Notes:
- Bread – Choose a crusty loaf of bread with a soft and fluffy interior such as French Bread or Italian Bread.
- Unsalted butter – Choose a high-quality brand for the best flavor. Unsalted is a must, because we add fresh sea salt to the butter spread!
- Fresh garlic is the star ingredient. Peeled garlic loses its potency quickly. That’s why I recommend grating freshly peeled garlic right before using. For the best garlic flavor, avoid store-bought minced garlic!
- Fresh parsley – Use either curly or flat-leaf (Italian) parsley for a mild, peppery flavor.
- Fresh chives give the herbed butter spread an oniony flavor that pairs perfectly with the garlic taste.
- Sea salt – Use this to enhance the overall taste of the garlic butter spread and make the savory, herby flavors pop!
How to peel garlic easily
Place garlic cloves on a cutting board and press a knife against them until they crack. This releases the skin from the clove, making it easy to peel off.
How to make the best garlic bread recipe:
In just 5 minutes, you can make this easy garlic bread recipe. It’s quick and simple to prepare and will be ready to eat in no time!
- Preheat your oven to 425°F, and line a large baking sheet with parchment paper or aluminum foil.
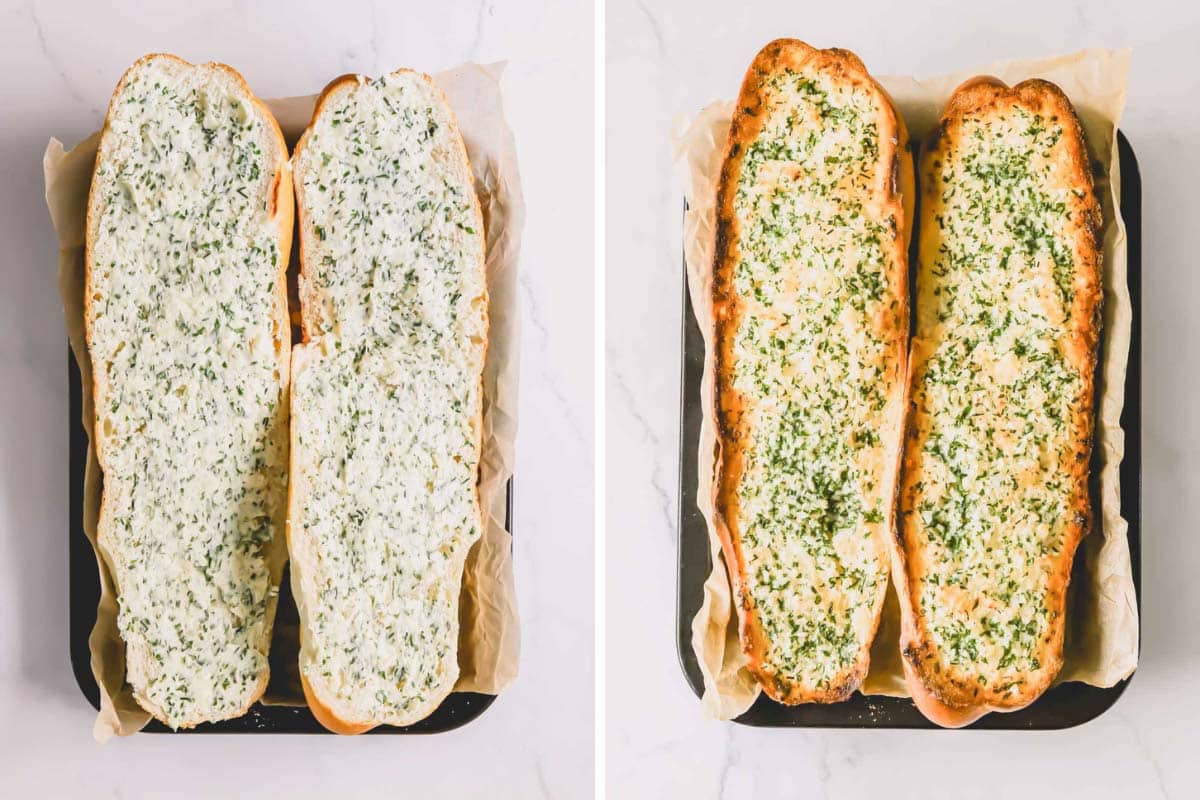
- Slice the bread in half length-wise using a large, serrated knife. Place the bread on your prepared baking sheet with the cut sides up.
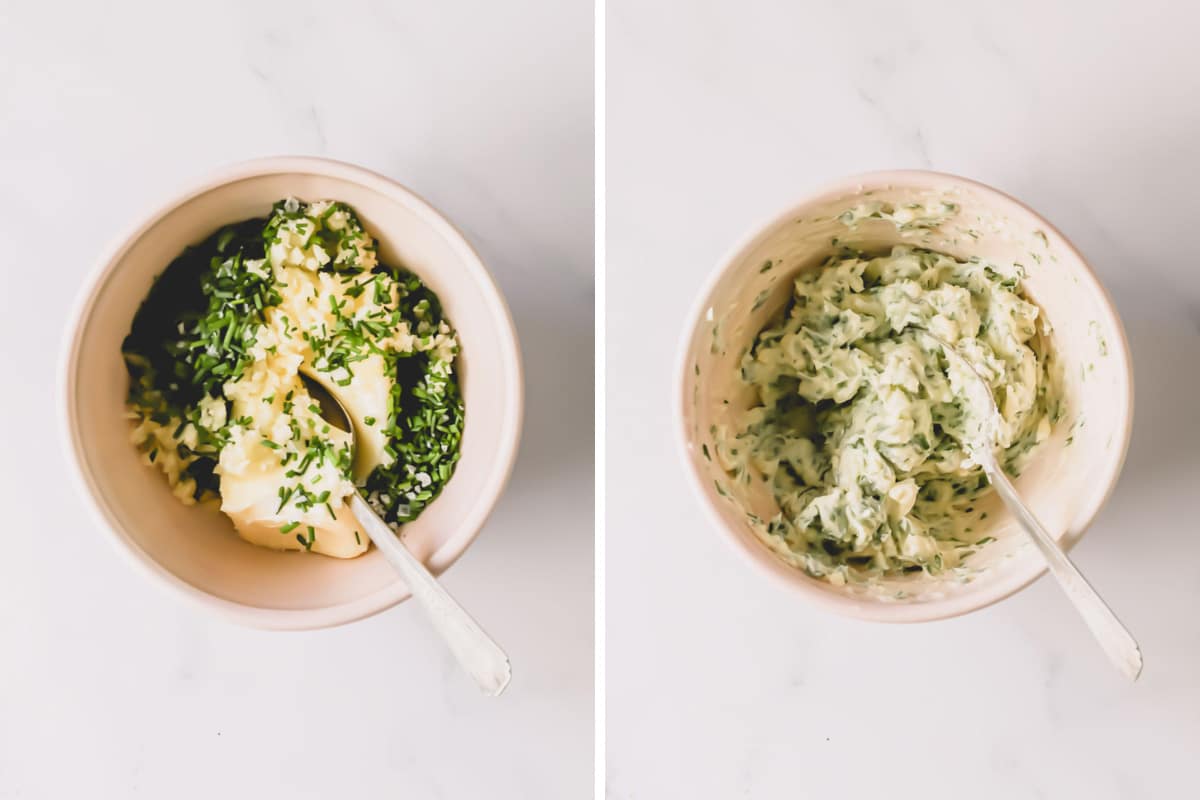
- Mix the softened butter, garlic, parsley, chives, and salt in a medium-sized mixing bowl.
- Spread the garlic butter mixture evenly across the cut sides of the bread.
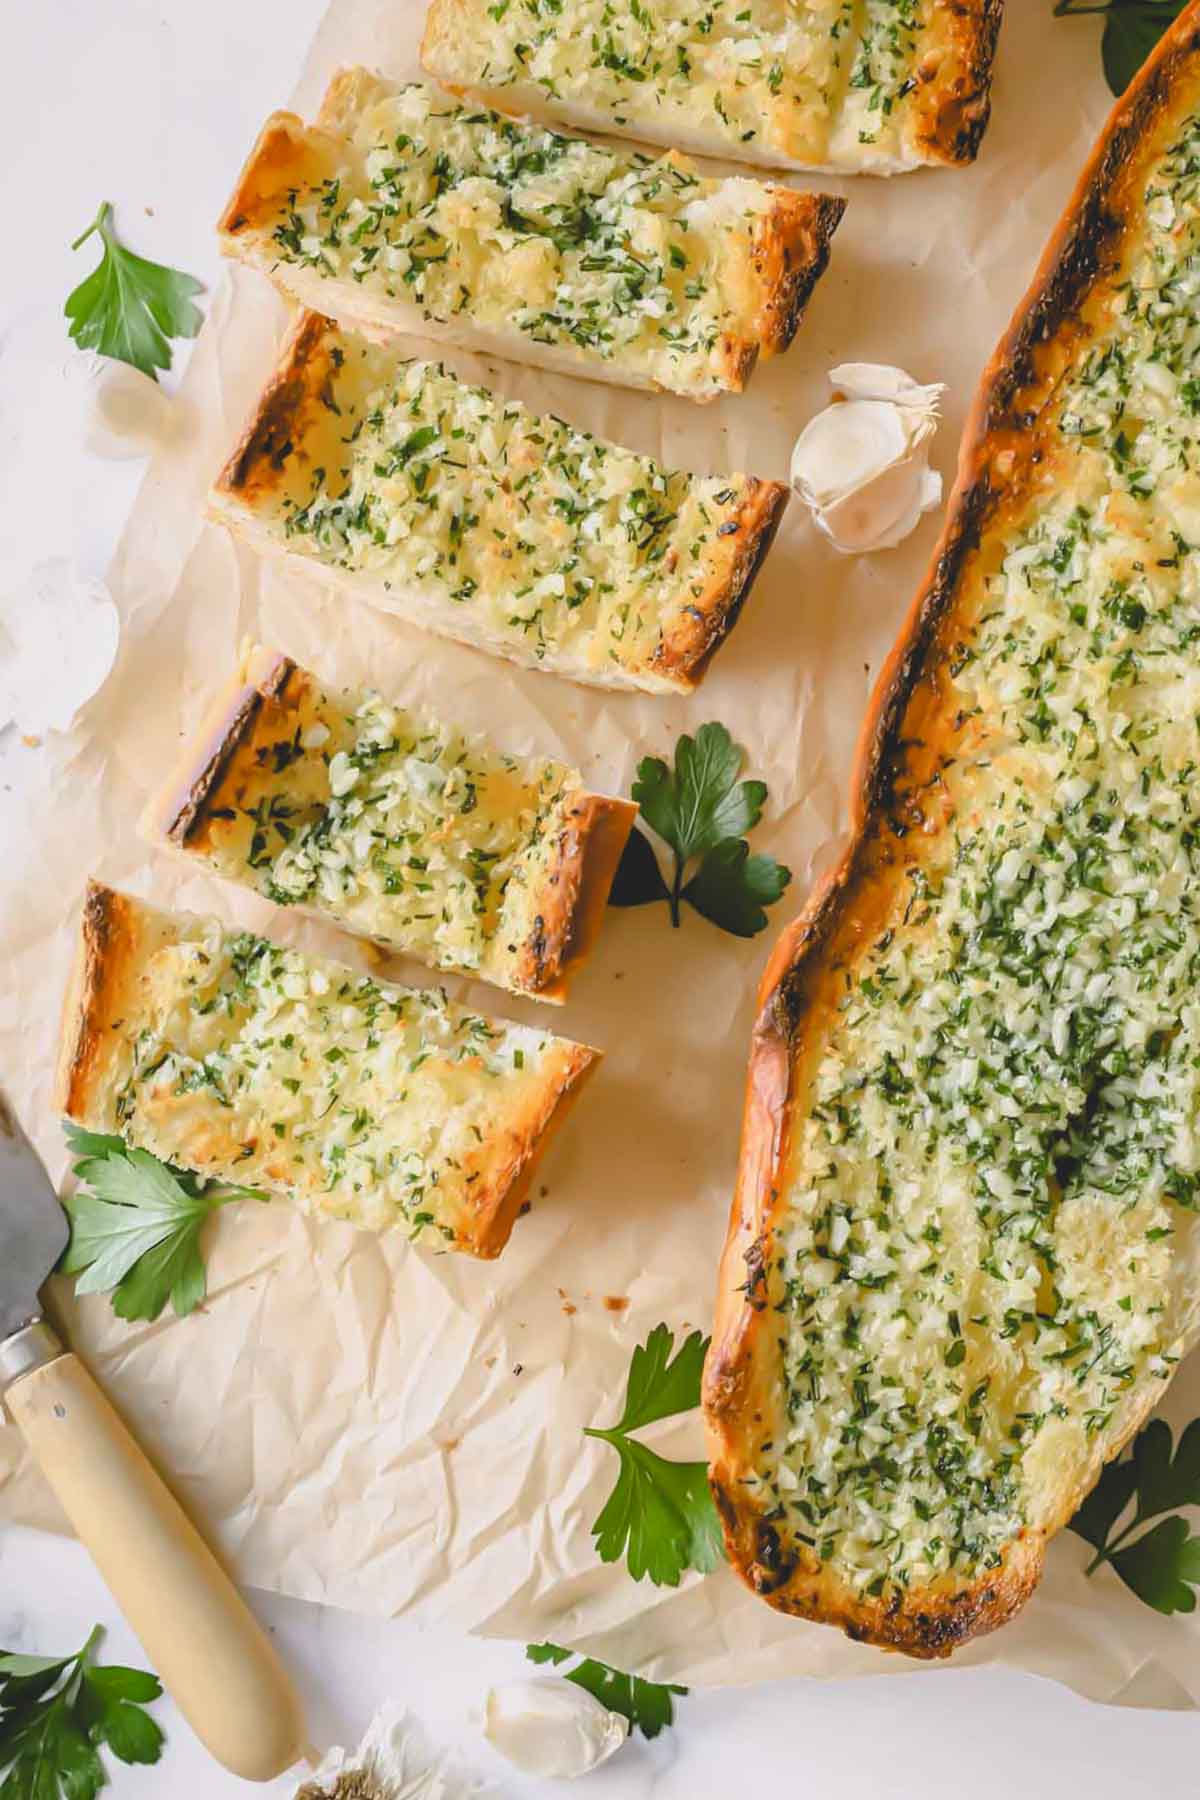
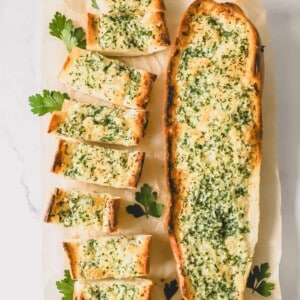
- Bake the bread for 8-10 minutes, or until the top is golden-brown and crisp.
- Serve freshly baked garlic bread with your favorite pasta dish or salad. Enjoy!
Avoid overbaking
Watch your bread carefully and take it out of the oven when the edges turn golden. After this point, it’ll burn quickly if let in the oven!
Tips for Success:
Follow these tips and tricks to make the absolute BEST garlic bread recipe!
- Use softened butter, not melted butter. Softened butter will spread more evenly across the bread. Let the butter sit at room temperature for at least 30 minutes.
- Broil for a crispier top. To make your bread crispier, put it under the broiler for a few minutes. Just watch it closely so that it doesn’t burn!
- Make cheesy garlic bread by sprinkling shredded mozzarella cheese and parmesan cheese on top of the butter spread.
- Garnish with fresh herbs. Sprinkle fresh parsley, fresh basil, or fresh oregano on your baked bread for a beautiful presentation.
How to soften butter quickly
- Fill a heat-proof cup with boiling water. Let it sit for a few minutes.
- Then, pour the water out. And place the hot cup upside down over the cold stick of butter. The heat trapped under the cup will soften the butter.
Make-Ahead Tips:
The best way to prepare this easy homemade garlic bread in advance is to prepare ready-to-bake loaves and stock them in the freezer.
Homemade freezer loaves are far tastier than anything store-bought!
- Slice the fresh bread in half, and slather on the herbed garlic butter spread. Then, place the bread in the freezer.
- Once it’s frozen solid, stack the two halves back together and wrap it tightly in plastic wrap.
- Place the wrapped bread back in the freezer, and freeze it for up to 3 months.
- When you’re ready to bake the bread, separate the two halves, and bake according to the recipe instructions. Add a few extra minutes as needed until the bread is warm and golden!
Storing Tips:
- Let leftover garlic bread cool completely, and wrap it tightly in aluminum foil. Store it in the refrigerator for 1-2 days.
- Garlic bread freezes well! Once cooled, double wrap it in aluminum foil, and store it in the freezer for up to 3 months.
- When you’re ready to enjoy, unwrap the bread, and reheat it in the oven at 350°F for about 10 minutes or just until it is warm.
- Avoid reheating the bread in the microwave, because the microwave can make it soggy.
Garlic Bread FAQs:
While fresh garlic is best, you could substitute fresh garlic with garlic powder if needed. I only recommend using garlic powder, though. It’s hard to control the amount of salt you add to the bread with garlic salt. If you want, you can always add garlic salt to taste when you’re serving the bread.
Fresh garlic bread should only take about 10 minutes to bake in the oven. Frozen bread will take slightly longer, around 15-20 minutes.
Garlic bread is a popular side dish because it pairs well with a wide variety of main dishes! You can’t go wrong when serving garlic bread with pizza, pasta, soup, or salad. It’s also commonly served with Italian mains like chicken parmesan, lasagna, stuffed shells, baked ziti, and manicotti.
More Garlic Recipes:
Classic Garlic Bread
Ingredients
- 1 pound french loaf or italian loaf
- ½ cup unsalted butter softened
- 6 cloves garlic finely minced or grated, Note 1
- 1 tablespoon parsley finely chopped
- 1 tablespoon chives finely chopped
- ½ teaspoon sea salt or more to taste
Instructions
- Preheat the oven to 425 degrees F and line a large baking sheet with parchment paper or foil.
- Slice bread in half lengthwise and place on a baking sheet, cut sides up.1 pound french loaf
- In a medium bowl, mix butter, garlic, parsley, chives and salt together until well combined. Spread evenly over bread.½ cup unsalted butter, 6 cloves garlic, 1 tablespoon parsley, 1 tablespoon chives, ½ teaspoon sea salt
- Bake for 8-10 minutes or until golden brown on the edges. Serve along your favorite pasta dish or salad.
⭐️ Did you make this recipe?
Please leave a review and let us know how you liked it!
Tips & Notes
– Wrap cooked and cooled garlic bread in aluminum foil, and store it in the refrigerator for 1-2 days.
– Homemade garlic bread freezes well! Once cooled, double-wrap it in aluminum foil, and keep it frozen for up to 3 months.
– Reheat from thawed or frozen in the oven at 350°F for about 10 minutes or just until warm.
Nutrition