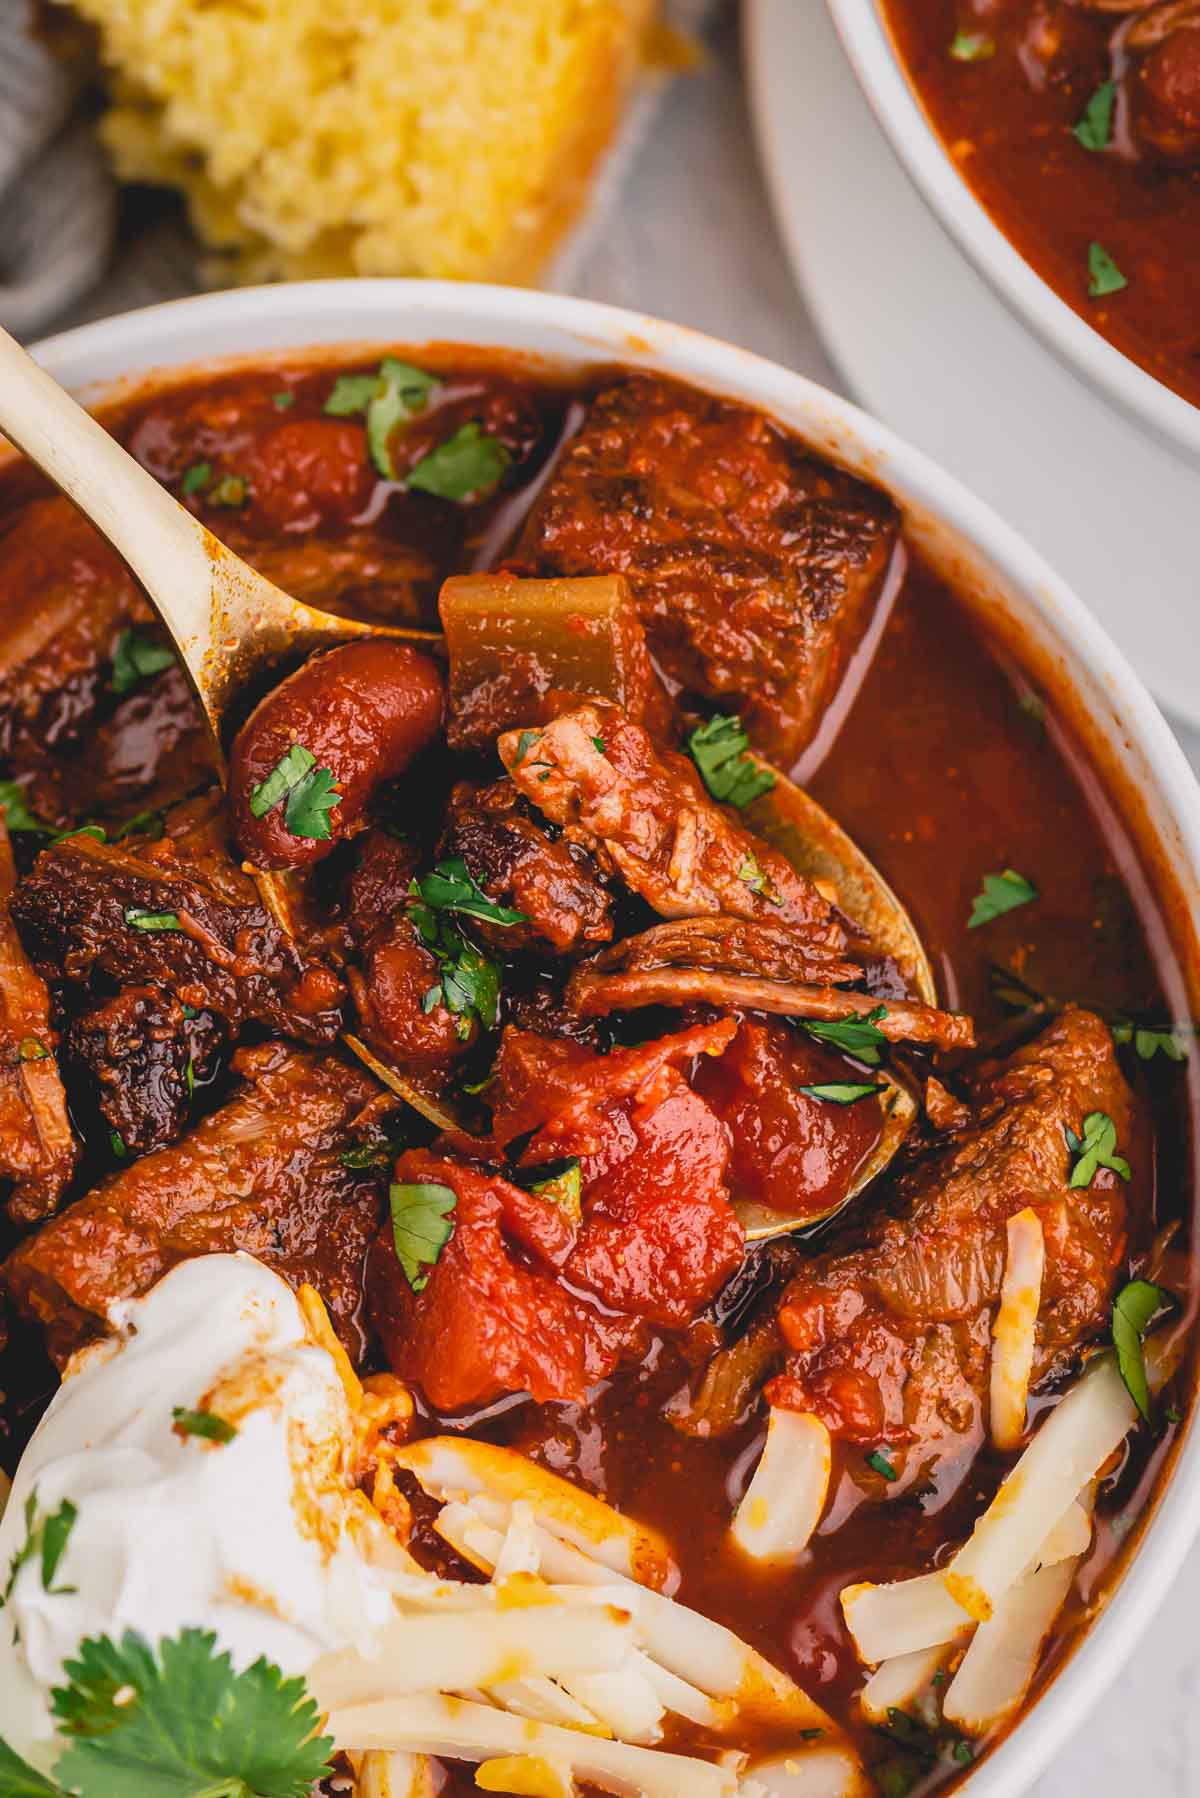
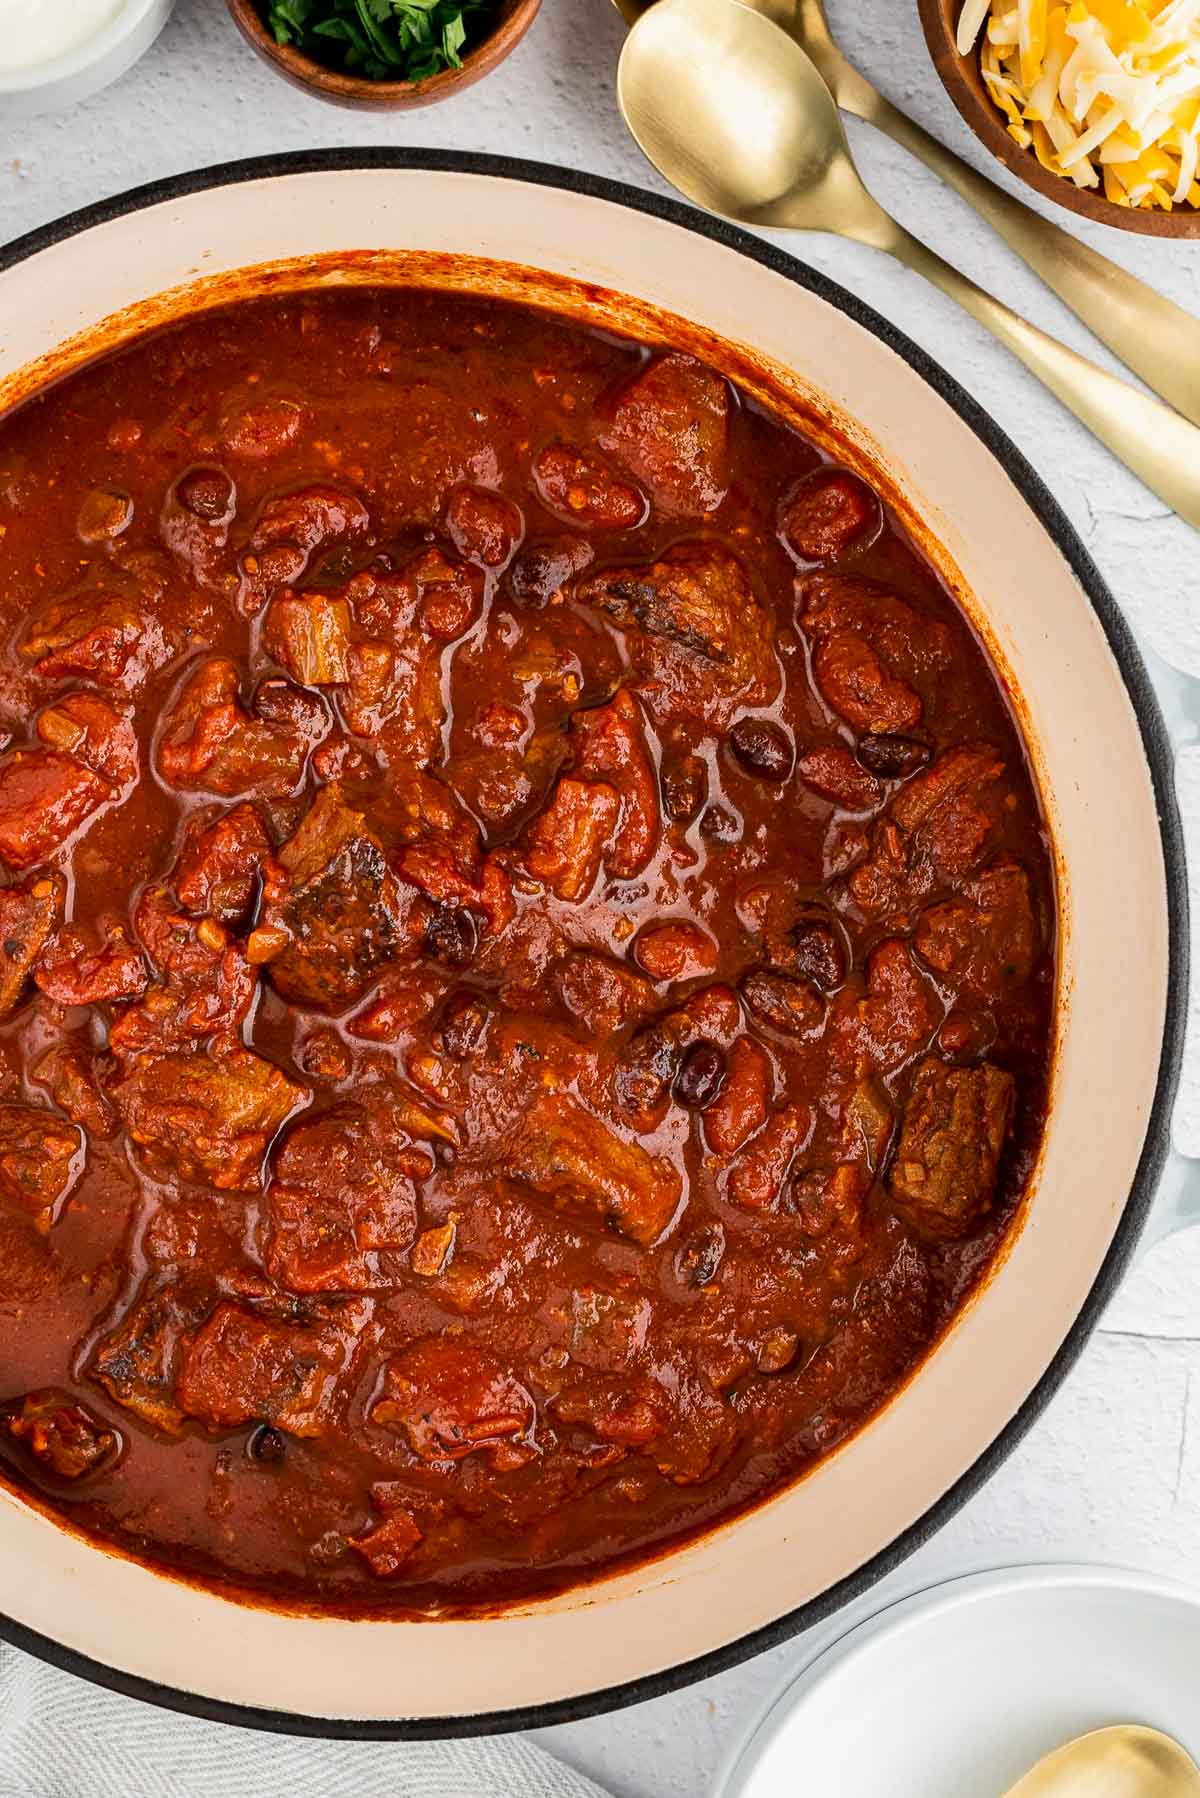
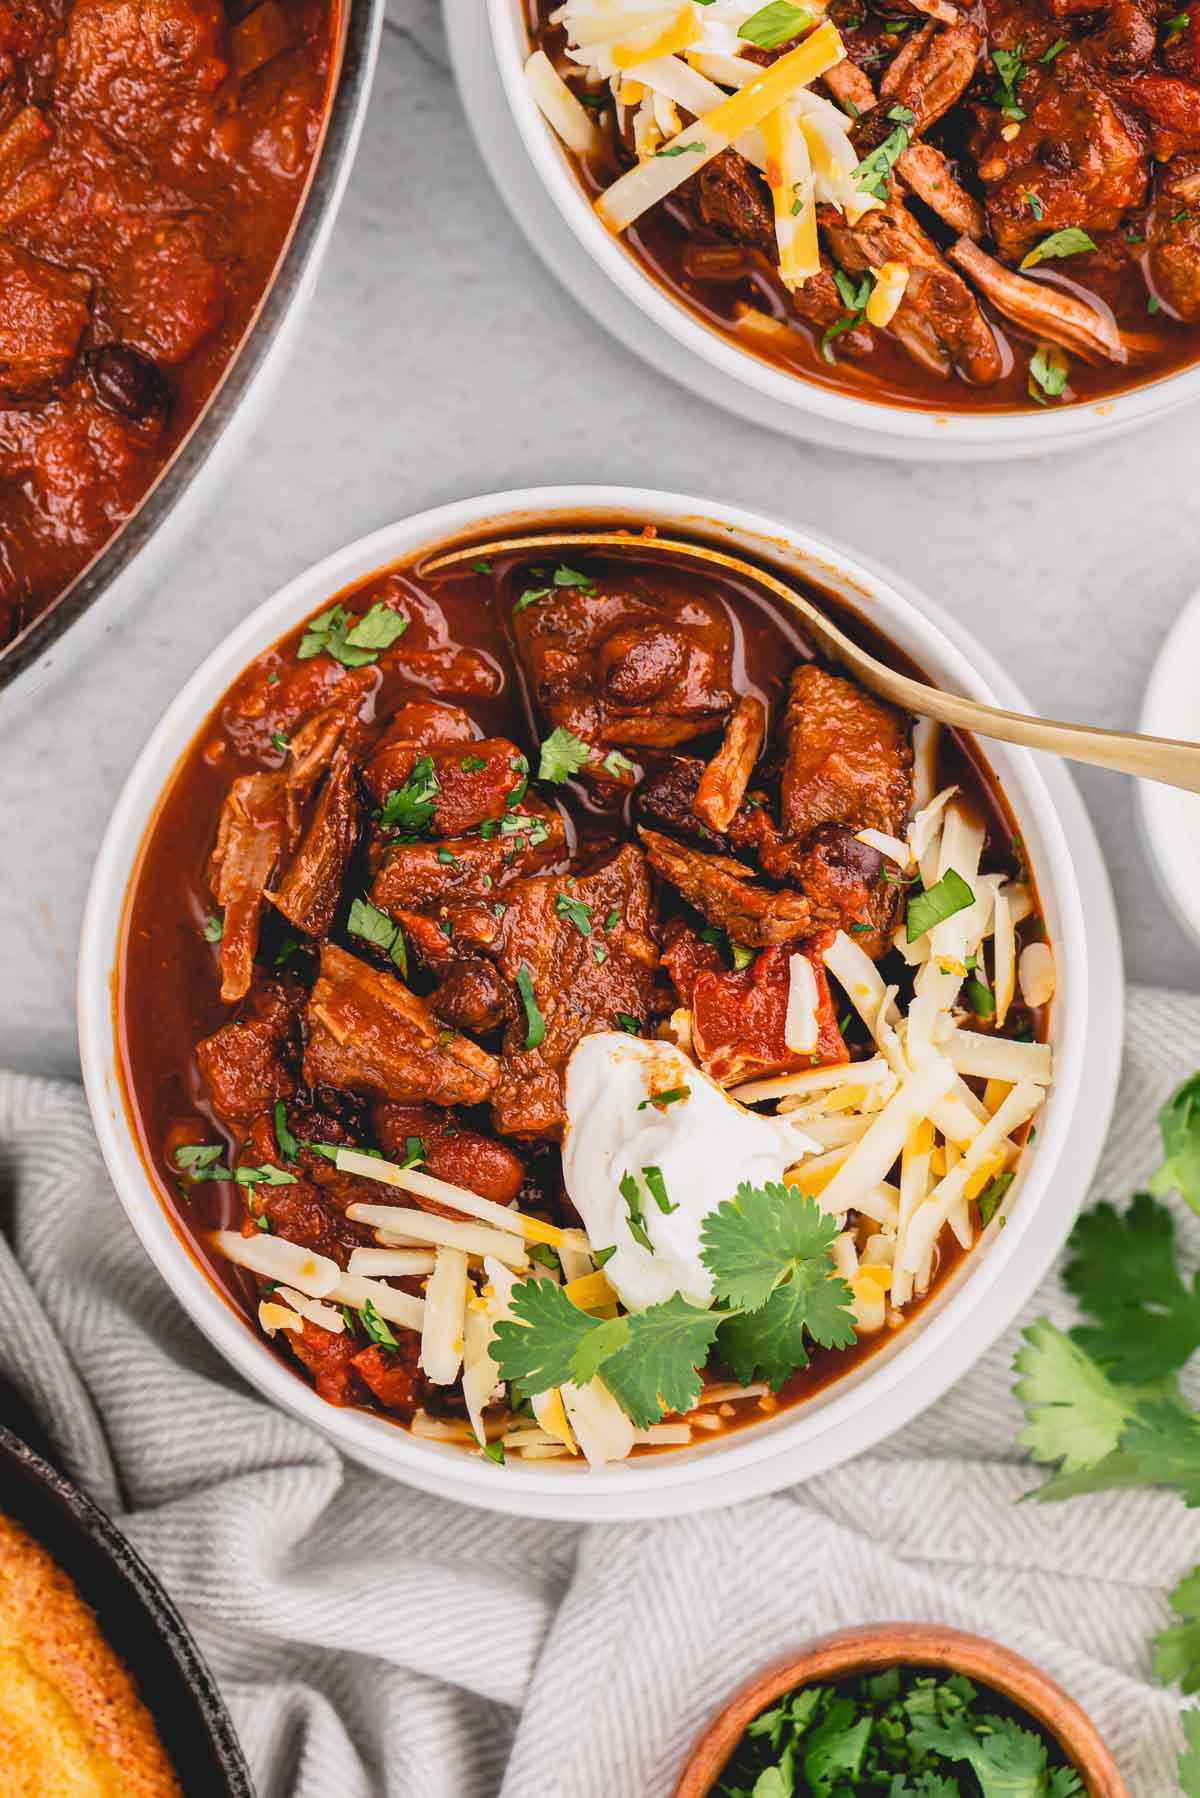
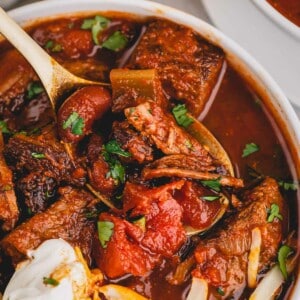
This chunky chili gets its hearty flavor from the caramelized stew meat, simmered in a Dutch oven until fork tender. Thick and rich, this lazy chili is truly a crowd-pleaser!
Why you’ll love this recipe:
It isn’t game day without chili or cheese dip! From Texas chili to chili con carne, the varieties are endless, but none compare to this Dutch oven chili. Here’s why you’ll love this simple stew:
- Simple ingredients with minimal prep time.
- Chunky chili that sticks to your ribs.
- It feeds a crowd and then some!
- Also, it freezes well for a busy weeknight.
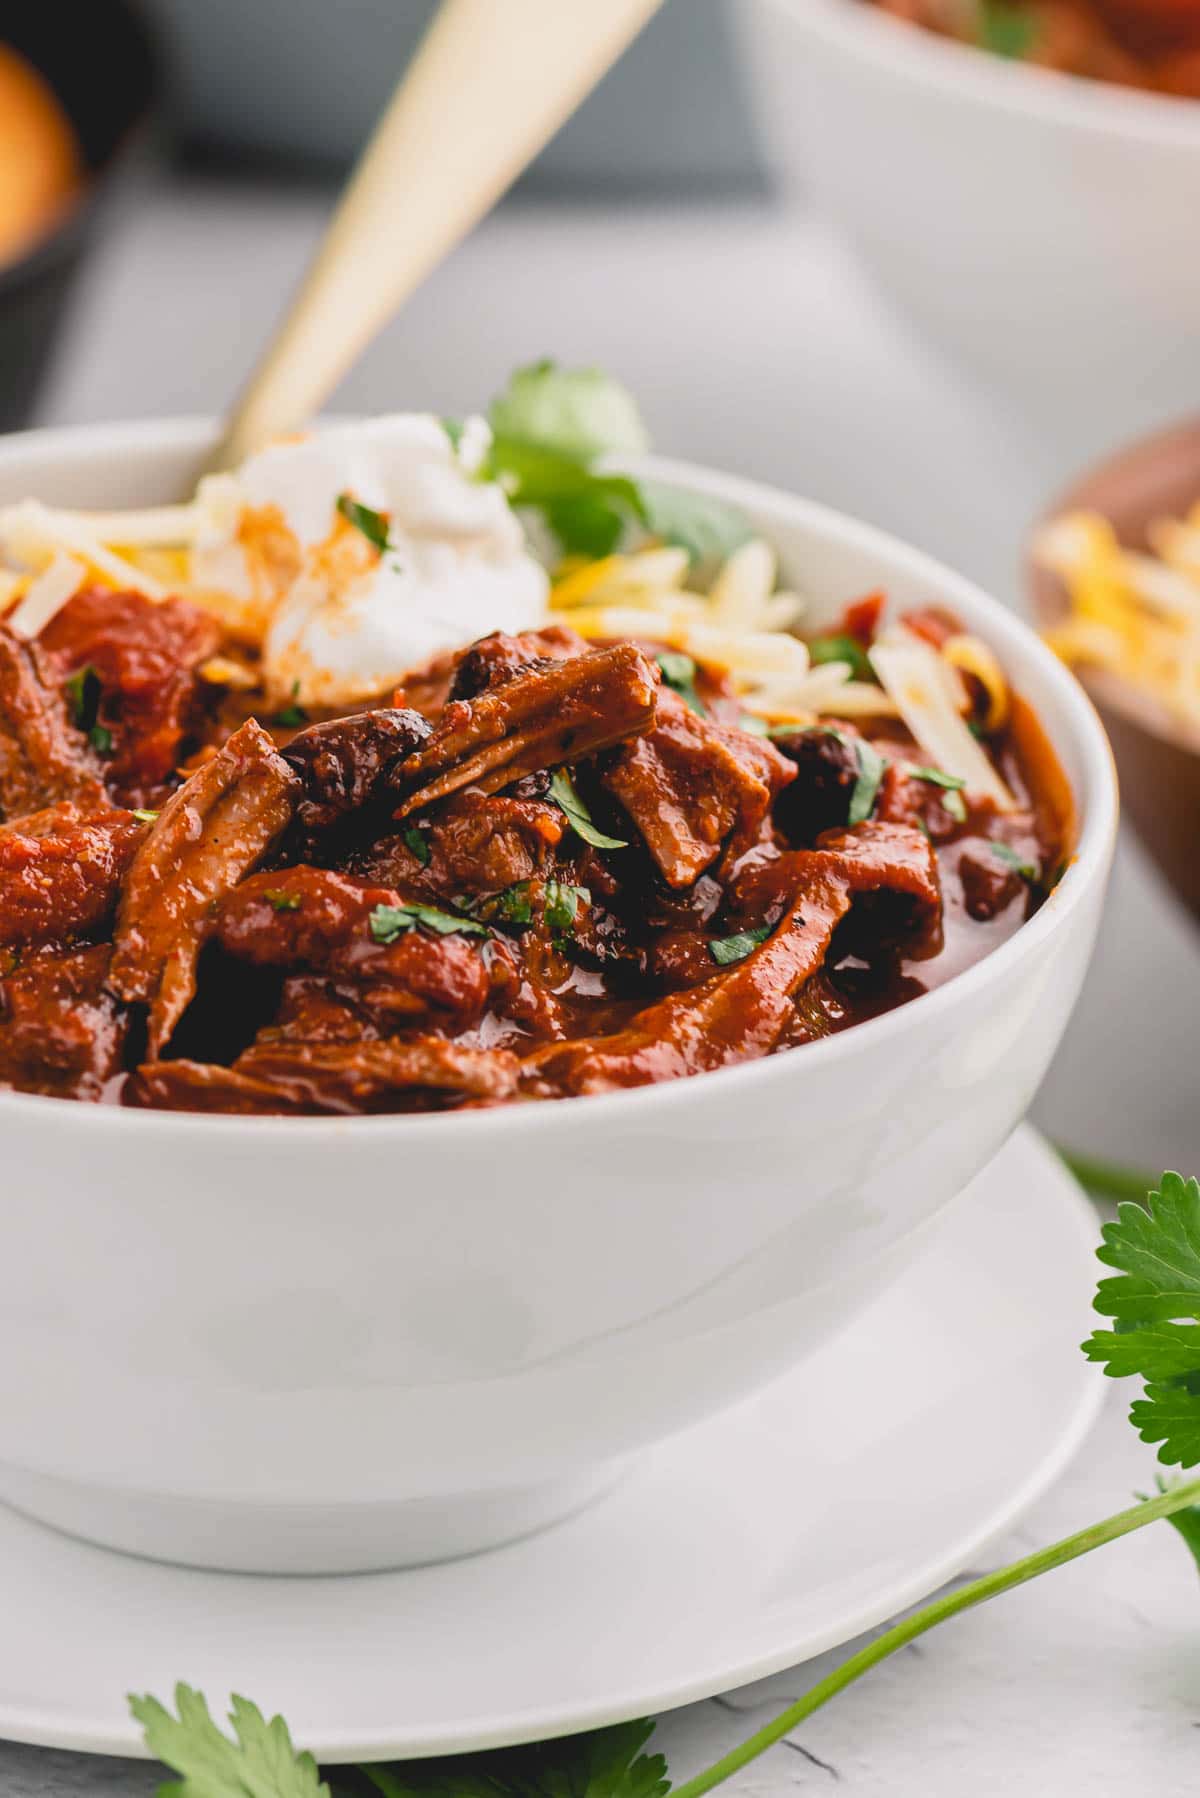
Top this chunky chili recipe with shredded cheese, fresh cilantro, sliced avocado, and corn chips for chili nirvana. Also, make it even more special with this delicious cornbread recipe!
You can double the recipe and freeze for a busy weeknight or make it ahead for an impressive but stress-free entertaining. We’re never in short supply of easy dinner ideas!
Key Ingredient Notes:
Don’t worry, the ingredient list may seem long, but most are pantry staples – eight of which are spices.
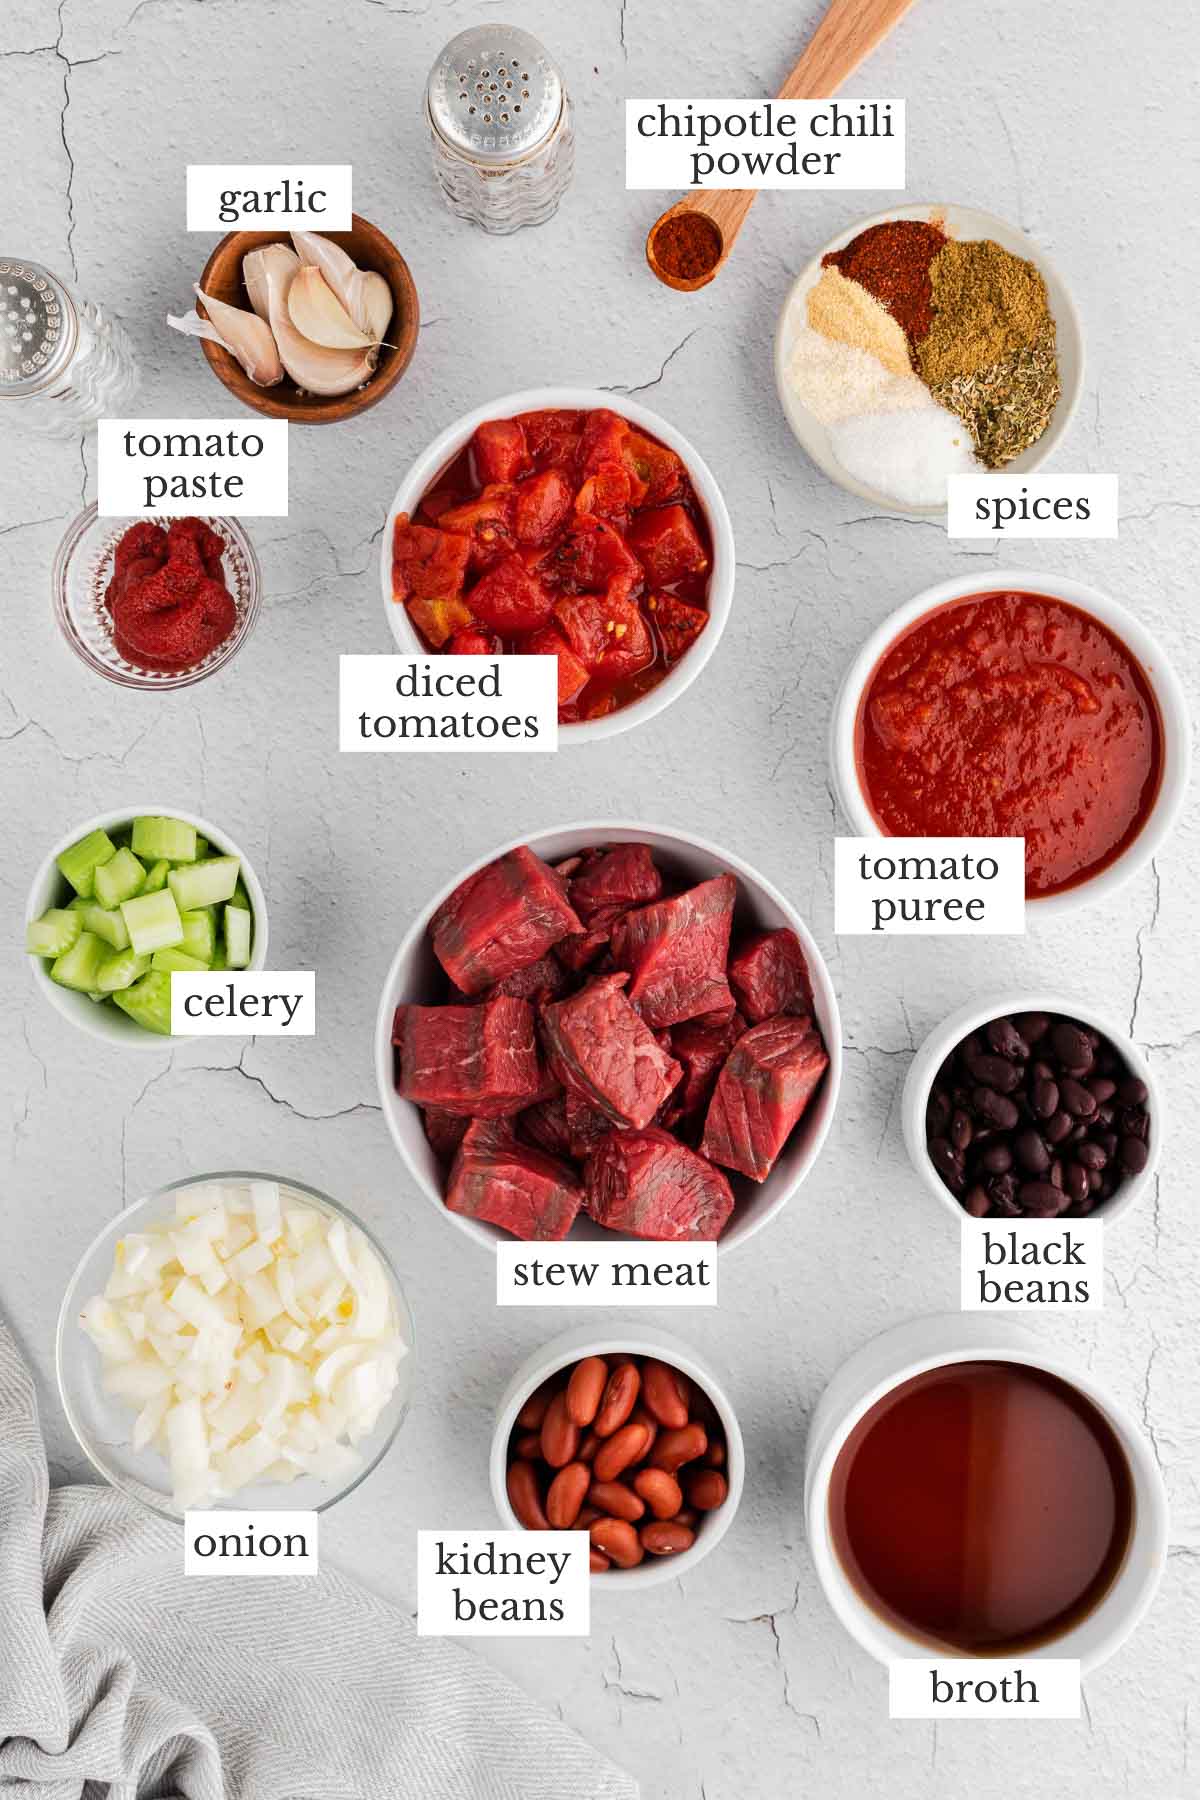
- Stew meat – Precut stew meat is budget-friendly and easy to find. Alternatively, you can cut up a beef chuck roast into 1-inch cubes and trim the excess fat. Stew meat benefits the most from slow cooking method, because it breaks down the tough meat until soft and tender.
- Aromatics – Sautéed onion, celery, and garlic build the foundation of the stew and maximize its flavor. Any type of onion works well here – just use your favorite. Sauté diced bell peppers along with the onion for even more flavor.
- Tomatoes, paste, & puree – Tomato paste doubles as a thickening agent and flavor booster. For more texture, use a 28oz can of diced tomatoes in place of the puree.
- Beans – I’ve used kidney and black beans here, but all beans are welcome. You can sub in pinto beans or canellini beans too!
- Beef broth – Beef broth is the flavorful liquid that forms the base of this chili. Store-bought broth can be high in sodium which is why I recommend reduced-sodium broth. Or homemade beef bone broth is great option as well.
- Spices – Chili isn’t the same without a homemade chili seasoning. Chili powder, cumin, garlic powder, onion powder, oregano, and chipotle powder add warmth and a complex flavor.
- Sugar – A small amount of sugar balances out the acidity of the tomatoes.
How to make this chunky chili recipe:
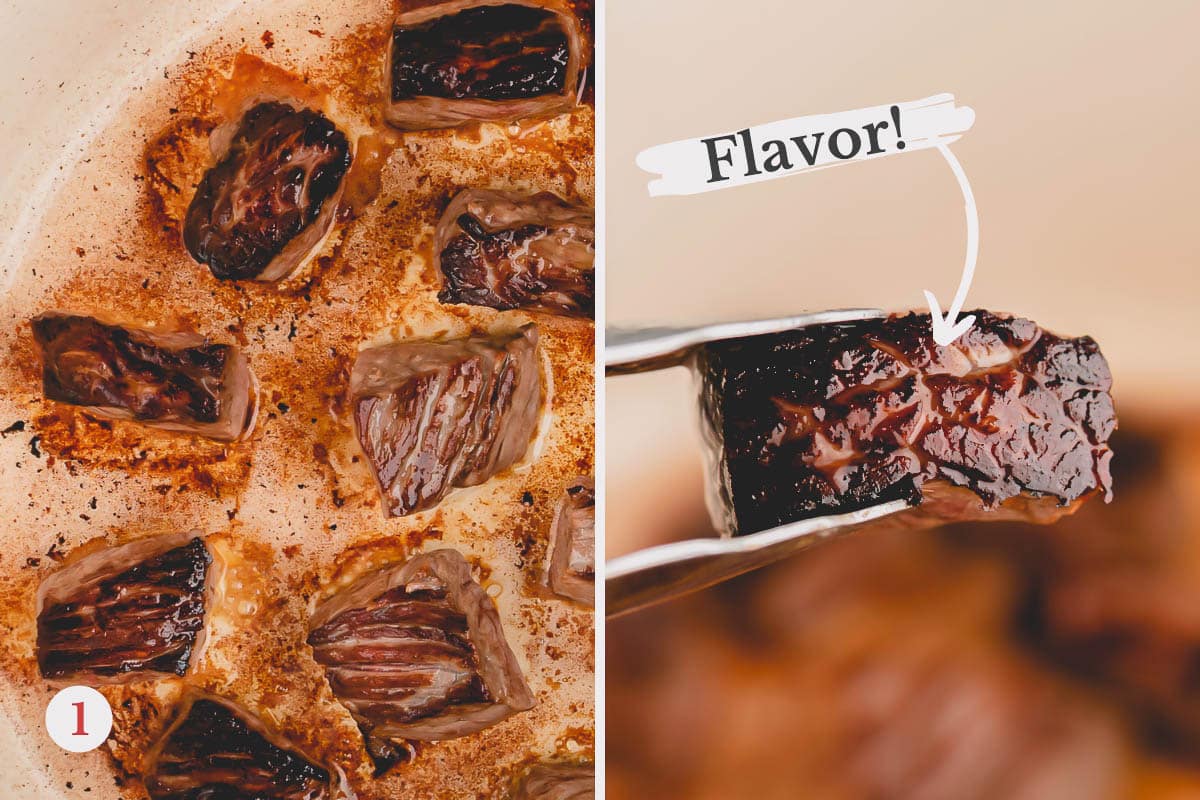
1. First, we’ll heat a large Dutch oven over medium-high heat, then drizzle in some canola oil or bacon grease.
Once the oil is hot, add the beef chunks and sear until nicely browned. Do not disturb! If you fiddle with them, the meat won’t stay against the pan long enough to caramelize. Don’t fear a dark brown sear, this imparts a deep and rich flavor to the chili.
Once all the meat is browned, transfer them onto a clean plate.
Tip
- Thoroughly pat the meat dry with paper towel. Moisture creates steam which prevents browning.
- Be sure to give the beef chunks some space. Overcrowding will cause excess moisture.
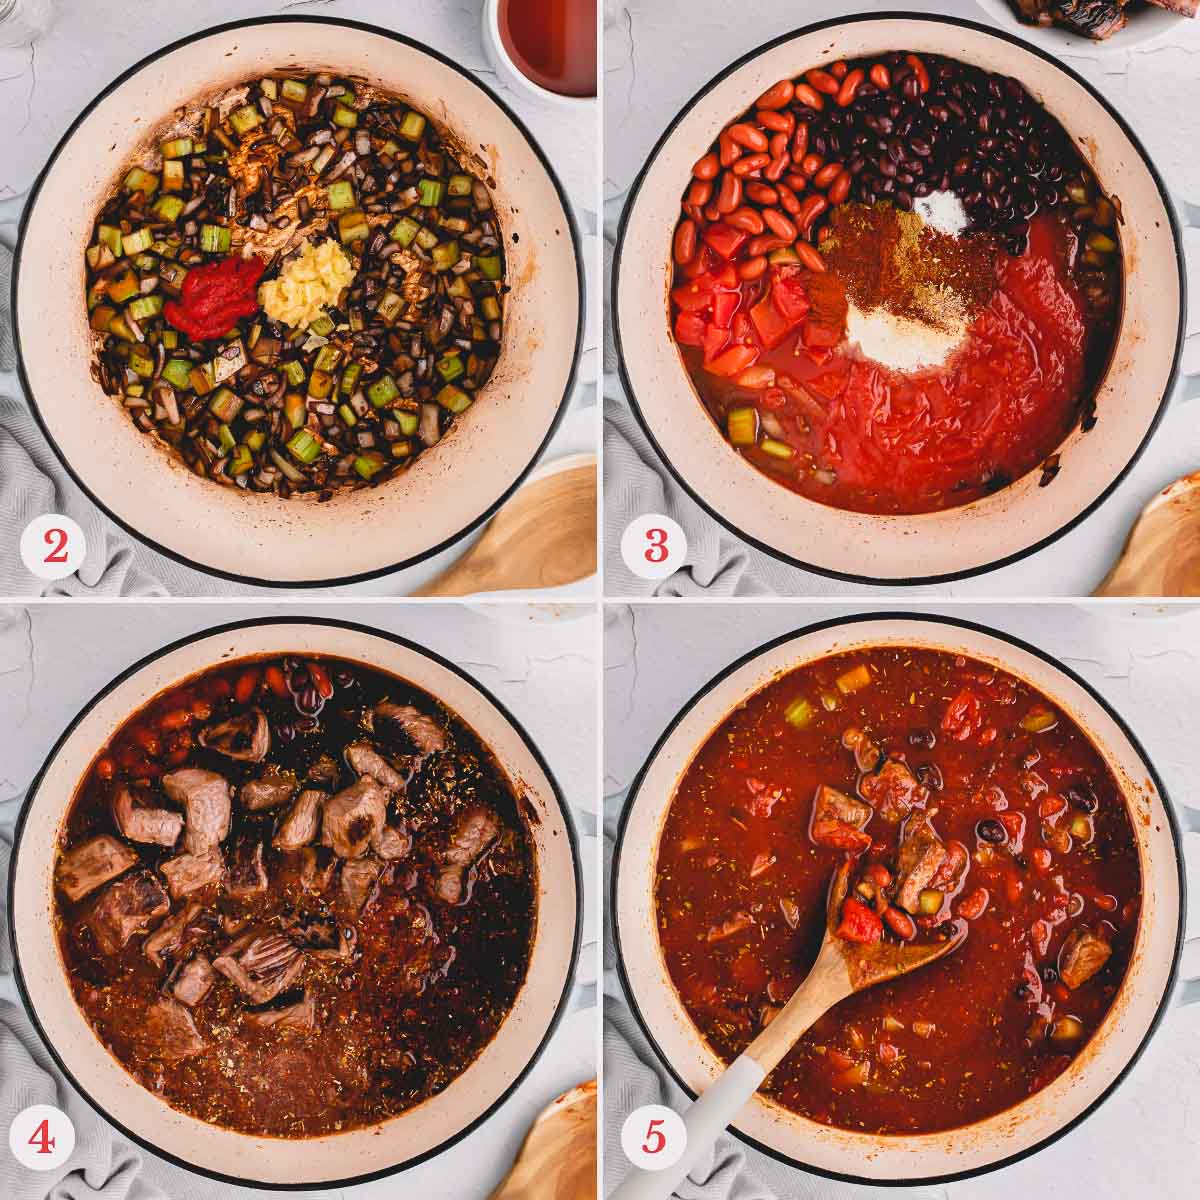
2. Add onions and celery into now empty pot and sauté until translucent. Then add the tomato paste and garlic and cook for another minute or so.
Add a splash of beef broth to deglaze the pot and scrape the bottom of the pot with a wooden spatula. The brown bits and brown coating on the bottom of the pan is called fond, which adds a ton of flavor to the chili.
3. Then add half of the beef broth, tomatoes, spices, sugar, and beans.
4. Stir in beef chunks with any juices as well. Add more broth if everything isn’t completely submerged.
5. Cover the pot and place it in the preheated 350°F oven to simmer until thick and tender, about 3 hours.
Tip
Check the broth level every hour. The chili will be thick and the meat fork-tender once it’s ready.
Chili Tips for Success:
- For even more heat, add a can of green chiles at the same time as the beans and tomatoes.
- For less heat, omit the chipotle powder and reduce the chili powder to a tablespoon.
- Don’t forget to dry your meat! It’s essential to that dark and crusty exterior that adds layers of flavor.
- If the stew meat feels stuck to the pan, it’s not ready to flip. You’ll know it’s ready when it releases itself when gently pulled on.
- All canned tomatoes are different. If your chili tastes a bit too acidic, you have two options. You can add 1/2 teaspoon of baking soda or a tablespoon of sugar or butter to the mixture. Both will mellow the flavor a bit.
- Feel free to simmer the chili on the stovetop for 2 hours instead of the oven. Just be sure to keep the heat on low to prevent the bottom from burning.
Make-Ahead Tips:
Dutch oven chili is a perfect make-ahead meal for a good reason. It tastes even better once the flavors sit for a day or two!
- Leftover chili lasts for up to 4 days in the refrigerator. Let it cool and then transfer it to an airtight container. Make it a day or two ahead and reheat for an easy dinner party or Sunday supper!
- This homemade chili recipe is easy to freeze! I like to double the recipe and freeze half of it for later. All you have to do is reheat and add toppings. Yes, please!
Storing Tips:
- Freeze the homemade chili in quart size bags for a quick meal. Thaw in hot water to release it from the bag then reheat in a covered saucepan or in the microwave. For more servings, thaw and reheat multiple bags.
- For best results, use the frozen chili within 4 months. I like to label the bag or container so I know exactly when that is.
- Chili expands when it freezes so be sure to leave a gap in the top of the bag or container you freeze it in.
Leftover Chili Ideas:
Leftover chili is versatile and easy to use! If you want to change things up, try one of these delicious ideas!
- Shepherd’s pie – Stir in frozen peas then transfer the chili to a baking dish. Top with mashed potatoes and bake until bubbly.
- Chili baked potatoes – Top warm baked potatoes with chili then sprinkle with cheese and sour cream!
- Chili mac – Stir hot chili into macaroni and cheese. Two amazing dishes just got better!
- Shakshuka – Transfer the chili to an oven-safe skillet and top with three eggs. Bake until the egg whites have set.
- Stuffed peppers – Stuff the peppers with chili, rice, and cheese. Bake until hot and bubbly!
FAQs:
Shredded cheddar, sour cream, diced onions, sliced avocado, shredded lettuce, fresh cilantro, pickled jalapenos, corn chips, tortilla chips, crumbled bacon, scallions, and hot sauce all make delicious toppings!
This hearty chili doesn’t need a side dish, but who can resist a slice of cornbread? Baked potatoes, white rice, homemade breadsticks, or a mixed greens salad are all great options!
Simmering stews in a Dutch oven builds up stain over time. But it’s so easy to restore that like-new finish. Here’s an easy tutorial on how to clean a dutch oven.
Chunky Beef Chili
Ingredients
- 2 ½ lb stew meat Note 1
- 1 cup chopped onion
- 2 celery stalks chopped
- 5 garlic cloves minced
- 2 tablespoons tomato paste
- 1 can (28oz) tomato puree Note 2
- 1 can (14.4oz) fire roasted diced tomatoes
- 1 can (15oz) black beans drained and rinsed
- 1 can (15oz) light kidney beans drained and rinsed
- 32 oz low sodium beef broth
- 2 tablespoons chili powder
- 1 tablespoon cumin
- 1 teaspoon garlic powder
- 1 teaspoon onion powder
- 1 teaspoon oregano
- ¼ teaspoon chipotle chili powder more or less to taste
- 1 tablespoon sugar Note 3
- 1 teaspoon table salt
- 1 teaspoon black pepper
Garnish options
- Sour cream
- Shredded cheddar
- Chopped fresh cilantro
- Fritos
- Saltine crackers
- Avocado
- Lime wedges
Equipment
- Dutch oven
- Liquid measuring cup
- Measuring spoons
- Wooden spoon
Instructions
- Preheat oven to 350℉, arrange racks to accommodate dutch oven in the center on the oven. Pat beef dry with a clean paper towel.
- Heat a 6-8 quart cast iron dutch oven over medium high heat, about 3 minutes, then swirl with a drizzle of canola oil or bacon grease. Working in batches, brown the beef on two sides per chunk, about 3 minutes per side. Leave at least 1” of space between each piece, do not crowd the bottom of the pot. Reduce heat to medium if the beef is getting too dark too quickly. Set browned beef aside in a medium bowl.
- Over medium heat, saute onions and celery until onions begin to turn translucent, about 3 minutes. Add tomato paste and garlic, cook for an additional minute. Add a splash of the beef broth to deglaze the pot, scrape the brown bits off the bottom of the pot with a wooden spoon.
- Add half of the beef broth, the tomatoes, spices & sugar, beef chunks with any juices, and beans. If everything isn’t completely submerged, add more broth. Secure the lid on the pot and place in the oven for about 2 to 3 hours, checking the broth level every hour. The chili should be fairly thick when it’s ready, and the meat will be fork tender. Garnish and serve.
⭐️ Did you make this recipe?
Please leave a review and let us know how you liked it!
Tips & Notes
– Leftover chili lasts for up to 4 days in the refrigerator. Let it cool and then transfer it to an airtight container.
– Freeze the homemade chili in quart size bags for a quick meal for up to 4 months. Thaw in hot water to release it from the bag then reheat in a covered saucepan or in the microwave. For more servings, thaw and reheat multiple bags.
– Chili expands when it freezes so be sure to leave a gap in the top of the bag or container you freeze it in.
Nutrition