
How to Make Rice Paper Sails for Cake Decorating
This post may contain affiliate links. Read full disclosure.
These easy rice paper sails are simple, minimalist and impressive cake toppers for decorating layer cakes with just 2 ingredients!
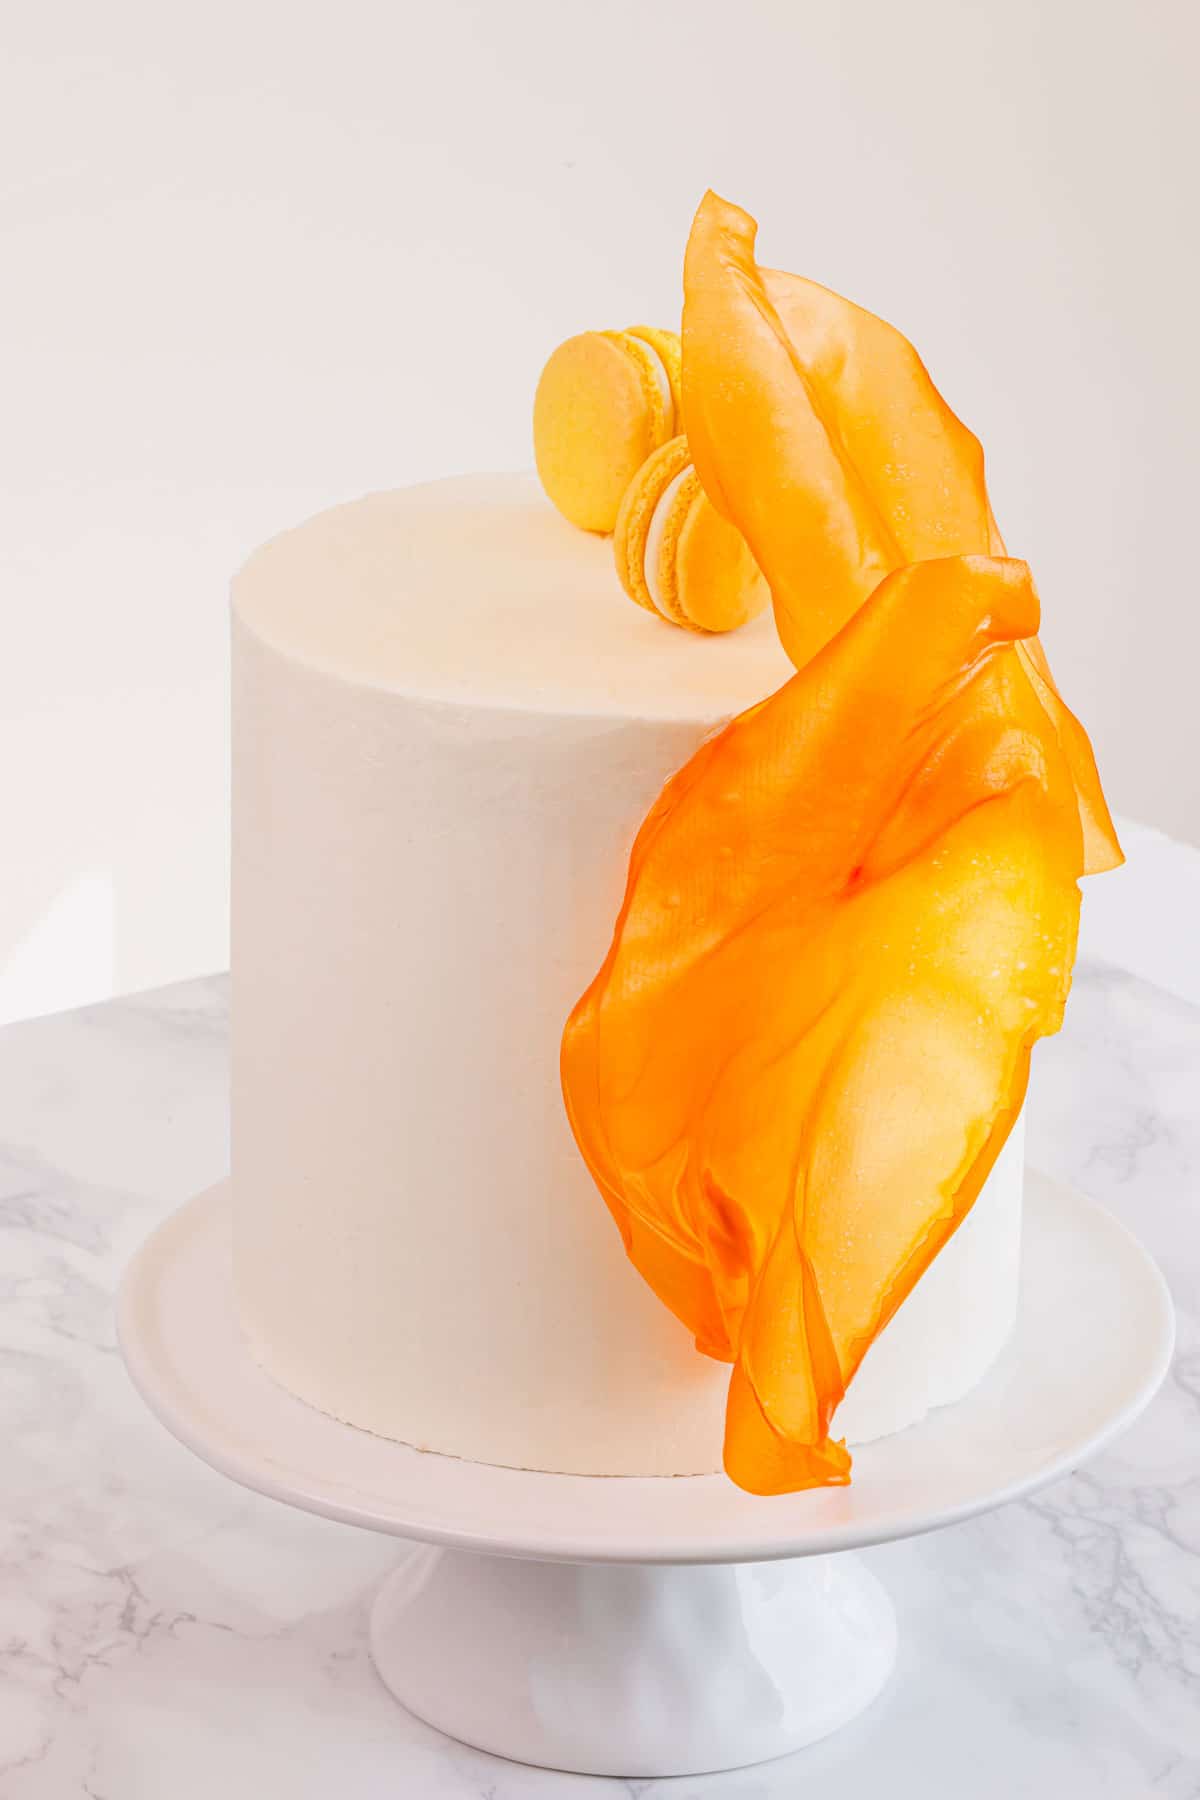
Wouldn’t you agree this pineapple layer cake is so much more elegant with these pretty sails?
Ever wondered how those abstract cake toppers were made? I certainly did!
When I learned that they were made with isomalt, I quickly dismissed the idea. I don’t know what that is and where to get it.
Later on I ran into these rice paper sails on the web somewhere. And I was intrigued!
What is rice paper sail?
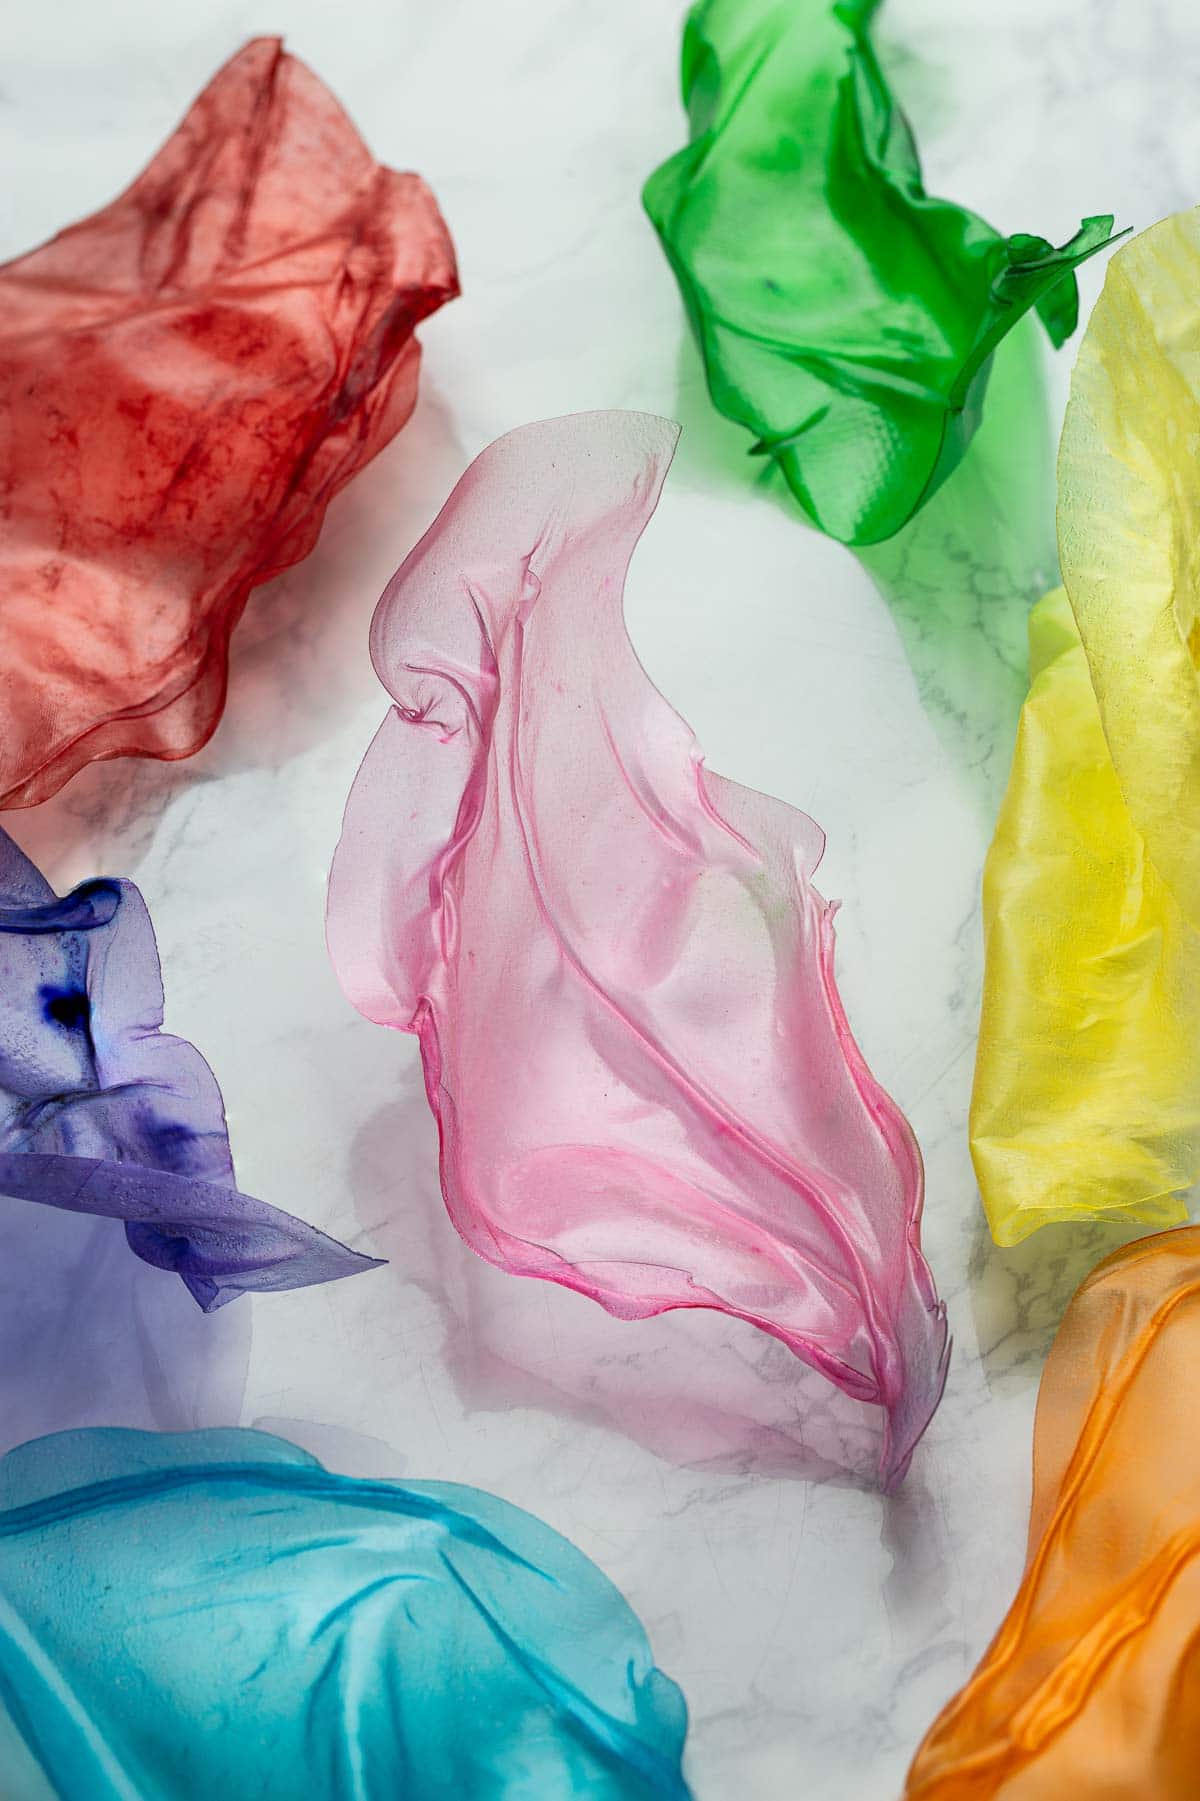
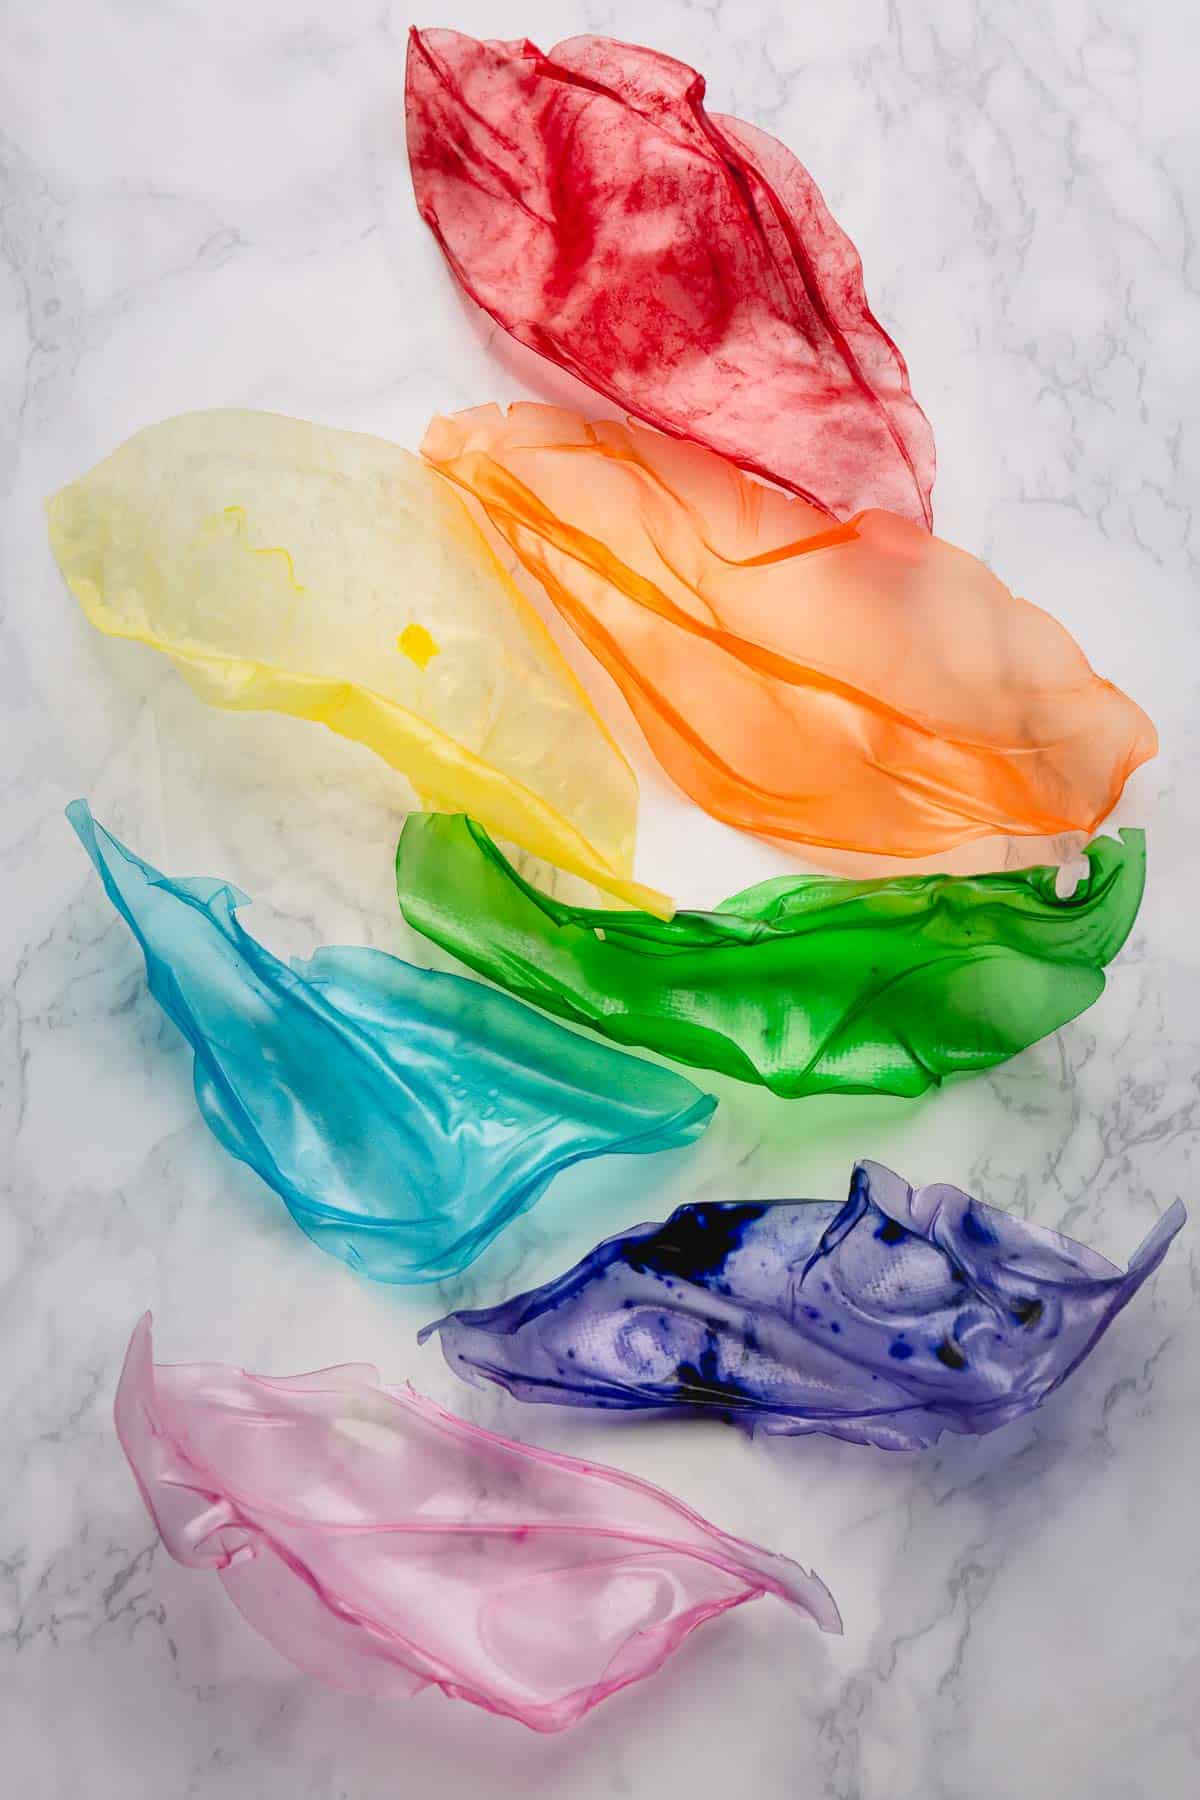
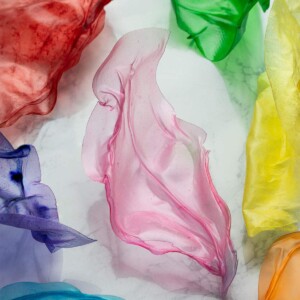
Rice paper sails are cake toppers made with rice papers (aka spring roll wrappers) soaked in water, then molded into various shapes and dried.
Super cool, easy and inexpensive way to decorate any layer cake!
What do you need to make these cake toppers?
You don’t need many things for this project, but you can definitely use additional things to embellish them more, if desired!
- Rice papers – They are also known as spring roll wrappers. Rice papers are translucent, hard, round sheets that are made with rice. If you’ve ever had spring rolls with veggies and shrimp in an Asian restaurant, then you’ve had rice paper. They’re available pretty much at any grocery stores (yes, even at Walmart!)
- Food coloring – While it’s optional, if you want to create colored cake toppers, you’ll need food coloring. Either powdered, gel and liquid food coloring would work.
Then, you can also use edible glitters, pearl dusts and/or markers for further decorating!
How to make these rice paper cake decors:
- If desired, cut rice paper sheet into oval, or whatever shape you want.
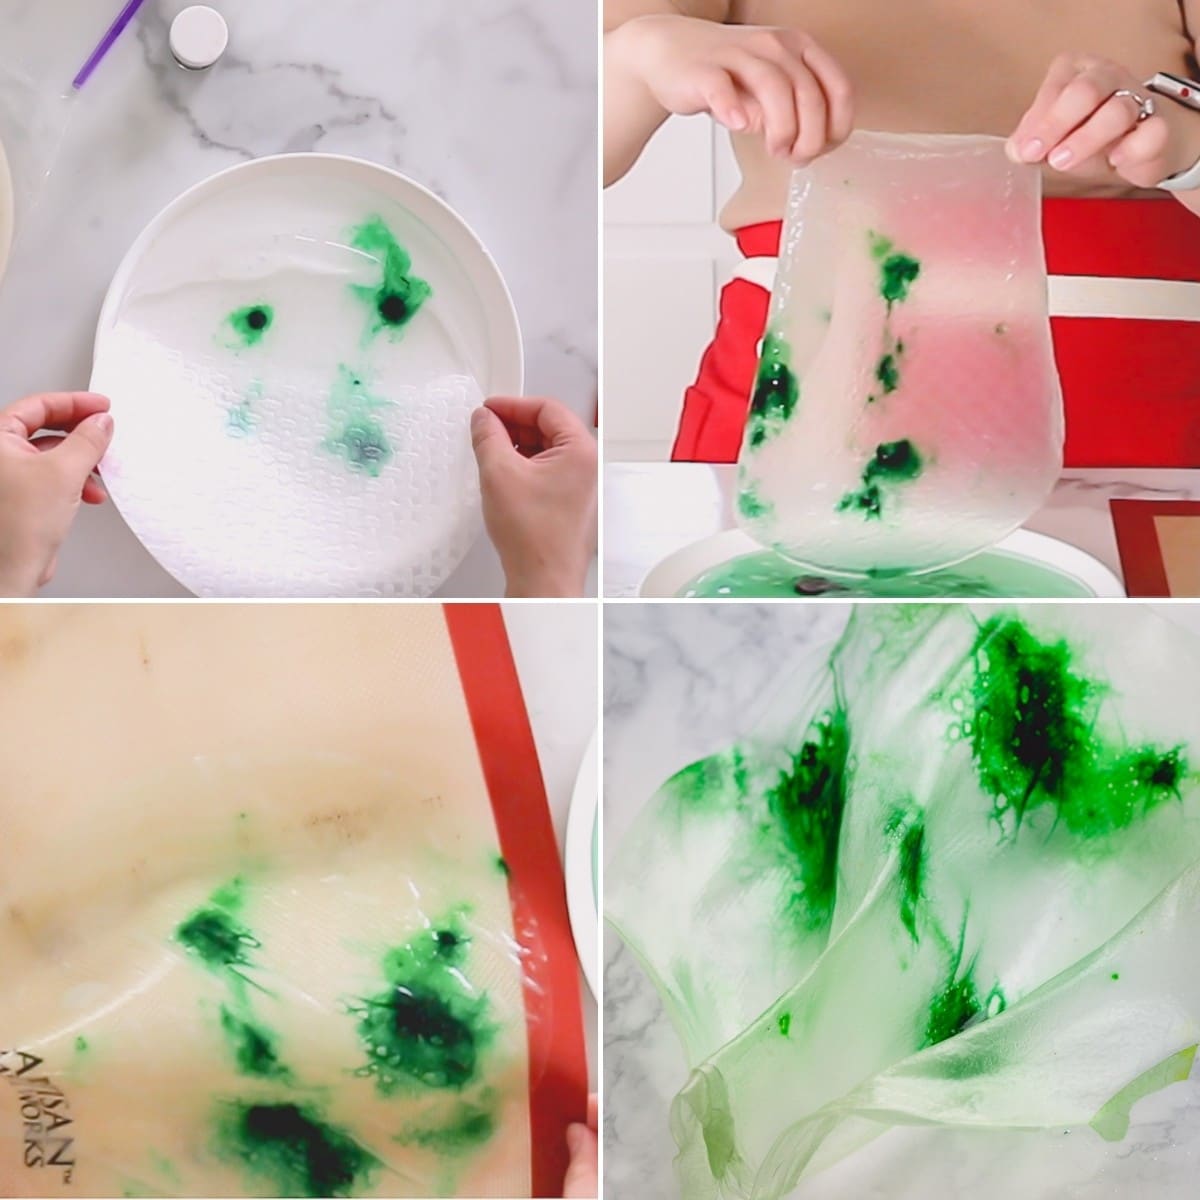
- Add warm water into a large plate and add a few drops of food coloring. gently dissolve the food coloring. Or you can leave the drops of color for different effects.
- Working with one rice paper sheet at a time, soak it in the water for a minute or so, or until they’re soft.
- Carefully transfer the softened rice paper sheet onto a silicone mat, or parchment paper. Mold it into whatever shape you want. You may want to use paper clips, or claps to give the mat or parchment paper shape. Or you can place something underneath to give dimension.
- Now, let them dry on the counter for 8-10 hours, or overnight. Once dry, they’re super easy to detach from the mat.
- To secure onto a cake, use some frosting as a glue.
Optional Decoration
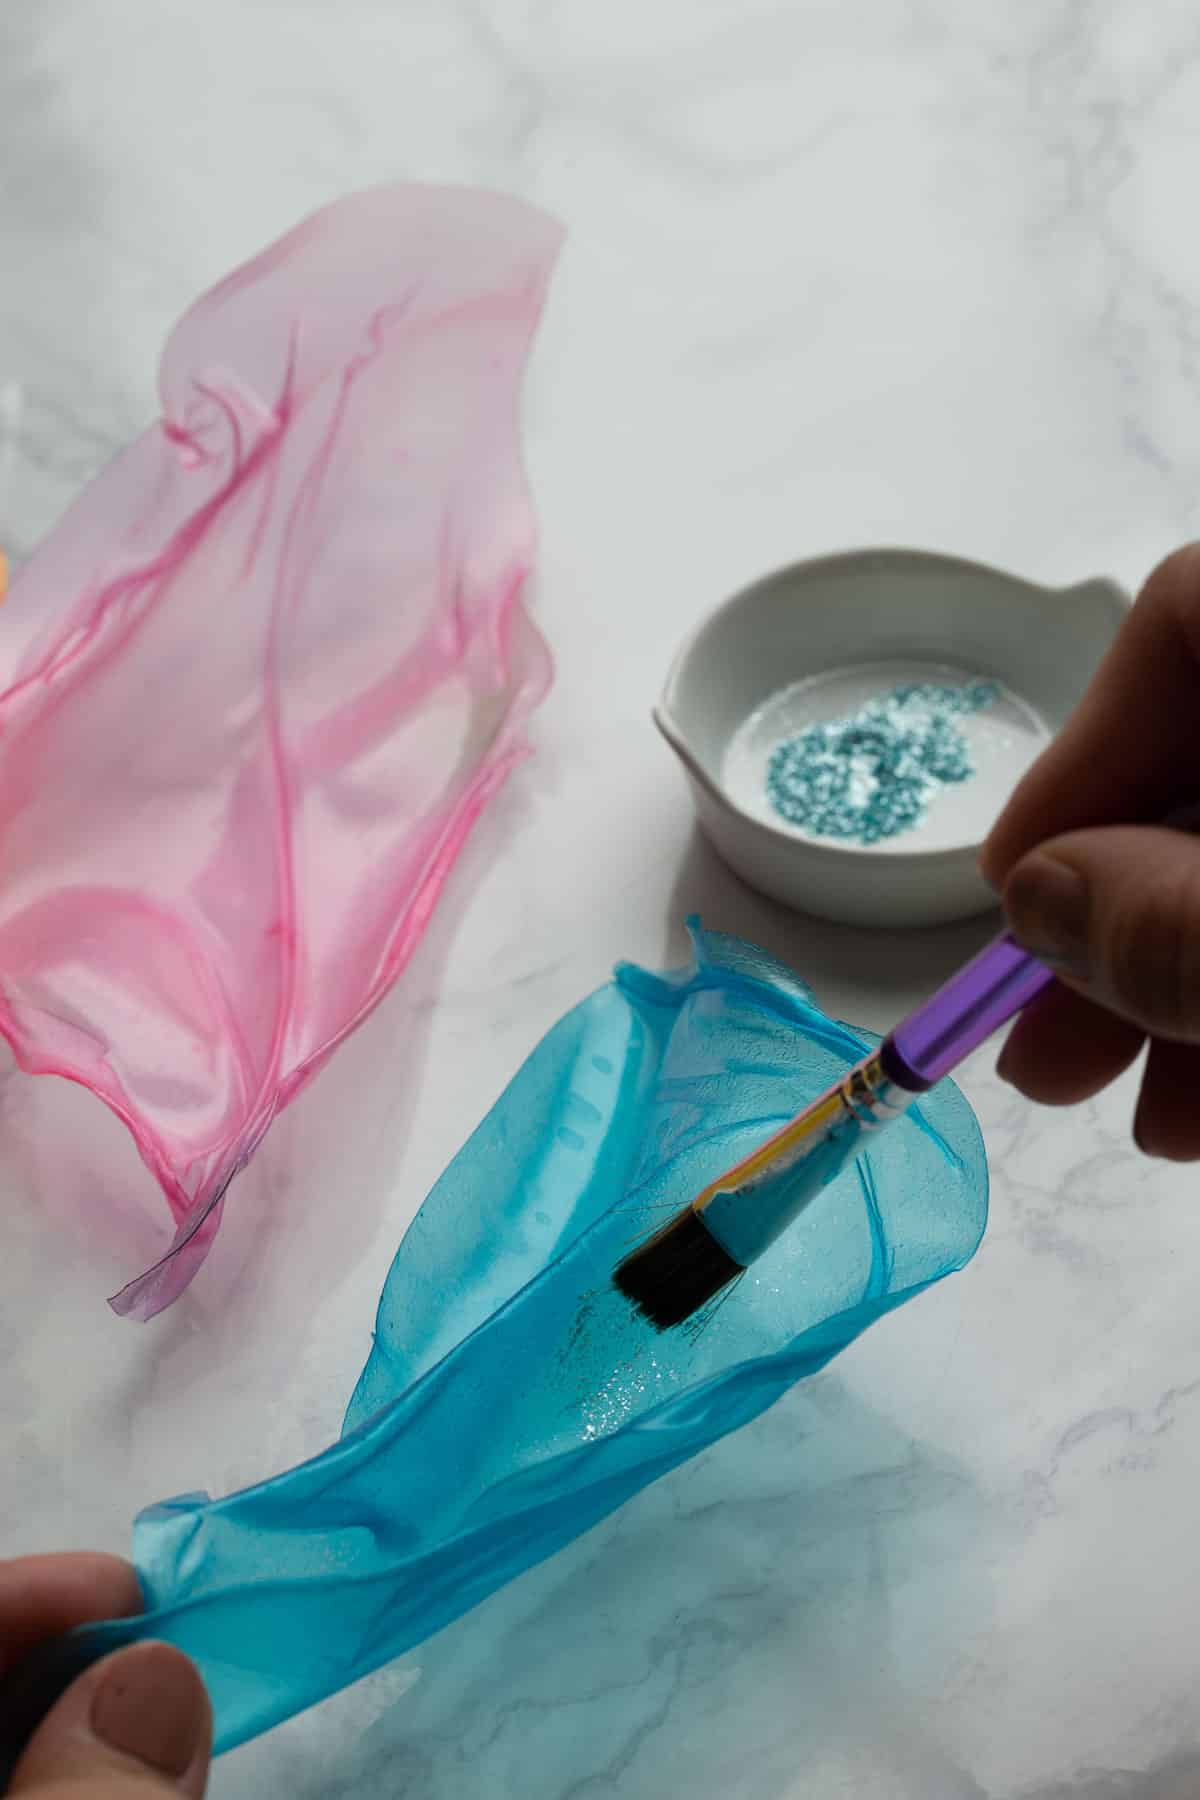
Once you have beautiful sails, you can paint on some edible glitter or pearl dust. 2 options:
- Mix the glitter with equal amount of vodka to create a paint. And brush it over the edges and over the grooves. Gold or silver glitter works perfectly for this.
- Brush dry glitter or pearl dust all over for a beautiful subtle shimmer.
Rice Paper Sail Cake Toppers
Ingredients
- Rice paper sheets
- Food coloring
Instructions
- If desired, cut rice paper sheet into an almond shape, or whatever shape you want.
- Add warm water into a large plate and add a few drops of food coloring. Disperse the food coloring for even solid colored sails, or you can leave the drops of color, or gently spread the color without fully dissolving for ombre effects.
- Working with one rice paper sheet at a time, soak it in the water for a minute or so, or until they're soft.
- Carefully transfer the softened rice paper sheet onto a silicone mat, or parchment paper. Mold it into whatever shape you want. You may want to use paper clips, or clamps to give the mat some shape and dimension. Or you can place something underneath to give dimension.
- Now, let them dry on the counter for 8-10 hours, or overnight. Once dry, they’re super easy to detach from the mat.
- To secure onto a cake, use frosting as a glue.
⭐️ Did you make this recipe?
Please leave a review and let us know how you liked it!
Video
Nutrition


Anxious to try this. I have a few questions…
I would like to make these in a smaller version for drink garnishes. Could you soak them in vodka instead of water? Could you add a flavoring to the water to make them tasty? Or use a sugar water with a flavor added?
Hi, Brigit!! I love how you think! I haven’t thought of using flavor water or alcohol, but I’m so intrigued!! I’ll have to test it myself. Have you tried it?
How can I get a black color, mine gets greenish? What color can I add to make it right?
Thank you!!! This was so helpful!!!
So happy it was helpful. Thank you for your feedback, Katie!
Thanks so much for your clear instructions in the video.
You’re most welcome. Hope you give it a try.
How would I store them if made in advance? Just leave them out or put in air tight container?
Hi, Lisa. The dried sails need to be kept in dry place. So if it’s humid where you’re, I recommend placing in in an airtight container, or a bag.
I am getting ready to try this for the first time. Thank you for the tutorial, it was very helpful.
Hi, Lisa. So happy it was helpful. Let us know how it turns out!
Hi Shinee,
Once placed on the cake can they be stored in the fridge?
Hi, Amber! Yes, it’ll be fine.
Hi, if I was to insert them into a cake (buttercream/ganache icing) so they were standing up, do they go soft or continue to be able to stand for days?
Thanks
Hi, Emma. It should hold up pretty good.