
This all-butter pie crust recipe is time-tested and practically fool-proof pie dough recipe! Unbelievably flaky and flavorful and super easy to make!
A great pie starts with a great pie crust. Flaky, buttery and tender…
And there are a million and one perfect pie crust recipes out there. Hand-written, stained recipe cards passed down through generations… Some made with all shortening, some with combination of butter and shortening, some with lard, or even all butter… With vodka and without… Variations are endless.
And here I am contributing my version into the mix along with my tips on how to store/freeze pie dough for extended period and minimize shrinkage issue during baking.
Hopefully, this one will become your go-to pie crust recipe for years to come.
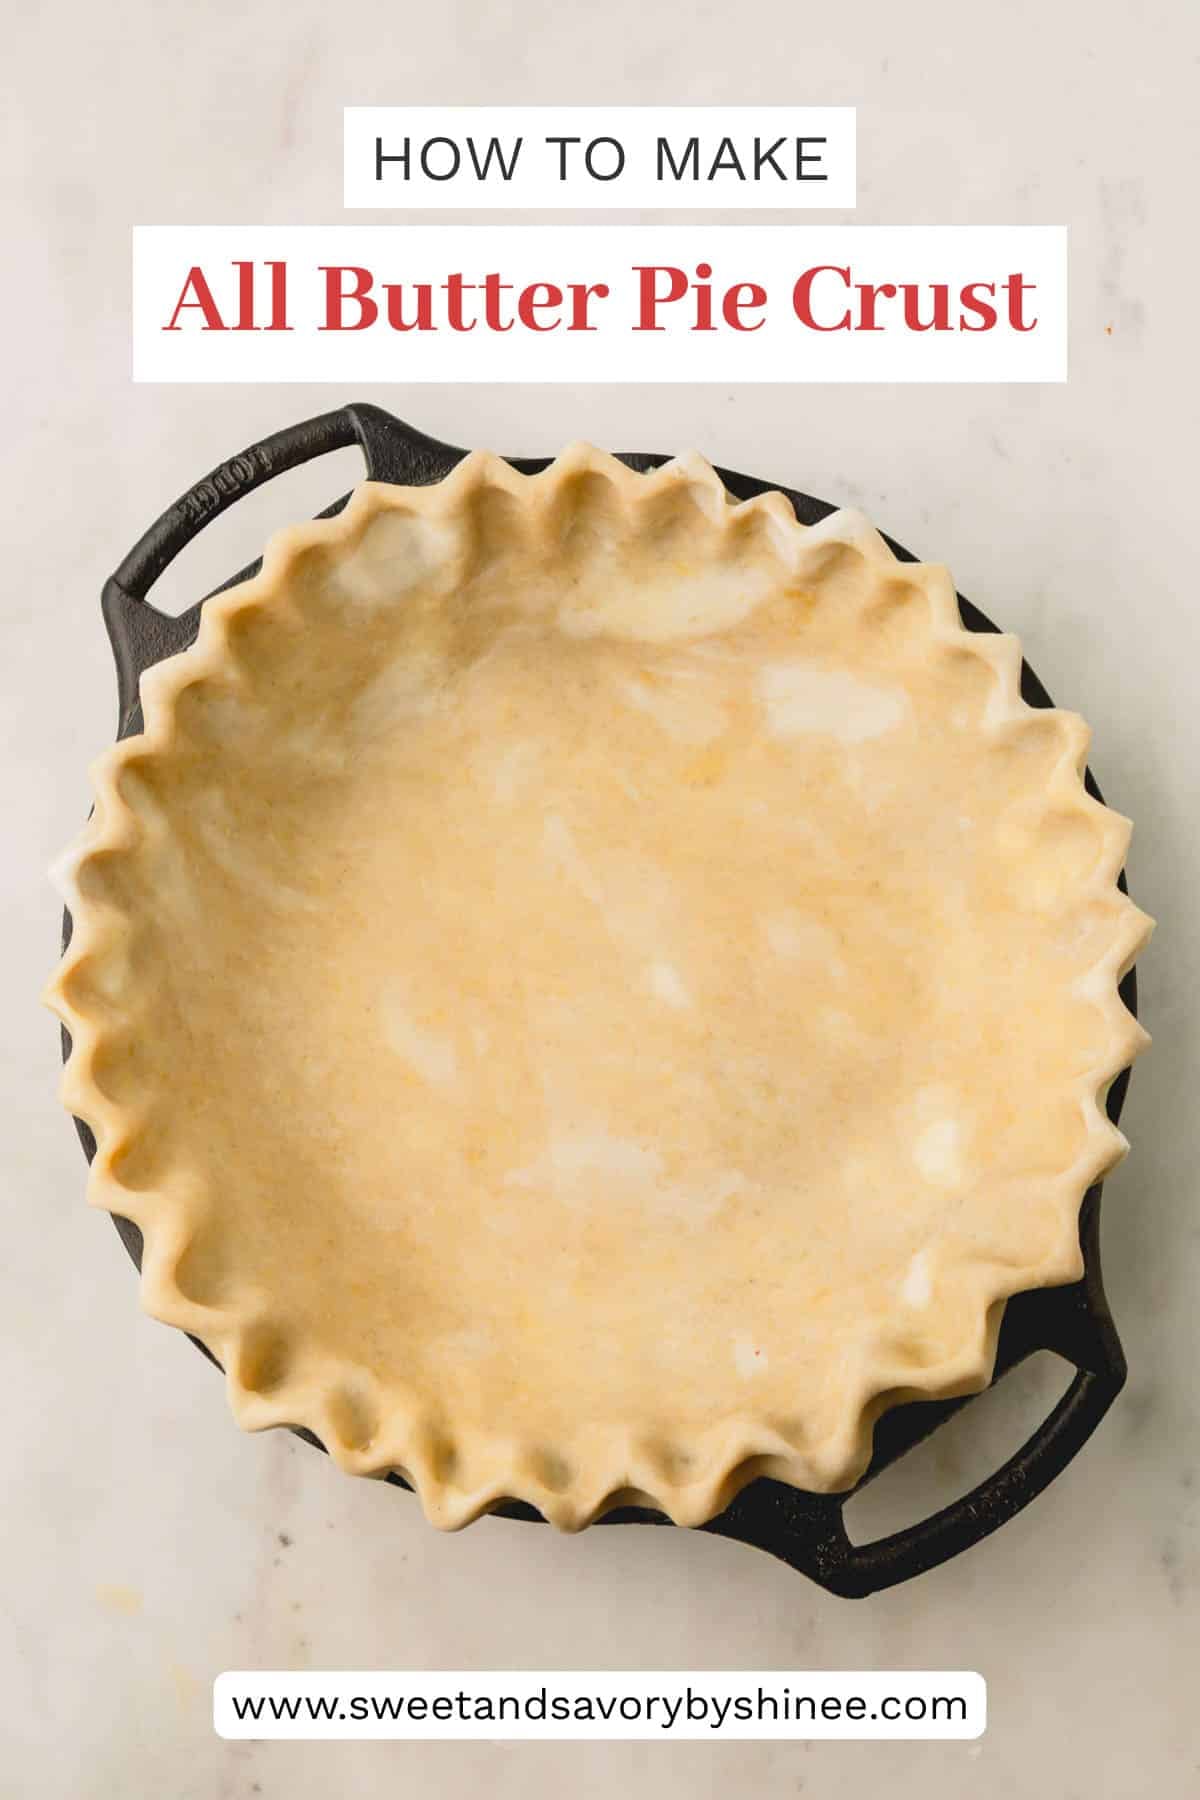
Table of Contents
Why you’ll love this all butter pie crust recipe
- Simple ingredients – As title states, this pie dough is made of all butter. It’s convenient for those of us who don’t usually have shortening on hand. Just for the record, I have nothing against shortening or lard, it’s just I don’t use them enough to keep them on hand.
- Flavorful – Egg yolk adds more flavor and richness.
- Easy – I use my stand mixer to make my pie crust dough. But a simple pastry cutter gets the job done as fine.
- Convenient – The recipe is super easy to double for double-crust pies.
You’ll get flaky, tender and the most flavorful pie crust every SINGLE time. Follow my tips below to ensure a pie success! I’ve made it enough to know how reliable and foolproof this recipe is, 8+ years and counting.
Key Ingredient Notes
- Flour – Use regular unbleached all-purpose flour to make this pie dough.
- Salt – This recipe is made with flakey kosher salt, it adds a good flavor! If using table salt, reduce the amount by half.
- Butter – I use unsalted butter. If using salted butter, omit the salt.
- Egg yolk enriches the dough and adds flavor.
- Ice water helps to keep the dough cold, preventing the butter to melt completely.

What is the best type of flour to use for pie crust?
With protein content of 10-12%, all-purpose flour is best suited for making a pie crust. Higher protein flours, such whole wheat or bread flour, will yield tougher pie crust.
Butter vs Shortening
Which is better all butter pie crust, or old-fashioned shortening pie crust?
Well, I’m glad you asked. Here’s the truth. Pie dough with shortening holds its shape better, especially if you took your time to shape a beautiful pie edges, intricate designs. And thus, if you’re going for impressive pie with detailed, intricate designs, go with pie crust recipe with shortening .
That being said, you’ll still get decent – aka rustic – looking pies with this butter pie dough, but extra tender and melt-in-your-mouth flaky!
How to make butter pie crust
As mentioned above, it’s super easy to make this recipe. I usually double the recipe and make it in my stand mixer.
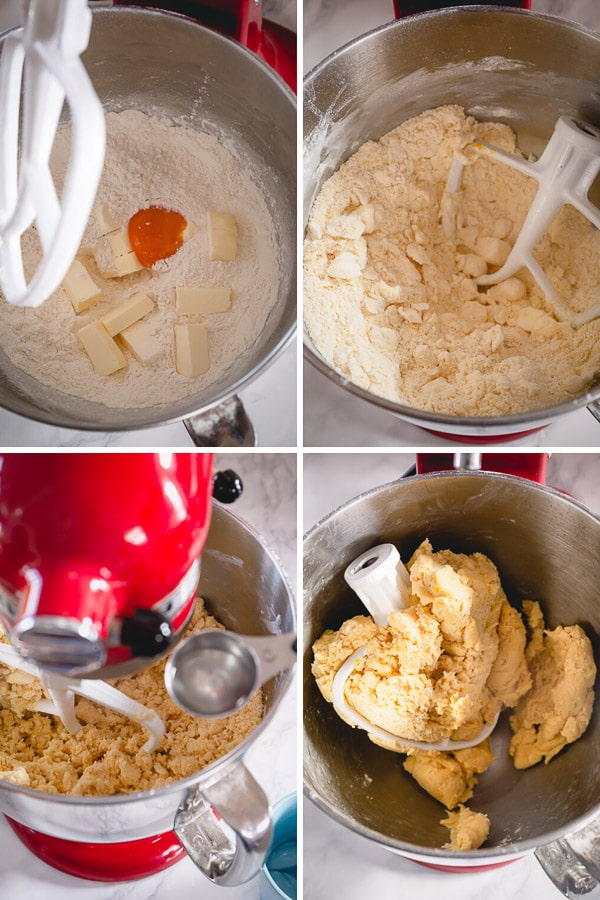
- Mix together flour and salt first.
- Add frozen butter cubes and egg yolk, and mix until most of the butter is pea-sized, with some larger chunks remaining.
- Add ice water, one tablespoon at a time, until the dough forms into a loose ball.
- Gather the dough on a counter into a ball.
- Flatten the dough into a disk, wrap in a plastic and refrigerate for at least 1 hour before rolling it out.
How to crimp pie dough edges
When it comes to pie, I don’t do fancy.
Let me show you how I crimp the edges of my pie crusts, the simple way. I don’t cut out excess dough (just make sure not roll out too big circle), as you may have seen in a lot of recipes. It seems wasteful.
So instead…
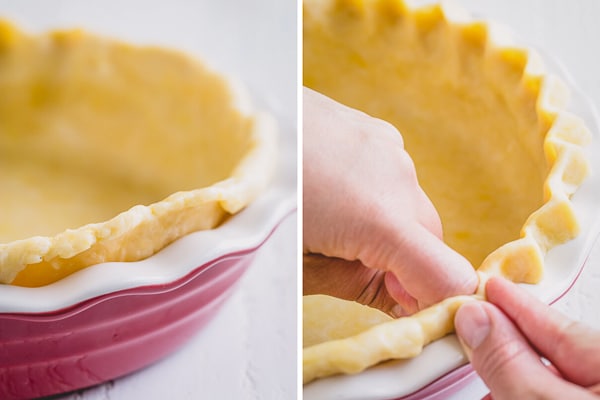
- I fold the edges out and roll it until it meets the pie dish. You’ll get a nice and thick border, if you will. It won’t be perfect all around, in some places it’ll be thinner, and in some places thicker, but that’s ok.
- Then I use simple 3-finger method to crimp the edges, as shown below. Classic and timeless.
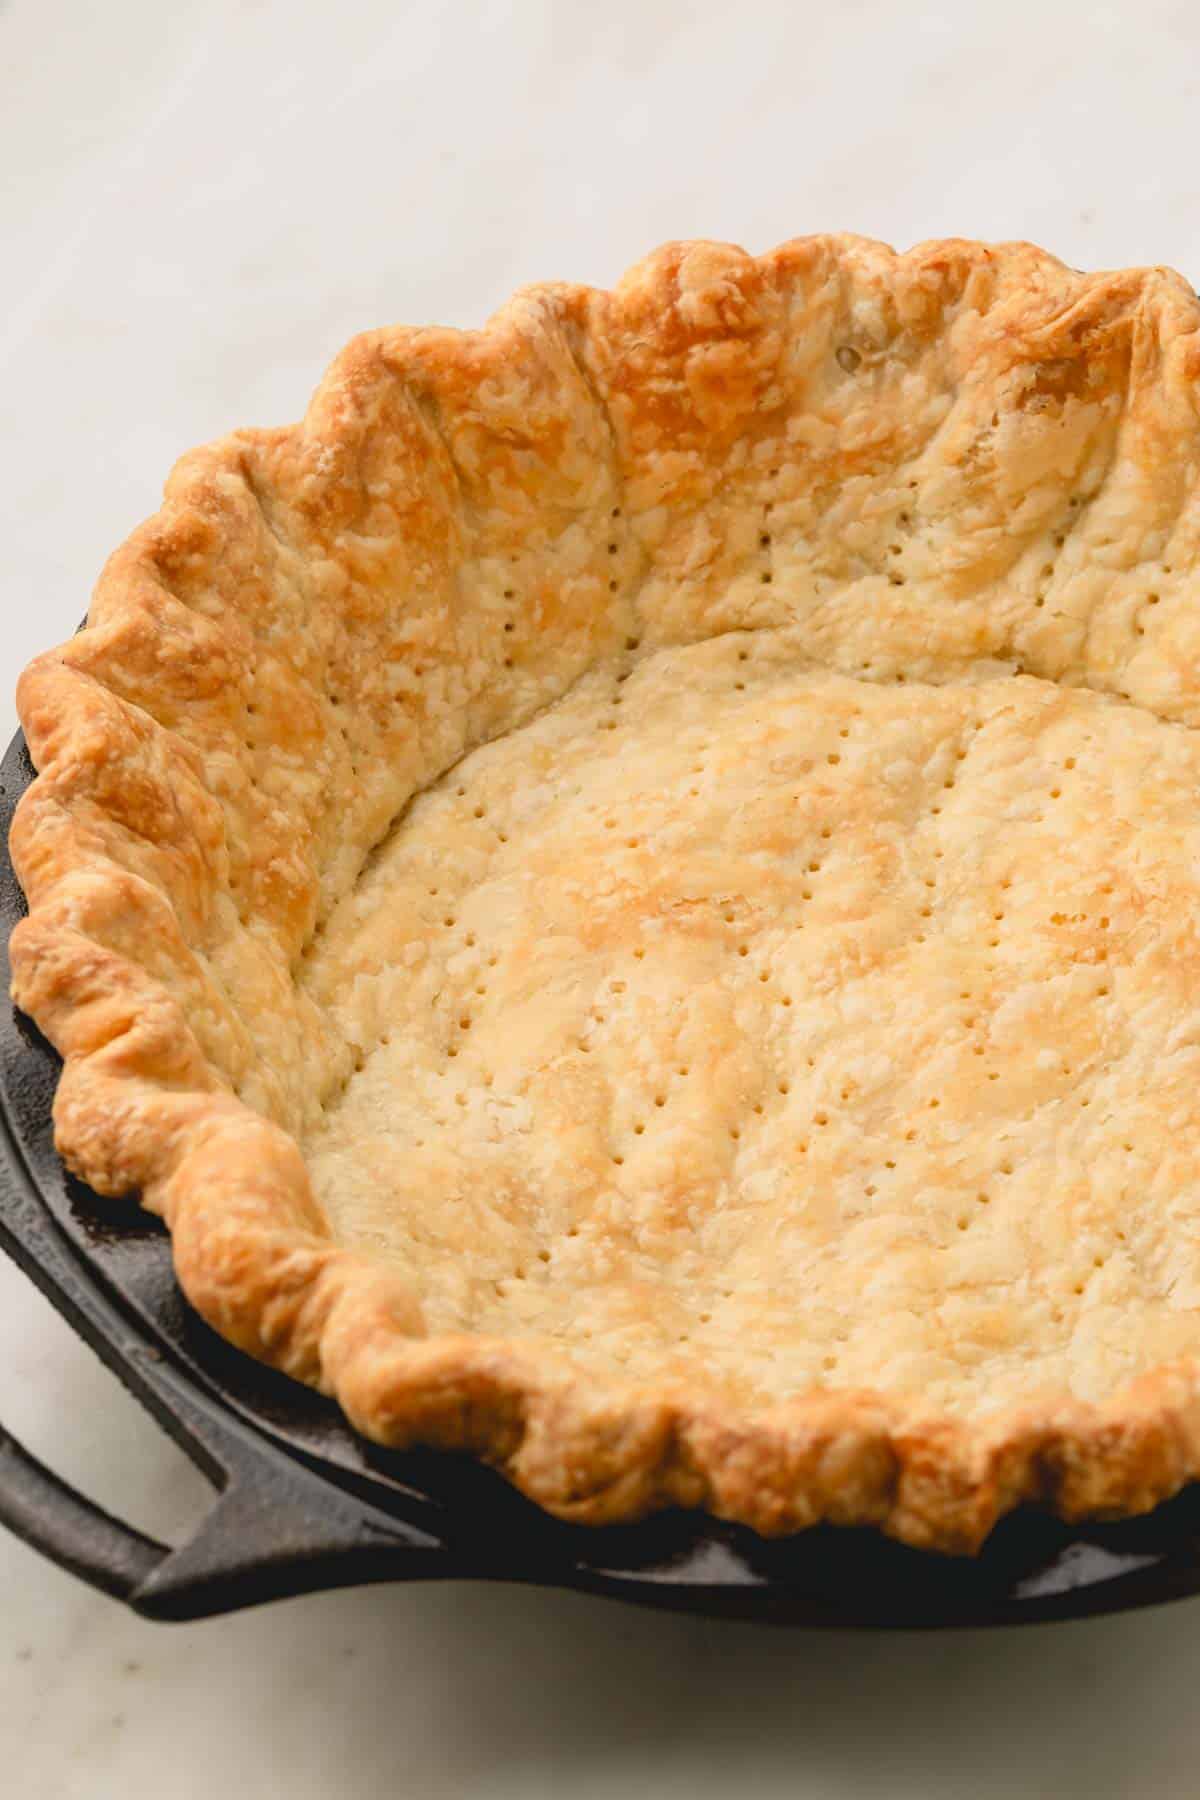
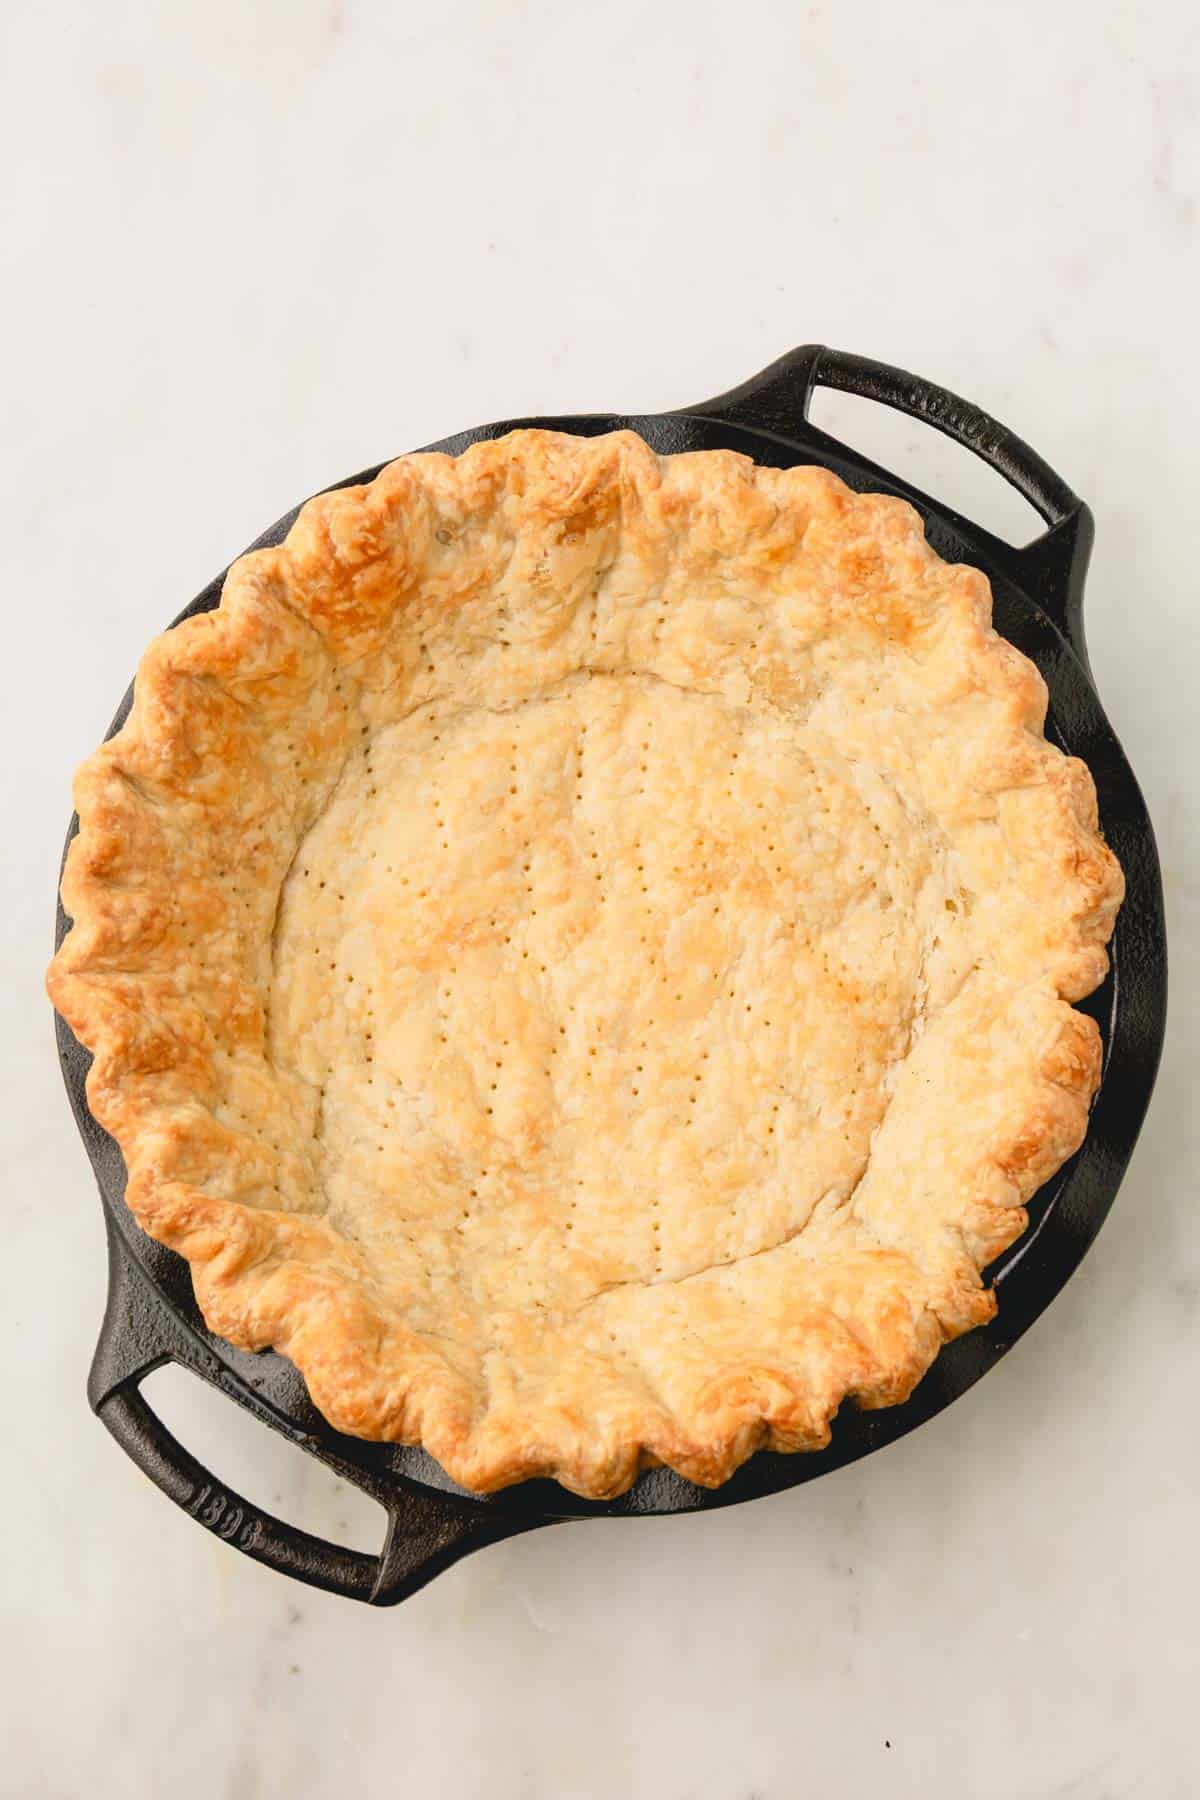
How to blind bake a pie crust
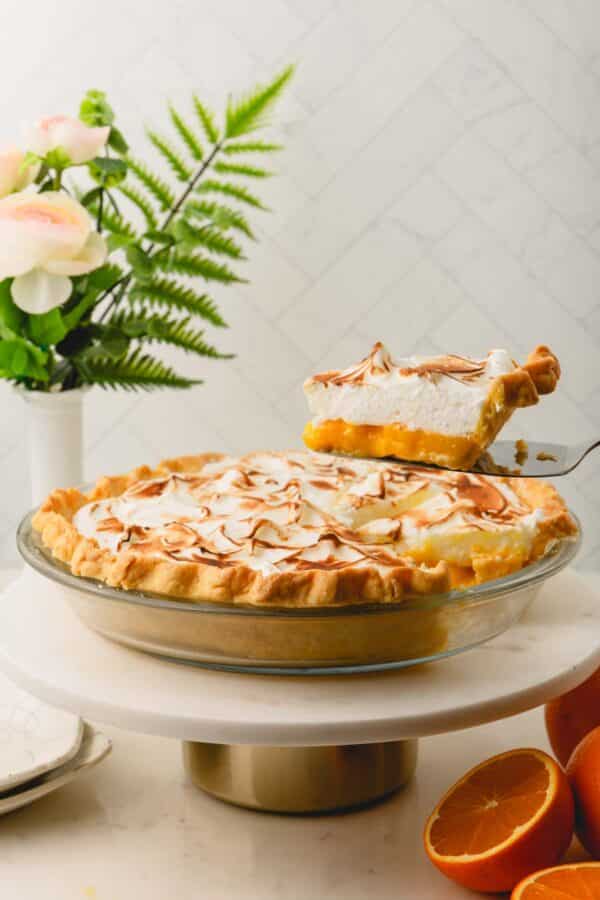
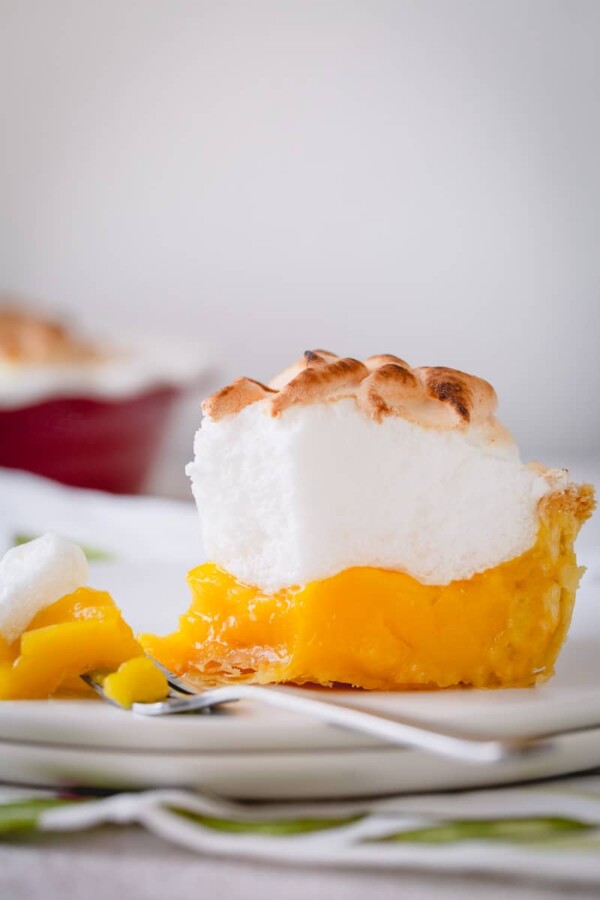
Some recipes, like my lemon meringue pie, pecan pie, banana cream pie, require the crust to be blind-baked first, which basically means the crust is cooked without the filling.
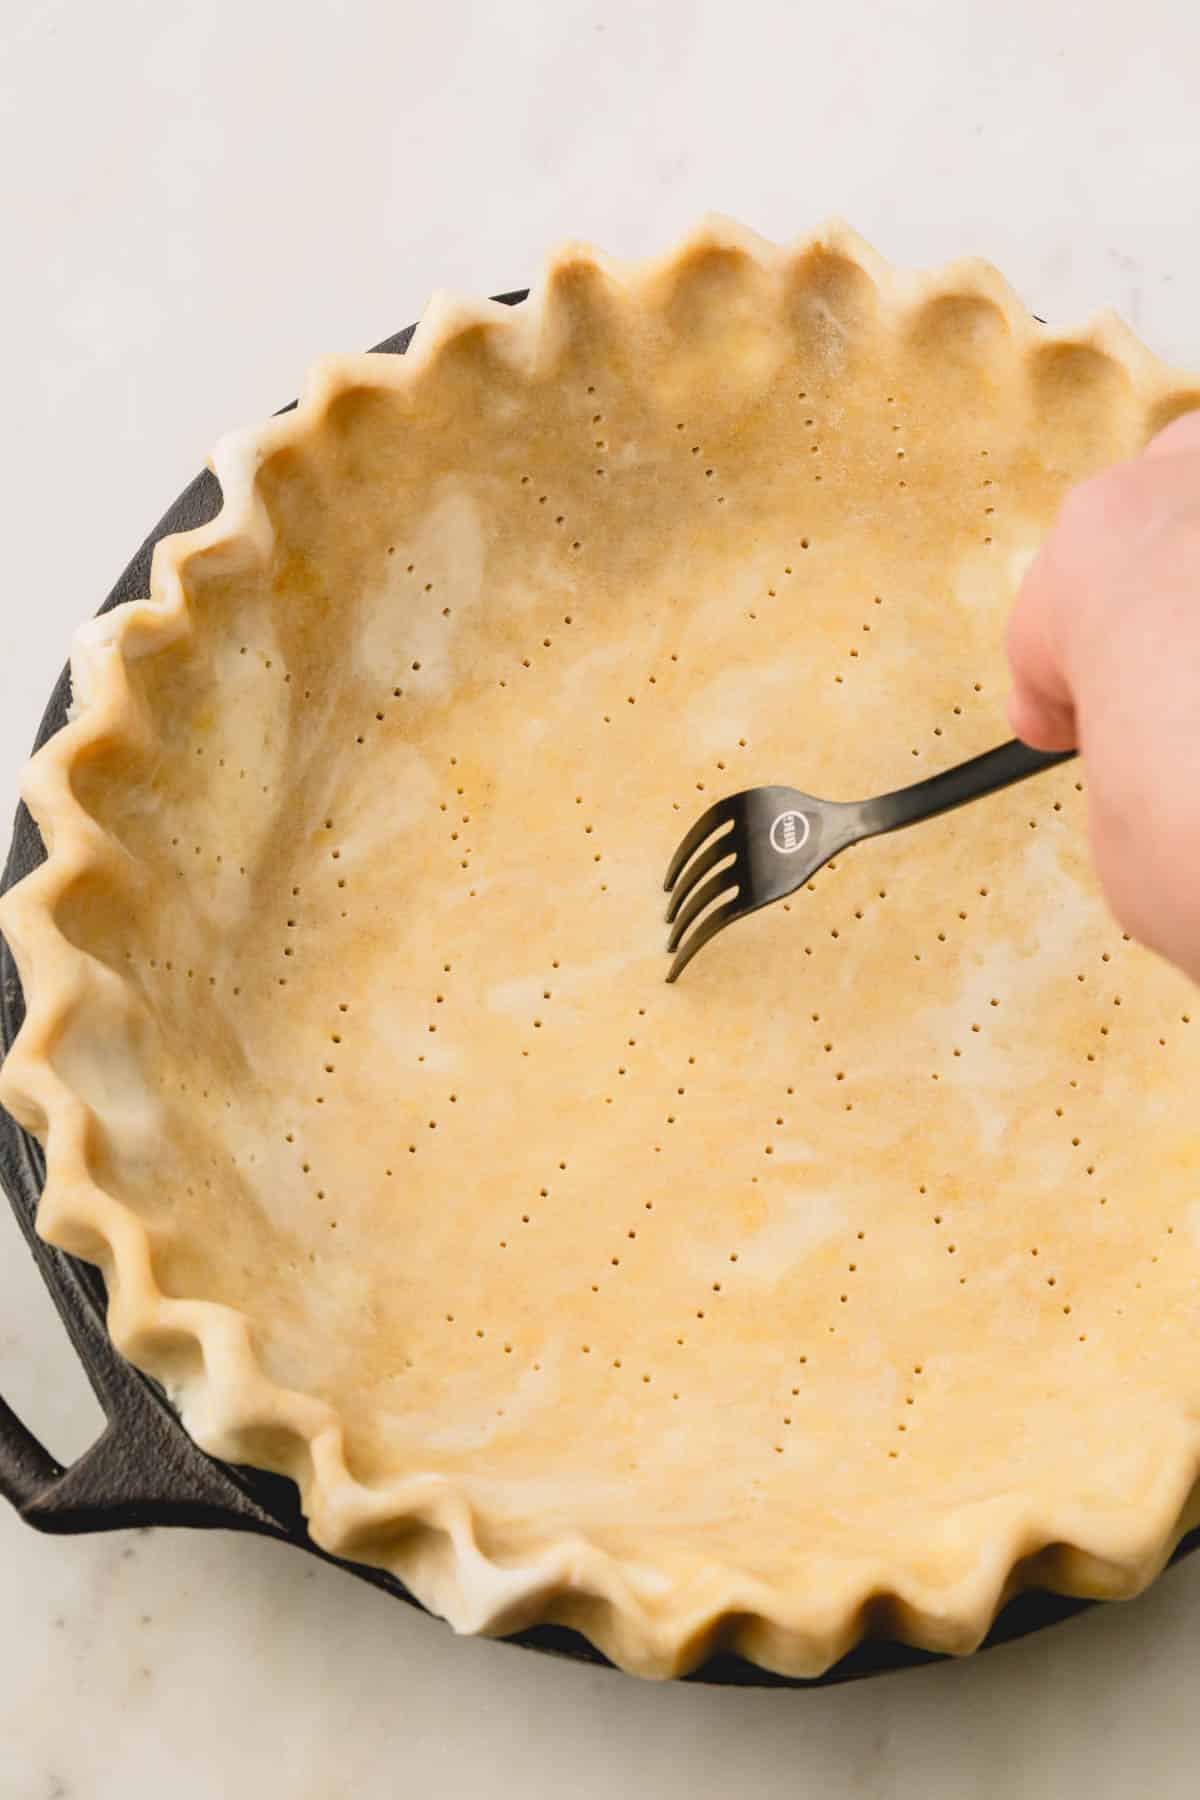
- Pierce holes all over the crust with a fork to prevent bubbles and air pockets throughout the crust.
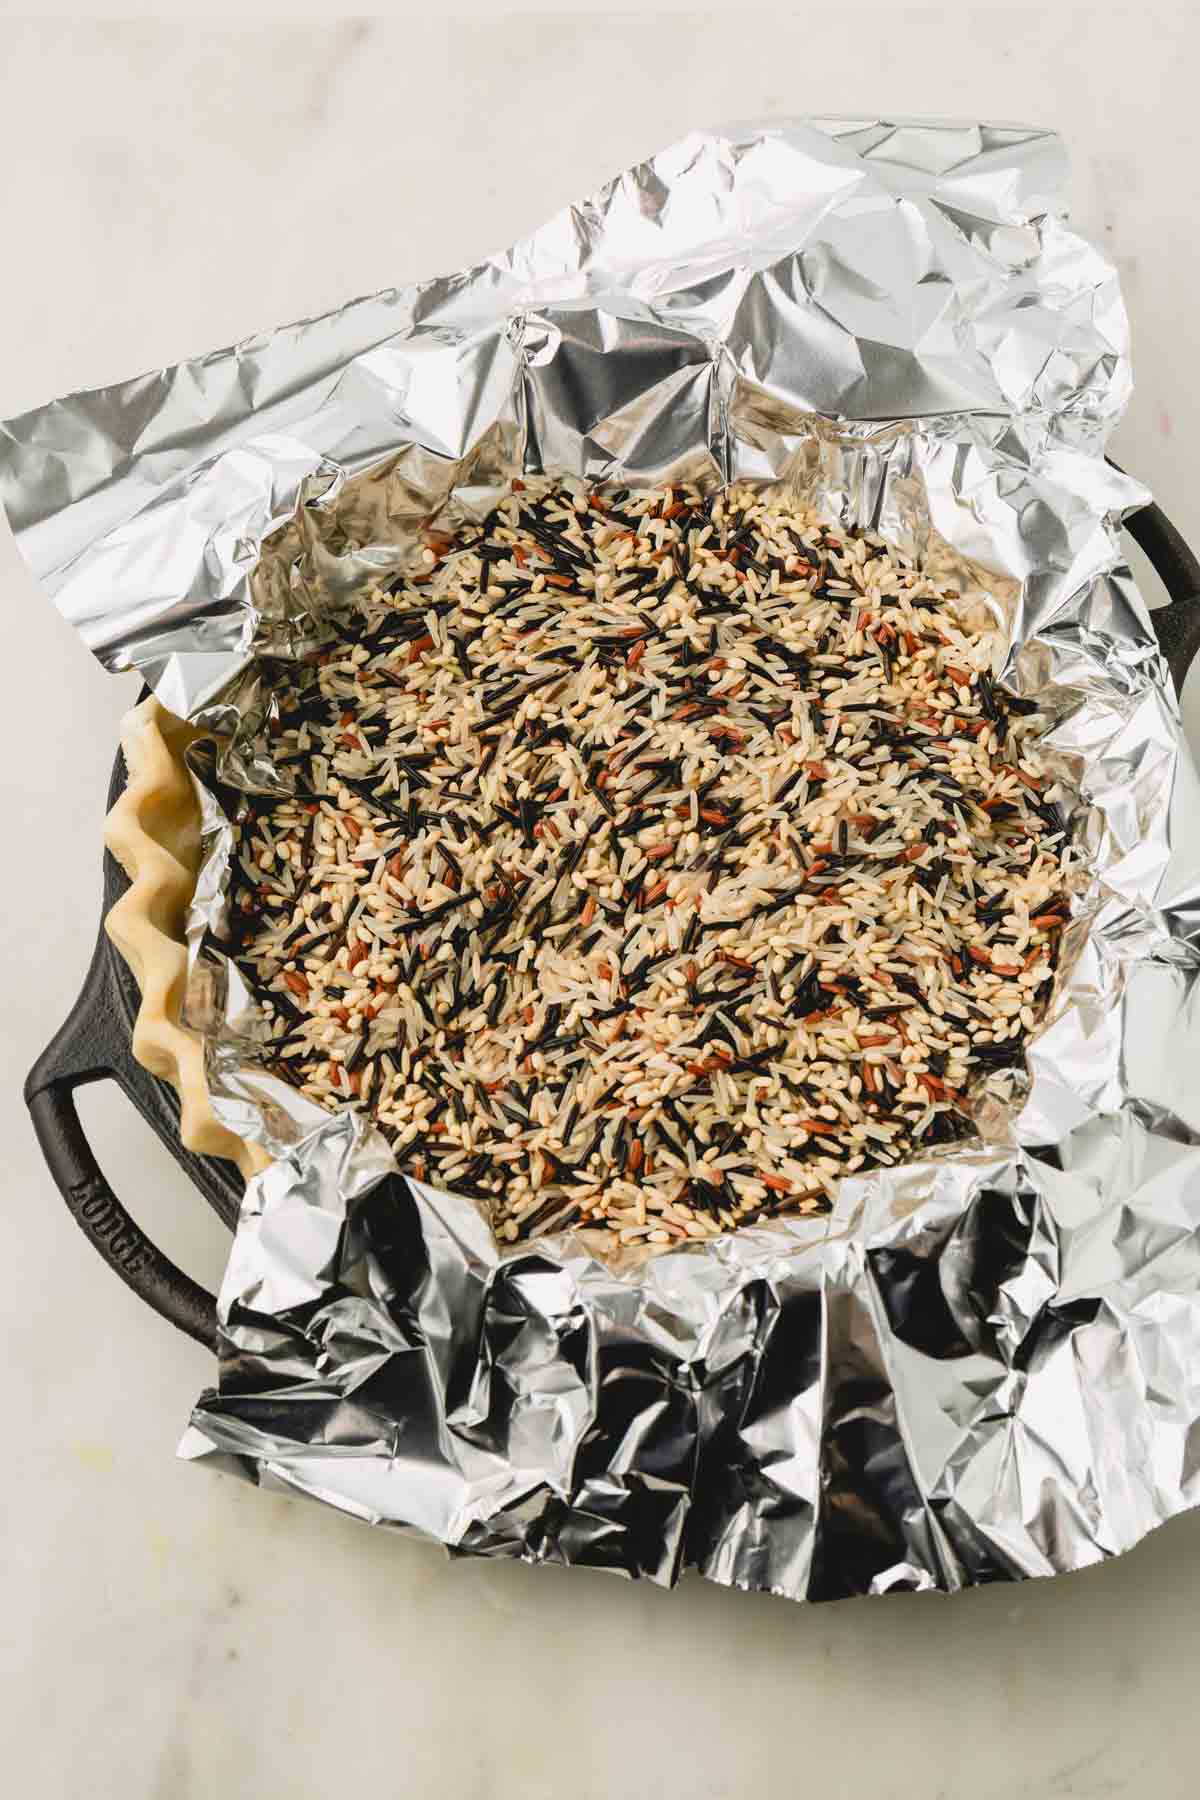
- Place a sheet of aluminum foil over a chilled pie crust.
- Add pie weights (or raw beans, or rice).
- Bake for 15 minutes at 350°F. (TIP: Place the pie dish on a baking sheet before putting it in the oven.)
- Carefully remove the weights and aluminum foil.
- Bake for another 10-15 minutes, or until golden brown.
Minimize shrinking
- #1 key to avoid the shrinking problem is to rest and chill the pie dough before baking. Once you crimp the edges of the pie, put it in the fridge to chill while you prepare the filling, for at least 30 minutes. The longer it chills, the better.
- Make sure to crimp the edges over the lip of the pie dish, not inside the wall.
Tips for Success
- While this isn’t crucial, I highly recommend weighing the flour, instead of measuring by volume. This ensures proper ratio of dry and wet ingredients.
- Cut the cold butter into ½-tablespoon chunks and freeze it for 15-30 minutes.
- Make sure not to over-mix the butter into the flour. You want mostly pea-sized butter chunks before adding ice water. A few bigger butter pieces are ideal!
- Use ice cold water to ensure your dough stays nice and cold and prevents melting the butter.
- Add water 1-2 tablespoons at a time, so you don’t put too much liquid into the dough. Or you’ll end up with sticky dough that is hard to work with.
Make-Ahead and Storage
Extra pie dough is never a bad thing. In fact, it’s an absolute must for me!! Especially right before holiday season hits…
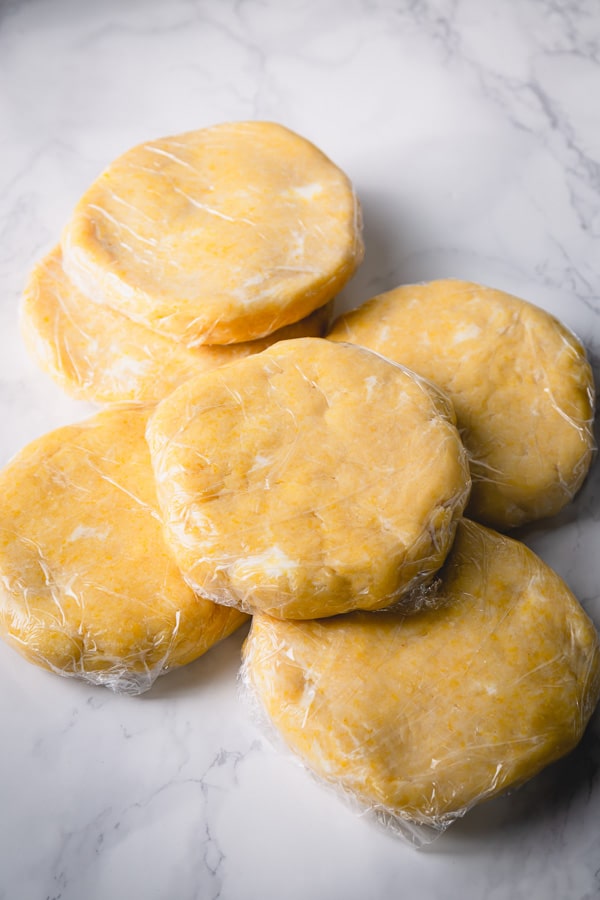
Pie dough can be refrigerated for up to 3 days. Or you can freeze them for up to 3 months.
2 ways to freeze a pie dough:
- Method #1: Wrap the flattened pie dough in a plastic wrap. (If you’re planning to freeze for more than a month, I’d double wrap in plastic.) Place it in a freezer bag. And freeze for up to 3 months.
- When ready to make a pie, thaw the frozen pie dough in the fridge overnight.
- Method #2: Roll the chilled pie dough and lay it in a pie dish. Crimp the edges. And then wrap the entire thing in a plastic wrap, then aluminum foil. Freeze for up to 3 months.
- Make sure it has plenty of space around it, and doesn’t get smushed with other things. That’s why I recommend upright freezer for this method.
- When ready to bake, you can take it straight from the freezer into the oven for blind-baking.
FAQs
Both pie dough and pastry dough are made with the same ingredients. However, puff pastry dough is typically made by laminating butter with the dough, creating flakey layers.
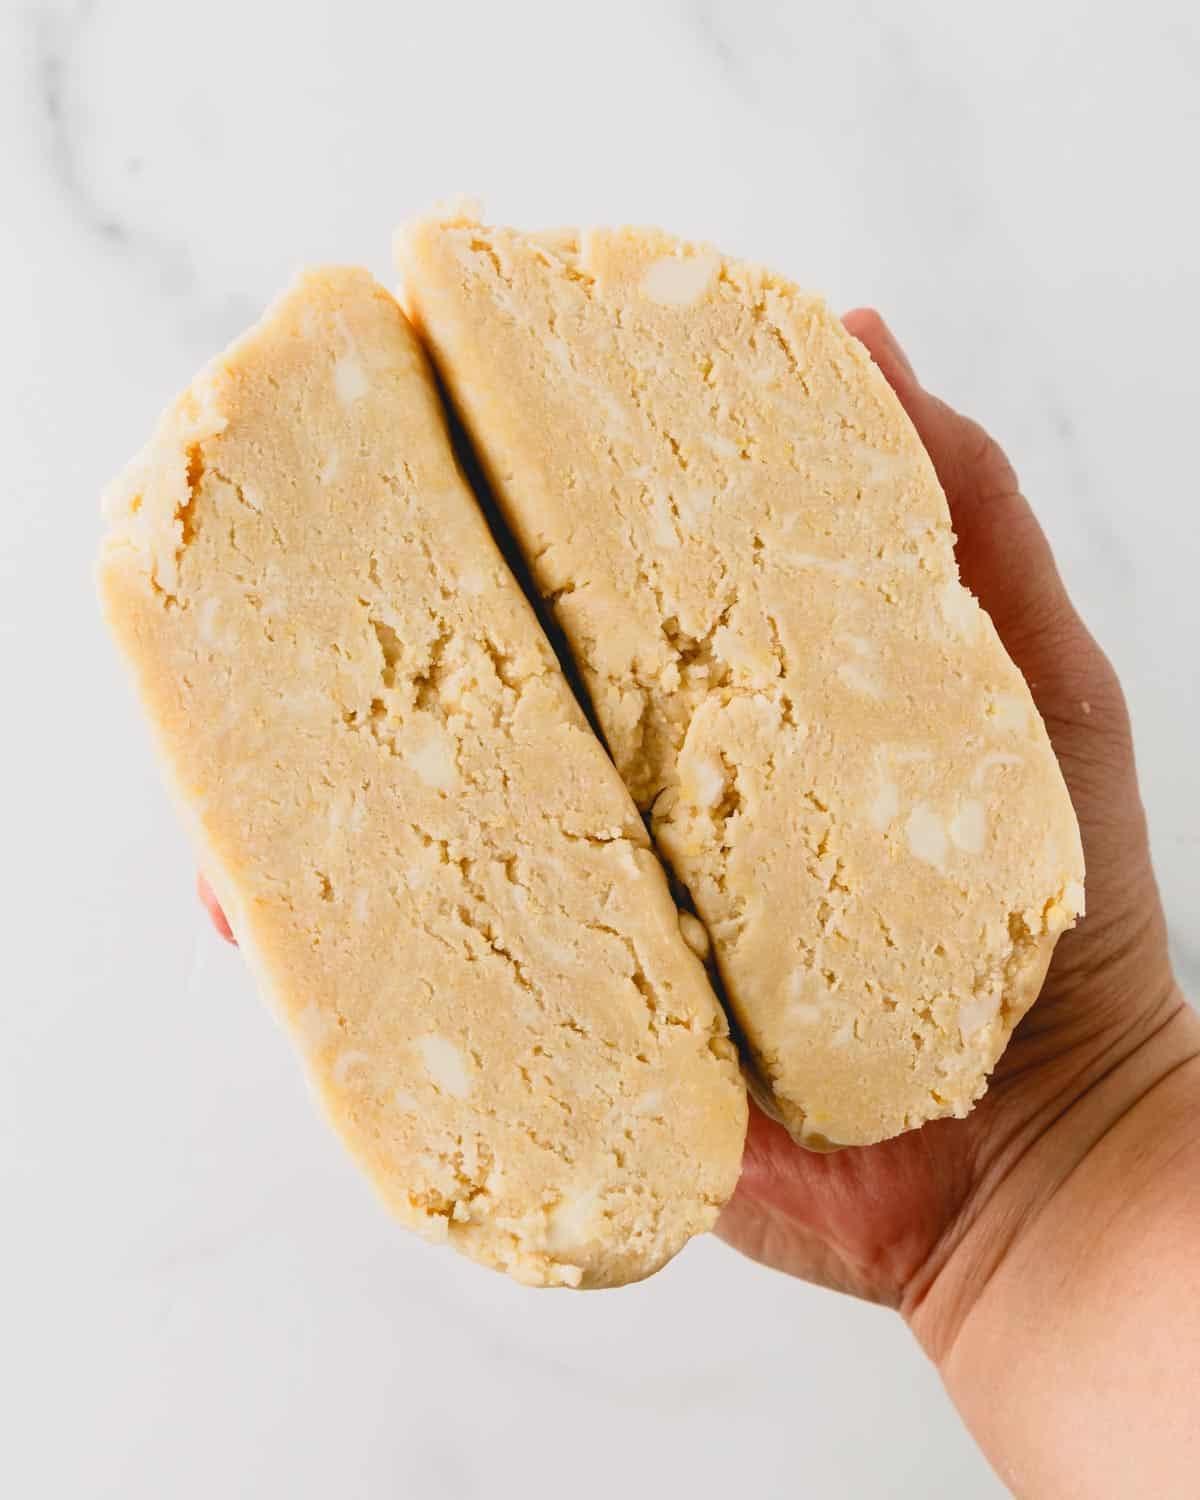
It’s crucial to use frozen butter and ice water when making pie dough so the butter doesn’t melt completely. We want lots of small chunks of butter throughout the dough, so that when we bake the pie crust, those butter pieces melt, creating little pockets in the crust. (Remember, the laminating technique for making flaky croissants? This’s basically the same concept.) Butter swirls and chunks all over the pie dough are a good sign!!
Frozen butter is the secret to a good flakey pie crust. It’s important to keep the dough cold when making the dough to prevent the butter from melting. The small pieces of butter suspended in the dough create air pockets in the dough during baking resulting melt-in-your-mouth flakey crust.
Remember, I said earlier that pie crust with shortening holds its shape better? Well, that’s true. Unfortunately, butter crusts aren’t the best at delivering perfectly crisp edges on carefully designed pies. But there’s a way to minimize the shrinkage! Once you crimp the edges of the pie, put it in the fridge to chill for at least 30 minutes. The longer it chills, the better.
No, there’s no need to spray the pie pan with cooking spray.
When blind baking a pie crust, you do want to poke the crust with a fork to prevent the crust from forming uneven bubbles and air pockets.
More Pie Recipes You’ll Enjoy

All Butter Pie Crust
Ingredients
- 1 ½ cups (190 g) all-purpose flour
- ¼ teaspoon kosher salt
- ½ cup (113 g) unsalted butter cut into ½ tablespoon pieces and frozen
- 1 (17 g) egg yolk
- 3-4 tablespoons (45-60 ml) ice water
Instructions
To make the pie dough
- In a large mixing bowl with a paddle attachment, mix together flour and salt. Alternatively, you can use a pastry cutter, instead of a stand mixer.
- Add frozen butter cubes and egg yolk. Mix on lowest/stir speed until most of the butter pieces are about pea-size. Some bigger butter chunks are good!!
- Add ice water one tablespoon at a time, until the dough forms into a ball. Depending on humidity, you might not need all the water, or you might need additional couple of tablespoons. That’s why you need to add it one tablespoon at a time until big clumps of dough sticks together. Too much water will make the dough too sticky and hard to work with. TIP: Don’t be alarmed if you see small pieces/swirls of butter in the dough, that’s exactly what you want to see! Those butter pieces will melt during baking and create the most tender and flaky crust.
- Form the dough into a ball and flatten it into a disk. Wrap it in a plastic wrap and refrigerate for at least 1 hour, or up to 3 days. Or place it in a freezer bag and freeze for up to 3 months.
To blind bake a pie crust
- Roll the pie dough into 10 to 11-inch circle on a lightly floured surface. Wrap the dough around rolling pin and carefully transfer it onto baking pan. Fold the edges out and roll until it meets the pie pan. Crimp the edges any which way you like, or as shown above.
- Place the crust in the fridge for at least 30 minutes.
- Meanwhile, preheat the oven to 350°F (177°C).
- Using a fork, pierce holes all over the crust to prevent bubbles and air pockets throughout the crust.
- Cover the crust with aluminum foil and pour pie weights, or raw beans/rice. (I use raw beans. And no, you can't use those beans, used as pie weights, for cooking.)
- Place the pie dish on a baking sheet and bake for 15 minutes, and then carefully remove the foil and pie weights. Bake for another 10-15 minutes, or until golden brown.
⭐️ Did you make this recipe?
Please leave a review and let us know how you liked it!
Video
Tips & Notes
Nutrition
This recipe was originally published on January 6th, 2013.


Just wanted to clarify the quantity of butter to use. In the video you mention 1cup but in the recipe on the website it says 1/2 cup. So if you could confirm, please, the amount to use. Also, if I may, when baking the pie crust if I use a glass pie pan that fits on top of the pie crust to weight it down, is that alright and i believe I would omit the foil at that point? I’m making the lemon meringue pie and I’ve watched the three videos on meringue, crust, and lemon curd. I really appreciate the explaining of the science behind the different elements and the helpful tips. You are the best teacher I’ve seen on you tube. With your instruction, hope to have a pie that won’t break (tempering I believe). Thank you!
Hi, Eric! So sorry for the confusion. And thank for reaching for clarification. It’s 1/2 cup (1 stick) of butter. I misspoke in my video, I must have meant 1 stick, not 1 cup. 😉
Great recipe. Thanks so much. If doubling, is it best to use 2 eggs yolks, or just a whole egg? Thank you!
Hi, Annette! So happy you loved the recipe. Use 2 yolks when doubling the recipe. You don’t want any egg whites in the pie dough.
I make my pie in an unbaked crust. Can I do that with this pie or is it a must to bake first alone?
Hi, Nadia. Yes, absolutely!
When I printed the recipe, I clicked to double the recipe. It doubled the cup amounts, but not the grams amount…just wanted you to know..thanks!
Thanks for letting me know, Linda.
Hi Shinee love your recipes! This all butter pie dough is straight forward and can’t wait to try it. I prefer deep dish pies. How will I alter this recipe to accomodate a 9.5 x 2″ pie plate with out wasting dough.
Thanks!