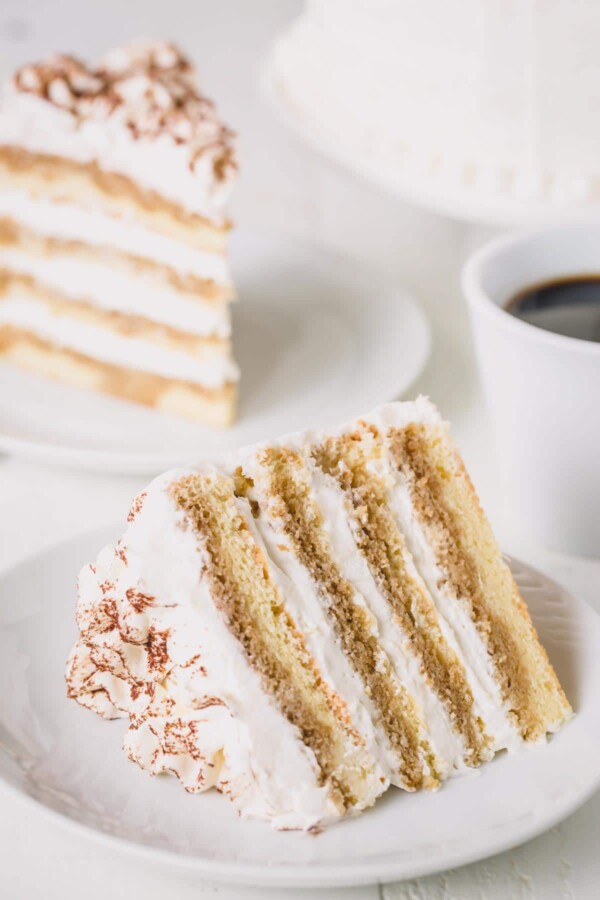
Melt-in-your-mouth tender and light sponge cake layers are soaked with intense espresso and filled with fluffy eggless tiramisu cream. This tiramisu layer cake is a dreamy dessert for any occasion.
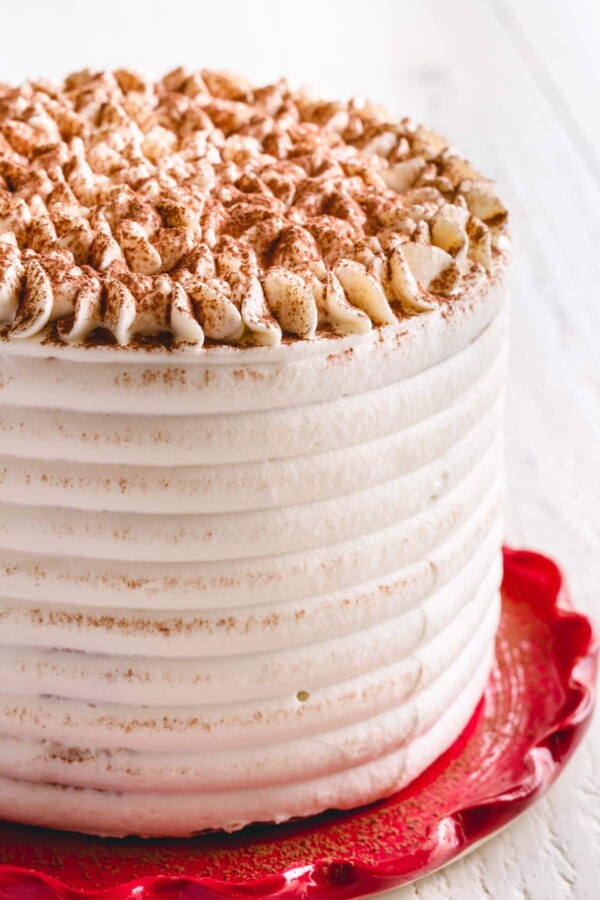
Table of Contents
Why you’ll love this cake:
OMG, this cake is the best!! So many reasons you’ll love it:
- Incredibly light and delicate, this cake is simply melt-in-your-mouth! All thanks to fluffy sponge cake layers generously soaked with espresso!
- The eggless tiramisu cream filling is the star of the show! It’s so creamy and fluffy – just dreamy!! Sure, it’s not an authentic tiramisu filling, but that doesn’t mean it’s not perfect!
- And it’s a perfect make-ahead cake that only gets better as time goes!
Key Ingredient Notes:
- Espresso powder – I use an instant espresso powder, because it’s so convenient and easy to use. In a pinch, you can substitute a strong coffee.
- Amaretto liqueur – This sweet and nutty liqueur adds the signature tiramisu flavor. My go-to brand of quality amaretto is Disaronno.
- Mascarpone cheese – It’s a soft Italian cheese that has a unique and subtle flavor. Although I highly recommend using mascarpone cheese, you can use cream cheese instead, but keep in mind the flavor will be slightly different.
How to make this layer cake:
1. Sponge cake
We’ll start with making cake layers, which can be made up to a month in advance. The light and airy sponge cake layers are sturdy enough to soak up all the espresso and make an ideal base for this layer cake.
And since I have a dedicated post on how to make this classic sponge cake (with step-by step photos and even video), I won’t bore you with details.
2. Mascarpone Cream Filling
This is the BEST part of the cake, I think! I absolutely adore this cloud-like filling that is not overly sweet, ultra-fluffy and light!!
This delicate filling is best when it’s made right before assembling the cake.
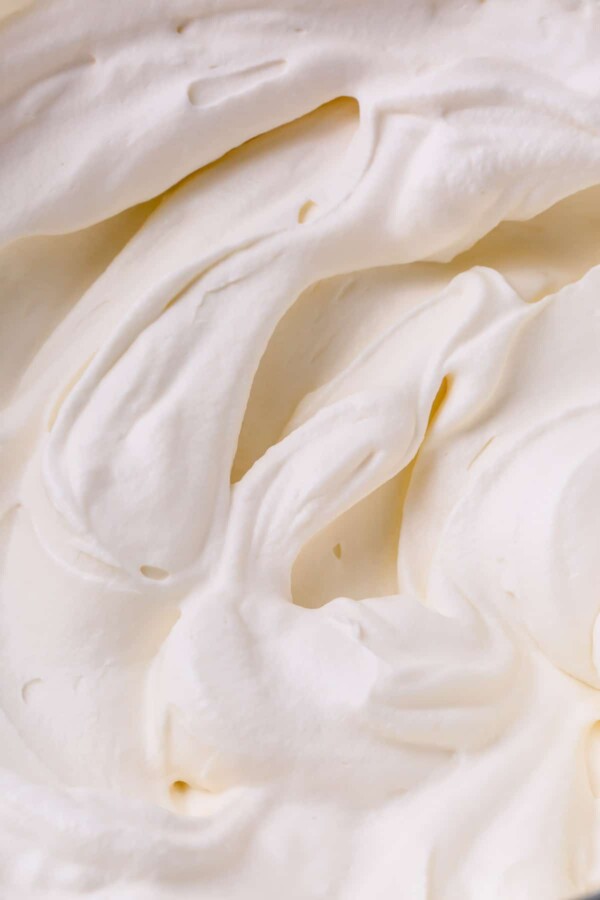
- Combine mascarpone cheese, sweetened condensed milk and vanilla and whisk it until well combined.
- In a separate bowl, whip heavy cream until stiff peaks form.
- Fold in half of the whipped cream into mascarpone mixture, then add remaining whipped cream and gently fold until well combined.
3. Espresso Syrup
It’s not really a syrup, but it won’t be a tiramisu without this mixture!
- Dissolve espresso powder in 1/2 cup of hot water.
- Stir in amaretto liqueur.
4. Assembling
You can assemble the cake a day or two prior to serving. The beauty of this cake is that it gets better as time goes, because sponge cake layers soak up all the flavors from the filling and becomes even better!
- Slice the cakes into 4 even layers.
- Put a dollop of filling on a cake board and place the first cake layer.
- Drizzle 1/4 of espresso mixture evenly all over the cake.
- Then spread a generous amount of filling over the cake layer.
- Place the next cake layer and repeat steps 3 and 4 until the last layer.
- Once all the layers are stacked, cover the cake with half of the remaining filling to crumb coat the cake. Refrigerate it for at least 1 hour to firm up.
- Then frost the cake with the remaining filling and decorate, as desired. Since the filling is soft and fluffy, you won’t achieve perfectly smooth and hard frosting.
- Dust the final cake with cocoa powder and refrigerate until ready to serve.
Tip
If you want, you can also add shaved chocolate in between the layers. It’s a great addition, but it’s not necessary. Just a little something.
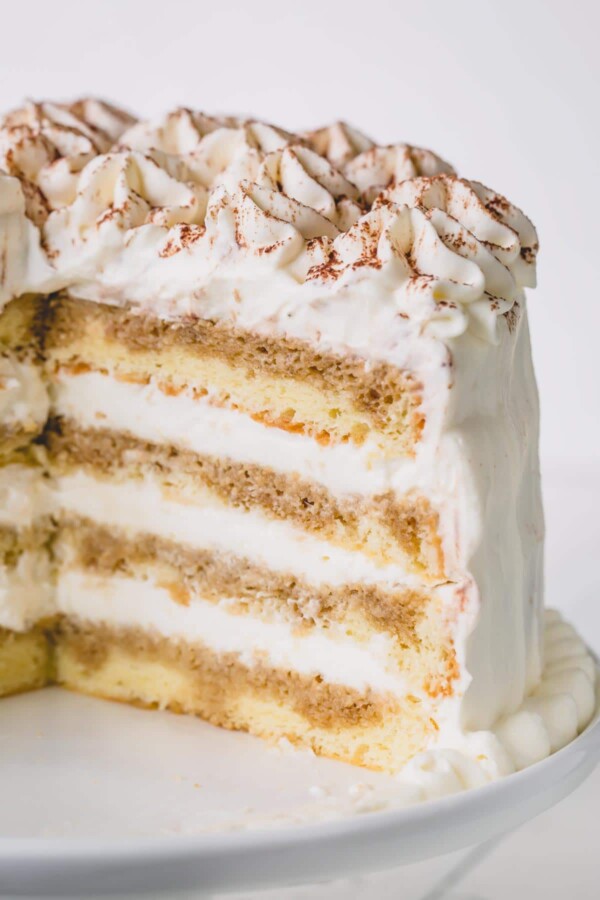
Hope you’ll make this tiramisu layer cake!! I promise you won’t regret it!
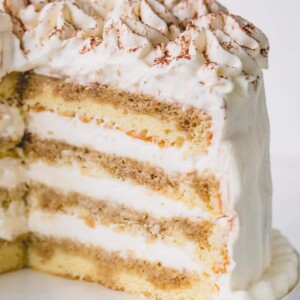
Tiramisu Layer Cake
Ingredients
For sponge cake:
- 6 large eggs at room temperature
- 1 cup (200g) granulated sugar divided Note 1
- 1 1/2 cups (180g) plain cake flour
- 1/2 teaspoon salt
- 1 teaspoon pure vanilla extract
- 1/4 teaspoon almond extract
For coffee syrup:
- 1/2 cup (120ml) hot water
- 2 teaspoons instant espresso powder Note 2
- 3 tablespoons amaretto liqueur Note 3
For tiramisu cream:
- 1/2 cup (120ml) sweetened condensed milk
- 8 oz (225g) mascarpone cheese softened Note 4
- 1 teaspoon pure vanilla extract
- 2 cups (480ml) heavy whipping cream cold
- 1 tablespoon unsweetened cocoa powder for dusting, optional
Instructions
To make sponge cake:
- Preheat the oven to 350°F (177°C). Line bottom of two 9 or 8-inch cake pans with parchment paper. No need to grease the pans.
- Separate egg whites and yolks, making sure not even a little bit of egg yolk gets into the whites. (TIP: It's easier to separate the egg when they're cold right out of the fridge.)
- In a mixing bowl with whisk attachment, whisk together egg yolks, ½ cup of sugar, vanilla and almond extracts until pale and tripled in volume, about 5 minutes.
- Meanwhile, sift flour and salt.
- In another mixing bowl with whisk attachment, beat egg whites at medium low speed until foamy.
- Add remaining ½ cup of sugar 1 tablespoon at a time and continue to whisk until stiff peaks, gradually increasing the speed to medium high, 7-10 minutes.
- Using a spatula, add 1/3 of the whipped egg whites into the egg yolk mixture and gently fold until mostly smooth. Add the remaining egg whites and gently fold until smooth.
- Add sifted flour into the batter in 3 stages, whisking the batter well after each addition.
- Pour the batter into prepared pan and smooth the top.
- Bake the cake for 25-30 minutes, or until inserted toothpick comes out clean. Don’t open the oven for at least the first 20 minutes!
- Let the cake cool for 5 minutes in the pan. Then run a knife around the edges and invert onto a cooling rack. Cool completely. Once cooled, wrap with plastic wrap and refrigerate for at least 2 hours or preferably overnight. It’ll be easier to cut when the cake is thoroughly chilled.
To make espresso syrup:
- Dissolve espresso powder in 1/2 cup of hot water. Then stir in amaretto liqueur.
To make tiramisu cream filling:
- In a mixing bowl with whisk attachment, beat mascarpone cheese, sweetened condensed milk and vanilla extract until combined.
- In a separate bowl, whip the heavy cream until hard peaks form.
- Gently fold in half of whipped cream into mascarpone cheese mixture. Then add the remaining whipped cream and mix until well combined. Refrigerate until ready to use.
To assemble the cake:
- Once the cake is completely cooled, slice each cake horizontally into 2 even layers.
- Put a dollop of filling on a cake board and place the first cake layer.
- Drizzle 1/4 of espresso mixture evenly all over the cake.
- Then spread a generous amount of filling (about 1 cup) over the cake layer.
- Place the next layer and repeat until all the layers are stacked.
- Cover the cake with half of the remaining filling to crumb coat the cake. Refrigerate it for at least 1 hour to firm up.
- Then frost the cake with the remaining filling and decorate, as desired. (I used Wilton 1M tip for the top.) NOTE: Since the filling is super soft and fluffy, you won't achieve perfectly smooth and hard frosting.
- Dust the final cake with cocoa powder and refrigerate until ready to serve.
Tips & Notes
– The sponge cake, tightly wrapped in a plastic wrap, can be refrigerated for up to 1 week, or frozen for up to 1 month.
– Cake can be assembled 1-2 days in advance.
Nutrition
This recipe was originally published on June 17th, 2013.


Hi! I only have 6 inch pans, will that be ok to use for this recipe?
Hi, Melissa. I’m not sure. If your 6-inch pans are at least 2-inch tall, you may get away with it. Even then, I’m not sure, because the batter fills my 2 7-inch pans pretty high.
Can you please tell me why you add the hot water into the batter
Thank you for sharing your wonderful recipe
Hi, Anh. The hot water helps to achieve light and airy texture. Hope you’ll give this cake a try.
Thank you so much, Shinee. I can’t wait to give it a try but another question is 2 tbsp cold water is beaten with egg yolks. What’s it for
Thanks in advance
Water helps to beat the egg yolks easier.
Thank you again so much, Shinee.
Is there any way this recipe can be converted to 8 or 9″ cake pans?
Hi, Marilyn. I think you can increase the ingredients 1.5 times and use 9-inch cake pan. I haven’t tried this way though. If you give it a try, let me know how it turns out.
Thank you for your reply. I did, however, buy 2 – 7″ cake pans – so I’m set to go!
Yay, hope you’ll love it. Let us know how it turned out, Marilyn!
I made this cake for a family birthday. While I had to increase the amounts needed because I had only 9″ pans, I used everything called for and followed directions exactly. It was wonderful!!!! Everyone loved it. It was moist, creamy, and had just the right amount of coffee/kahlua taste! I will definitely make it again. I could have used more frosting to pipe, but that might have been my multiplication and addition of fractions:-)) Thank you so much for the recipe!
Hi, Ruth! Yay, so happy to hear you made the cake and your family loved it!! Thank you so much for your feedback!
I would love to know how you converted this for 9″ pans. Most of us don’t have 6″ or 7″ pans (although I did just get 6″ and have a 7″ springform, I don’t bake enough to buy another size for layer cakes…).
I love the idea of turning tiramisu into a layer cake. My two favorite desserts in one. I actually tried the cake today and the cream was holding well( very foamy and fluffy) But then the minute I started assembling the cake its started oozing from everywhere and was too runny….. A disaster. I dont know what went wrong..I didn’t even get the chance to frost it…
Hi, Hasna. Sorry to hear you had some trouble. Did you cool the cakes completely before assembling? It sounds like the cake layers may have been a bit warm since the frosting started melting. It’s important to cool the cake layers completely for this very reason. Hope this helps.
Can I just soak the layers in coffee instead of making the coffee syrup?
Definitely. I’d make a bit strong coffee though. Hope you’ll like it, Kaylee.
Hello, the cake looks lovely and I am going to try it. Is the Tiramisu cream enough to do the decorations as shown or do I need to make more? If more, do i need 1.5 times? Thank you!
Hi, Hui! You’ll definitely have enough frosting to do the same decoration as shown in these photos. I actually had a little bit leftover even. Let me know how yours turns out, or better yet send me pic. 😉
Stunning cake! Would love to make this ahead. Can it be frozen?
Hi, Will. I wouldn’t recommend freezing the entire cake, since the layers are soaked with liquid and whipped cream frosting may not turn out well after thawed. But you can bake the sponge cake layers and freeze them. Hope this helps. Let me know if you give it a try.
Look at all those layers! What a gorgeous cake! I love tiramisu too!
Thank you, Eden!!
Stunning cake!! Tiramisu all dressed up for Valentines day. Love your addition of sweetened condensed milk into the frosting, fab idea.
Thanks so much, Maria!