
Ultimate chocolate macarons recipe with deep dive into various cocoa powders, specific tips to consider for making chocolate macarons and more!
Pin this now to find it later
Pin ItAre you new to making macarons?
Have you mastered basic macarons and are up for a challenge?
If you thought plain macarons are a pain, just wait to try making chocolate version. I’m not saying this to discourage you, but I also want to give you a fair warning and set you up for success.
Here’s the thing…
If you haven’t mastered the basic macaron techniques, like making a stable meringue, understanding a proper macaronage, or figured out the sweet spot of your oven, your macaron journey may turn out harder than it needs to be.
Why?
Because an addition of cocoa powder throws a curveball to the whole process. But don’t worry, I’ll share ALL THE TIPS I learned over the years right here!
Why you’ll love this chocolate macarons recipe:
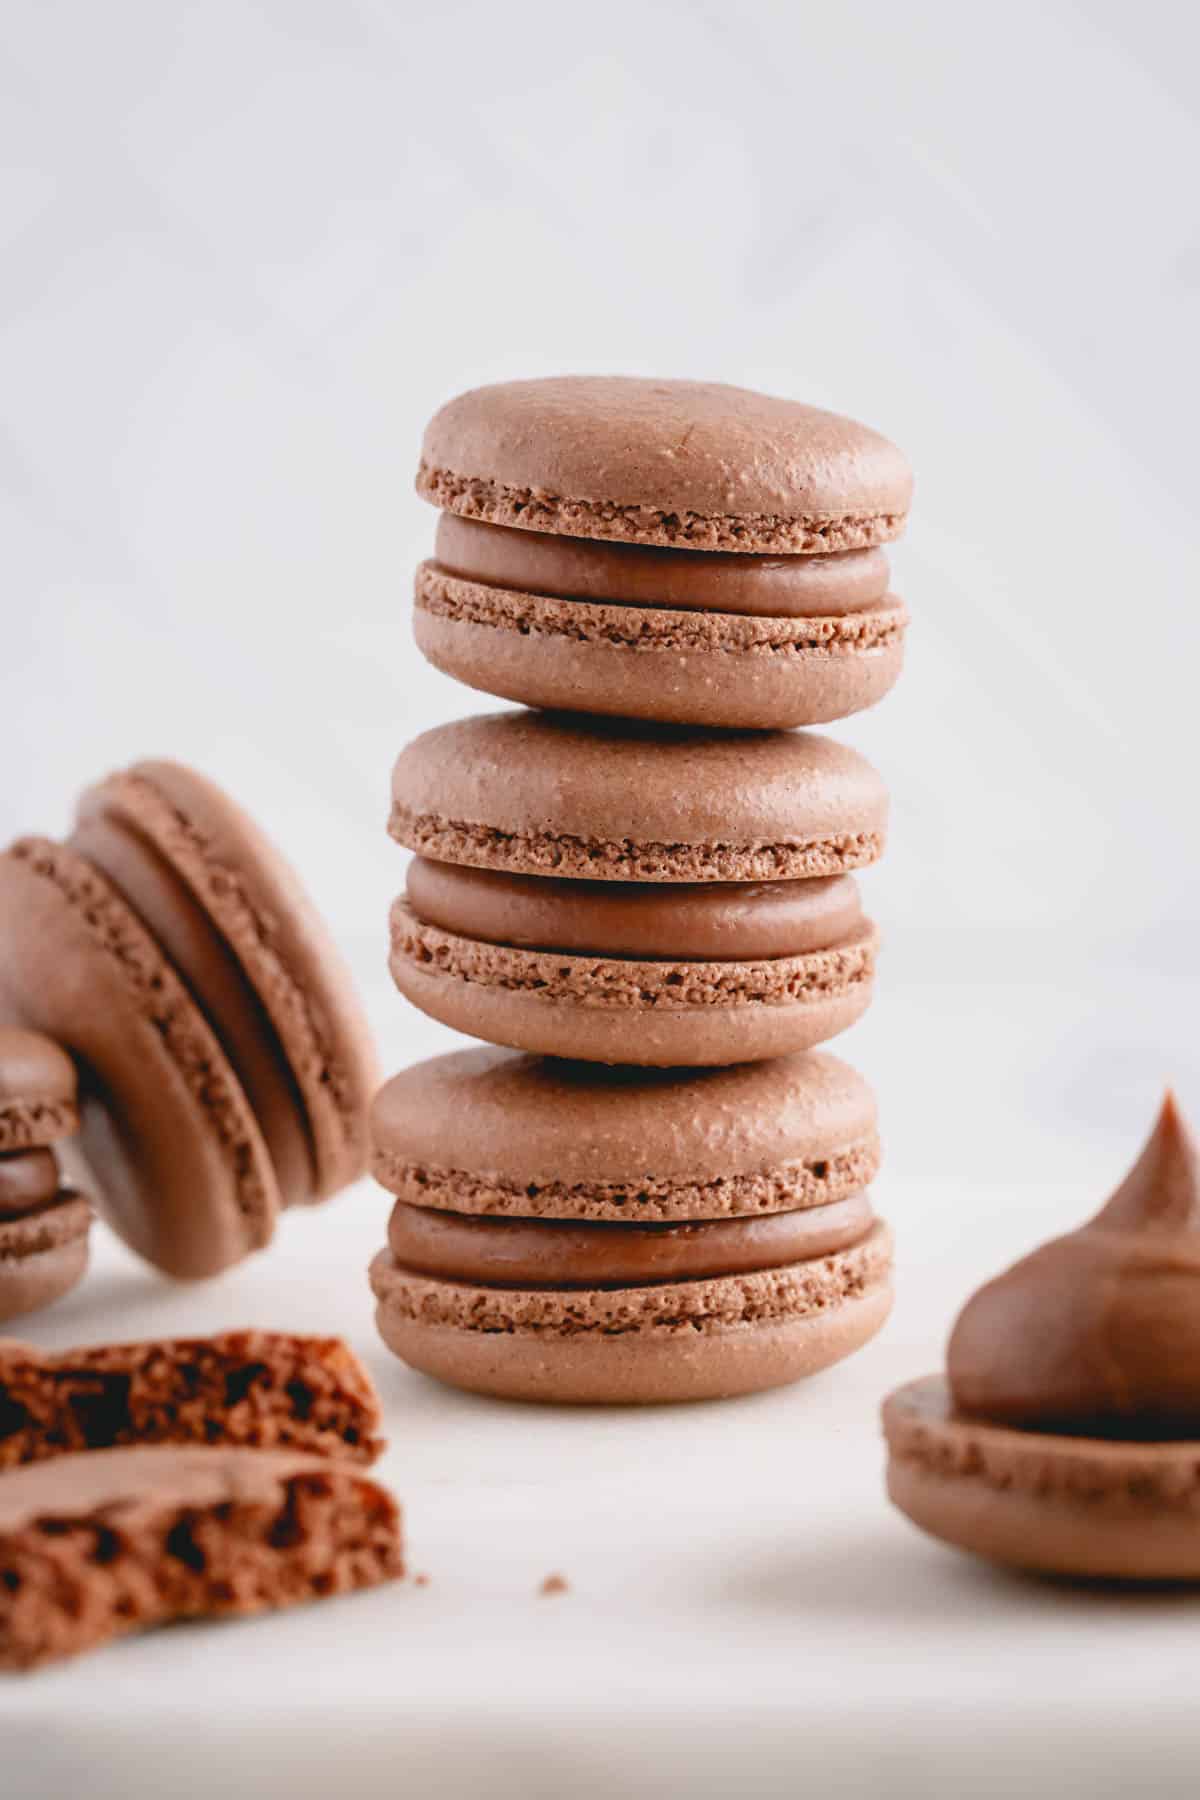
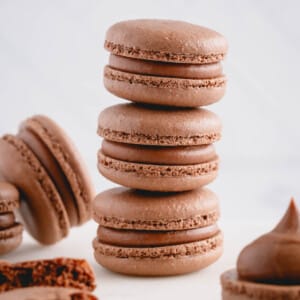
These chocolate macarons are beyond indulgent. So rich, yet addicting, you won’t be able to stop at just one! Even the failed ones are supremely good!!
There is literally no foolproof macaron recipe, and this chocolate macaron recipe is no exception. And the only way you can perfect your macarons is through experimentation.
And my goal here is to equip you with all the tips and tricks to consider when making these decadent treats.
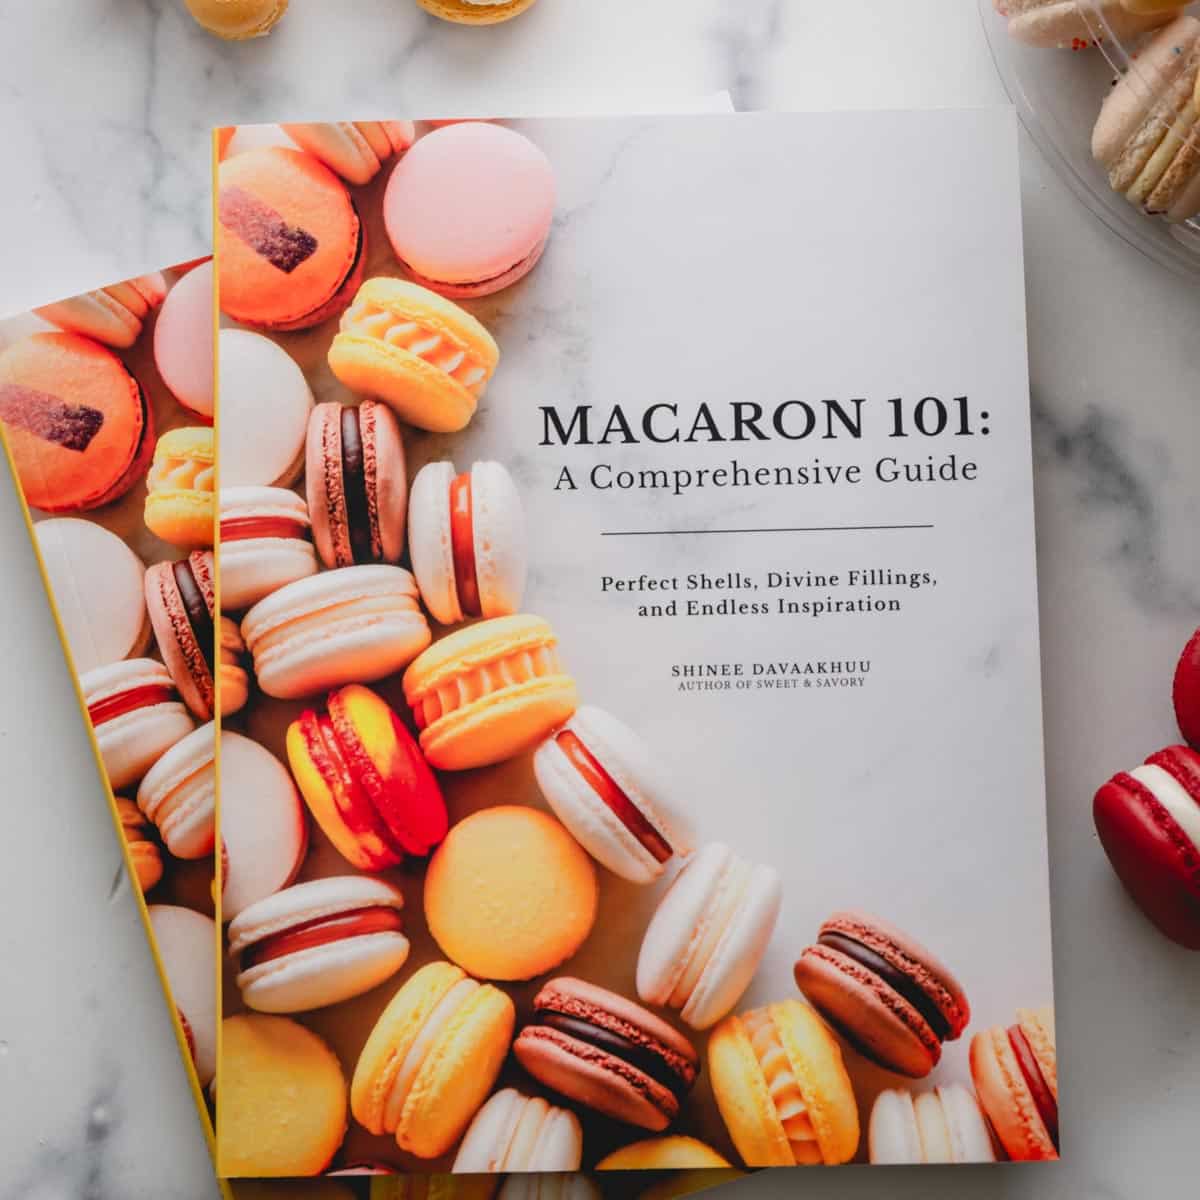
Macaron 101: A Comprehensive Guide
Master the art of French macarons and create your signature flavors!
Key Ingredient Notes
- Egg whites – Take good care to separate egg whites from yolks without contaminating the whites with yolks. Room temperature egg whites whip faster and reach better volume.
- Almond flour – Choose super-fine almond flour to with light beige color and fluffy texture.
- Powdered sugar is essential for making macarons.
- Granulated sugar – Use fine granulated sugar, aka caster sugar or baker’s sugar, as it dissolves faster in the egg whites.
- Cream of tartar is optional and can be omitted. However, it helps to stabilize egg whites and create sturdier meringue. It’s just an extra insurance!
- Cocoa powder – You can use either unsweetened natural or Dutch-processed cocoa powder. Not all cocoa powders made same. Read more details below.
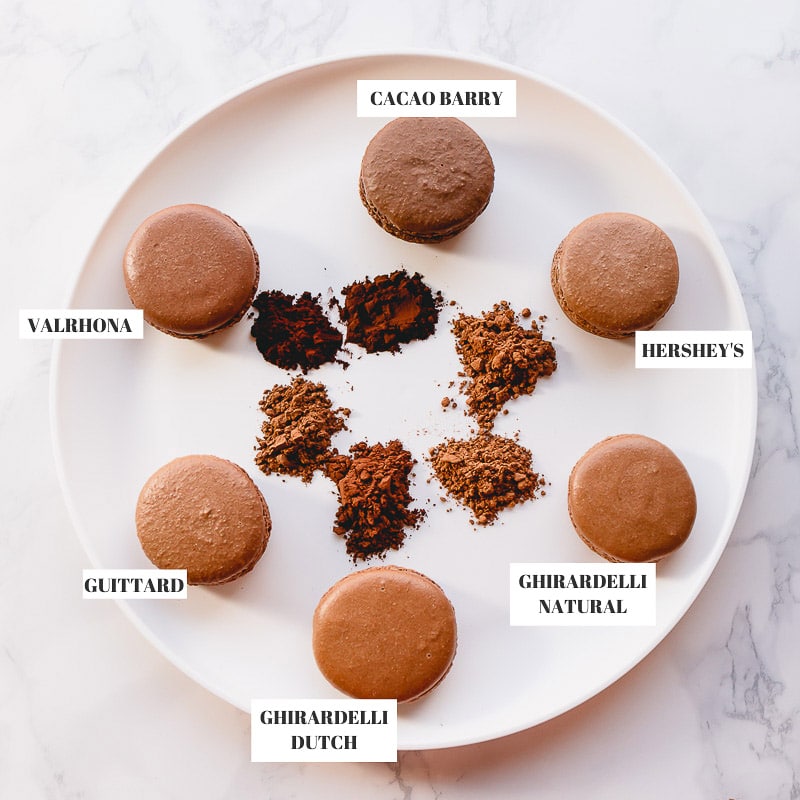
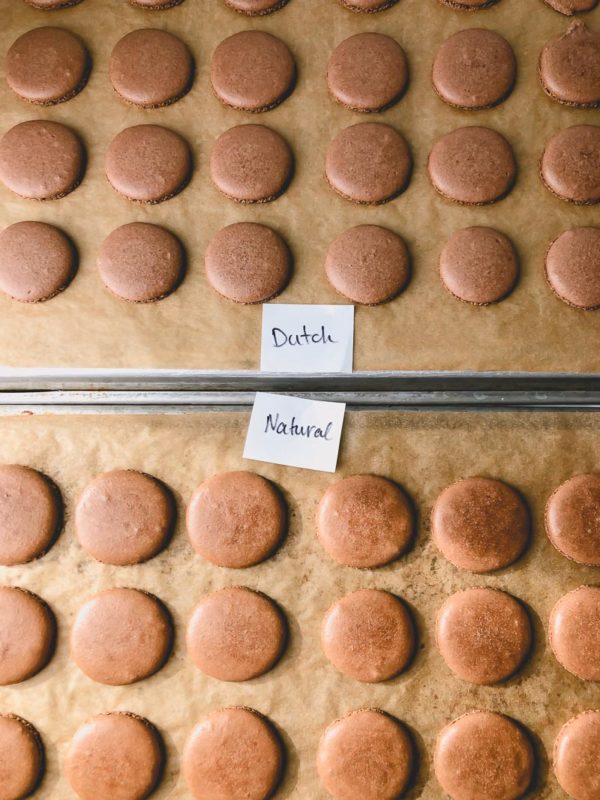
What cocoa powder should you use for macarons?
Does type of cocoa powder matter in making chocolate macarons? Yes, no and maybe! 🙂
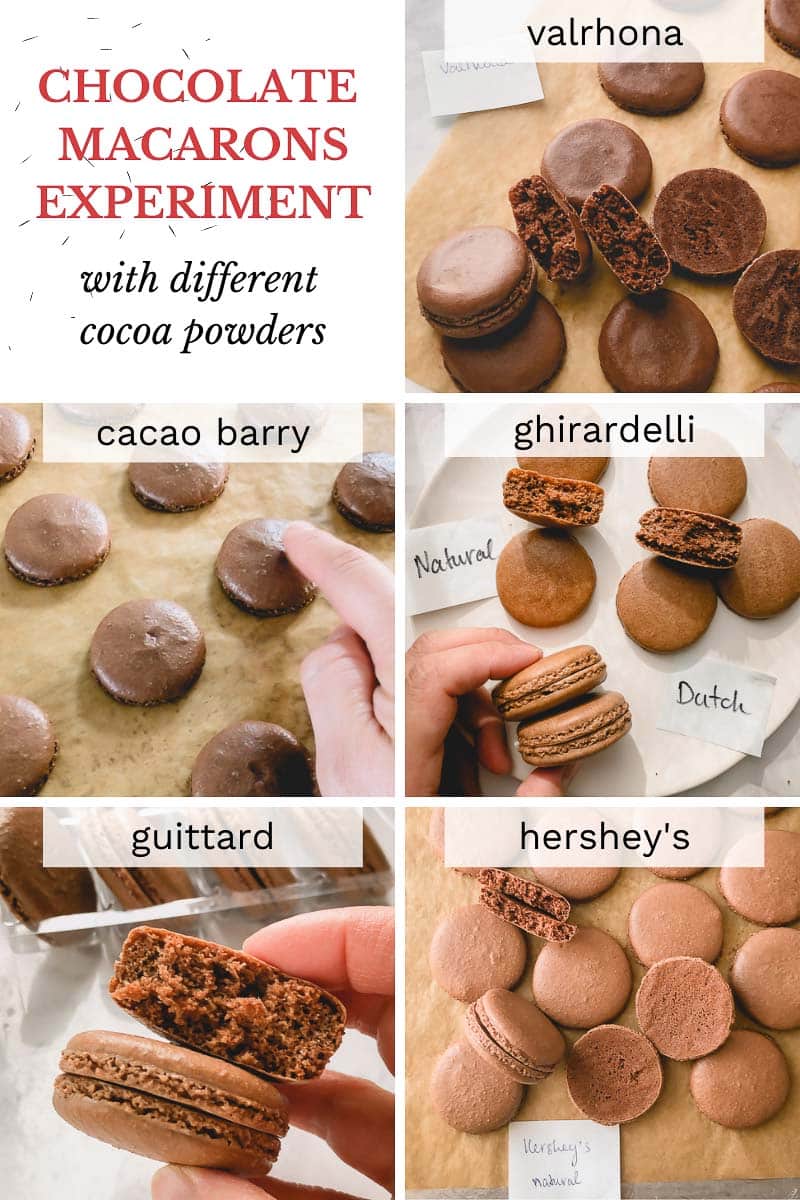
I’ve tested 6 different cocoa powders with the same recipe.
Cacao Barry Extra Brut cocoa powder
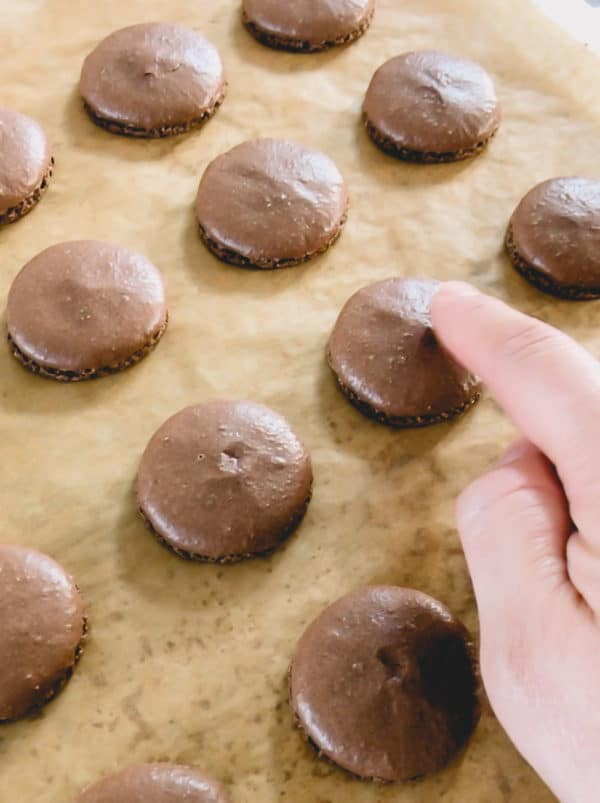
I loved how these macarons were dark and rich colored. They were slightly on the soft side, meaning the shells were a little fragile on the top.
But baking these macarons a little longer solved the problem. After filling and maturing, they were perfect!
Valrhona cocoa powder
Valrhona cocoa powder is pretty dark in color, which produced richer colored macarons with great chocolate flavor.
However, some of the macarons had slightly wavy tops (not completely wrinkly), and I suspect it’s due to higher fat amount of the cocoa powder.

Guittard Rich Dutched cocoa powder
These chocolate macs were also perfect: nice shells with crisp outer layer, full inside and great chocolate flavor.
They had slightly darker shade of brown than macarons made with Hershey’s natural cocoa powder.
Ghirardelli Natural and Dutched cocoa powders
I was quite surprised how similar the macarons with Ghirardelli natural and Dutched cocoa powders were.
Although cocoa powders have different shades, the macarons were practically the same color. But nonetheless, they were perfect macarons with nice smooth tops and full inside.
Hershey’s Natural cocoa powder
Macarons with Hershey’s natural cocoa powder came out perfect every time! Crisp outer skin, full meaty inside, smooth tops and chocolatey flavor!
The only downside is they are light brown colors, which is no big deal in my opinion. And if you want richer brown color, add a small amount of brown gel food coloring.

Cocoa powder conclusion
The high end cocoa powders tend to have higher percentage of fat which is not ideal for macarons.
The most commonly available Hershey’s Natural and Ghirardelli cocoa powders work perfectly for making macarons!
How to make chocolate macarons:
Now that we sorted everything with cocoa powders, let’s make these beautiful macarons.
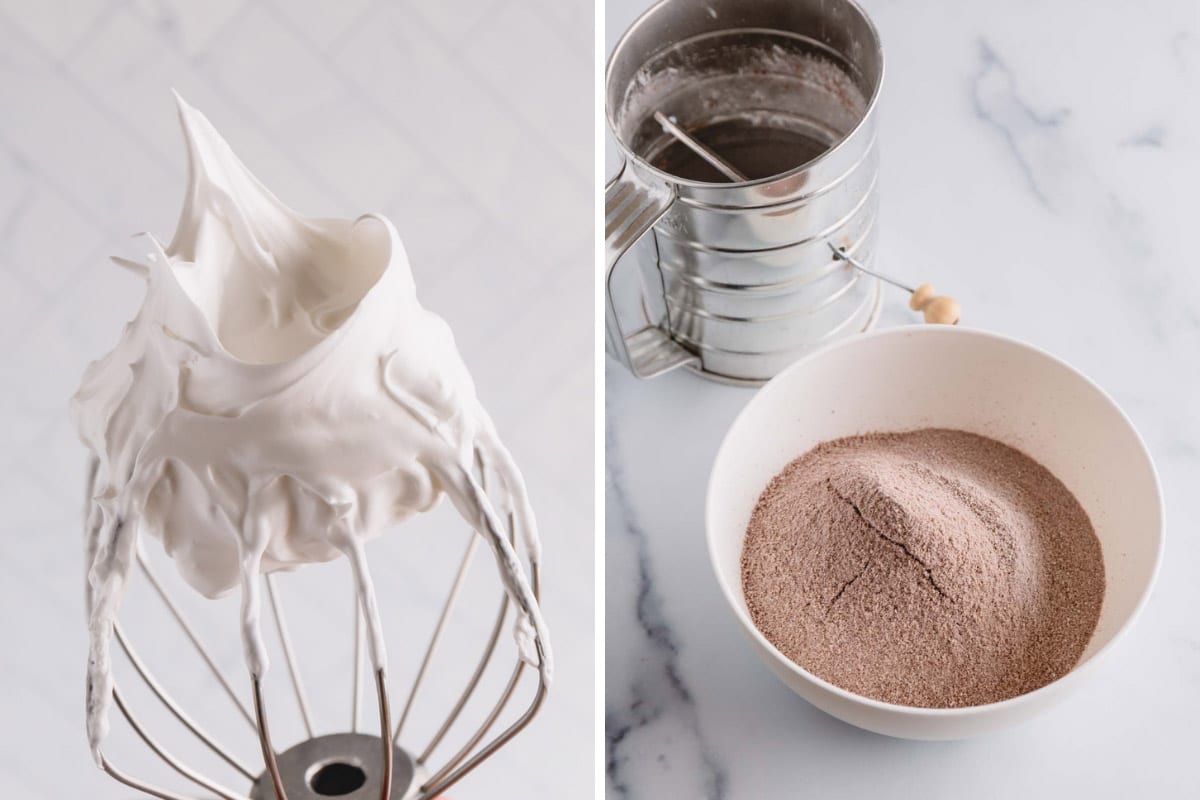
1. Make meringue and sift dry ingredients
- Make meringue: Combine egg whites, granulated sugar, salt and cream of tartar, if using, in a mixing bowl. Whisk the egg whites on a consistent medium speed until stiff peaks form. You want to see those nice sharp ribs and pointy ends when you lift the whisk. (On KitchenAid stand mixer, I beat the meringue on speed 4. This process may take up to 40 minutes. Don’t rush it.)
- Sift dry ingredients: twice. Yes, two times. Not only are we combining the almond flour, powdered sugar and cocoa powder, we’re also aerating the dry ingredients to get that beautiful full interior.
2. Mix the macaron batter
- Sift in almond flour mixture into the meringue.
- Fold the dry ingredients into the meringue with a large silicone spatula. Then fold the batter until lava-like consistency, which means the batter is thick, yet runny enough to slowly flow off the spatula.
WATCH MY REAL TIME MACARONAGE VIDEO

To test the consistency of the batter: Scoop the batter with the spatula and drop it back into the bowl. Then tilt the bowl slightly and count to 10. If the edges of the ribbon are dissolved back into the batter in 10 seconds, the batter is ready!
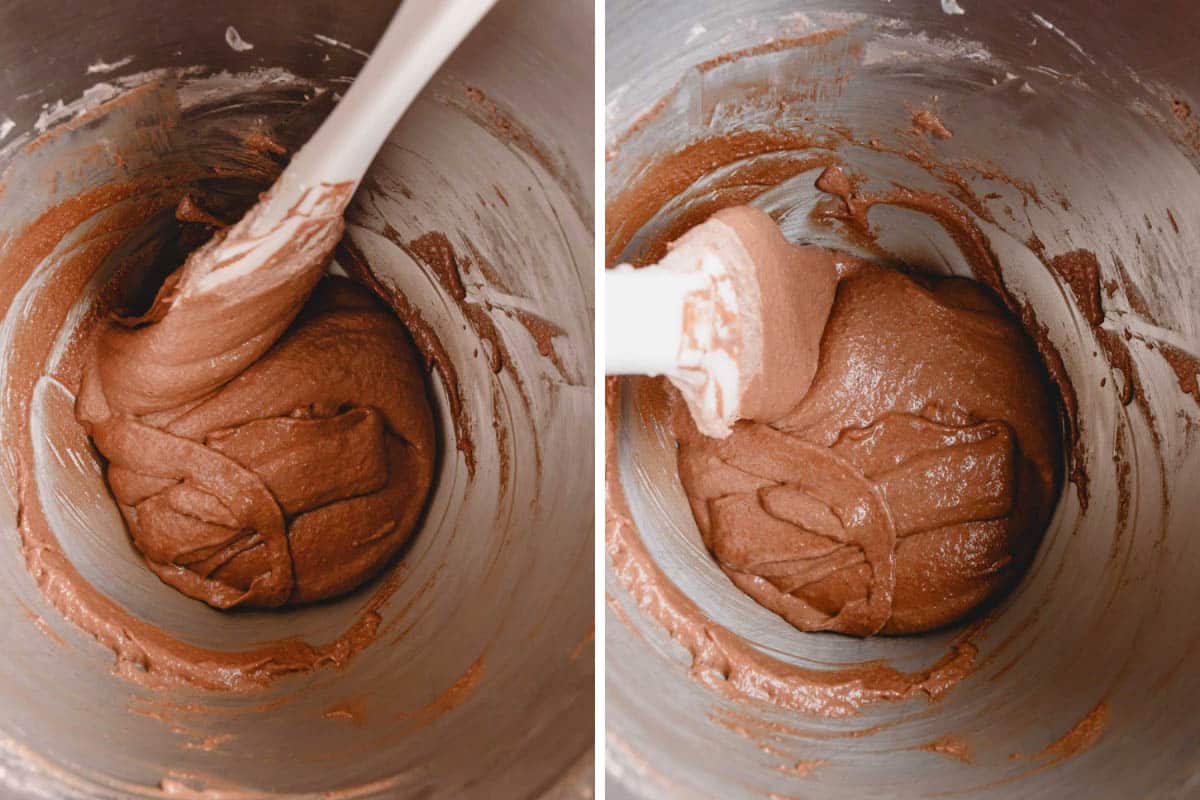
Chocolate Macaron Batter Consistency
I learned from Phay Shing that chocolate macaron batter tends to be thicker, thus it doesn’t melt back into the batter the same as plain macaron batter. Don’t over-mix!
3. Pipe and bake
- Transfer the batter into a piping bag, fitted with a round tip (I use Wilton 2A tip). And pipe 1.5-inch rounds on two baking sheets, lined with teflon sheets or parchment paper.
- Rest the macaron shells for 15 minutes.
- Bake for 18-20 at 300°F oven. Cool macaron shells completely on the baking sheets and then carefully peel them off.

NEED HELP? Check out visual Macaron Troubleshooting Guide for tips and tricks to fix or prevent common macaron issues!

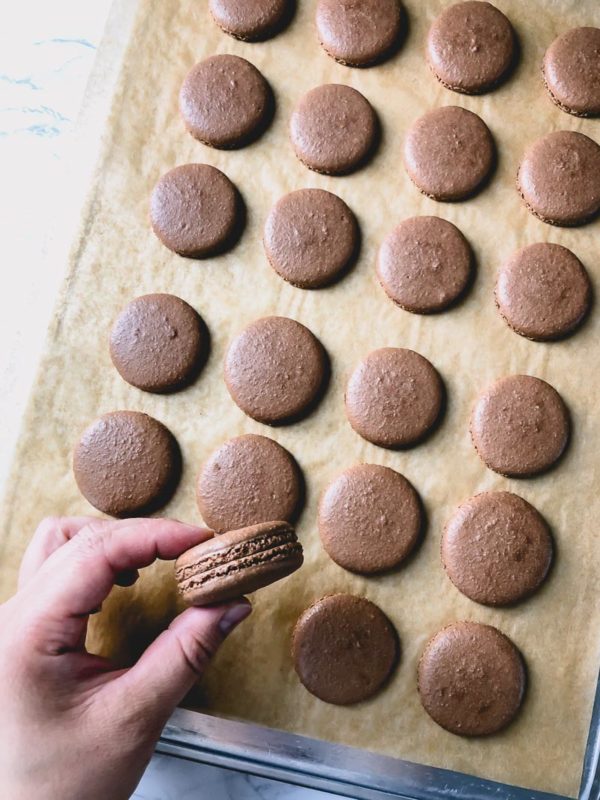
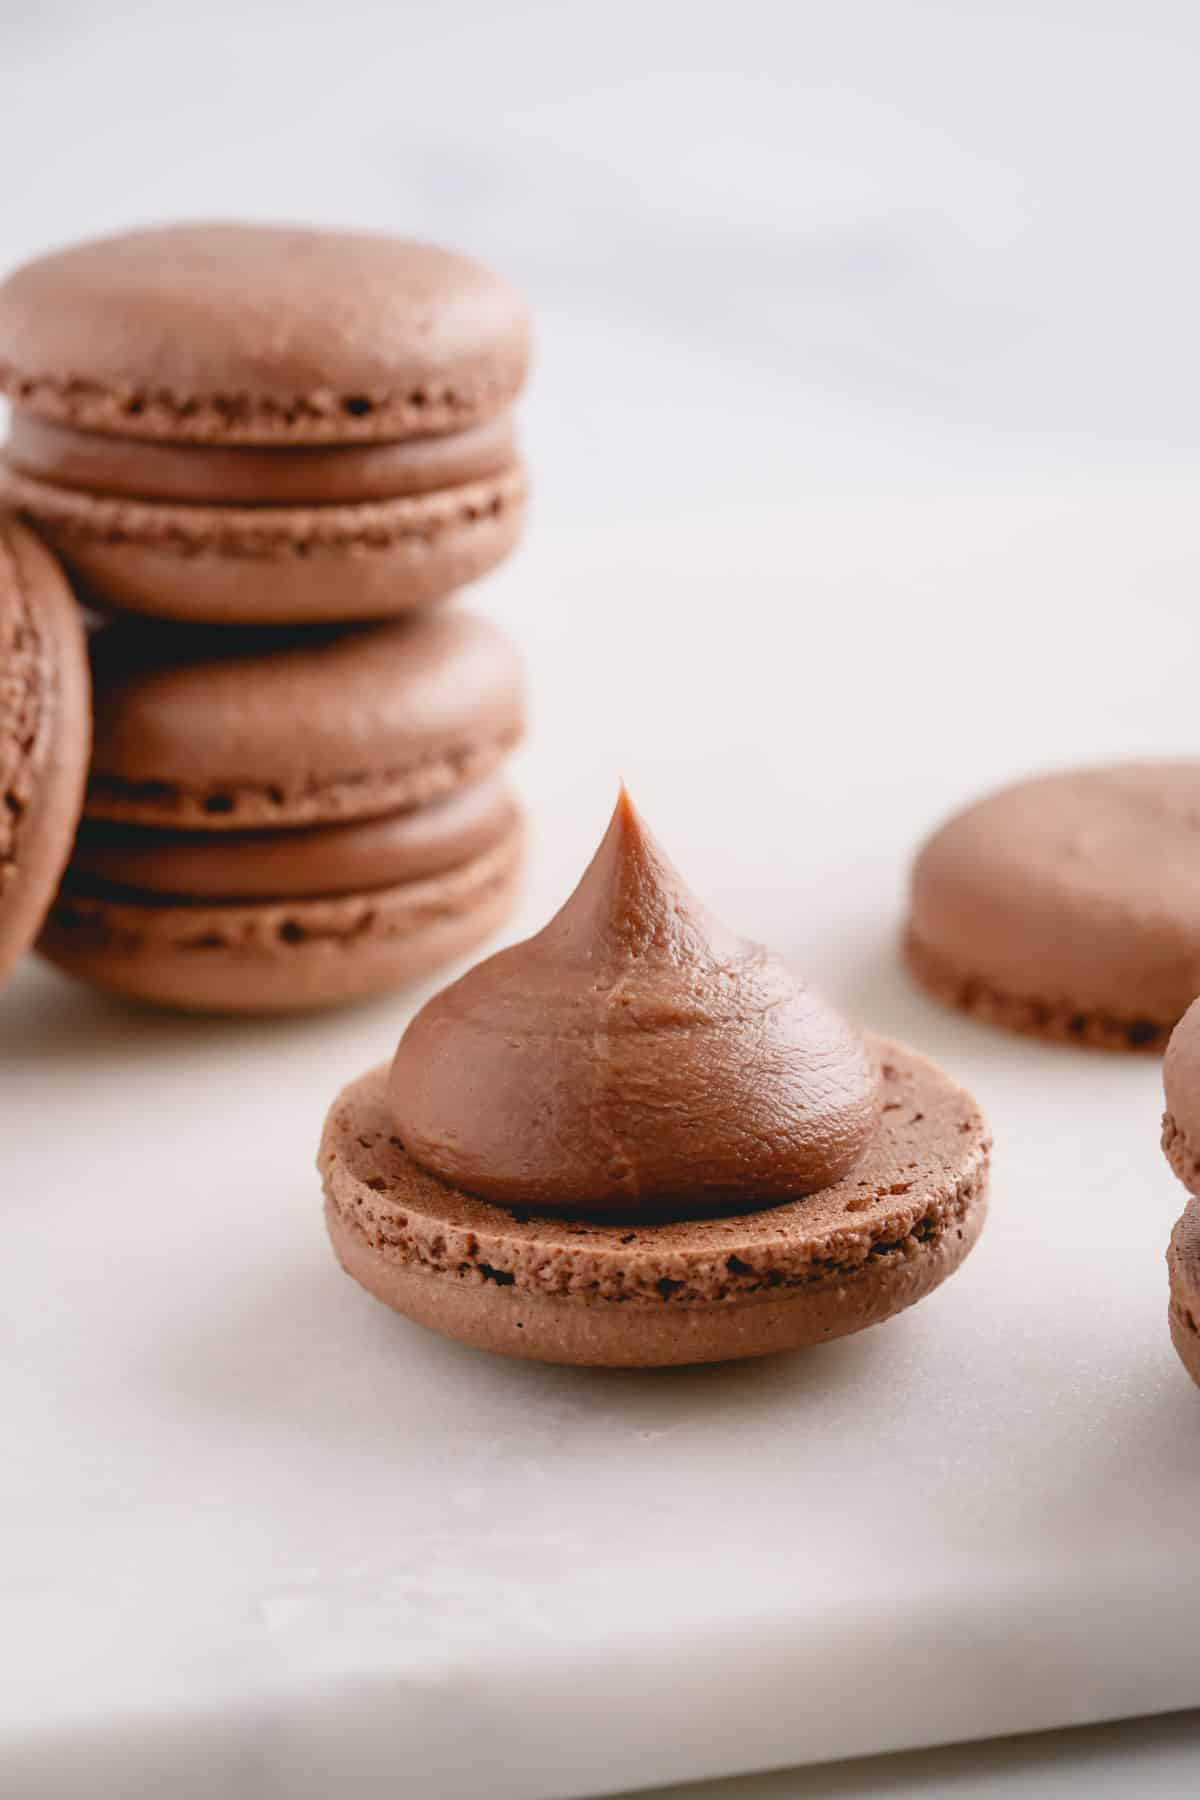
4. Assemble the macarons
- Remove the cooled macaron shells from the baking surface. If the shells are stuck to the baking surface, the shells are either underbaked, or you need to let them cool completely.
- Then pair the shells by size and arrange them on a baking sheet, or wire rack, placing one shell bottom side up.
- Pipe a dollop of filling on bottom shells and place the top shell over the filling and press lightly so the filling spreads till the edges.
- Place the filled macarons in an airtight container and refrigerate for at least 8 hours or preferably for 24 hours. This process is called maturing, which allows the filling to soften and flavor the shells.
Chocolate Macarons Filling Ideas:
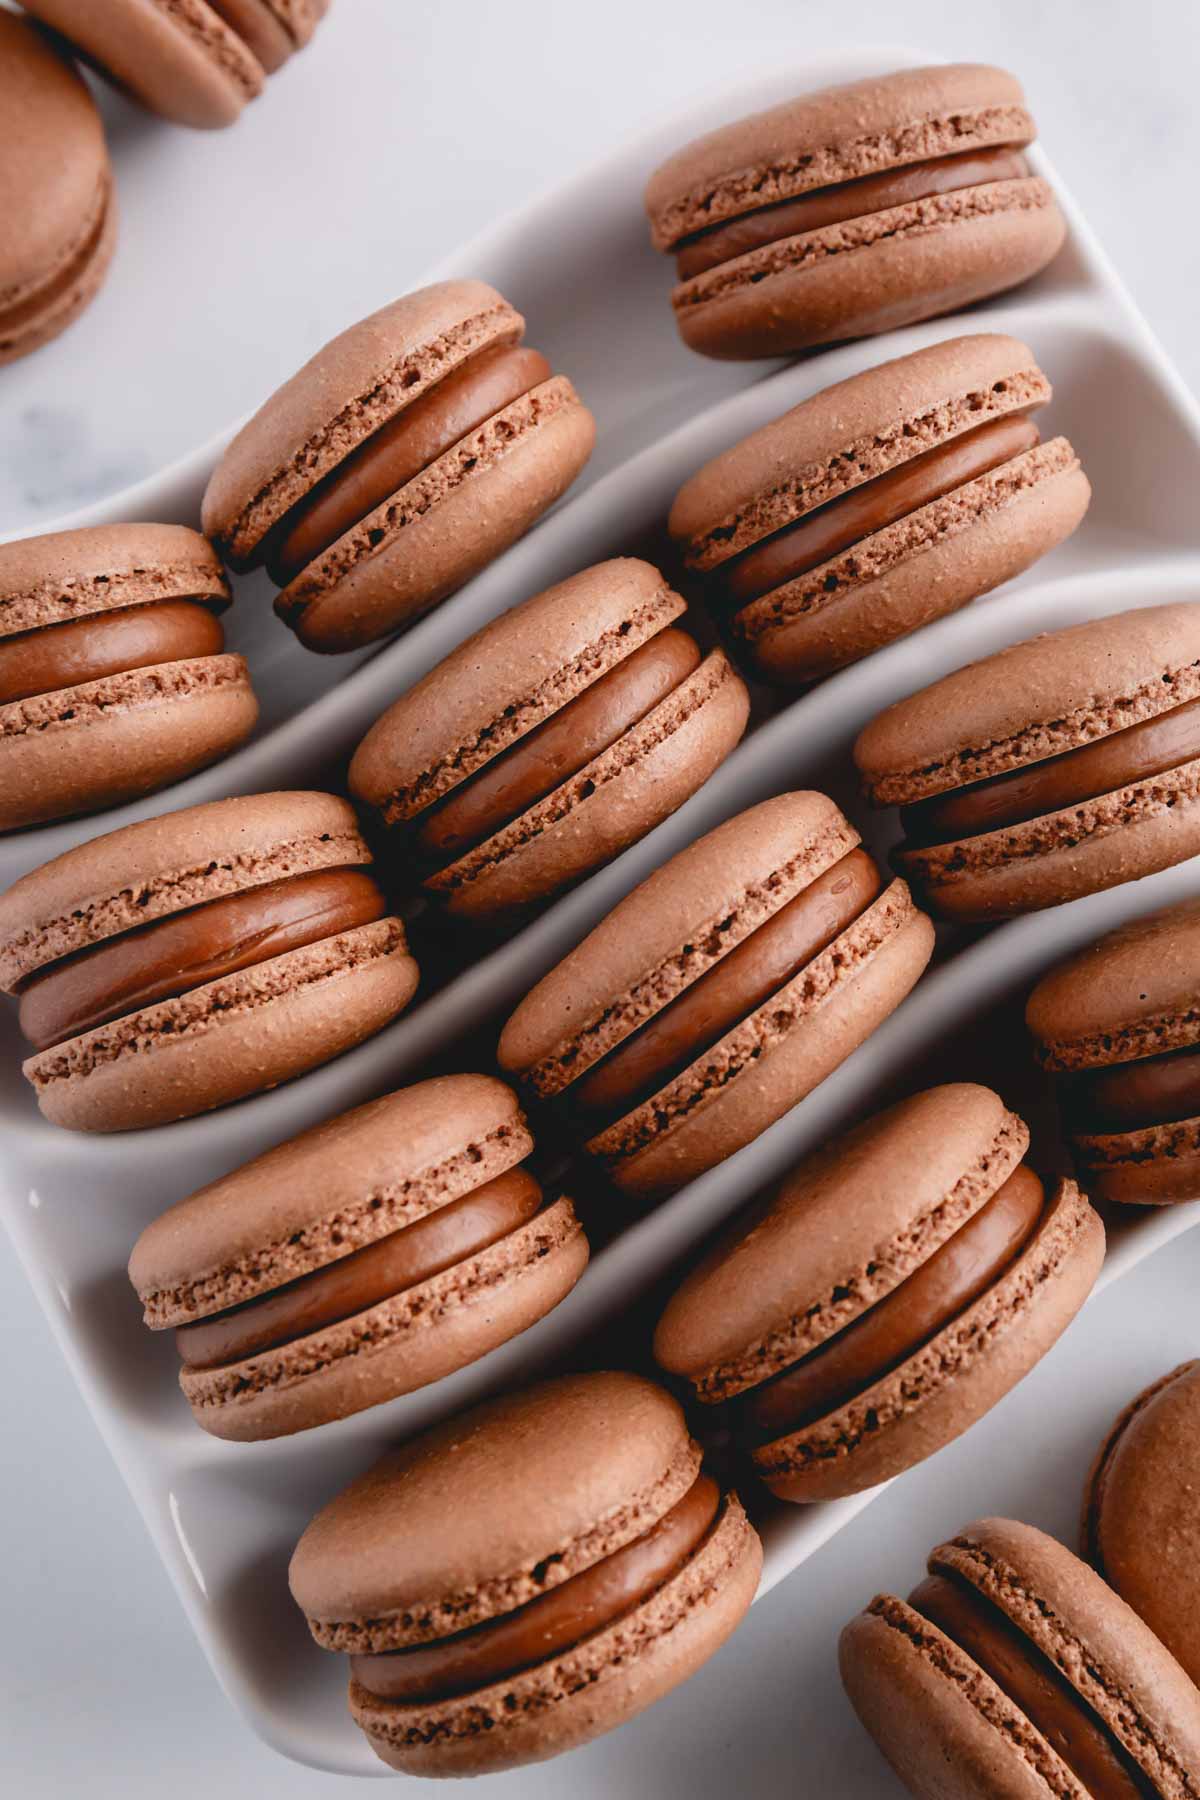
Chocolate macarons are so versatile and pair perfectly with pretty much any kind of filling.
Here are my favorite ways to fill chocolate macs:
- Simple chocolate ganache
- Chocolate Swiss meringue buttercream
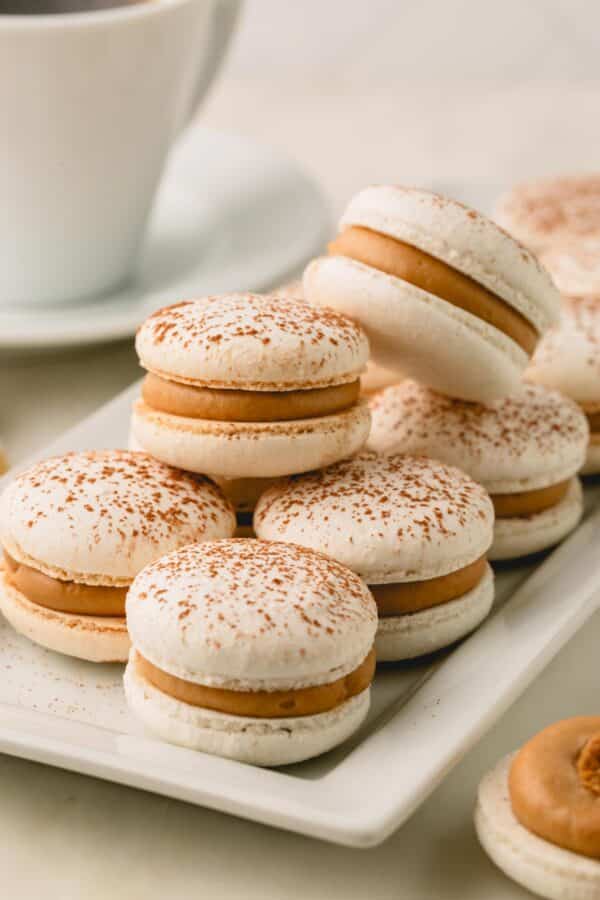
- Easy peanut butter buttercream
- Combination of chocolate Swiss buttercream with salted caramel in the center
- Straight up Nutella – the easiest solution!
Chocolate Macarons
Ingredients
For macarons shells:
- 100 g finely ground almond flour Note 1
- 65 g powdered sugar Note 2
- 10 g cocoa powder Note 3
- 75 g egg whites at room temperature Note 4
- 75 g fine granulated sugar Note 5
- ¼ teaspoon cream of tartar Note 6
- ¼ teaspoon coarse kosher salt
For filling of your choice:
- Chocolate ganache 1/3 of the linked recipe
- Chocolate Swiss meringue buttercream 1/2 of the linked recipe
- Salted caramel for the center
Instructions
To make chocolate macaron shells:
- Preheat the oven to 300°F (150°C). Line 2 baking sheets with parchment paper, or teflon sheet, or silicone mat. (TIP: For even air circulation, flip the baking sheets upside down.)
- To prepare dry ingredients, sift together almond flour, powdered sugar and cocoa powder twice. Note: If you have up to 2 tablespoons of chunky dry ingredients left in the sifter, you don't have to replace it. Simply discard those chunky bits.
- To make meringue, in a clean mixing bowl with a whisk attachment, combine egg whites, granulated sugar, cream of tartar and salt and beat the mixture on medium speed until soft peaks form. (I set it to speed 4 on my KitchenAid stand mixer. It takes 30-40 minutes to whip the meringue, but it's well worth it for nice and full shells.)
- Continue beating the egg whites on the same medium low speed until hard peaks form. Visual cues: Meringue should ball up inside the whisk, and when you lift the whisk, the meringue should hold a pointy end and have sharp ribs. (See pictures above or watch this meringue video for more information.)
- To make batter, sift almond flour mixture into the meringue. Using a silicone spatula, fold the dry ingredients into the meringue until fully incorporated. Then continue to fold the batter until it’s runny enough to draw a figure eight. To test, take a small amount of batter and drop it into the bowl. If the small peaks dissolve into the batter on its own in about 10 seconds, the batter is ready. If not, fold couple more times and test again. Be careful not to over-fold the batter. (TIP: Making french macarons is all about the technique. This is one of the most crucial step. Let me try to describe the folding motion as best as I can: run the spatula clockwise from the bottom, up around the sides and cut the batter in half. If you’re beginner macaron-baker, I suggest to count every fold. It takes roughly about 50 folds to reach the proper consistency. After 50 folds, start testing the batter, and continue testing after every couple folds.)
- To pipe macaron shells,transfer the batter into a pastry bag, fitted with a round tip. (I use this Wilton 2A tip.)
- Hold the pastry bag at straight 90° angle and pipe about 1.5-inch rounds about an inch apart on prepared baking sheets. (TIP 2: Download my free macaron template. Simply pipe the batter to fill inner circle.)
- Tap the baking sheets firmly on the counter (or slap the bottom of the baking sheet with one of your hands) a few times to get rid of any air bubbles. You can also use a toothpick to burst some large air bubbles. This step ensures smooth tops.
- Let the macarons rest on the counter for 15 minutes before baking.
- To bake, bake the macarons for 18-20 minutes, one baking sheet at a time, on the middle rack. It’ll take longer for larger macarons. To test for doneness, touch a macaron lightly and try to move it. If it slides and wobbles, bake a minute or so longer. The cooked macarons should be firm to touch and the base shouldn’t move.(TIP: It’s always better to slightly over-bake macarons than under-bake them!)
- Cool the macarons complete and then remove the shells from the baking surface. (TIP: Don't remove the shells while warm, you may risk breaking the shells, or the bottom might get stuck to the baking surface.)
To assemble macarons:
- Pair the colled macaron shells by size and arrange them on a wire rack. Line them up so that bottom shells are upside down.
- Pipe a dollop of desired filling on bottom shells. Place the top shell over the filling and press lightly so the filling spreads till the edges.
- Store the filled macarons in an airtight container in the fridge for at least 24 hours to mature, which allows the filling to soften and flavor the shells.
- To serve, bring the macarons out about 30 minutes prior to serving.
⭐️ Did you make this recipe?
Please leave a review and let us know how you liked it!
Video
Tips & Notes
Nutrition
This recipe was originally published on November 21st, 2014.


I have had so much success with your macaron recipes and for the first time ever, I had a spectacular fail with this recipe. Cracked shells, no feet, too crunchy. Disaster. If it could go wrong it did and I am not sure they are edible! I may have done a few things wrong so I will regroup on a non-chocolate recipe and try again. I am not going to rate the recipe as I think this was on me.
Hi, Andrea. Chocolate macarons are especially finicky, and I’m sorry to hear your experience. Cocoa powder has a huge influence on the outcome, as you may have read in the post above. 😉 Let me know if you give it another try.
This recipe is very good, I have tried it and have got very good results. Shineshka Mam, you are doing a very good job, everyone should learn without charging any money, your recipe is very good, I hope you keep moving ahead like this and keep helping like this
Thank you so much for your feedback, Aamir! So happy you tried and loved this recipe.
Thank you Shinee!! I was having issues with my macarons and was at the point of giving up after many failed attempts. Shinee was so kind and offered advice, which helped me discover the issue – moist almond flour. After drying it as recommended, I have had great success. I wish I could post a photo of the gorgeous chocolate macarons xx
Hi, Cyndi!! I’m SO happy to hear about your macaron success!! I’m glad I was able to help you to find the culprit of your issue. Thanks for sharing your feedback.