This foolproof crepe recipe is super simple to make with just 8 pantry staples. I’m sharing 2 methods: a blender method and a whisk method.
Enjoy my time-tested recipe for delicately thin and lacy crepes.
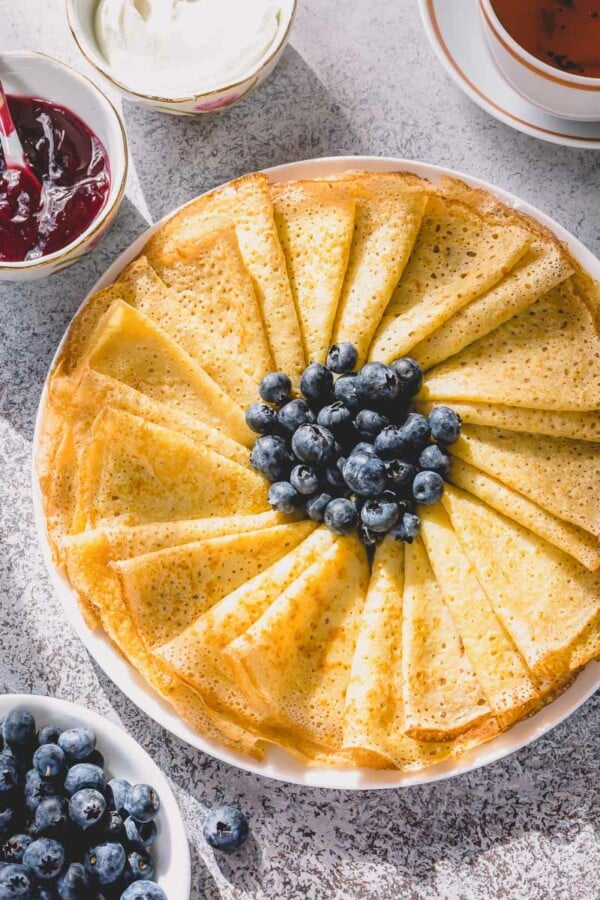
Table of Contents
There’re million and one crepe recipes out in the world.
- sweet and savory
- water-based or milk-based
- with and without yeast
- with different types of flour
While you can make it complicated, there’s absolutely no reason to. Basic crepes are a perfect canvas for layering different flavors!
Why you’ll love this crepe recipe:
- Only 8 simple ingredients
- No special tool required
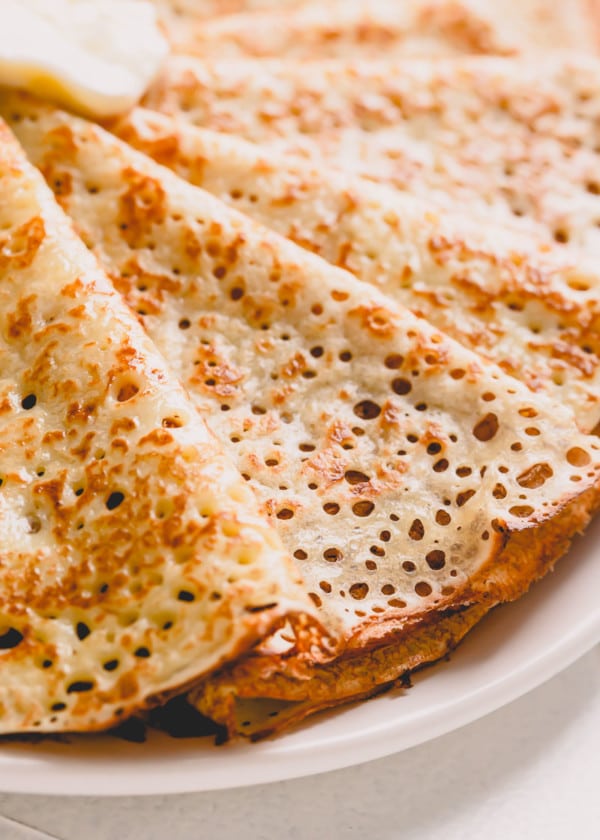
- Beautiful golden brown color
- Lacy thin with million little holes
- Delicately tender
- Crispy edges

8 TIPS TO MAKE PERFECT CREPES:
- Tepid milk yields delicately soft crepes.
- With a little bit of vegetable oil in the batter, you don’t need to butter the pan for every crepe. It works like a magic!
- Baking powder = million little holes!
- Rest crepe batter for at least 10-15 minutes, or even overnight. That way, crepe batter spreads better on the skillet and crepes don’t tear easily.
- Non-stick skillet is your friend!
- Heat the skillet well before adding the batter. Crepes won’t stick to the hot pan and cook super quick, creating a lacy texture all over!
- A large cookie scoop (a little less than 1/4 cup of batter) makes a perfect portion for 7-inch crepe.
- And lastly, remember, the first crepe never turns out perfect. As Russians say, “Первый блин всегда комом!” Think of it as a cook’s treat and enjoy it!

HOW TO MAKE CREPE BATTER:
Method #1: Bowl and whisk
- Whisk eggs, sugar, vanilla extract, and salt, then stir in half of the warm milk.
- Add flour and mix until smooth.
- Pour in the remaining milk and mix well. Cover and rest for at least 15 minutes, or refrigerate overnight.
- Stir in vegetable oil and baking powder.
Tip
Mixing the dry ingredients with half of the milk first helps to make the batter smooth and lump free.
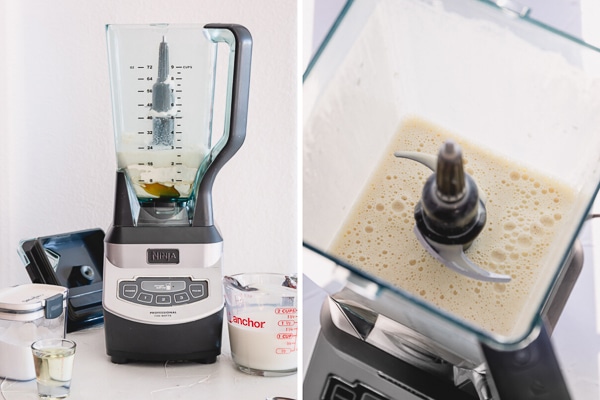
METHOD #2: Blender
You don’t need blender to make this crepe recipe, but it sure makes it super easy!
- Add all the ingredients in the order they’re listed in a blender and process until smooth.
- Cover and rest for at least 15 minutes, or refrigerate overnight.
How to shape and cook crepes:
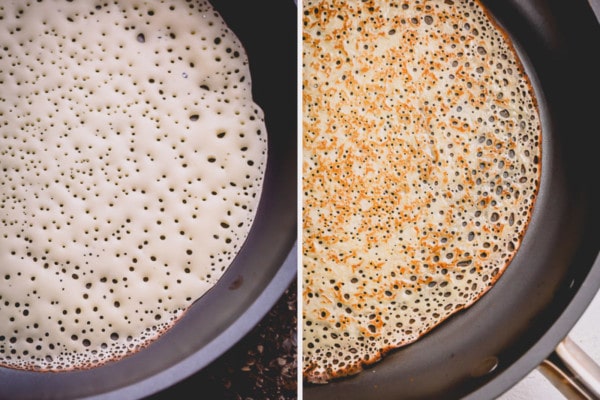
- Heat a 10-inch non-stick skillet over medium high heat.
- Drop about 1/4 cup of batter and swirl the pan to spread the batter evenly to cover the bottom of the skillet.
- Once the edges start browning, carefully run a spatula around the edges of the crepe. Then insert the spatula under the crepe and flip it over.
- Cook it until nice and brown on other side, about 30 seconds. Transfer it onto a serving plate and continue with the rest of the batter.
Tip
Cooking crepes longer on low to medium heat will create tougher (chewy?) crepes.
So crank up that heat and work quickly!
DO I NEED A SPECIAL CREPE PAN TO MAKE CREPES?
No, it’s absolutely not necessary. Quite frankly, I have no experience with crepe pans, and there may be some advantages to them.
But I’ve been making this crepe recipe my entire life and any regular non-stick skillet worked just fine!
HOW TO SERVE HOMEMADE CREPES:
Soft, thin and oh so delicate crepes are a perfect canvas for all kinds of toppings and fillings. Here’re my favorite fillings:
- Butter & jam is our go-to!
- Nutella with banana slices makes an indulgent treat.
- Homemade whipped cream with fresh berries are amazing too.
- Drizzle of honey, maple syrup or sweetened condensed milk also adds a nice touch.
HOW TO FREEZE CREPES:
Crepes are my kids’ favorite breakfast. So, I usually double the recipe and freeze some for later.
Here’s how I freeze crepes:
- Make sure to completely cool the crepes first.
- Roll each crepe into a tight tube.
- Arrange on a baking sheet, lined with parchment or wax paper in one or two layers. Make sure to place a sheet of parchment paper in between layers.
- Freeze the crepes on the baking sheet until solid, for couple of hours.
- Then transfer into a freezer bag and put it back to the freezer.
To thaw frozen crepes:
- Take out as many frozen crepes as you need.
- Let thaw on the counter for 10-15 minutes.
- OR cover with plastic wrap and pop them in microwave for 30-45 seconds.
Tip
If you microwave crepes without covering, they’ll dry out.

Hope you’ll make and enjoy these perfect crepes.

Basic Crepe Recipe
Ingredients
- 2 large eggs
- 2 tablespoons granulated sugar
- 1 teaspoon pure vanilla extract
- ½ teaspoon coarse kosher salt
- 2 cups (480ml) warm milk Note 1
- 1 ½ cups (190g) all-purpose flour
- 2 tablespoons vegetable oil
- 1 teaspoon baking powder
Instructions
Whisk Method:
- In a medium bowl, whisk eggs, sugar, vanilla extract, and salt.
- Stir in 1 cup of warm milk.
- Add flour and mix until smooth and lump-free
- Pour in the remaining 1 cup of milk and mix well.
- Cover and rest for at least 15 minutes, or refrigerate overnight.
- Stir in vegetable oil and baking powder. Mix until the batter is smooth, about a minute.
Blender Method:
- In a blender, add all the ingredients in the order they’re listed and process until smooth.
- Cover and rest for at least 15 minutes, or refrigerate overnight.
To shape and cook:
- Heat a 10-inch non-stick skillet over medium high heat.
- Pour scant of ¼ cup of batter into the hot pan and swirl the pan around, so the batter is evenly distributed. (TIP: Use large cookie scoop for measuring the batter.)
- Once the edges start browning, carefully run a spatula around the edges of the crepe. Then insert the spatula under the crepe and flip it over.
- Cook it until nice and brown on other side, about 30 seconds. Transfer it onto a serving plate and continue with the rest of the batter.
- Serve the crepes warm with butter and jam, or Nutella, whipped cream, and/or fresh fruits.
Tips & Notes
Store leftover crepes in refrigerator, covered, for up to 3 days. Warm it up in a microwave for a few seconds before serving.
Read the post above for freezing instructions.
Nutrition

This recipe was originally published on November 2, 2015, and last updated on February 18, 2021.


Is it important to heat up the milk? Why do you recommend heating it?
Heating the milk helps the flour absorb liquid faster and make the batter smoother.
Threw away all my previous crepe recipes. I can depend on every one of your recipes to be delicious! Not having to clarify the butter for the pan before making crepes is so much easier. Your directions are so detailed, sensible, and your tips for each recipe are great. I appreciate that.
Aww, thank you so much for your kind feedback, Barbara!! I’m happy you’re loving my recipes. Thank you so much!!!
Hi,
How do you warm the milk and to what temperature?
Thanks
I just microwave it for 2 minutes. The temperature isn’t so important, just as long as it’s hot to touch. Hope this helps, Brenda. Thanks for reaching out.
The best recipe ever. My children said it is the best after we tried a few! Thank you
Yay. So happy you and your kids loved it, Wendy!!! Thank you!
Looks amazing! Thanks for the tips about heating the milk and adding baking soda, I will for sure try this!
I am curious about rolling the crepes to freeze them. Do you unroll and fill them? Do they stick together and tear when you’re unrolling them? Or do you just serve them rolled up and add toppings that way?
Great questions, Jes!! Yes, I thaw the crepes and then unroll them before filling and serving the frozen crepes. I like to roll them up so that I can only take out as many as I need. And if you’re careful, they don’t tear as much. But even fresh crepes tear sometimes, because they’re so thin, but it doesn’t bother me a tall.
I make crepes often, it is my kids’ most requested breakfast. I usually eyeball the ingredients and it magically works out:) I haven’t tried baking powder in the batter but am going to try next time- love the texture of you crepes, Shinee!
Baking powder helps to get tiny little holes, which I so love! Hope you’ll love it too. And you’re so brave with eyeballing the ingredients, but then again, if you make them often enough, it becomes like a second nature, right? 🙂 Thank you, Mila!
I’ve always been intimidated by the idea of making my own crepes, but these look amazing! I love that you included a video tutorial! Pinning!
Michelle, glad to hear the video was helpful. Hope you try it. Thanks for stopping by.
I love crepes, but the idea of making them has always intimidated me- I’ll have to give these a try because they look delicious!
I stopped by from Inspiration Monday.
Thanks, Jessy. They’re just as easy as making pancakes. Hope you give them a try. 🙂
I love crepes, and I love stuffing mine with jam too! Your crepes look sensational, and the video was so cute! Fantastic, Shinee <3
Thanks so much, Beeta! ❤️
Pure crepe perfection!!! My daughter will do just about anything for crepes, and she makes them herself! I’m printing this for her. Maybe she will make some for me too!
Kim, how awesome that your daughter can make crepes! I’m sure she’ll happily make you some! 😉
These crepes look fabulous! So thin and crisp- delicious!
Thank you, Medha!