• Skip to primary navigation
  • Skip to footer navigation
  • Skip to header navigation
  • Skip to privacy navigation
  • Skip to recipes navigation
  • Skip to main content
  • Skip to primary sidebar
Cook Well, Eat Well
  • Shop
  • Meet Shinee
  • Contact
Facebook Instagram Pinterest YouTube

Sweet & Savory

Cook Well, Eat Well

  • New? Start Here
  • Recipes
    • Appetizers
      • Dips
      • Meat-lovers
    • Desserts
      • Bars & Brownies
      • Cakes
      • Cheesecakes
      • French Macarons
      • Pastries
      • Pies
    • Dinner
    • Drinks
    • Salads
    • Seasonal
      • Summer Favorites
      • Easter
      • Christmas
      • Cinco de Mayo
      • Game Day
      • Halloween
      • New Year’s Eve
      • Thanksgiving
      • Valentine’s Day
  • Easter
  • Discover
    • Ingredients
    • Tools
  • Learn
    • Baking Basics
    • Cooking Basics
    • Advanced Techniques
    • How-To’s
  • Share
    • Seasonal
    • Party Planning 101
  • Facebook Instagram Pinterest YouTube
    Subscribe To Updates
Home » RECIPE » Jams & Fruit Sauces » Easy Raspberry Jelly (No Pectin)

Easy Raspberry Jelly (No Pectin)

Skip to Recipe Print Share
Share on:
By: Shinee Published: 8/17/2022Updated: 8/17/2022

This post may contain affiliate links. Read full disclosure

Sharing is caring!

800 shares
  • Share
  • Tweet

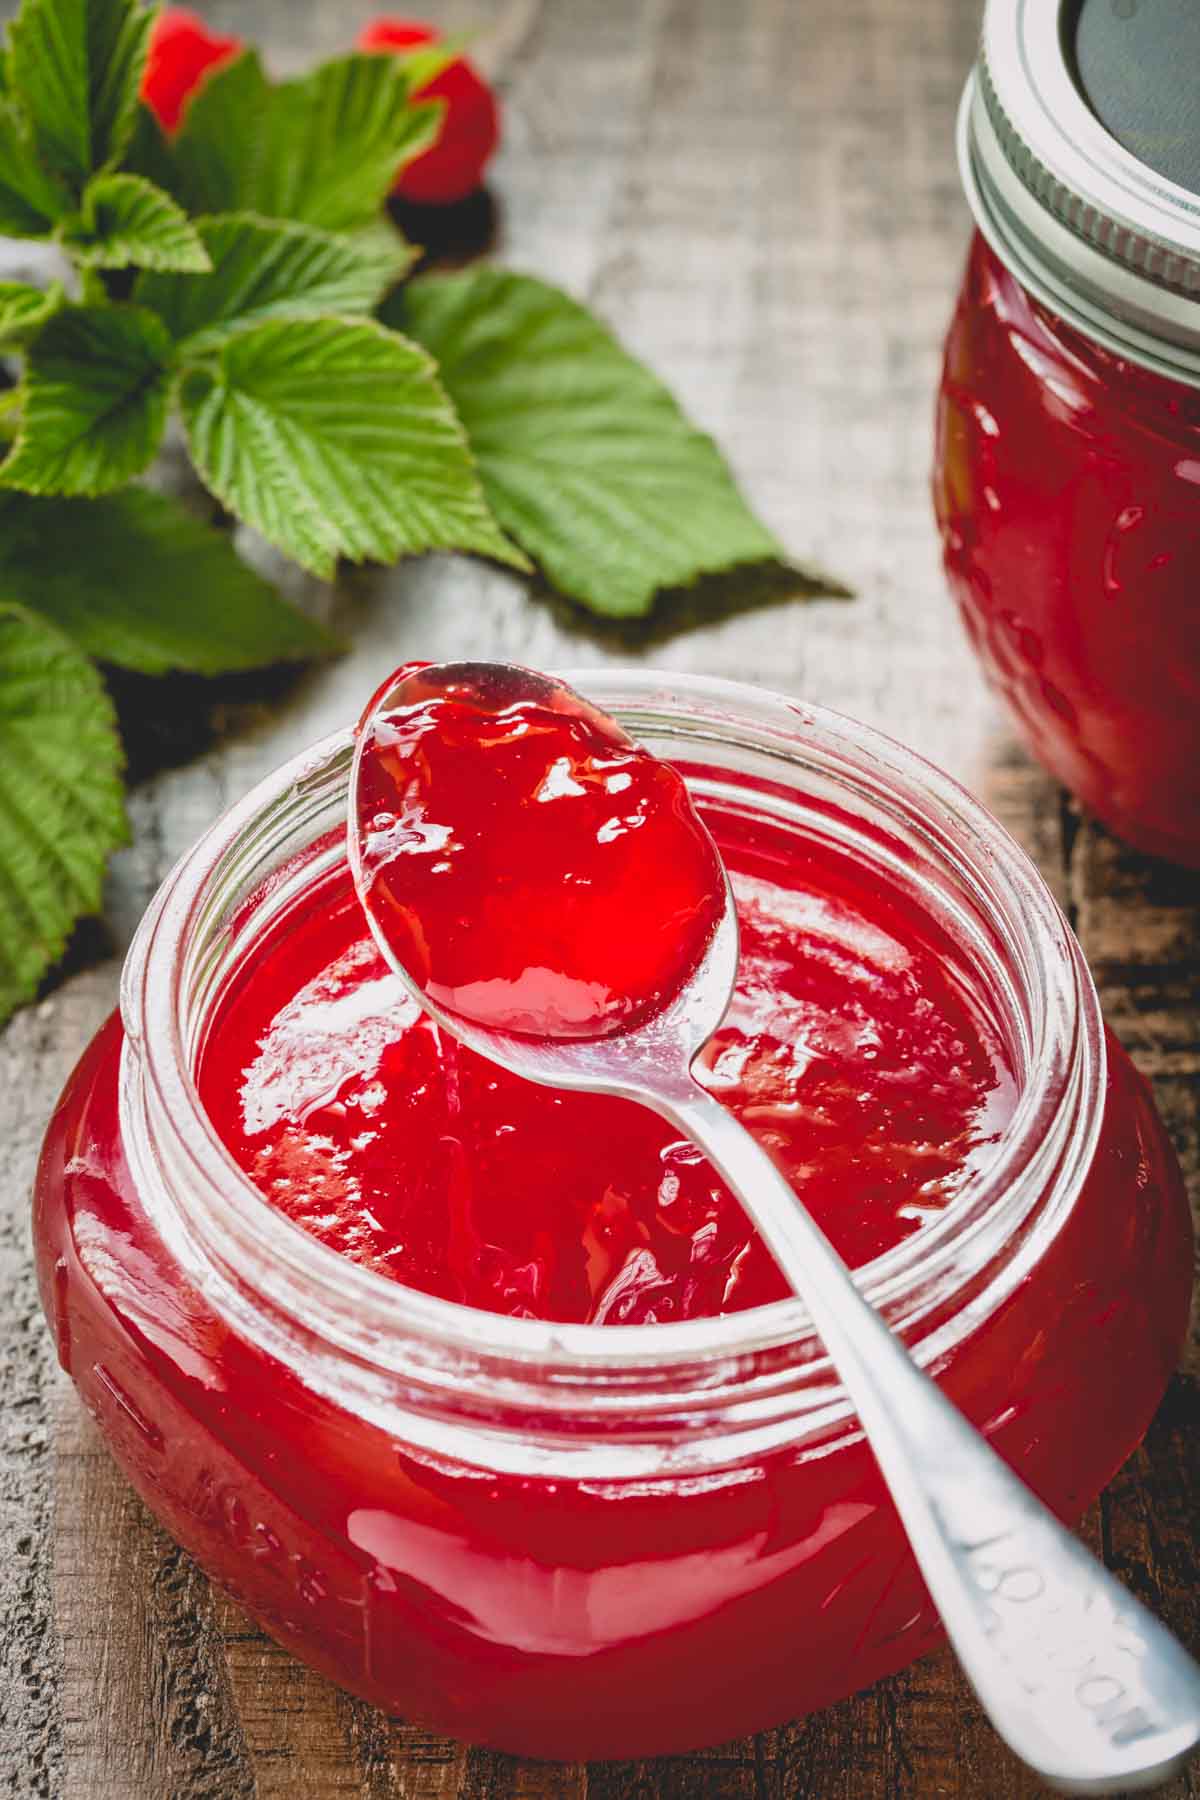
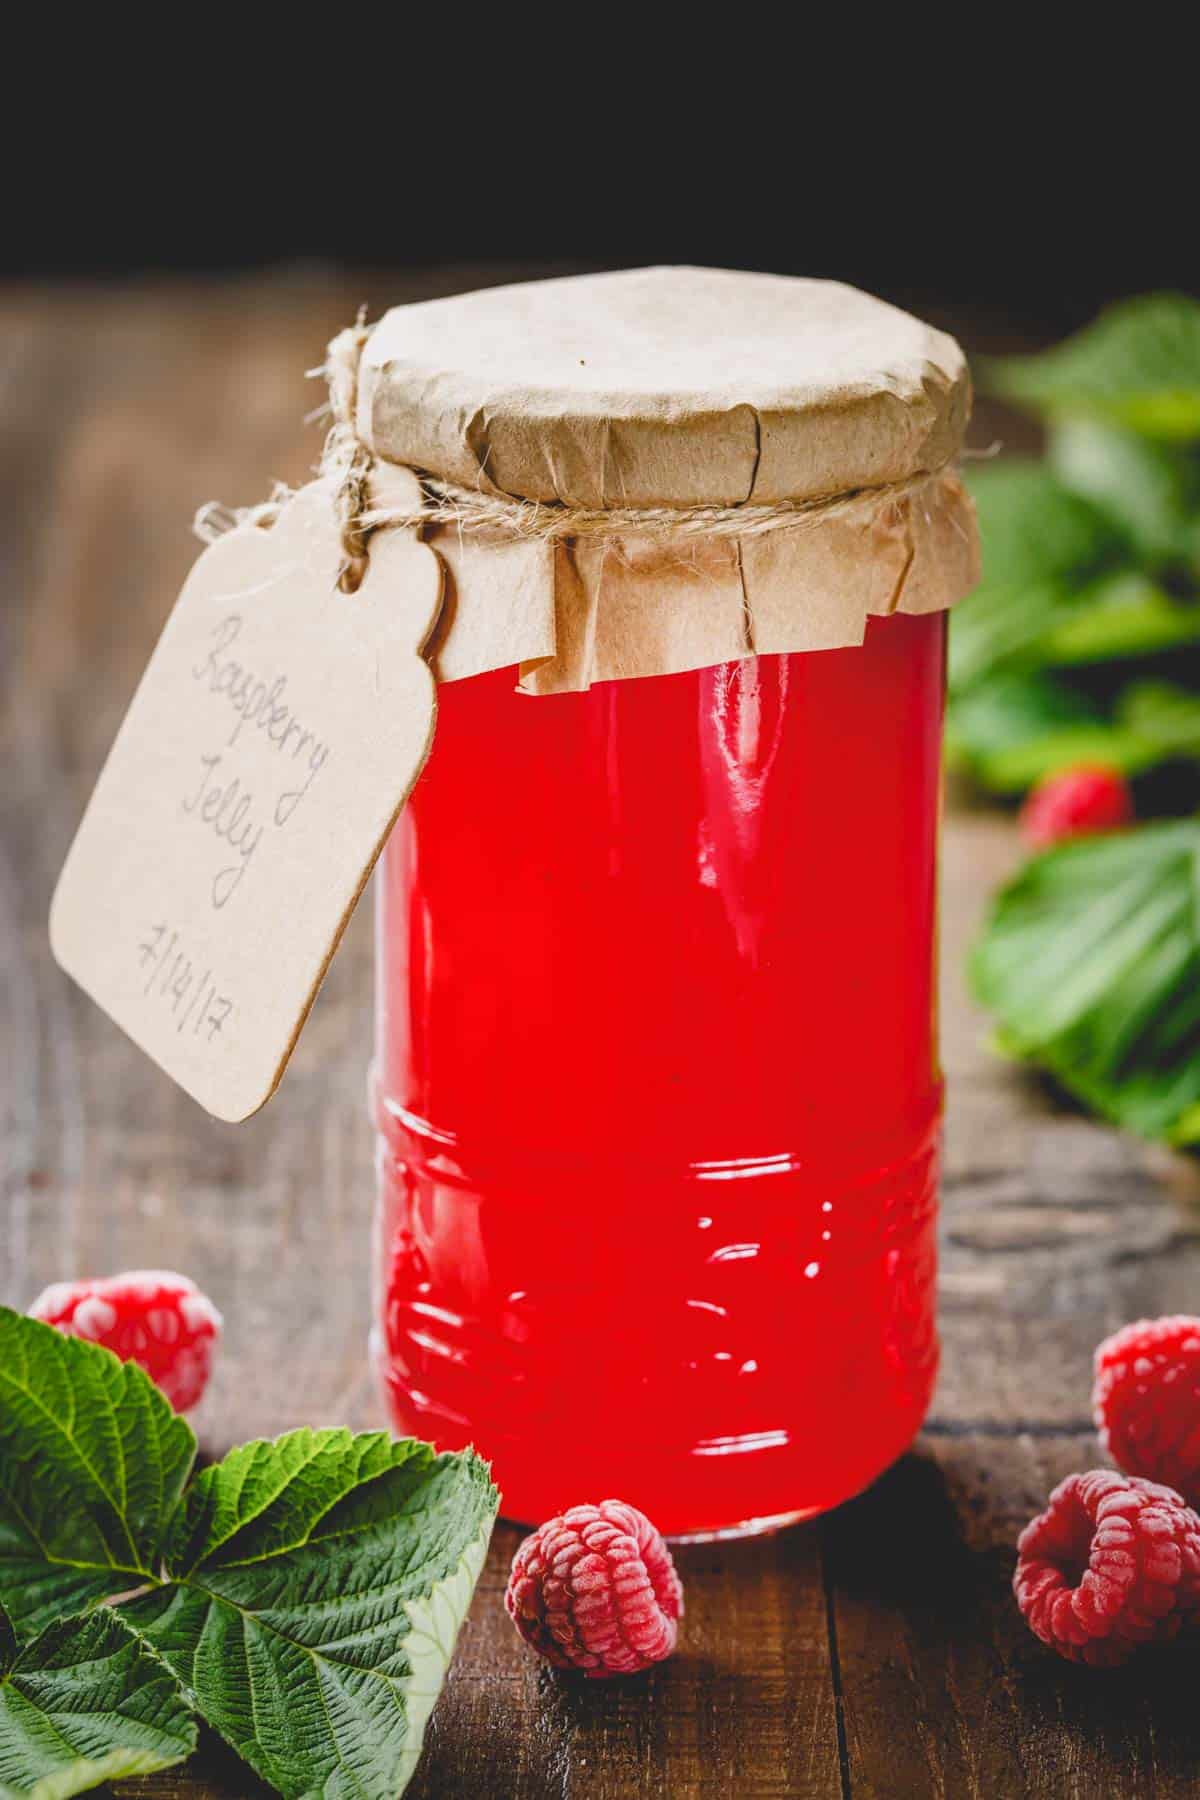
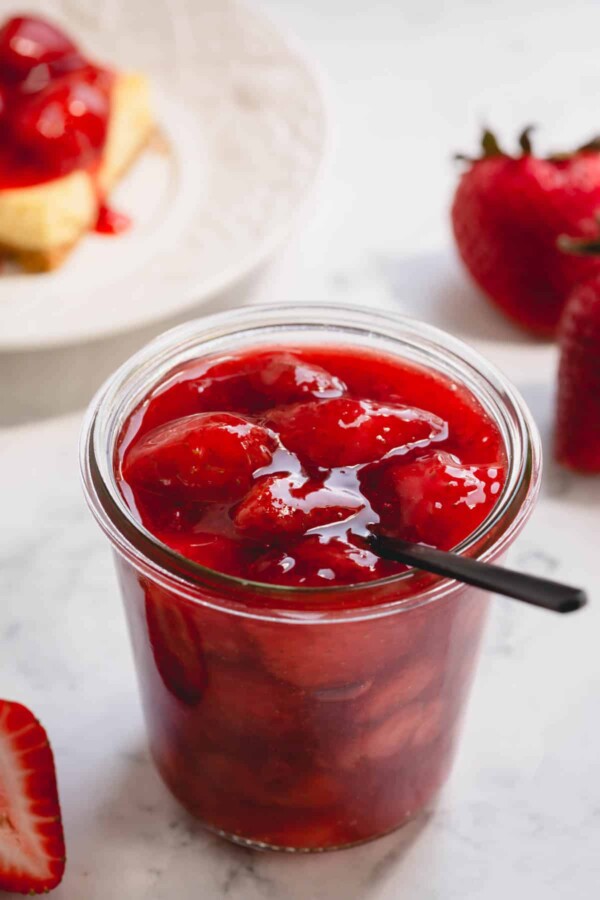
Beautiful and tasty, this homemade raspberry jelly is so easy to make! You’ll love the bright and fresh flavors of the raspberries and soft spreadable consistency.

Raspberry jelly in a wide mouth glass jar with spoonful of jelly rested on the jar.

Our raspberry patch in the backyard has been bursting with raspberries this summer! I love to go out there and spend couple of hours picking bucketful of raspberries.

And what better way to preserve them than making a jelly, right? It’s an annual tradition for me. And here’s my go-to raspberry jelly recipe.

Table of Contents

  • Why you’ll love this jelly recipe:
  • Ingredients:
  • How to make this recipe:
  • How to sterilize the canning jars and lids: 
  • Tips for Success:
  • FAQs:
  • Easy Raspberry Jelly (No Pectin)

Why you’ll love this jelly recipe:

This seedless raspberry jam recipe has been time-tested family favorite. And I know you’ll love it too, because this recipe …

  • is truly easy to make.
  • requires less than 30 minutes and only 2 ingredients.
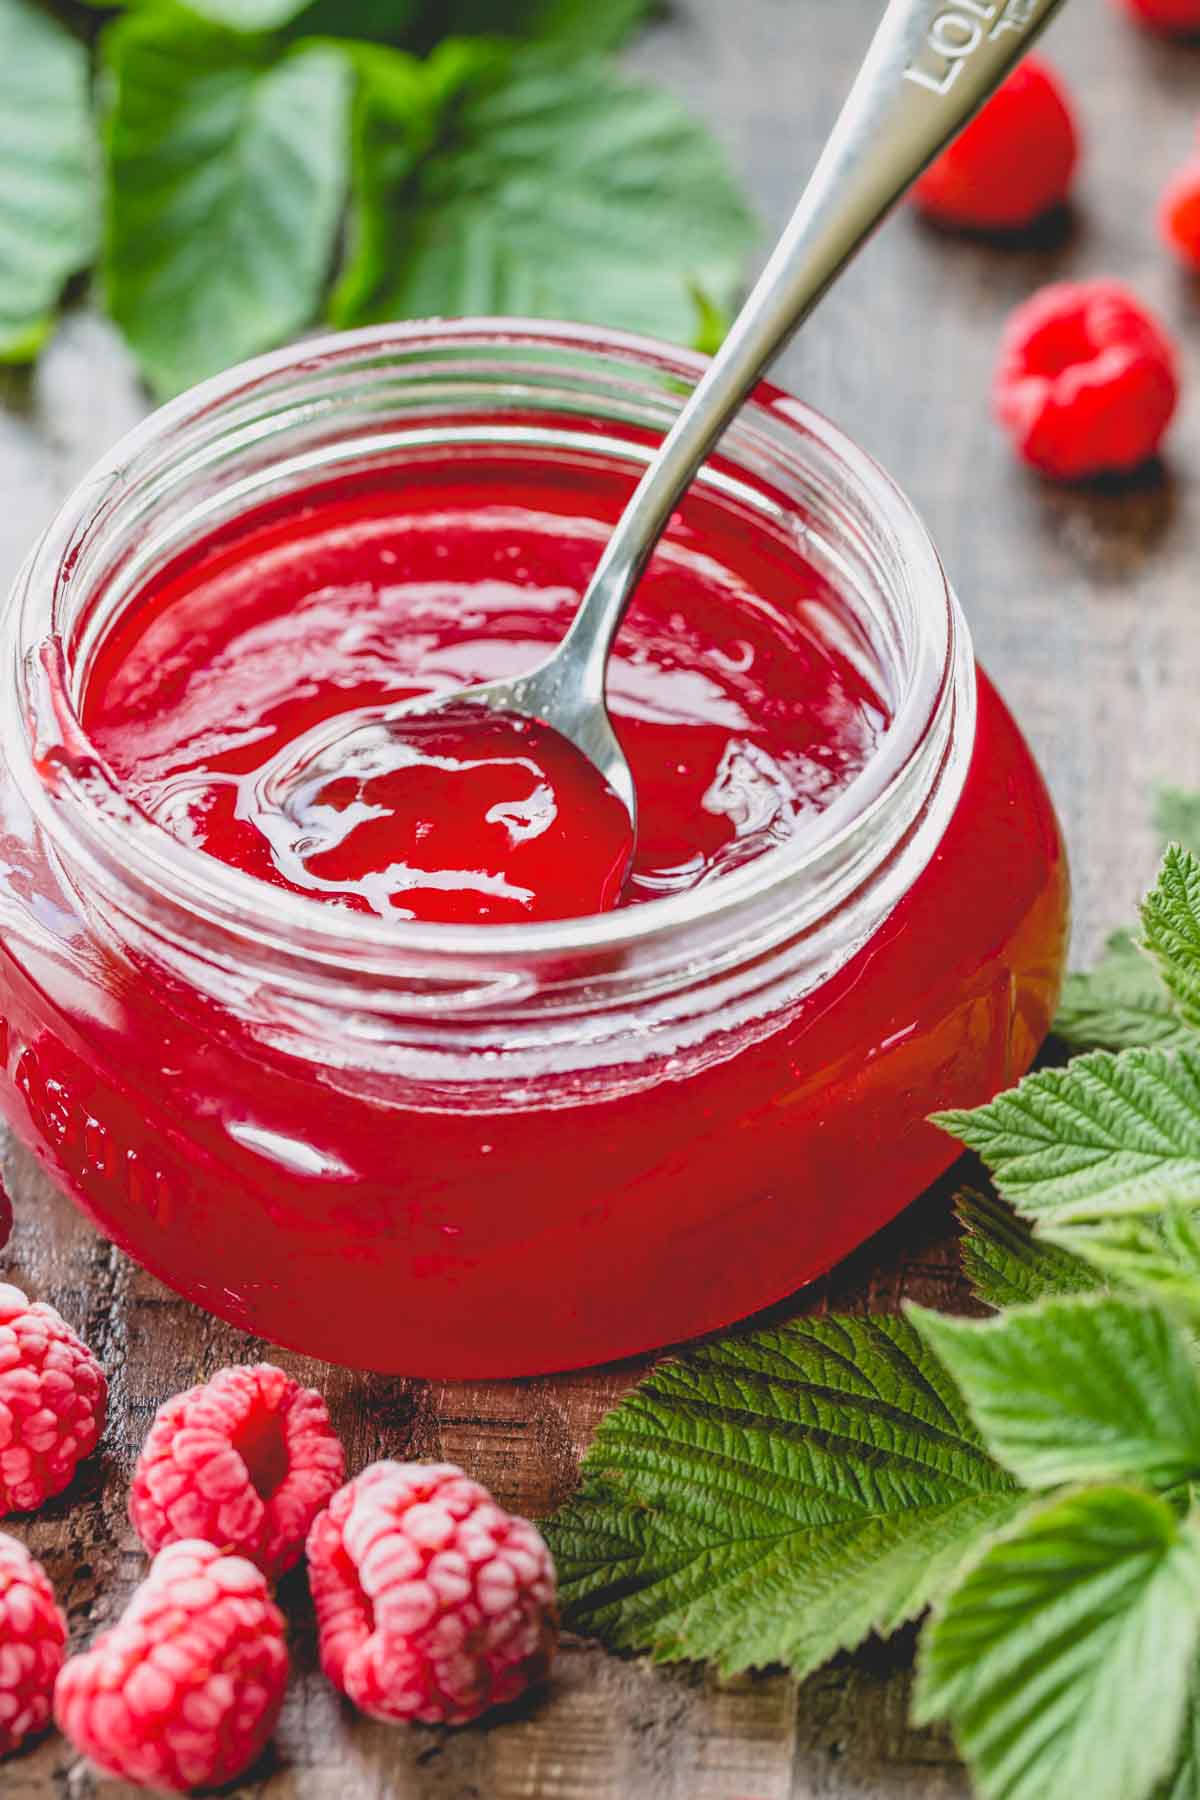
  • produces jelly with bright flavors and soft spreadable consistency.

Ingredients:

You’ll only need 2 ingredients to make this seedless raspberry jam.

  • Raspberries – Only use fresh raspberries and preferably with some unripe berries in the mix, because unripe berries are higher in natural pectin. Jam with frozen raspberries didn’t set properly.
  • Sugar – Don’t be tempted to reduce the sugar. Besides sweetening the jam, sugar also helps to set the jam and lengthens the shelf life of the jelly.

How to make this recipe:

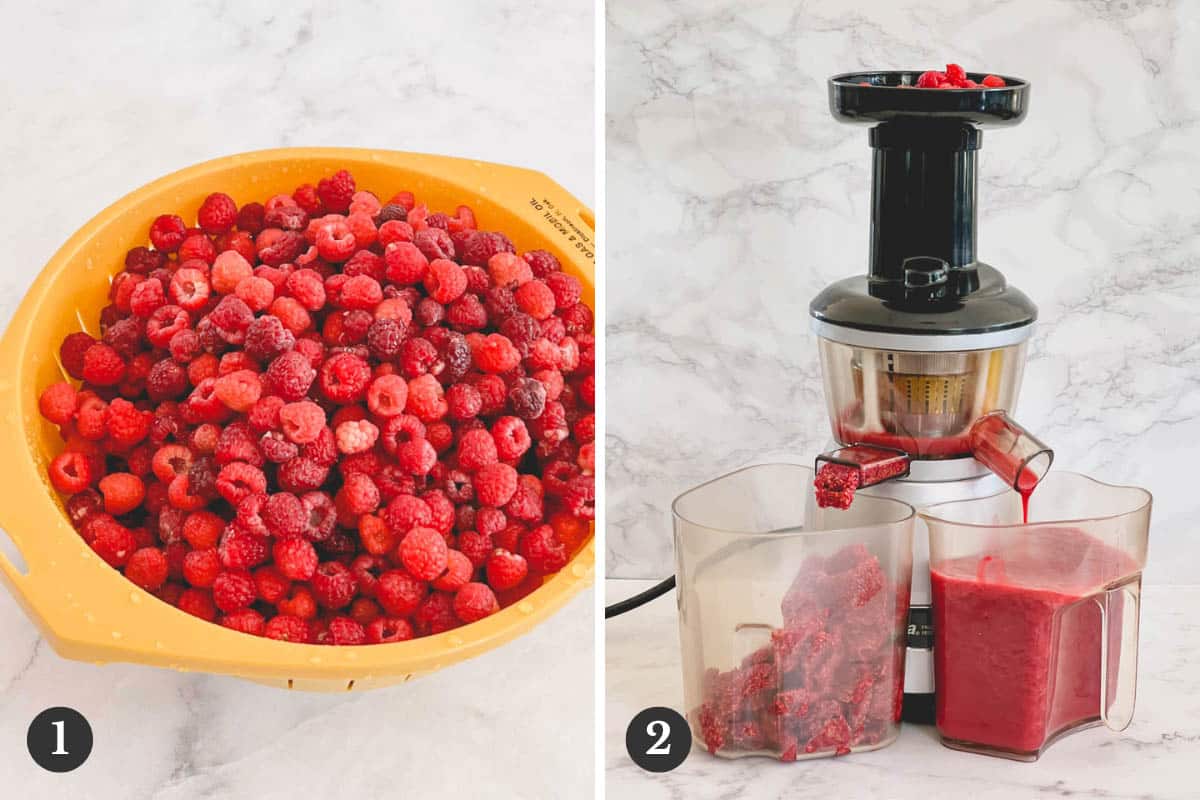
1. Juice the raspberries

The secret to smooth jelly consistency is to juice the raspberries!

I use a juicer to remove the seeds and extract as much raspberry juice as I can. I’ve been using my Omega VERT350 since 2012 and it still works like new in 2022.

Tip

To extract as much juice as possible, I run the seeds through the juicer couple of times until they come out almost dry.

Side by side images of fresh raspberries and juicer extracting raspberry juice.

Not juicer? No problem! Simply cook the raspberries with some water for about 10 minutes, then push it through a fine mesh sieve, cheesecloth or jelly strainer.

Using my juicer, I get exactly 5 cups of juice out of 3lbs of raspberries.
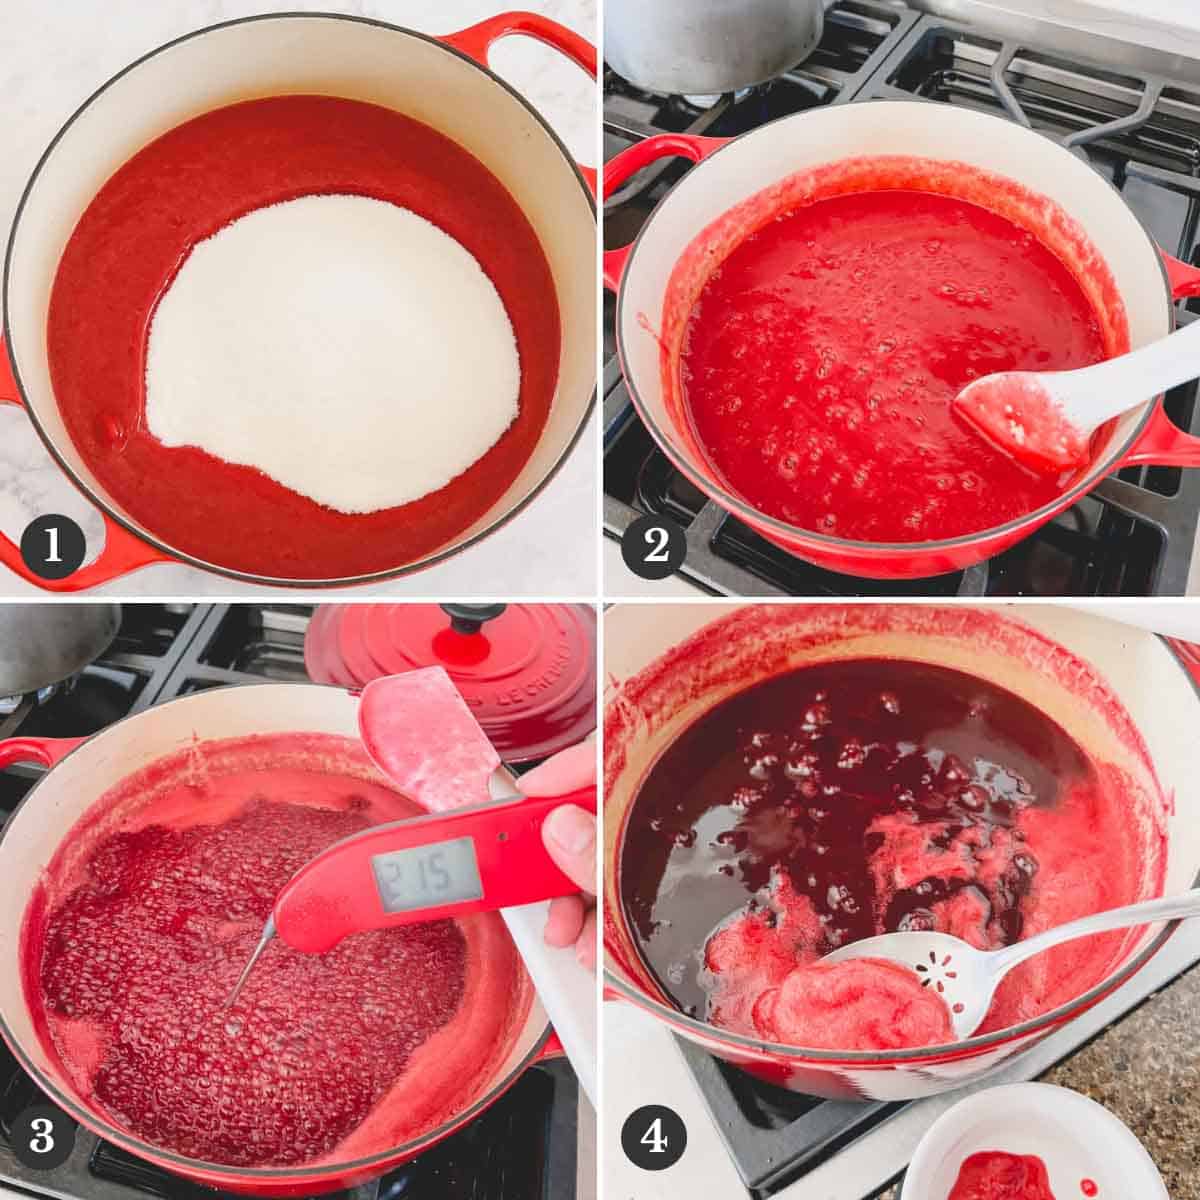
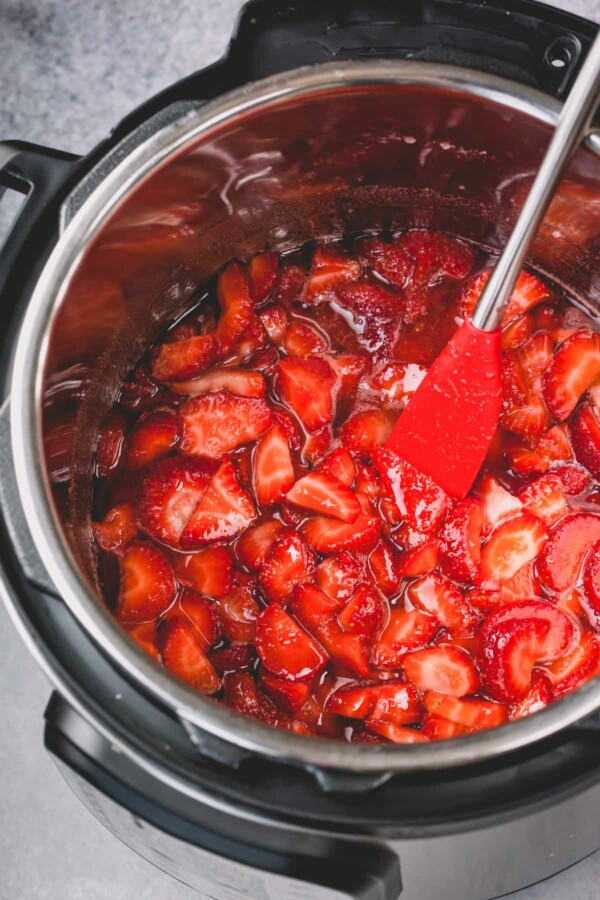
2. Cook the jelly

  1. Combine equal parts of raspberry juice and sugar in a deep Dutch oven.
  2. Gently heat the mixture over medium heat, stirring frequently to dissolve the sugar.
  3. Once the most of the sugar is dissolved, increase the heat to medium high and cook the mixture until it reaches at least 215°F on an instant thermometer, about 25 minutes. Be sure to stir frequently to prevent the jam from scorching on the bottom.
  4. Turn the heat off and skim off the foam with a slotted spoon.
Step by step photos of making raspberry jelly.

Tip

Be sure to use a large heavy-bottomed pot! You’ll need at least 5qt pot, because jam boils up quite a bit.
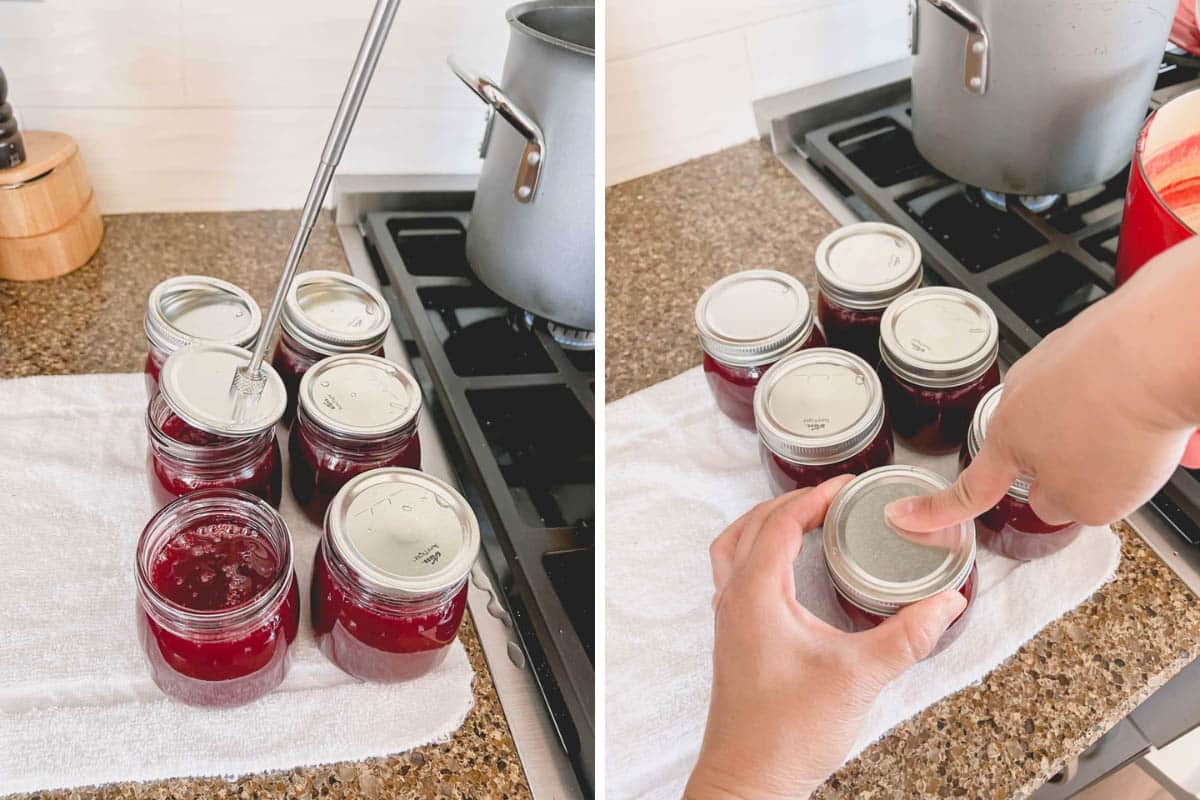
3. Canning

  1. Divide the jelly into sterilized jars, leaving at least 1/4 inch space from the top.
  2. Clean the jar rims with a damp towel and place the lids. Then tighten the metal ring on top, while holding the lid in the middle with your finger. That way, you won’t damage your lid seal when tightening the metal ring. (A tip I learned from my mother-in-law!)
Side by side photos of canning the jelly.
  1. Carefully put the jars into a deep pot, filled with boiling water and lined with a rack.
  2. Boil for 10 minutes, then turn off the heat and let sit for 5 minutes before removing onto a counter lined with a towel.

You may hear some popping sounds after you remove the jars from hot water bath. It means your jars are being sealed, and that’s exactly what you want to hear!

After the jars are completely cooled, check the seal by pressing in the center of the lid. If it springs back, it means the jar hasn’t been sealed. Store it in the refrigerator.

How to sterilize the canning jars and lids: 

  • Put clean canning jars into a boiling water for about 5 minutes.
  • Bring a pot of water to a boil, then turn off the heat and put the canning lids in the hot water. Don’t boil the water with the lids, as it may compromise the rubber seal. 
A talk glass jar of seedless raspberry jam.

Tips for Success:

  • Use fresh raspberries to make raspberry jelly. And avoid over-ripe berries as they lack natural pectin. In fact, it’s ideal if there’s a mix of unripe raspberries, which are high in pectin.
  • I don’t recommend frozen raspberries, because they’re typically ripe berries and they don’t have enough natural pectin to set properly.
  • To extract as much raspberry juice as possible, use a juicer!
  • Be sure to use equal amounts of raspberry juice to sugar for proper set and shelf life! For every cup of juice use 1 cup of sugar.
  • Use a heavy-bottom pot, so it distributes the heat evenly. Enameled Dutch oven pot works perfectly for it!
  • Be sure to use a large enough pot (at least 5qt) to accommodate bubbling mixture while cooking.
  • Overcooking the mixture will produce darker colored jelly. So be sure to keep a close eye on it!
  • This canning kit is super convenient!!!
A glass jar of raspberry jelly with a spoon dip in it.

FAQs:

How do you get seeds out of the raspberries for jelly?

There are multiple ways to remove raspberry seeds. 2 of my favorites methods are:
1. Use a juicer to remove raspberry seeds.
2. Cook the raspberries with water and then push it through a sieve, cheesecloth or a jelly bag.

How to sterilize the jars and canning lids:

– Put clean canning jars into a boiling water for about 5 minutes.
– Bring a pot of water to a boil, then turn off the heat and put the canning lids in the hot water. Don’t boil the water with the lids, as it may compromise the rubber seal. 

What is the difference between jam and jelly?

Typically, jelly doesn’t have any fruit pieces. Jam, on other hand, is made of mashed fruits.

Hope you’ll make this beautiful jelly for your friends and family. It definitely makes a great hostess gift. And as always, thanks for reading!

A glass jar of raspberry jelly with a spoon dip in it.

Easy Raspberry Jelly (No Pectin)

Beautiful and tasty, this homemade raspberry jelly is so easy to make! You'll love the bright and fresh flavors of the raspberries and soft spreadable consistency.
5 from 7 votes
serves: 6 jars
Prep: 10 minutes
Cook: 25 minutes
Total : 1 hour
Print
Leave a Review

Ingredients

  • 5 cups fresh raspberries juice Note 1
  • 5 cups granulated sugar Note 2
Note: I test all my recipes with both measurements for the most precise and accurate result!

Instructions

To make the jelly:

  • In a large heavy-bottomed pot (at least 5qt), combine raspberry juice and sugar.
  • Gently heat the mixture over medium heat, stirring frequently to dissolve the sugar.
  • Once the most of the sugar is dissolved, increase the heat to medium high andbring the mixture to full rolling boil, which means the mixture continues to boil even when you stir it.
  • Continue cooking the mixture until it reaches at least 215°F on an instant thermometer, about 25 minutes. Be sure to stir frequently to prevent the jam from scorching on the bottom.
  • Turn the heat off and skim off the foam with a slotted spoon.

Canning Instructions:

  • Divide the jelly into sterilized jars, leaving at least 1/4 inch space from the top.
  • Clean the jar rims with a damp towel and place the lids. Then tighten the metal ring on top, while holding the lid in the middle with your finger. That way, you won’t damage your lid seal when tightening the metal ring.
  • Carefully put the jars into a deep pot, filled with boiling water and lined with a canning rack. Make sure the jars are covered with at least 4 inches of water.
  • Boil for 10 minutes, then turn off the heat and let sit for 5 minutes before removing onto a counter lined with a towel.
  • As the jars cool down, you should hear popping sounds. It’s a sign that the jars are being sealed. Sealed jars can be stored in the pantry for up to 1 year. Unsealed jelly is good for 1 month in the refrigerator.

Tips & Notes:

Yields: 6 half-pint jars
Note 1: Only use fresh raspberries and preferably with some unripe berries in the mix, because unripe berries are higher in natural pectin. Jam with frozen raspberries didn’t set properly.
To juice raspberries:
– Method 1: Using a juicer, juice the raspberries to remove the seeds and extract as much raspberry juice as possible. (I use this Omega VERT350 juicer and I run the seeds through the juicer couple of times until they come out almost dry.) I get exactly 5 cups of juice out of 3lbs of raspberries.
– Method 2: Simply cook the raspberries with 1.5 cups of water for about 10 minutes, then push it through a fine mesh sieve, cheesecloth or jelly strainer. You may need about 4lbs of raspberries to get 5 cups of juice.
Note 2: Use 1 cup of sugar for every cup of raspberry juice. Don’t be tempted to reduce the sugar. Besides sweetening the jam, sugar also helps to set the jam and lengthens the shelf life of the jelly.
How to sterilize the jars and canning lids:
– Put clean canning jars into a boiling water for about 5 minutes.
– Bring a pot of water to a boil, then turn off the heat and put the canning lids in the hot water. Don’t boil the water with the lids, as it may compromise the rubber seal. 

Nutrition Facts:

Calories: 697kcal (35%) Carbohydrates: 179g (60%) Protein: 1g (2%) Fat: 1g (2%) Saturated Fat: 1g (6%) Polyunsaturated Fat: 1g Monounsaturated Fat: 1g Sodium: 3mg Potassium: 154mg (4%) Fiber: 7g (29%) Sugar: 171g (190%) Vitamin A: 33IU (1%) Vitamin C: 26mg (32%) Calcium: 27mg (3%) Iron: 1mg (6%)
* Disclaimer: All nutrition information are estimates only. Read full disclosure here.
Author: Shinee
Course:Condiments
Cuisine:American
A glass jar of raspberry jelly with a spoon dip in it.
Did you make this?Show me your creation! Tag me @shineshka and hashtag it #sweetandsavorybyshinee!
  • Facebook
  • Twitter
  • Yummly

This recipe was originally published on August 11, 2013.

Related Recipes

  • Fudgy Raspberry Brownies
  • Pineapple Raspberry Sangria
  • Raspberry lemon tartlets arranged on a rectangular serving platter.
    Raspberry Lemon Tartlets
  • a whole lemon raspberry cheesecake topped with fresh raspberries on a white serving platter.
    No-Bake Lemon Raspberry Cheesecake

Never Miss a Recipe!

Subscribe and receive my FREE Portion Planning Cheat Sheet for Cocktail and Dinner Parties.

Previous Post
Peach Ice Cream
Next Post
Raspberry Macarons v2.0 (Improved)

Reader Interactions

Leave a Review Cancel reply

Your email address will not be published. Required fields are marked *
Made this? Rate this recipe:


This site uses Akismet to reduce spam. Learn how your comment data is processed.

  1. Janice says

    Posted on 11 July 2021 at 4:02 pm

    5 stars
    I seldom cook and never can. I have made this recipe 2 years now and I think it is delicious and so easy!

    Reply
    • Shinee says

      Posted on 20 July 2021 at 4:37 pm

      Yay, so happy to hear this, Janice! Thank you for sharing your feedback!

      Reply
  2. Tom Amirault says

    Posted on 26 July 2020 at 8:03 am

    Can you use thawed whole raspberries that were frozen so they keep over a few weeks to amass enough berries to process Through the extractor?

    Reply
    • Shinee says

      Posted on 26 July 2020 at 8:59 pm

      Hi, Tom. Yes, you can definitely freeze the berries and then juice them. Hope you love it. Let me know if you give it a try!
      I’ve been harvesting raspberries every morning, and making jelly every week.

      Reply
  3. Ann Rychly says

    Posted on 29 October 2019 at 1:46 pm

    5 stars
    Thank yo so much for your recipe for raspberry jelly without pectin.  We think it’s the best jelly recipe I’ve made and I make all sorts of jams and jellies.  Both the flavor and texture are amazing and made simple.  I will be searching your web site in the future for other recipes.  Thanks again.

    Ann Rychly
    Mpls. Minnesota

    Reply
    • Shinee says

      Posted on 5 November 2019 at 10:07 pm

      Awesome. So happy to hear you loved the recipe. Thank you for your feedback, Ann!

      Reply
  4. Milihka says

    Posted on 21 September 2019 at 2:45 pm

    I take the berries put them in the blender then I drain them by placing in cheese cloth and twist as if I’m ringing clothes lol trust me when I tell you every drop of juice comes thru.

    Reply
    • Shinee says

      Posted on 21 September 2019 at 3:33 pm

      That sounds like a great way to juice the berries without a juicer! Thanks for sharing, Milihka.

      Reply
  5. Lorraine says

    Posted on 15 July 2019 at 12:25 pm

    I used an immersible blender to juice the raspberries. Simply put the clean, whole raspberries in a deep stainless steel large pot, & run the immersible blender until the fruit is all broken down & juicy. Strain the juice through a dampened cheesecloth to remove the seeds.

    Reply
    • Shinee says

      Posted on 16 July 2019 at 3:13 pm

      Thats’s a great tip, Lorraine! Thank you for sharing it.

      Reply
  6. Alisha says

    Posted on 2 August 2018 at 7:16 am

    My jelly turned out a bit runny, possible because I doubled the recipe and it didnt get hot enough. Is there a way I can fix this?

    Reply
    • Shinee says

      Posted on 3 August 2018 at 2:15 pm

      Oh no, Alisha. Sorry your turned out runny. Did you use a thermometer to check the temp of the jam? If not, and if you only cooked the jam for 10-15 minutes, then yeah, the mixture probably didn’t reach proper temperature to set. You can boil it again and re-jarred it. Or call it a raspberry syrup. 🙂

      Reply
  7. Chris says

    Posted on 21 July 2018 at 6:33 pm

    To make jelly without a juicer – all you need is a piece of muslin and some string.
    Heat your fruit gently with a little water till it goes mushy, starts to break down and the juices are flowing.

    Place a sieve over a largeish jug or bowl. Drape a large square of muslin (big enough to hold all your fruit with enough hanging over to use as handles to suspend your jelly bag..

    Pour the fruit and juice into the muslin.

    Now you are going to suspend it above the jug/bowl to catch the juice as it runs out. Get 4 bits off string, and tie one end to each corner of your muslin, then tie them to something like the handle of a kitchen wall cupboard so the bag dangles just above the jug (you can get rid of the sieve now!).

    Leave it to drip for as long as you want, overnight if you like. I never have the patience to wait that long, so I tend to prod the pulp gently to get more juice out, once it’s slowed to an occasional drip. If you want a lovely clear jelly, you shouldn’t squeeze the bag too much (or at all, some people would say), but I’d rather have the juice.
    Then you’re all ready to make your jelly – for most fruits, use 1lb sugar for every pint of juice you have. If it’s a low-pectin fruit, add some lemon juice.

    Reply
    • Shinee says

      Posted on 28 July 2018 at 5:56 pm

      Hi, Chris. Thanks so much for sharing your way of juicing the raspberries!!

      Reply
  8. Arlene Hrisko says

    Posted on 7 October 2017 at 4:42 pm

    5 stars
    Thank you very much…so easy to make, beautiful color and absolutely delicious. I used two cups of raspberries to experiment, which produced 1 cup juice. I have raspberries in the freezer and will make this recipe again and again, Many thanks!

    Reply
    • Shinee says

      Posted on 7 October 2017 at 10:06 pm

      Hi, Arlene! So glad your jelly turned out delicious, and that you’re planning to make more. A word of caution about the frozen raspberries though. Last year, I froze some raspberry juice and when I made my jelly, it never set properly. It turned into the most delicious raspberry syrup though. So my suspicious is that the berries lose their pectin during freezing. And if you want jelly, you most probably will need commercial pectin.

      Reply
  9. Frank J Smith says

    Posted on 14 August 2017 at 9:24 am

    I was looking for a papaya jam recipe on the internet and stumbled across your website. I was surprised to see a JAM prepared using Raspberry. Worth bookmarking your site for future references. Definitely, I would try this weekend and let you know.

    Reply
    • Shinee says

      Posted on 14 August 2017 at 9:34 pm

      Thanks, Frank. Glad you liked my raspberry jelly recipe. Let me know you like it.

      Reply
  10. Rosann says

    Posted on 11 August 2017 at 9:51 am

    Can I be lazy and leave the seeds in and follow the rest of your recipe?

    Reply
    • Shinee says

      Posted on 11 August 2017 at 1:23 pm

      Yes, definitely. Garrat doesn’t like raspberry seeds, so we opt for seedless jelly.

      Reply

Primary Sidebar

Welcome!

Hi, I’m Shinee! I’m so happy you’re here! I believe anyone can cook restaurant-quality food at home! And my goal is to help you to become a confident cook with my easy-to-follow recipes with lots of tips and step-by-step photos.

New? Start Here

Browse Specialties

Main Dishes Side Dishes Appetizers Salads Breads & Pastries Cakes Macarons Drinks Browse All
Portion Planning 101
Free Dinner Party Cheat Sheet
Download Now

Popular Recipes

Yellow and white macarons.

French Macarons for Beginners

Best Prime Rib Roast (Bone-In)

This is the simplest and moistest banana bread - easy to make and yields 2 breads! #bananabread

Best Moist Banana Bread Recipe

A plate full of chocolate chip cookies.

Egg Yolk Cookies

How to Make Homemade Pistachio Paste

sliced plain sponge cake layers

Easy Sponge Cake (3 Ingredient Cake)

Brunch Recipes

Blueberry muffins on a wire rack.

Blueberry Cheesecake Muffins

a stack of waffles with berries

Waffles Recipe

slices of chocolate banana bread

Chocolate Banana Bread

Strawberry Cheesecake Tart

Smoked salmon quiche with creamy soft custard and fresh asparagus and dill - a perfect brunch for special occasions or a nice light dinner served with fresh green salad. #smokedsalmonquiche #quiche

Smoked Salmon Quiche

Sliced scone with butter and jam.

Foolproof English Scones

Game Day Eats

Cooked bacon jalapeno poppers on a baking sheet.

finger food:

3-Ingredient Jalapeno Poppers

meat:

Beer BBQ Meatballs

Bean dip in a casserole dish with a portion being scooped with a chip.

dip:

3-Ingredient Bean Dip

appetizer:

Bacon Wrapped Cheesy Crackers

sandwich:

Philly Cheese Steak Sliders

dessert:

5-Ingredient Pineapple Cake

Facebook Instagram Pinterest YouTube

Never Miss A Recipe

Subscribe and receive my FREE Portion Planning Cheat!

  • Discover
    • Recipe Index
    • Tools & Gadgets
    • Ingredients
  • Learn
    • Baking Basics
    • Cooking Basics
    • Advanced Techniques
  • Share
    • Holidays
    • Appetizers
    • Party Planning 101
  • Back To Top
  • About
  • Work With Me
  • Privacy Policy
  • Contact
© 2013-2023 Sweet & Savory Site Credits Designed by Melissa Rose Design Developed by Once Coupled Exclusive member of Mediavine Food
Opens in a new window Opens an external site Opens an external site in a new window

Subscribe and Receive My FREE Portion Planning Cheat!