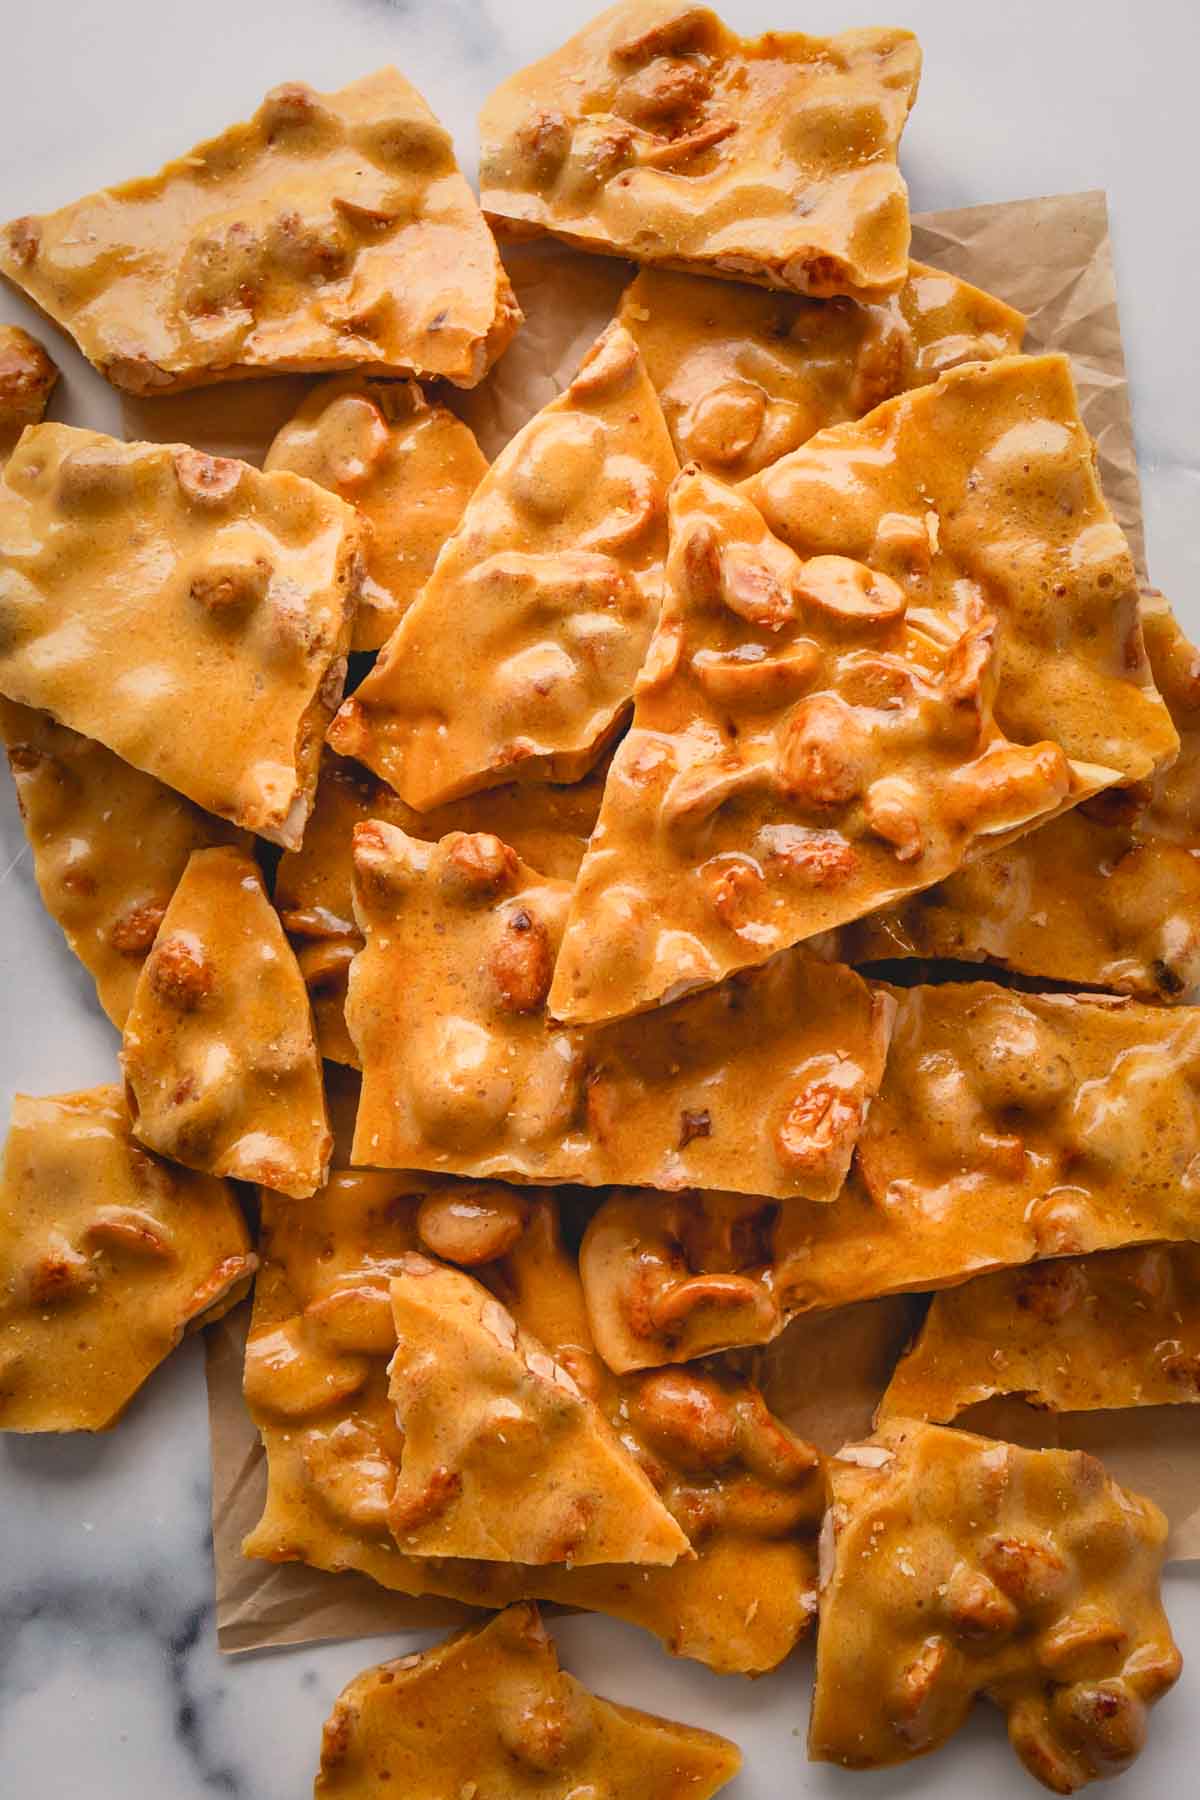
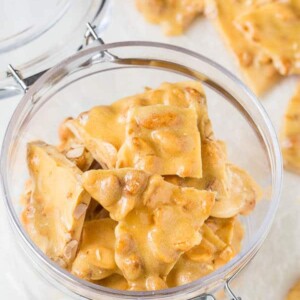
Learn how to make crunchy, melt-in-your-mouth microwave peanut brittle that isn’t rock hard or stick-to-your-teeth chewy! It’s quick and foolproof. No candy thermometer is required!
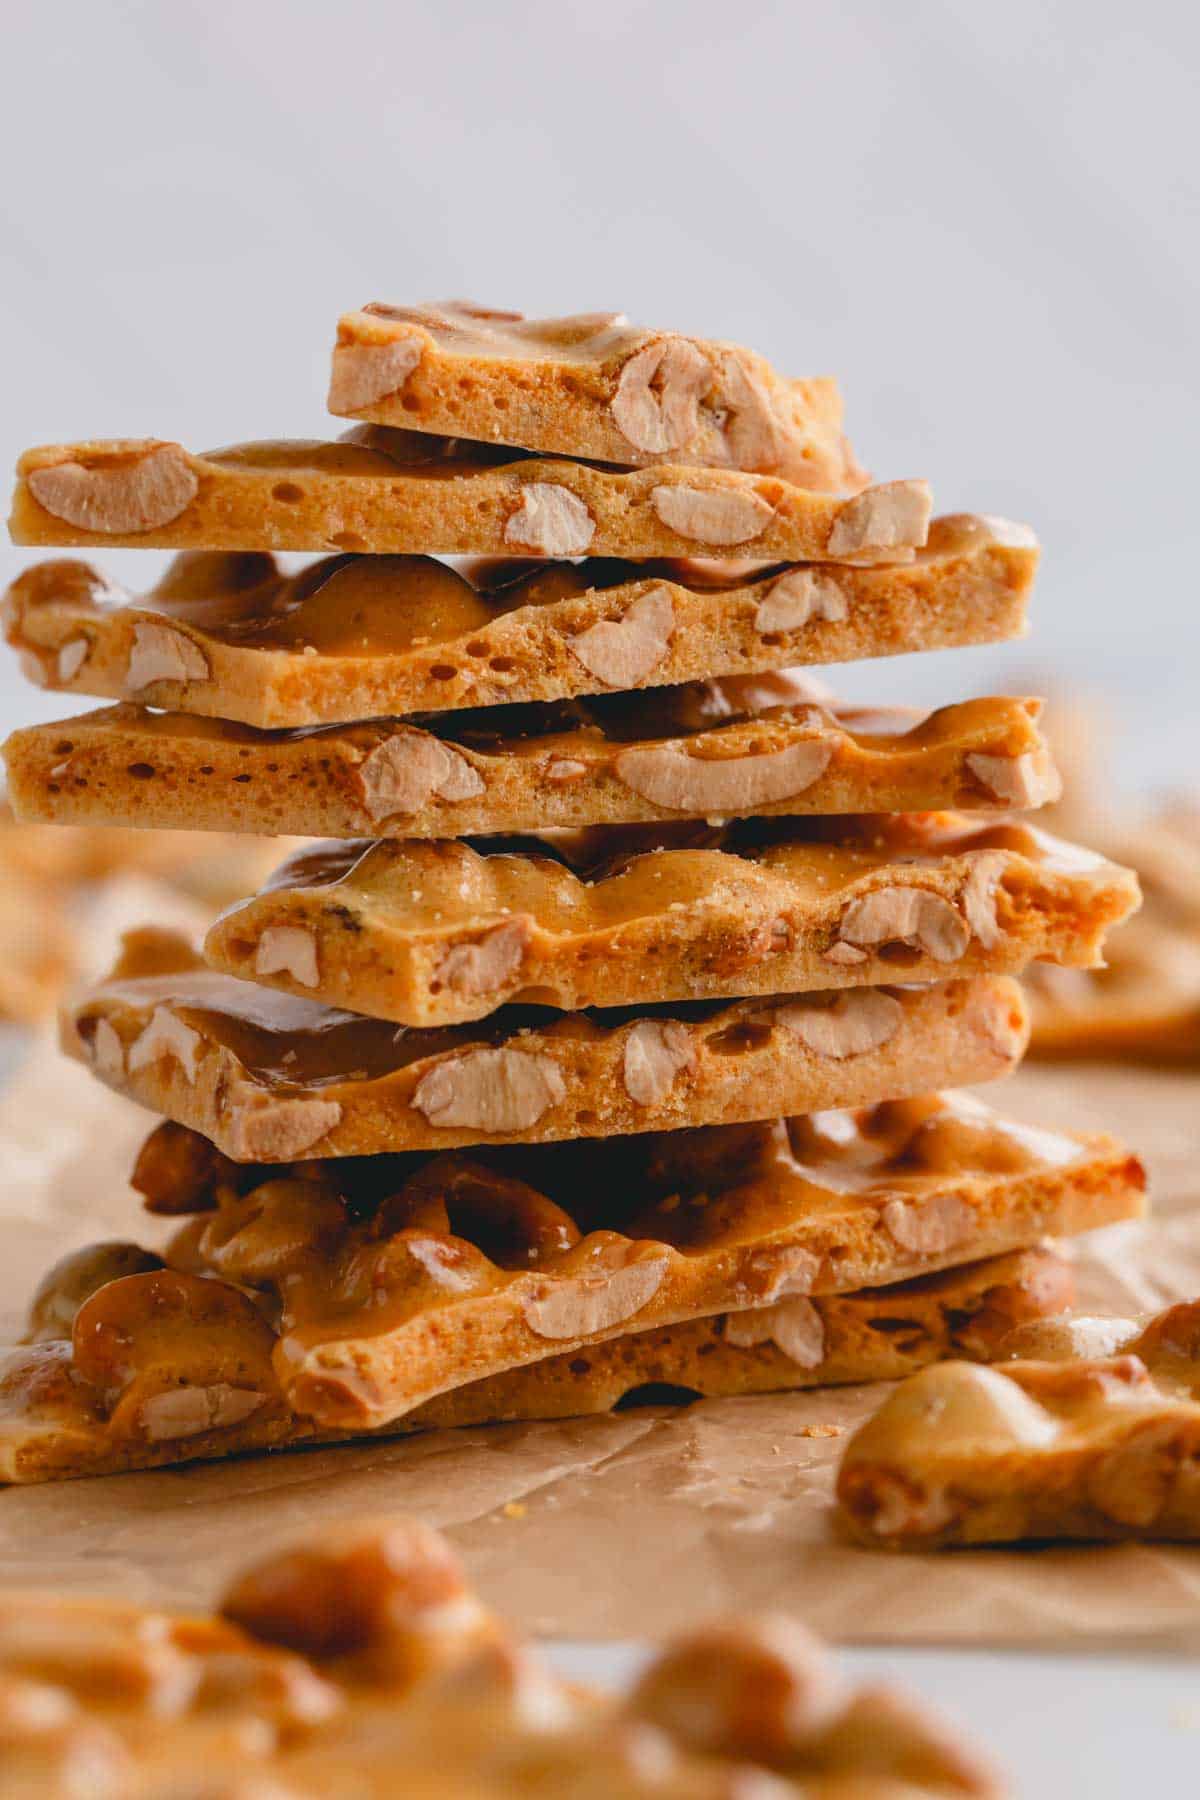
My mother-in-law’s friend, Leo, makes the most addicting peanut brittles that I’ve ever had! It’s sweet and nutty, melt-in-your-mouth crunchy.
Lucky for use, Leo was generous enough to share his recipe with us!!
Why you’ll love this peanut brittle recipe:
This microwave peanut brittle recipe is easy to make and easy to eat! In fact, it’s almost a little too easy to eat!
I’m not exaggerating when I say this is the simplest and best peanut brittle recipe on the internet! Here’s why:
- You don’t need to fuss with a candy thermometer.
- No stirring a sugar mixture over a hot stove.
- You only need 10 minutes of hands-on time, one bowl with a lid, a microwave, and a handful of simple ingredients.
In addition to being seriously easy to make, it’s addicting, too! You’ll love the nutty, sweet flavors and the light, airy texture with the most satisfying crunch.
And, if you want to upgrade your microwave peanut brittle, try this chocolate peanut brittle recipe next!
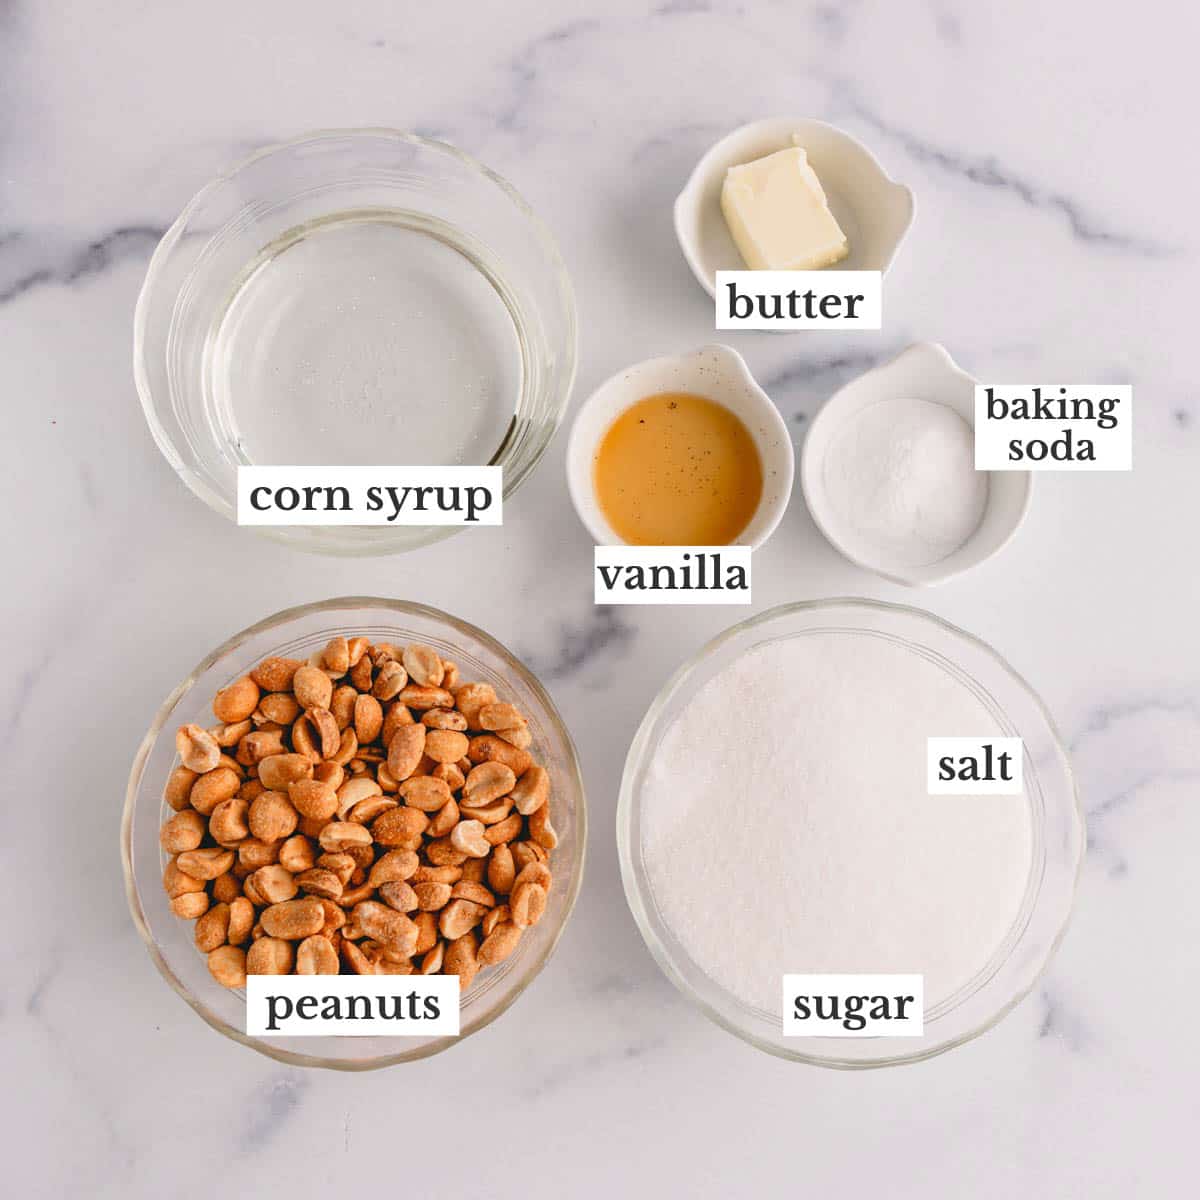
Key Ingredient Notes:
- Dry-roasted peanuts – Look for unsalted peanuts roasted without oil. We don’t want raw peanuts here, because roasting brings out the nutty flavor. I’ve also used salted dry-roasted peanuts with success.
- Granulated sugar is used to sweeten the peanut brittle, giving it a caramel-like flavor and a classic golden color. It also holds the brittle together as it cools down.
- Salt – A pinch of salt balances the sweetness.
- Light corn syrup gives the peanut brittle a smooth texture, because it doesn’t crystallize or become grainy when heated.
- Butter – The original recipe calls for margarine, but I use butter with the same result.
- Pure vanilla extract – Try making your own DIY vanilla extract. Storebought is okay too. Just be sure to avoid the imitation varieties.
- Baking soda gives the candy a light and airy texture.
How to make homemade peanut brittles:
Before you get started, evenly coat a baking sheet with nonstick cooking spray.
Microwave session 1
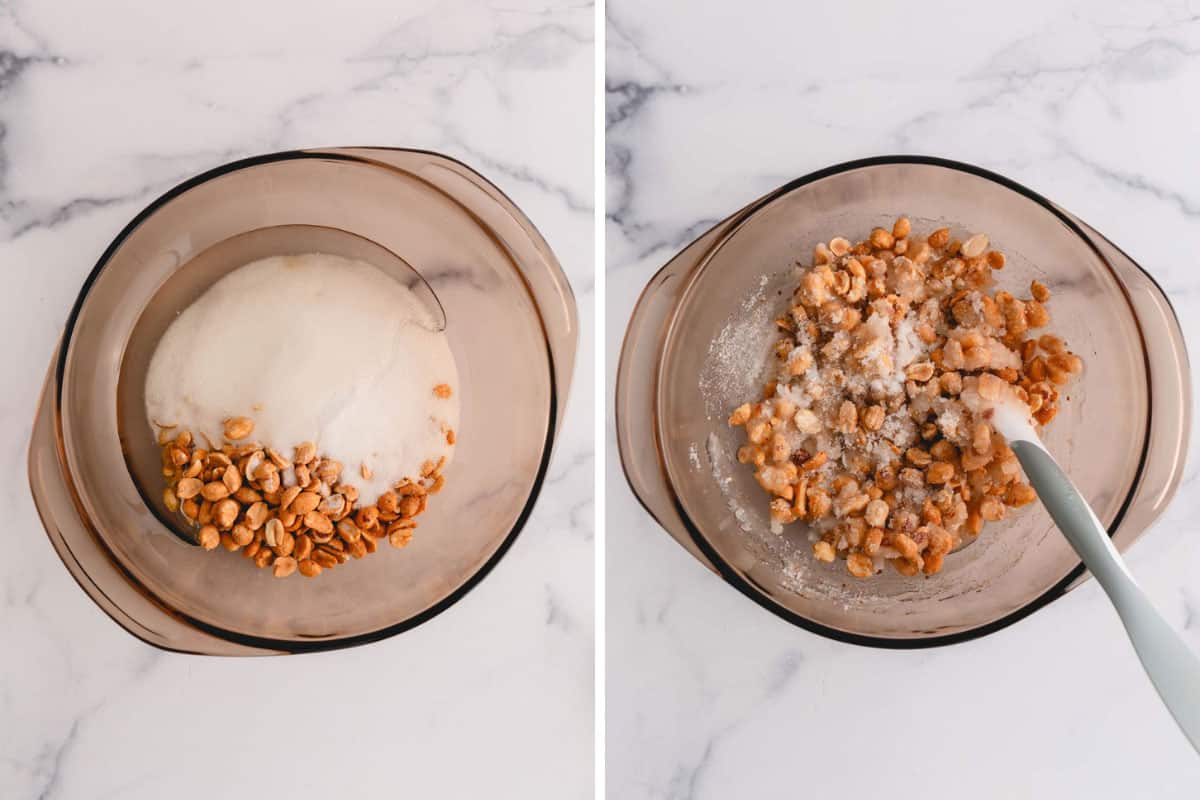
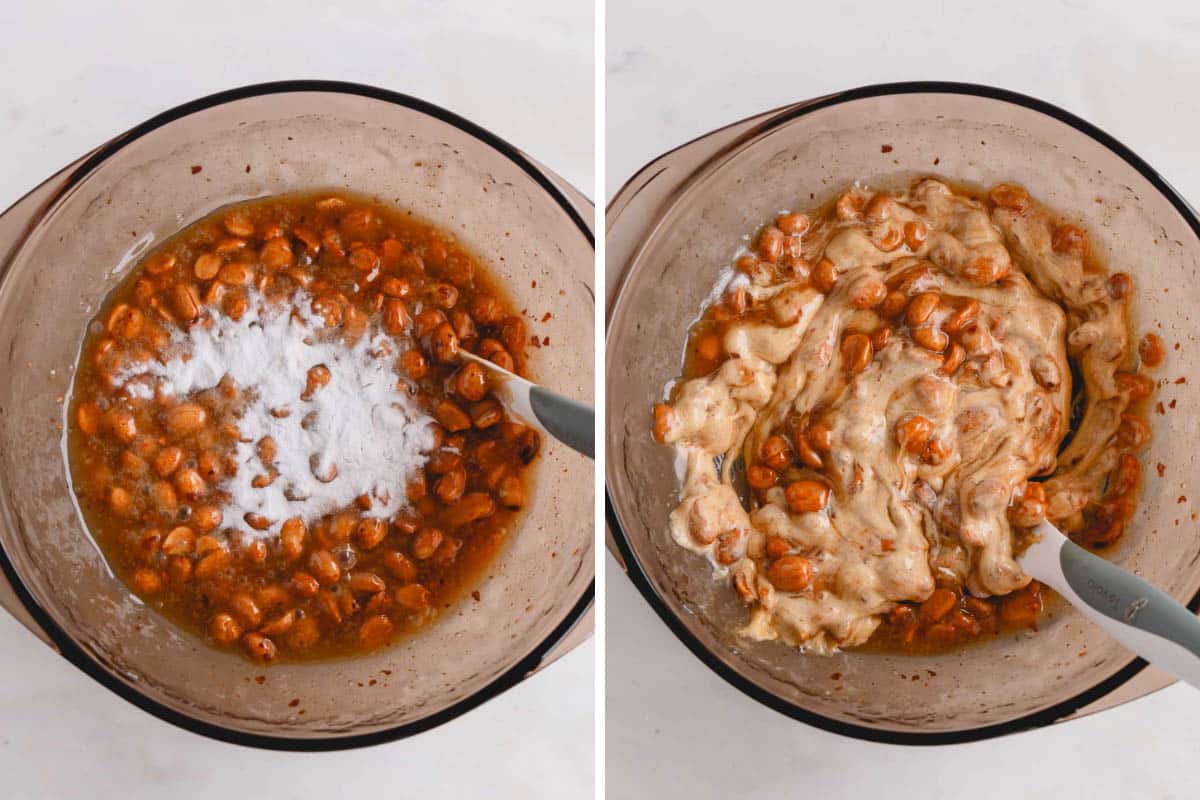
- Combine the peanuts, sugar, salt, and corn syrup in a 1-quart, microwave-safe glass bowl with a lid.
- Place the lid on the bowl, and microwave the mixture for 3 minutes. Then, remove it from the microwave, and give it a good stir.
Prevent burning
You absolutely need to cover your bowl! The peanut mixture will burn if it’s not covered.
MICROWAVE SESSION 2
- Place the cover back on the bowl, and microwave the mixture for an additional 3.5 minutes.
- Uncover, and stir in the butter and vanilla extract.

MICROWAVE SESSION 3
- Cover, and microwave again for another 2.5 minutes.
- Remove the mixture from the microwave, add the baking soda, and quickly stir as the mixture foams.
Shape the peanut brittle
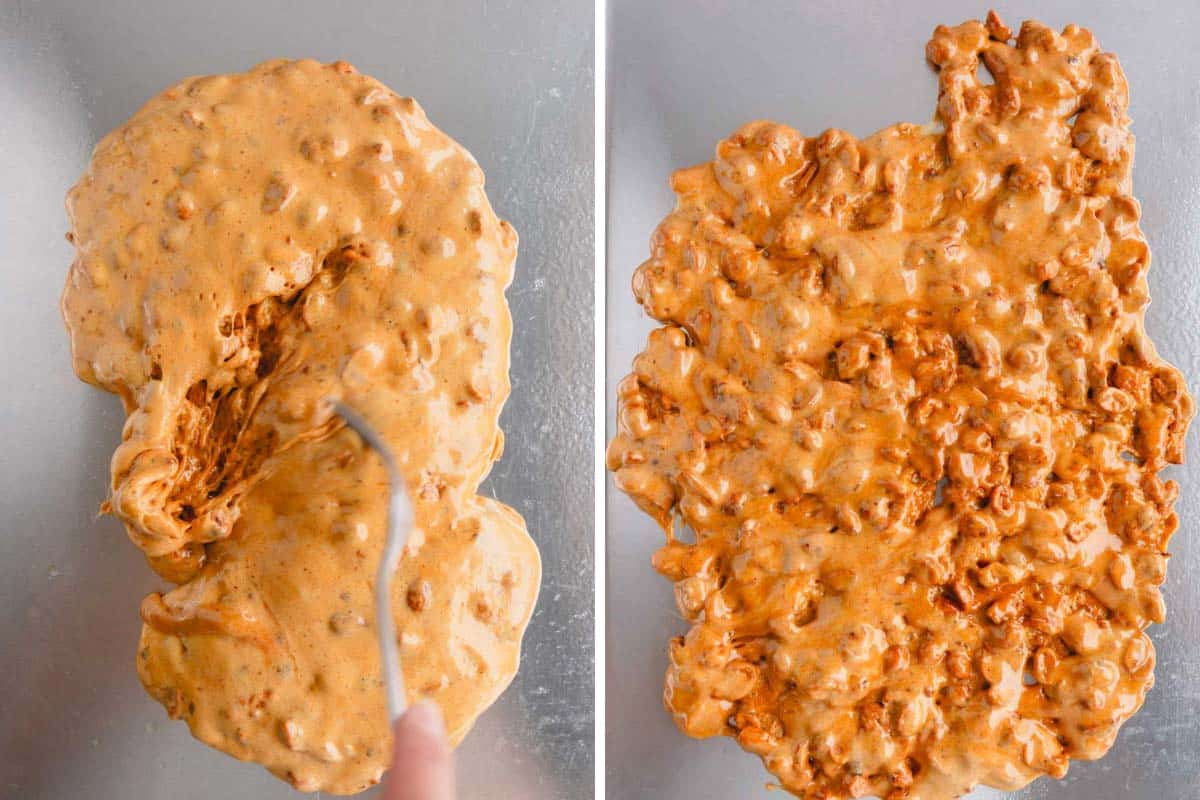
- Pour the peanut brittle mixture onto your prepared baking sheet.
- Spread it into an even layer using 2 forks. Be careful not to spread it too thin!
Let it set
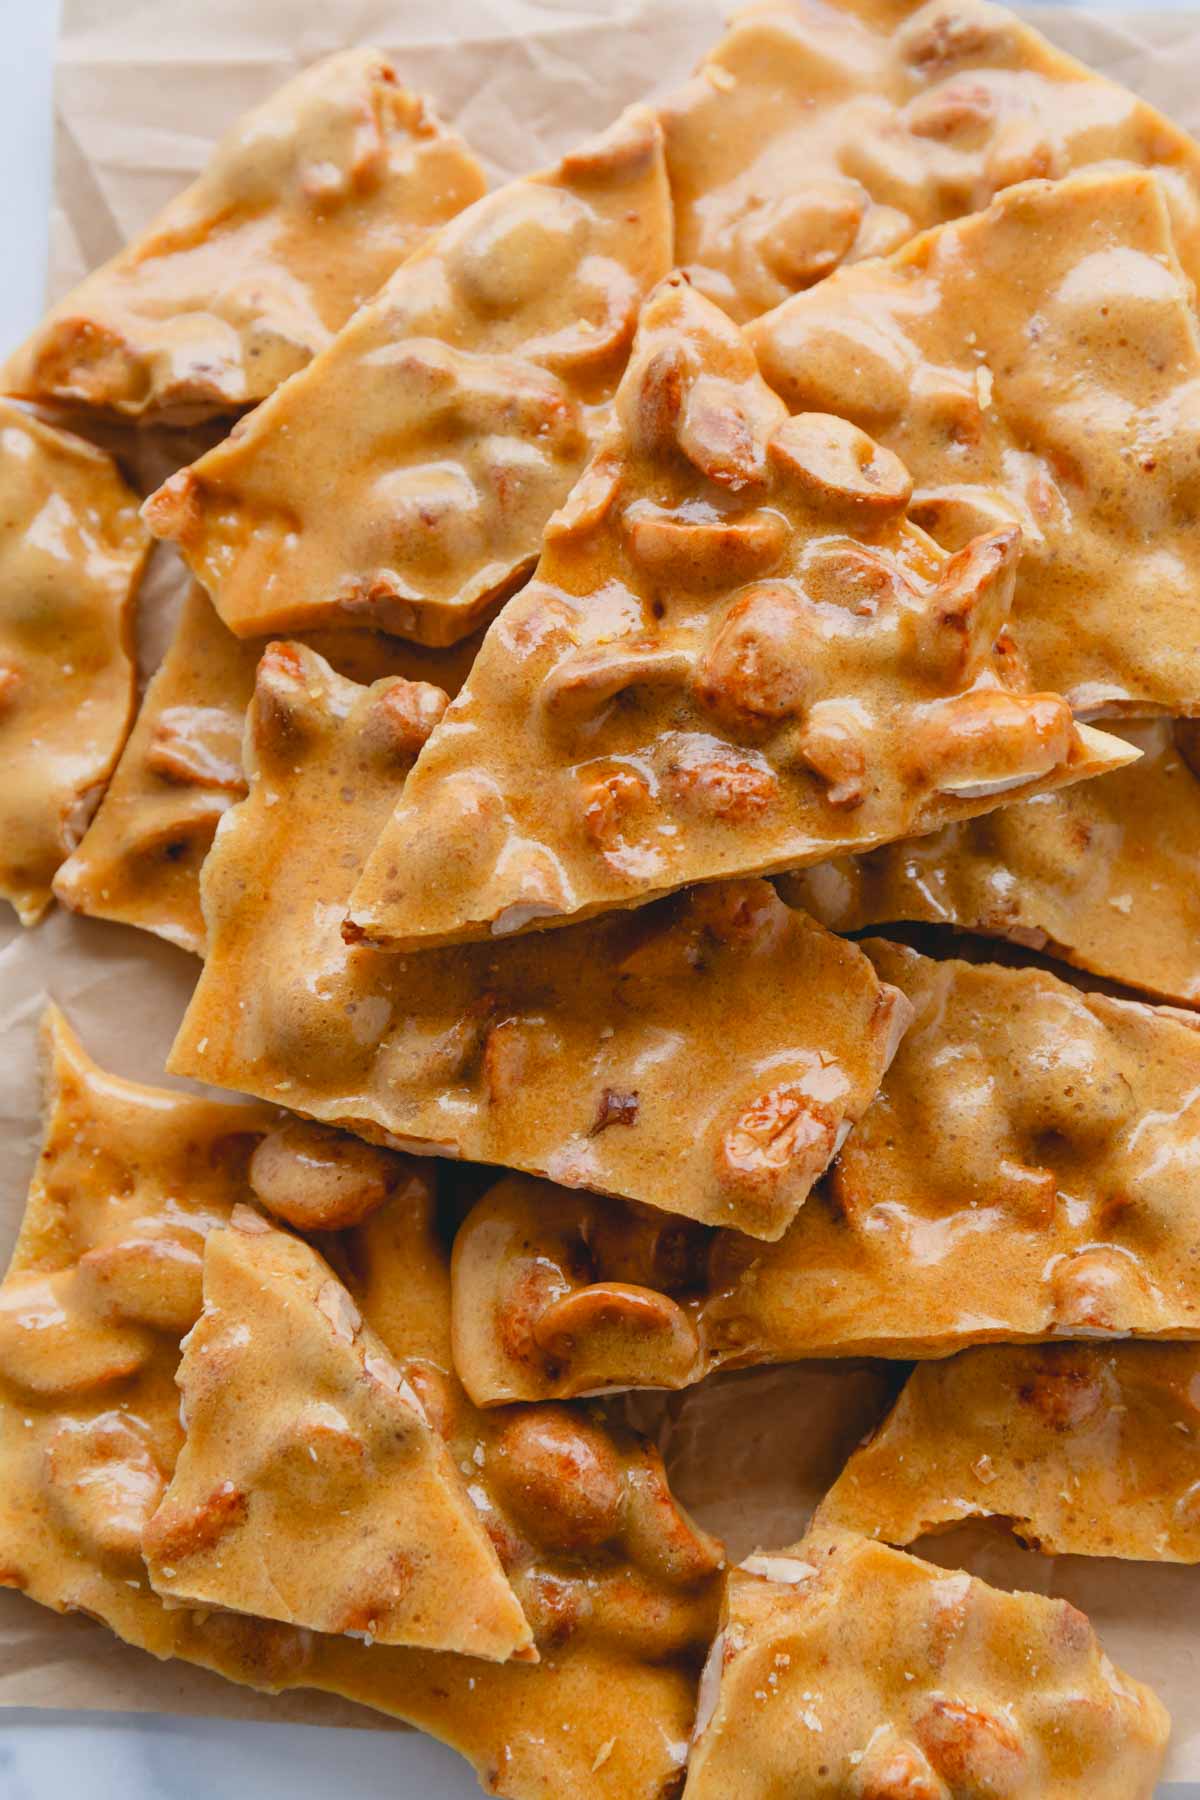
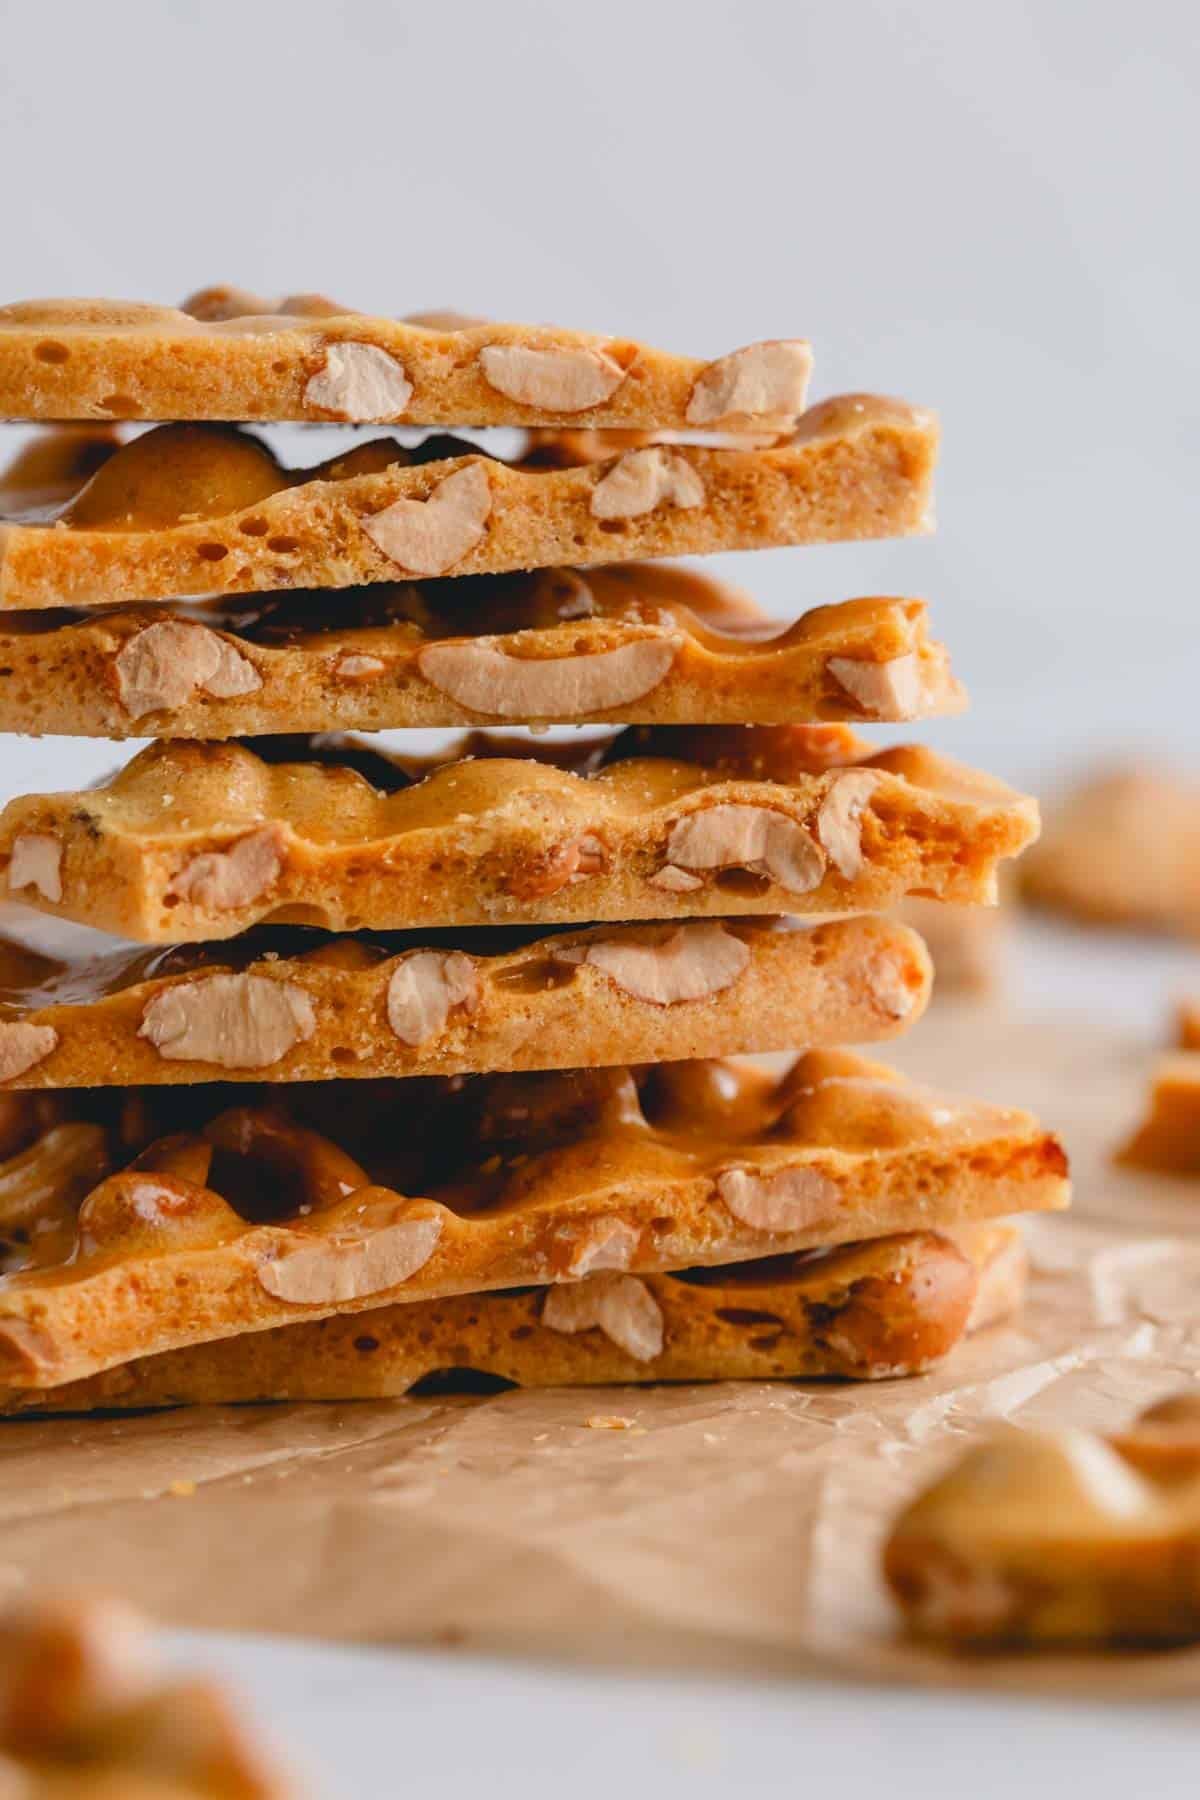
- Let the brittle cool and harden for 30-45 minutes. Then, break it into large pieces, and enjoy!
Tips for Success:
- Check your microwave’s power. This recipe is specifically written for a 1000-watt microwave. So, the peanut brittle is likely to burn if your microwave is stronger than 1000 watts.
- Have all your ingredients measured and ready to use! This recipe for microwave peanut brittle is super quick. Once you get started, there’s no time to run around the kitchen grabbing ingredients.
- A microwave-safe bowl with a tight-fitting lid is essential. Without a lid, the mixture will burn. Avoid using a plastic bowl if you can.
- Make sure your baking soda is fresh. Baking soda makes the microwave peanut brittle light and airy. So, you want to be sure your baking soda isn’t expired. And don’t be alarmed when the baking soda foams up – it’s a good thing!
- After adding the baking soda, don’t spend too much time mixing. You only need a few good stirs until the mixture is evenly foamed.
Storing Tips:
- Store leftover microwave peanut brittle in an airtight container at room temperature for up to 1 week. Refrigeration isn’t recommended, because the moisture in the refrigerator can cause the brittle to become sticky.
- To freeze, allow the brittle to fully cool. Then, transfer it to an airtight container, separating the layers of brittle with parchment paper. Freeze for up to 3 months.
Peanut Brittle FAQs:
If your peanut butter is soft and chewy, it probably didn’t cook for long enough in the microwave. This could be due to using a lower-wattage microwave, as this recipe is written for a 1000-watt microwave only.
Adding baking soda to hot peanut brittle results in a foaming action, creating tiny air pockets. These air pockets give the brittle a light, airy, and snappy texture, making it easier to bite into. It’s what helps make peanut brittle, brittle!
Moisture and humidity are the top reasons peanut brittle becomes sticky. Allow the peanut brittle to harden in a cool, dry location, and don’t store leftovers in the refrigerator.
More Candy Recipes:
The Easiest Peanut Brittle
Ingredients
- 1 cup (125 g) dry-roasted peanuts
- 1 cup (200 g) granulated sugar
- 1/8 teaspoon salt
- ½ cup (150 g) light corn syrup
- 1 tablespoon (14 g) margarine, or unsalted butter
- 1 teaspoon pure vanilla extract
- 1 teaspoon baking soda
Instructions
- Before you begin, check your microwave power. (Mine was written at front when you open the door.) The time directions in this recipe for microwaves with 1000Watts.Measure and prepare all the ingredients before moving forward.
- Prepare a baking sheet and spray with non-stick spray.
- In 1-quart microwave-safe bowl with a lid (stay away from plastic container though, I prefer a glass bowl), combine peanuts, sugar, salt and corn syrup.
- Cover the bowl and microwave the mixture for 3 minutes. (TIP: If you don’t cover the mixture, it’ll get burnt.) Take it out and give it a nice stir.
- Then cover and microwave for another 3.5 minutes. Take it out and stir in margarine and vanilla extract.
- Cover and microwave again for 2.5 minutes. Take it out and add baking soda.
- Quickly stir, as the mixture foams. And pour the mixture onto the prepared baking sheet.
- Using 2 forks, spread it out into even layer.
- Let it cool and harden, about 30-45 minutes. Store in a ziplock bag for up to a week.
Tips & Notes
Nutrition

This recipe was originally published on April 21, 2016.


I tried to make this recipe and it came out to soft.
What Can I do to make it turn out a little hard but not to hard.
Thank you, Anna Baty
Hi, Anna. Have you checked the power of your microwave. I’m guessing it’s less than 1000Watt? If it is, then you many need to increase the cooking time. My instructions are for 1000Watt microwaves.
Dry roasted peanuts – salted or no salt?
What about Spanish peanuts?
Hi, Teresa! The person I got the recipe from actually called for Spanish peanuts, but I couldn’t find it in our grocery store, so I use dry roasted salted peanuts. And I love it. So you can definitely try Spanish peanuts.
I have a 950 watt, it burned using these directions. Any suggestions???
Did you cover the bowl? Uncle Leo, who I got this recipe from, had warned that if you don’t cover, it burns. I always cover mine, and never had mine burnt. I made so many batches this year.
when making this try adding nuts the last minutes or at the end this works add crushed nuts this way they won’t burn like so many said there’s burnt
I made this it so EZ and great taste the only thing I did was crush the peanuts it spread out easier a was like air great
Oh, I’ll have to try crushing the nuts. I can imagine how it’s much easier to spread that way. Thanks for the suggestion, I’ll definitely try that next time I make this.
Done this twice and each time my peanuts come out burn at the end, and when my Granddaughter did it it was great, can’t figure what I’m doing wrong, pls help. Lol
Hi, Paro. What’s the power of your microwave? The time directions are for microwaves with 1000watt power. If your microwave is more powerful, it’ll burn the mixture. You’ll have to adjust the power when you’re microwaving, or adjust the time, but I won’t be able to offer any specifics as to how much. Hope this helps.
Have you made multiple batches at once? Like 5 pounds?
So, yes! AND it failed miserably! 🙂 I doubled the batch (I needed like 4 batches) and increased the cooking time, but it still didn’t set right. It turned out kind of soft and chewy, and not in a pleasant way. I’d stick with the recipe as is. But I know how tempting it is to make one big batch. 😉
I have a 700 watt mw. Has anyone tried this recipe using such and how did it turn out? Thank you much!
Deb, you’ll need to increase the time for each round, since your microwave has lower power. If I have to guess, maybe add a minute to each round. Otherwise, the mixture won’t reach high enough temp to set properly.
This sounds so good. I love peanut brittle but have failed to make it right. It is too expensive to buy already made so I have to try this one. So happy to have found you and this recipe!
AnnMarie, definitely give this a try. It’s so easy that literally takes 10 minutes. 🙂
I made this peanut brittle and it’s AMAZING!! I didn’t think it would work because it just seemed too easy but it did and it was delicious and hubby and I devoured it. Now I want to make another batch but I’m thinking I should wait…..or NOT. Thank you for sharing and I love the fact that there’s no candy thermometer. Follow the recipe exactly and the magic will happen!!
Janet, so happy you tried! Isn’t it amazing how easy it is? I’ve made many peanut brittles complicated way, but they turned out quite as well as this one. Thanks so much for your feedback! 🙂