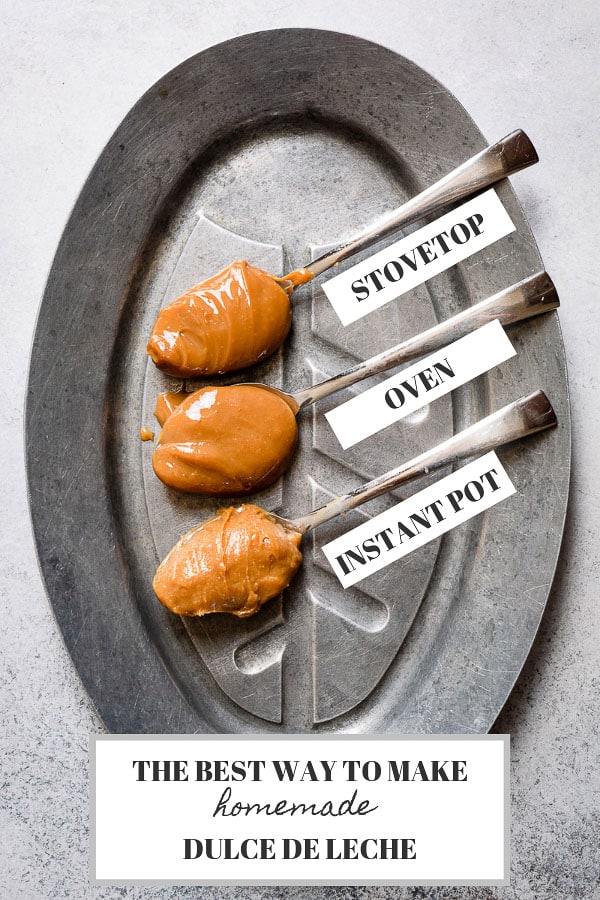
Here’re my top 3 proven methods to make homemade dulce de leche. From stovetop to Instant pot, I’ve explored different ways to make homemade version and I’m ready to report my findings.
This is a long post, but you’ll learn details of 3 ways to make dulce de leche at home, pro’s and con’s of each method, and one method that disappointed me greatly. Plus, storing tips and different ways to eat this golden deliciousness!

I’ve been meaning to write this post for very, very long time. You see, I’ve made homemade dulce de leche for as long as I remember. And it’s, hands down, my childhood favorite!
Instead of sharing my go-to method only, I decided to experiment other ways to cook dulce de leche and see if there’s any better method out there. And in the process, I learned a lot and even found the worst method that’s absolutely not worth trying. If you want to find out, just keep on reading.
But first…
WHAT IS DULCE DE LECHE?
Dulce de leche is basically a caramelized sweetened milk. It’s a Spanish phrase and it literally means “candy made of milk”.
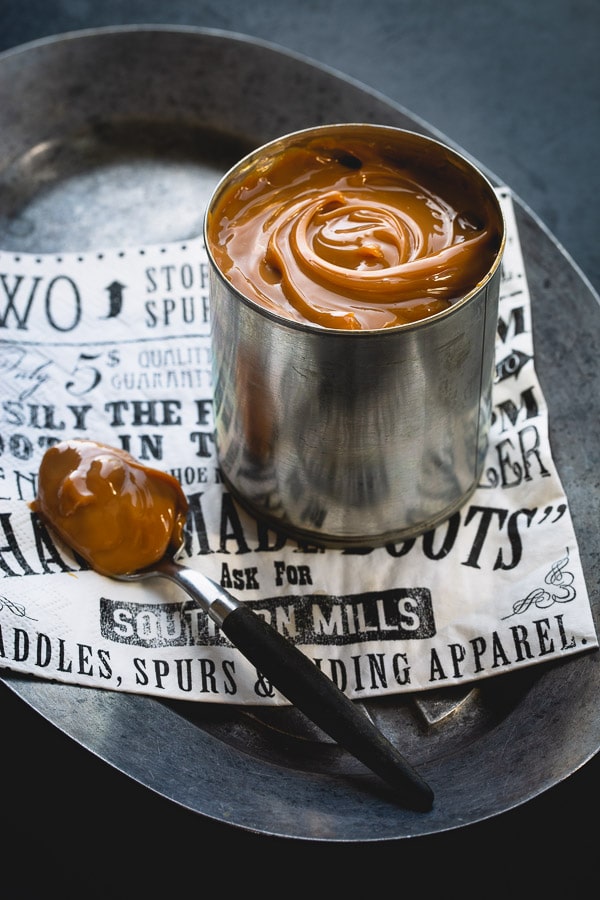
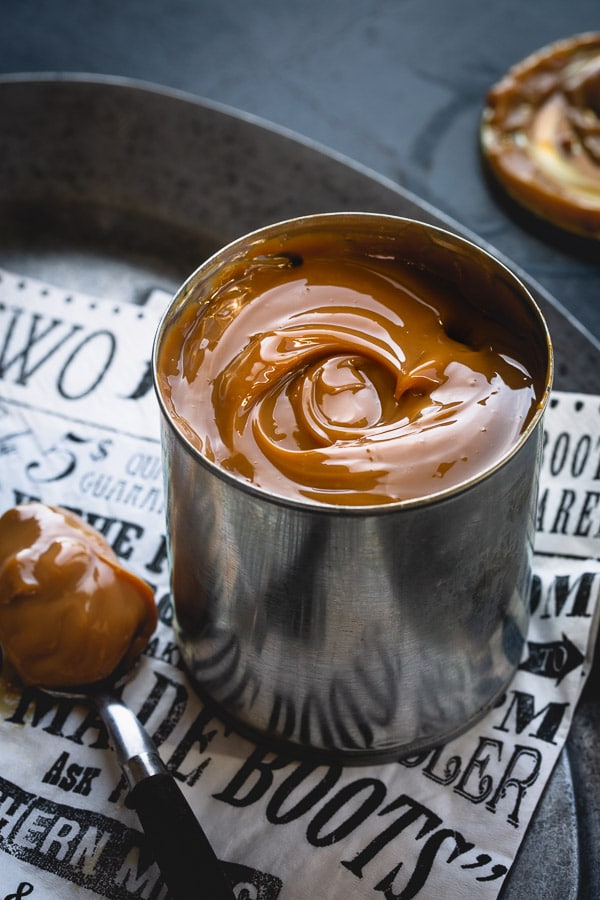
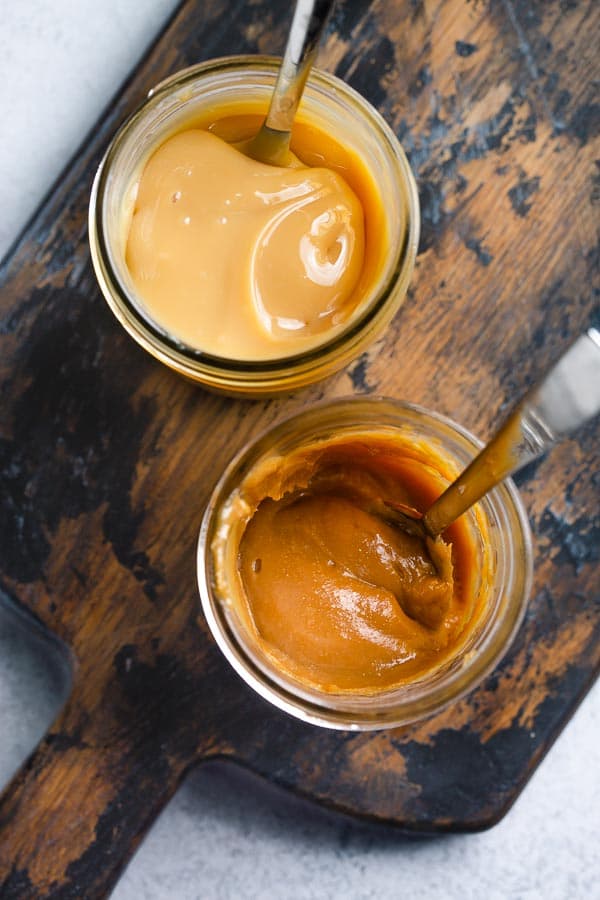
Ok, forget the technical terms, dulce de leche is a liquid gold. It’s so lusciously creamy and sweet with toffee like flavor. There’re so many ways to consume it. We’ll talk about different ways to use it in a sec, but my favorite is to eat it by spoonful!
WHAT IS THE DIFFERENCE BETWEEN DULCE DE LECHE AND CARAMEL?
Actually not much, yet they’re 2 different things. Caramel is sugar-based, and dulce de leche, on other hand, is milk based. You can read more about the differences between caramel and dulce de leche in this article, which explains it way better than I could.
Also, in my opinion, dulce de leche is less sweet than caramel.
Ok, now let’s talk about different cooking methods. I’m sharing 3 methods that I’ve tried and recommend, pro’s and con’s of each method, and one method that disappointed me greatly. Plus, storing tips and different ways to eat this golden deliciousness!
Method #1. STOVETOP
This is my go-to method of cooking homemade dulce de leche. This’s how my mom, my friends’ moms, basically everyone around me cooked it.
HOW TO COOK DULCE DE LECHE ON STOVETOP?
It’s very simple. Basically, remove the label off of cans of sweetened condensed milk, place unopened cans (I always cook 3-4 cans at a time) in a large stockpot, fill with water until it covers the cans at least 1 inch above (better if you can do 2 inches above cans), cover, bring it to a boil, then reduce heat to low and simmer for 3-3.5 hours.
WARNING: This is not the time to leave the house! Keep an eye on the pot from time to time, making sure the water level doesn’t drop, exposing the cans. You know what happens if the cans get exposed? It explodes! Yes, for real! And you’ll end up with a huge mess to clean up, or even remodel.
Ok, I’m not trying to scare you off trying this method, but I also don’t want you to set it and forget it.
That being said, if you add enough water to cover the cans at least 2 inches over the cans and cover the pot, while simmering, water won’t evaporate as much, and I rarely needed to add more water. If you don’t have deep pot, like I do, you may need to add more water to keep the cans submerged in water.
Pro’s:
- Super simple and easy way to cook multiple cans of sweetened condensed milk.
- Rich dark color and thick consistency after 3-3.5 hours of cooking.
- Silky smooth texture.
- Unopened cans means longer shelf life.
Con’s:
- Not completely hands-off. Requires check-ins from time to time to maintain proper water level.
- Danger of explosion. Only if you disregard the point above .
CONCLUSION: Stovetop method is still my favorite one. It yields the smoothest dulce de leche out of all the methods I’ve tried. Scroll down to see the side by side comparison.
If you make this method, PLEASE don’t open a hot can! Be patient and wait until the cans are fully cooled. Why? Because pressurized hot dulce de leche will spray you in your face. OUCH!

Method #2. OVEN
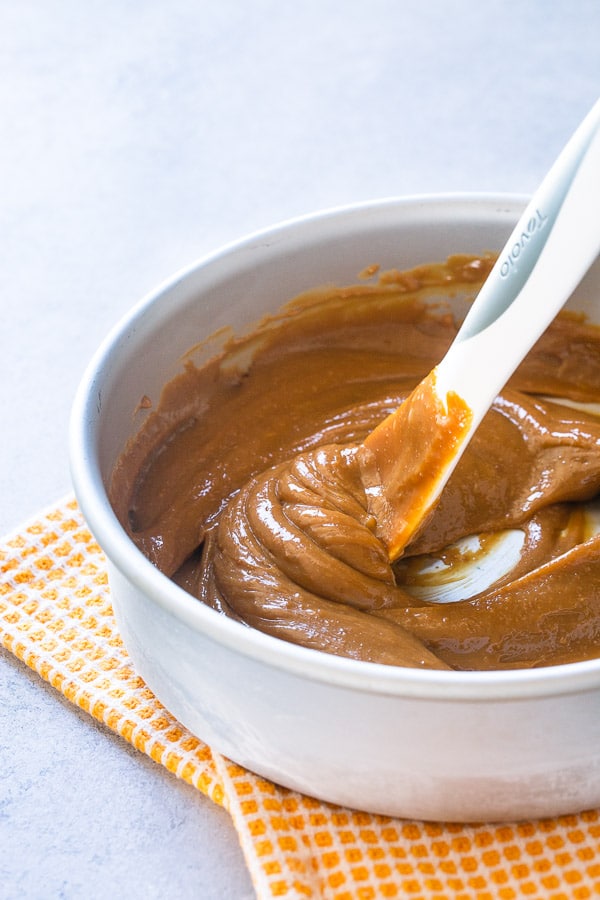
So, baking sweetened condensed milk in the oven was a new method for me. But I was pleasantly surprised by the result. If you’re afraid of cooking unopened cans, this method is for you! It still takes a few hours to reach that nice dark color, but once you put it in the oven, you may wonder off to do other things. The only downside I noticed is that dulce de leche is not as smooth as stovetop method.
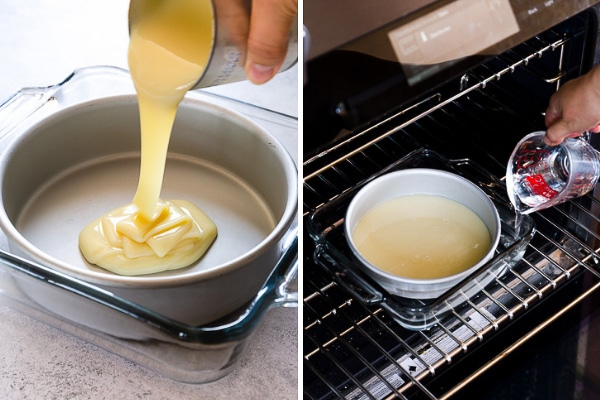
HOW TO COOK DULCE DE LECHE IN OVEN?
Open a can of sweetened condensed milk, pour it into a cake pan, set the pan in a large roasting pan, cover the cake pan with a foil, add hot water into roasting pan until it reaches half way up the cake pan. Then bake at 350°F (190°C) for about 3 hours, or until it reaches desired color.
TIP: Don’t forget to cover the pan with sweetened condensed milk with an aluminum foil, or it’ll scorch on top.
Pro’s:
- Super simple and easy way to make dulce de leche.
- No risk of explosion.
- Rich dark color and thick consistency after 3 hours of baking.
Con’s:
- Slightly grainy texture, but mostly smooth.
- Multiple dirty pans.
- Shorter shelf life than unopened cans.
CONCLUSION: I highly recommend this method if you need 1-2 cans to use right away (or within a week or two), and don’t want to babysit simmering pot on a stovetop.
Method #3. INSTANT POT
I had high hopes about this method!!! I absolutely love my Instant Pot and was excited to try making dulce de leche in it, hoping to cut down cooking time. BUT I’m also not crazy about putting unopened can under pressure!
HOW TO COOK DULCE DE LECHE IN INSTANT POT?
So, I tried 2 ways of cooking sweetened condensed milk in Instant Pot:
- Cooking in a cake pan, or stainless steel bowl.
- Cooking in a canning jar.
And because cooking a glass jar in an Instant Pot makes me a little nervous, I tried cake pan method first. After 15+ minutes of coming to pressure and 40 minutes of cooking, I was quite disappointed to see barely blond concoction. I put it back and tried for another 40 minutes, and it darkened a little more, but it was still on paler side to my liking.
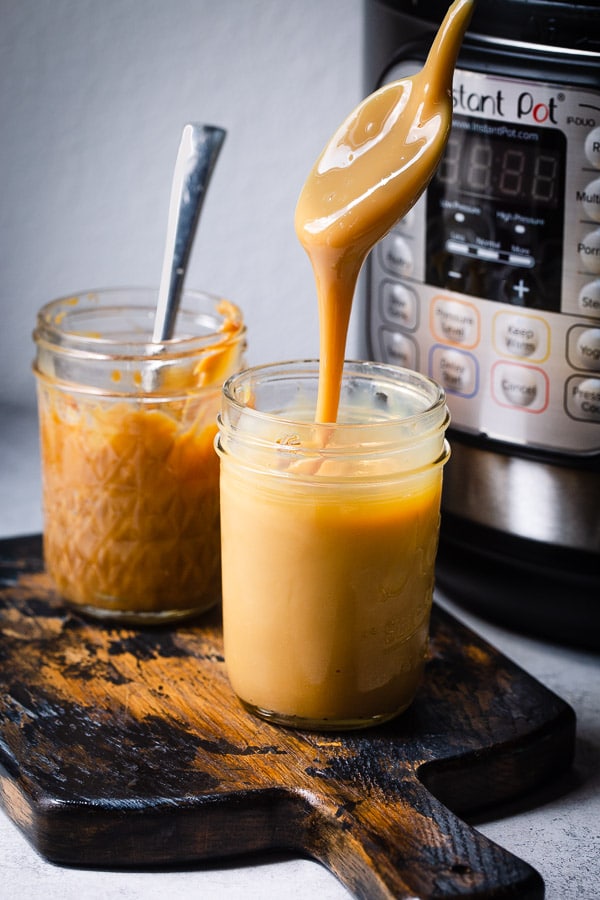
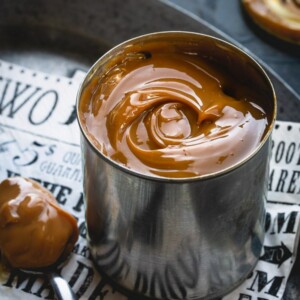
But since I’ve seen SO many Instant Pot dulce de leche recipes out on internet, I thought it can’t be for nothing! That’s why I decided to try cooking sweetened condensed milk in a canning jar. And I got much better result! Nice rich color in 40 minutes of cooking under pressure. See the image below.
However, I wasn’t a huge fan of the texture. It was the grainiest of all. Again, you’ll see the difference in my side-by-side photo below.
Pro’s:
- Quickest method! Nice rich color and thick consistency in a little over an hour when cooked in a canning jar.
- You can make as many jars as you can fit in your pressure cooker.
Con’s:
- Grainy texture.
- Multiple dirty pans/jars.
- Shorter shelf life than unopened cans.
CONCLUSION: This’s definitely a great method of making a homemade dulce de leche, especially if you’re pressed for time. In about an hour or so, you can enjoy deliciously rich, thick and creamy dulce de leche. However, the texture may come out slightly grainy, but it doesn’t affect the flavor.
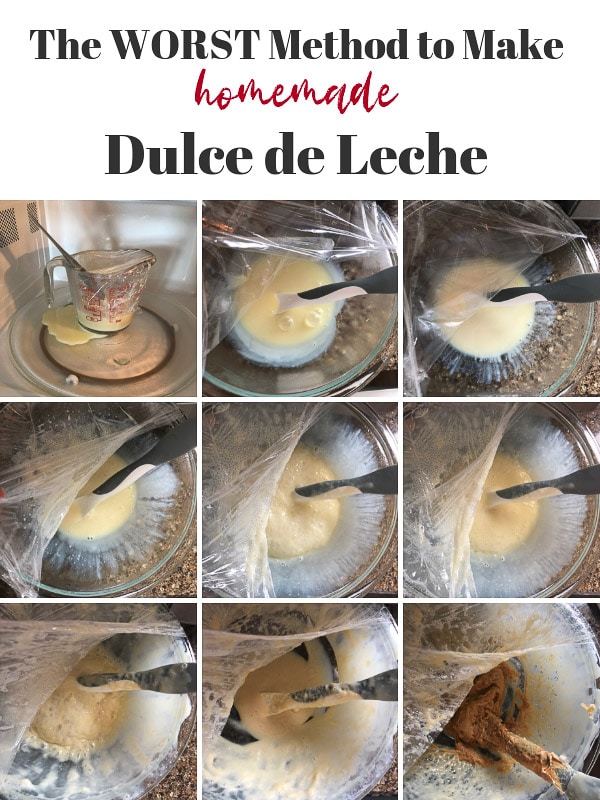
NOT RECOMMENDED METHOD: Microwave!
A promise of enjoying rich dulce de leche in less than 15 minutes seemed too good to be true. Yet, I was hopeful despite its active hands-on process.
Unfortunately, making dulce de leche in a microwave was a big miserable bust! I tried this method couple of times to make sure I’m not giving up on this method too soon. But both times I ended up with a giant mess, as you can see below.
Instructions: place sweetened condensed milk in a big bowl, cook at 50% power for 2-minute sessions, stirring in between sessions. After 10 minutes, cook for 1-minute sessions at 50% power.
First time, I used a 2-cup measuring cup for half a can of sweetened condensed milk. After 2nd 2-minute session, it overflow all over.
So then I used a bigger bowl, 5qt bowl to be exact, it was kind of working nicely, until it finally reached dark color, but at this point it was also scorched. The last 3 sessions were at 1-minute intervals!
So yeah, don’t waste your time, or sweetened condensed milk!
Now, let me show you 3 scoops of deliciously creamy dulce de leche from each cooking method side by side. Which one looks the best to you?
I may be biased but stovetop version looks the best to me, thick and smooth, just how it should be. Oven version is nice too! But in a pinch, Instant Pot will always come to rescue!
HOW TO STORE HOMEMADE DULCE DE LECHE?
- Unopened can of dulce de leche can be stored at room temperature for up to 3 months.
- Leftover dulce de leche should be refrigerated in an airtight container for up to 2 weeks.

HOW TO USE DULCE DE LECHE?
There’re endless ways to eat dulce de leche. And since I’m so obsessed with this sweet sauce, I’ve incorporated it in many of my dessert recipes.
Ok, friends, put on your yoga pants! Here’re just a few ideas to add a dose of dulce de leche into your daily life:
- Add it to your coffee.
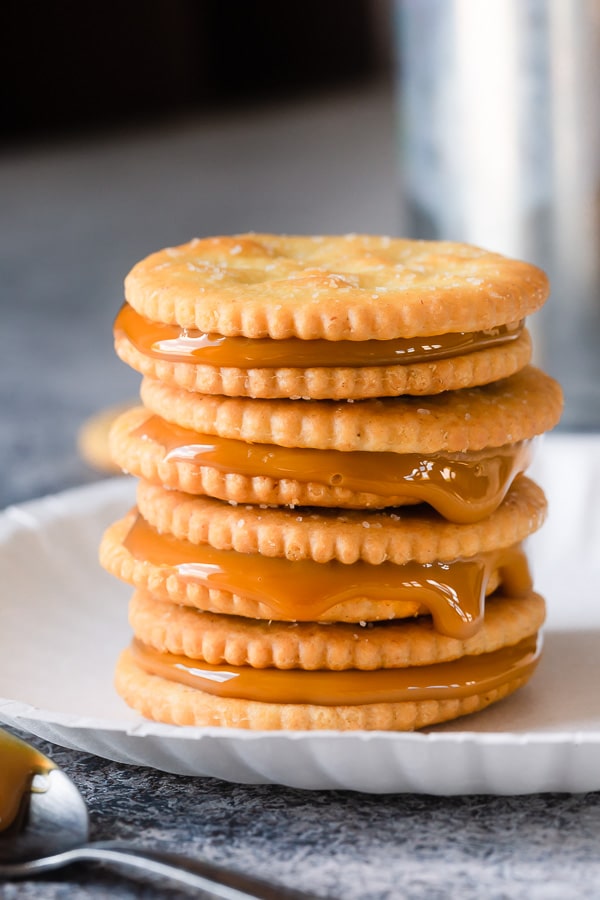
- Make dulce de leche and Ritz cracker sandwich. Salty and sweet, these little snack bites have a complex texture combination of buttery crispy crackers and creamy filling. So good, my favorite treat with my afternoon tea!
- Eat it with apple slices.
- Fill your crepes.
- Make these indulgent dulce de leche chocolate mini cakes.
- Or this decadent dulce de leche cheesecake. So impressive too!!
- These 4-ingredient dulce de leche chocolate cups are great treats to have on hand!
- Add it to your brownies.
- And if you need a quick caramel buttercream frosting, use dulce de leche!
- Drizzle it over ice cream!!! Yum!
Hope you found this tutorial helpful!
Homemade Dulce de Leche
Ingredients
- 1-4 14oz cans of sweetened condensed milk (Note 1)
Instructions
- STOVETOP METHOD. Remove the label off of cans of sweetened condensed milk, place unopened cans (I always cook 3-4 cans at a time) in a deep stockpot.
- Fill with water until it covers the cans at least 1 inch above (better if you can do 2 inches above cans). Cover the pot and bring it to a boil.
- Then reduce the heat to low and simmer for 3-3.5 hours. Keep an eye on water level often and make sure it doesn't expose the cans. If the water level drops, add more hot water to keep the cans fully submerged.
- WARNING: This is not the time to leave the house! Keep an eye on the pot from time to time, making sure the water level doesn't drop, exposing the cans. You know what happens if the cans get exposed? It explodes! Yes, for real! And you'll end up with a huge mess to clean up, or even remodel.
- Using a pair of kitchen tongs, remove the cans and cool completely before opening. Do NOT open the hot cans, or pressurized dulce de leche will spray you in your face! Unopened cans can be stored at room temperature for up to 3 months.
- OVEN METHOD. Open a can of sweetened condensed milk, pour it into a cake pan and cover with a foil.
- Set the pan with sweetened condensed milk in a large roasting pan, add hot water into roasting pan until it reaches half way up the cake pan.
- Then bake at 350°F (190°C) for about 3 hours, or until it reaches desired color.
- Transfer dulce de leche into an airtight container and refrigerate for up to 2 weeks.
- INSTANT POT METHOD. Open a can of sweetened condensed milk, pour it into a canning jar and close the lid, not too tight.
- Place a trivet on the bottom of inner pot of your Instant Pot. And put the canning jar(s) on the trivet.
- Add hot water until it reaches just under the lid. Close the Instant Pot, make sure the valve is set to sealing.
- Set Instant Pot to Manual/Pressure Cook for 40 minutes on High.
- Once time is up, do a quick pressure release by turning the valve to venting.
- Carefully open the lid and carefully remove the jar(s) with a pair of kitchen tongs. Cool completely before opening. Store in the fridge for up to 2 weeks.
Tips & Notes
Nutrition


If i want to store the leftover in freezer how many times it will last?
We know it as cajeta
Yes, similar to cajeta, except for caveat is made with goat’s milk.
Just wondering if you have tried the slow cooker method (crock-pot) Takes about 12 hours but you get great results.
No, I didn’t try slow cooker method.
Thanks for all the hard work and research. How thin or thick does this get? Does it solidify? Can you pour over the top of a Bundt cake and remain creamy(without either seeping into cake or turning into a stiff hard mess.)?
Thank you
Hi, Jennifer. Dulce de leche doesn’t harden like caramel, but it stays thick and creamy. It’s not really pourable though. You can microwave it for like 20-30 seconds to thin slightly, but it won’t be pourable like caramel sauce. You can see the consistency of it at the beginning of this video: https://youtu.be/Z5wmVDQUt14
I made the stove top version last night & have a question, has your water turned brownish & smelled sweet after you boiled the cans? Mine did but it doesn’t look like any of the cans have oped or leaked so I’m very curious about it. The cans are still to hot to open right now. Thanks!
Hi, Bea. I’ve never had that happen to me. That’s so strange!! Were the cans with pull tabs on top? Although I’ve been cooking cans with those pull tabs for the last couple of years, I always wondered if they’d crack open during cooking.
Very nice
Thank you, Pou!
I enjoyed your research on Dulce de Leche, and appreciate the time it took to actually try all these methods, clean up all the messes, and document each. I actually tried to make it in my crock pot: I put two unopened cans (labels removed) in the crock pot and covered the cans with with water, then set it on low for +/- 8 hours. It was a great ‘set it and forget it’ method, but I was disappointed that both of my cans of dulce de leche were very grainy. The stove top method will likely be the only method I use from here on out. Sometimes there are just no short cuts. 🙂
Hi, Pamela. Thank you so much for sharing your experience with slow cooker dulce de leche, that one I haven’t tried! And I agree, stovetop method is still my go-to method.
I just did the oven method cooking it for 2 hours at 425 degrees. Turned out great. Thanks for showing the different methods. I came to get “how to store it once made” info and you were very helpful. Thanks
So glad you found my post helpful. Thank you for your feedback, Lani.
One more way to eat it is with fresh bananas! We Brazilians absolutely love it! I make mine with whole milk. It’s a lengthy process but it’s fantastic. I’ve been making for canning and I am hoping to add some citric acid to increase shelf life. Do you have any idea of how much citric acid should I add? Thanks in advance!
And I wanted to add that I understand that if acid is added to fresh milk, I would curdle the milk. Curdled dulce de leche is delicious too. But I am thinking adding towards the end of the process, it might work and prevent the curdling. Becasuse as of now I just want to try to achieve the creamy consistency I have been achieving but increased shelf life. Thanks again!
Hi, Carmen! Bananas with dulce de leche sounds amazing!! I’m so trying it! As for citric acid, I have no advice, as I have no experience making dulce de leche from scratch.
you left out one way to eat it… with a spoon!!!! it’s fun to know different methods, thanks for the recipes!
OMG, you’re right, Zoey!!! That’s my favorite way to eat dulce de leche.