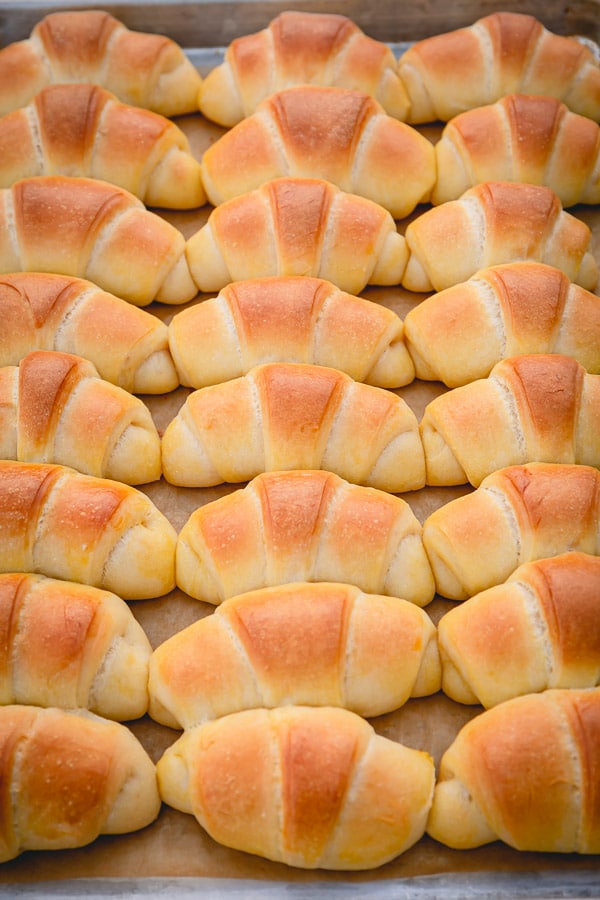
Making homemade dinner rolls may seem intimidating, but it doesn’t have to. Let me teach you how to make rich and buttery dinner rolls with soft and tender crumbs with lots of tips and step by step photos!
Plus, you’ll also learn how to make dinner rolls in advance, how to freeze and reheat them with the same great taste!
Out of all the wonderful, mouth-watering smells that comes out of my kitchen, I can never get enough of freshly baked bread smell. It’s so nostalgic!
My mom used to make homemade bread and rolls all the time growing up. That aroma of yeasty, just-out-of-the-oven hot bread, slowly spreading from kitchen throughout the rest of the home, takes me straight to my childhood. The BEST feeling ever!
This recipe was inspired by my mom’s dinner rolls and a version of the Parker House Rolls recipe from Cook’s Illustrated. Instead of the hassle of shaping the perfect roll, I go with the easy crescent shapes. Plus, it’s how my mom used to make them.
HOW TO MAKE HOMEMADE DINNER ROLLS
Step 1. Make the dough
We’ll be using a stand mixer to make the dough, because it’s the easiest way.
- Start with a paddle attachment to mix all the ingredients first.
- Then switch to a dough hook attachment to knead the dough for 6 minutes on medium speed.
TIP: Use instant yeast for this recipe. My go-to yeast is Red Star Platinum Instant Yeast. With an instant yeast, you don’t have to proof it first. Simply combine instant yeast with dry ingredients and mix the dough!!
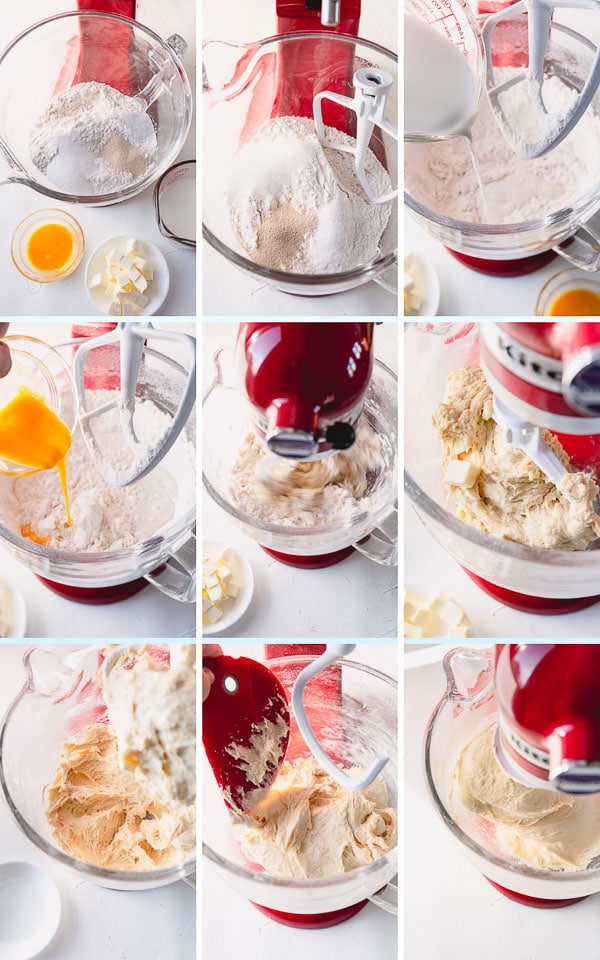
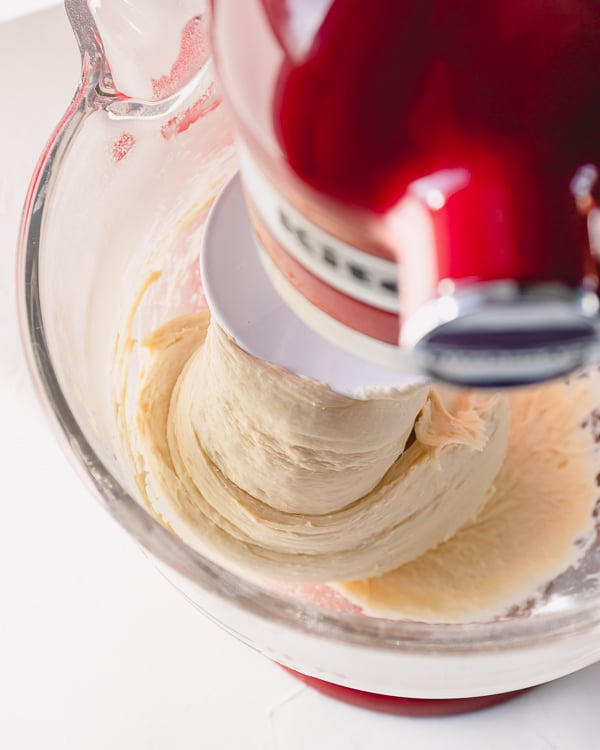
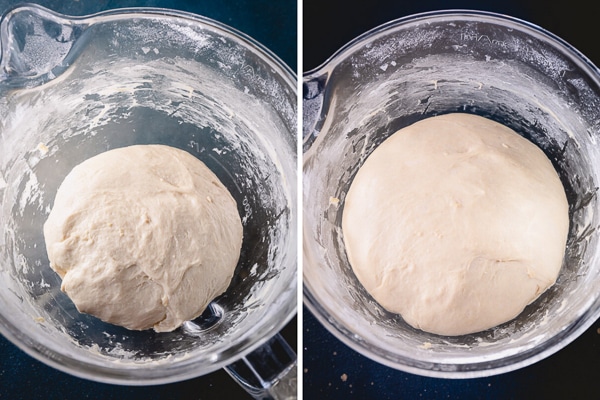
NOTE: Initially, the dough will be super sticky, and that’s totally normal. Keep kneading the dough and it’ll magically become smoother and smoother, and will start pulling away from the bowl. See picture below.
Can I use my hands instead of a stand mixer?
Yes! If you don’t have a stand mixer, or prefer doing this the old fashioned way, you can use your hands. Start mixing the dough with a wooden spoon. And when it becomes too difficult, use your hands to knead it. NOTE: Keep in mind, it’ll take a little longer to knead by hand though.
Step 2. Proof the dough
- Once the dough is nice and smooth, place it in a lightly oiled bowl.
- Cover with a kitchen towel, or plastic wrap and put it in a warm place to rise.
You want the dough double in size!
To speed the rising process, I use the microwave as an insulated box.
How to use a microwave as an insulator:
- Microwave a tall mug of water for 2 minutes. This creates a warm humid environment, perfect for yeast dough.
- Push the mug into the back of the microwave, and place your bowl with the dough inside. Close the microwave and let it rest for 30-60 minutes. (Don’t turn on the microwave though, we’re just using it as an insulated box!)
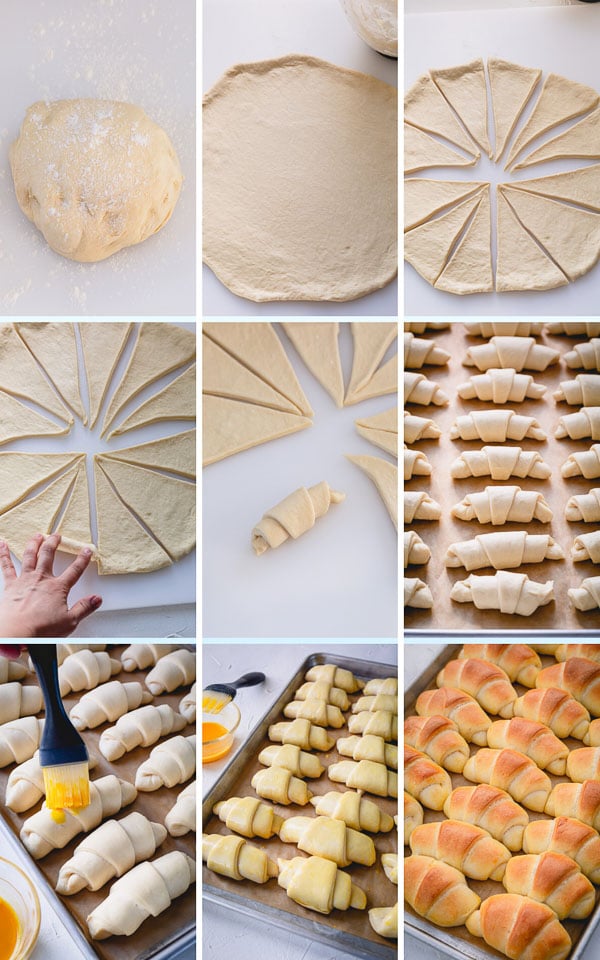
Step 3. Shape the rolls
- Take the dough out on a lightly floured counter and knead it into a smooth balls.
- Divide into 2 equal parts and roll them out into 14-inch circles
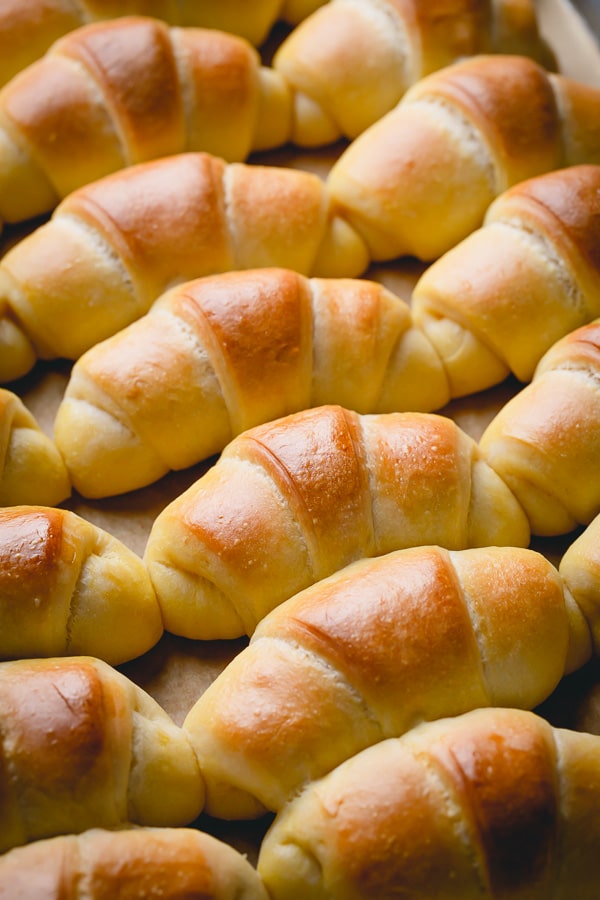
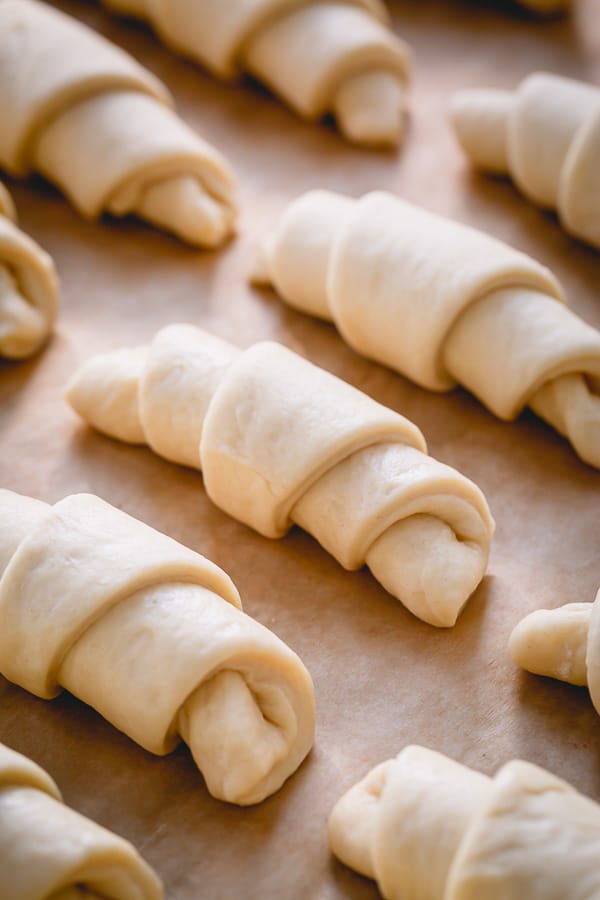
- Slice like a pizza into 12 triangles and wrap them like crescents.
- Arrange the rolls on two baking sheets, lined with parchment paper, or silicone mats.
- TIP: Make sure to leave some space in between the rolls to rise.
Step 4. Final proof and bake
- Cover the rolls with a kitchen towel, place in a warm place again and let it rest for about 20 minutes to rise again.
- Meanwhile, heat the oven to 350°F (177°C).
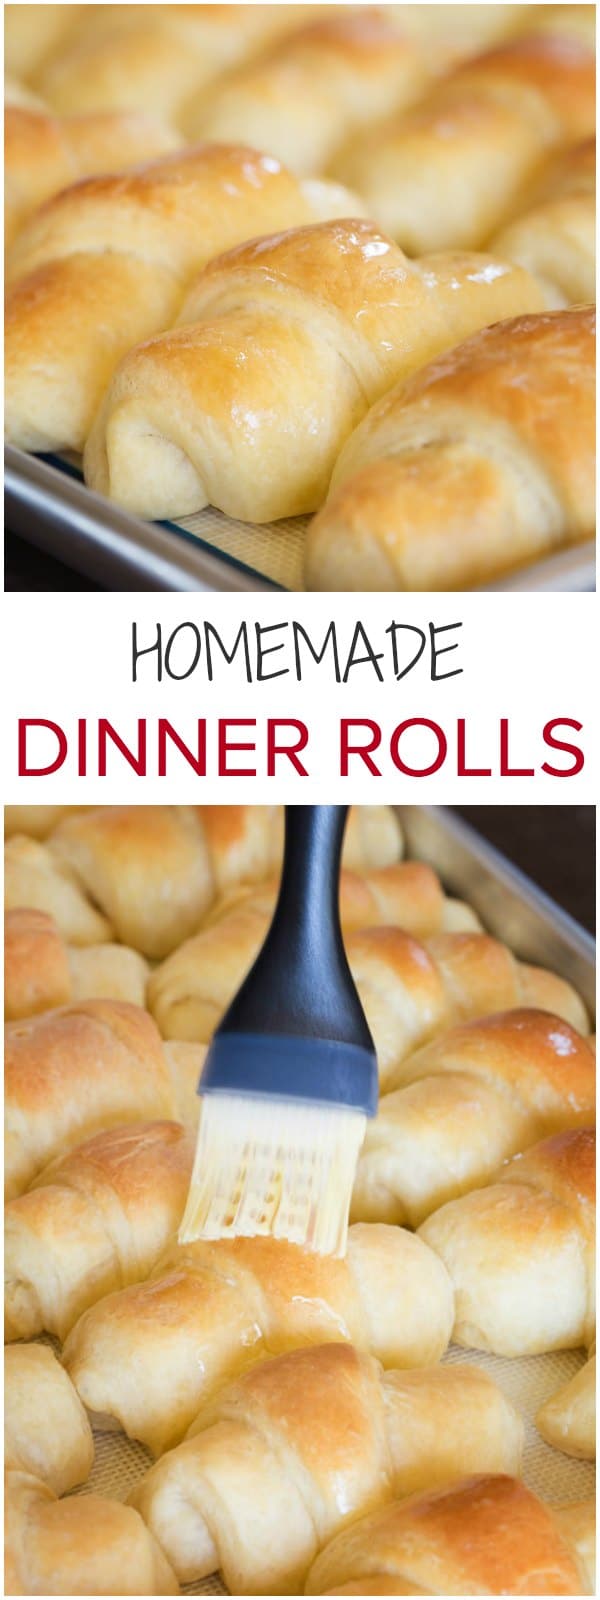
- Right before baking, brush the rolls with an egg wash to give the rolls nice color.
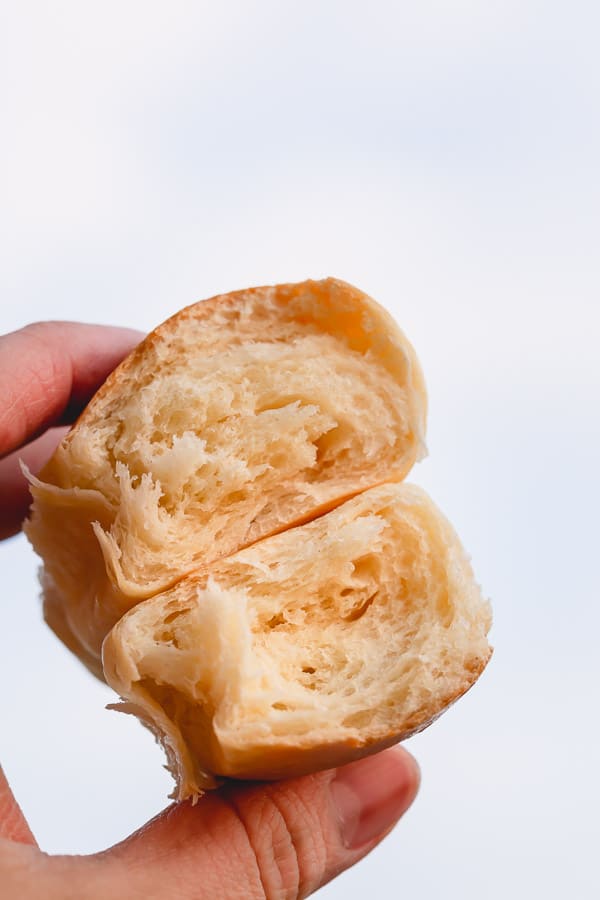
- And finally, bake them for 20-25 minutes, or until nice and deep golden brown.
3 TIPS FOR SUPER SOFT AND FLUFFY DINNER ROLLS
- I highly recommend to weigh the flour on a scale, instead of measuring by volume. Too much flour will make the rolls tough and heavy.
- Use a quality yeast. Reliable yeast is essential for soft and fluffy dinner rolls! I recommend instant dry yeast, instead of active dry yeast, for a quick rise and you can skip the proofing step!
- In “The New Best Recipe” book by Cook’s Illustrated, the instructions emphasized the precise kneading time, which is crucial for perfectly soft airy crumbs. Knead too long, and you’ll get chewy rolls due to overdeveloped gluten. Knead too short, and the rolls don’t rise properly because the dough doesn’t develop enough structure.
How to make homemade dinner rolls ahead of time
If you are making these to serve later, there are two ways you can make these ahead of time:
- After the dough has risen slightly, place the dough ball in a bowl in the refrigerator overnight. This slows down the yeast rising process. Remove the dough about 2 hours before you are ready to bake and allow it to come to room temperature and finish rising.
- You can also make these rolls all the way to the shaping process, then refrigerate for up to 48 hours. Remove the shaped dough from refrigerator about 3 hours before baking.
Can you freeze dinner rolls?
Yes, you can freeze baked and unbaked dinner rolls.
- To freeze the rolls unbaked, shape and place on a baking sheet in the freezer and cover with plastic wrap. You can leave them this way, or transfer them to a freezer bag for easier storage.
- To freeze baked rolls, bake them as instructed, then place in a freezer bag once they are cool.
How to reheat frozen dinner rolls
- Oven: To reheat frozen rolls, preheat your oven to 300 degrees Fahrenheit and place the thawed rolls in foil and heat in the oven for about 15-20 minutes until warmed through.
- Microwave: To reheat frozen dinner rolls, wrap the frozen rolls in a damp paper towel and microwave for 30 seconds at a time until they are warm.
And smearing generous amount of melted butter on freshly baked rolls is just icing on the cake!! So good.
Hope you’ll try this easy recipe for homemade dinner rolls. Please share you feedback if you do! I love hearing from you!

Homemade Dinner Rolls
Ingredients
- 2 ½ cups 325gr all-purpose flour
- 2 tablespoons sugar
- 1 packet about 1 ½ teaspoons instant yeast
- 1 teaspoon salt
- ½ cups + 2 tablespoons 150ml tepid milk (any milk is fine, I use whole milk)
- 2 large eggs divided
- 4 tablespoons 56gr unsalted butter, softened and cut into small pieces
- 2 tablespoons melted butter for brushing on baked rolls
Instructions
- To make the dough, in a large mixing bowl with paddle attachment, combine flour, sugar, yeast and salt.
- Add milk and 1 egg. Mix for about 1 minute.
- While the mixer is running on low, add butter one piece at a time. Increase the speed to medium and mix until dough is well combined. (The dough may seem super soft and sticky, but it's totally normal. See photos for reference.)
- Replace the paddle attachment with dough hook, and knead for 6 minutes on medium speed. (It's normal for the dough to be super sticky, it'll get smoother as you knead it. If the dough is too dry, add water 1 tablespoon at a time until dough is smooth and soft.)
- Cover with a kitchen towel and place it in a warm place to rise, for about 30-60 minutes. (TIP: Put it in a microwave with a glass of hot water. Don’t turn on the microwave.)
- Once the dough is doubled in size, turn it onto a counter, sprinkled with flour. Knead the dough into a smooth ball and divide it into 2 equal balls.
- To shape the rolls, roll each dough into 14-inch circles.
- Then cut it into 12 equal wedges, as if you’re cutting a pizza.
- Roll the triangles into a spiral, not too tight, but not too loose either.
- Arrange the rolls on a baking sheet, lined with parchment paper or silicone mat.
- Rest for about 20 minutes to rise.
- Meanwhile, preheat the oven to 350°F (177°C).
- To make the egg wash, in a small bowl, combine the remaining 1 egg and 1 tablespoon of water and whisk until smooth.
- Brush the egg wash evenly on rolls right before baking.
- To bake, bake the rolls for about 20-25 minutes, or until nice and golden.
- Transfer the rolls to a wire rack.
- Brush on remaining 2 tablespoons of melted butter and cool before serving.
Nutrition

This recipe was originally published on October 17, 2017 and updated on February 5, 2020.

Hi Shine,
This is my third one from your recipe book. I made these dinner rolls last night…omg!!!! they are so delicious. My kids love it. I cant wait to try the next recipe..lol.I absolutely love how you describe your methods and your instructions are straightforward. JUST LOVING YOUR PAGE… loads of hugs to you🤗😘😍
Hi, Shoby. Aww, your comment brought so much joy today. Thank you so much for your feedback!! So happy you and your kids loved the dinner rolls.
These looks so fluffy!
Yeah, fluffy they are. Thanks!!
Loving it. Thanks soo much.